Create a Customer in Shopify Using SQS Message Polling

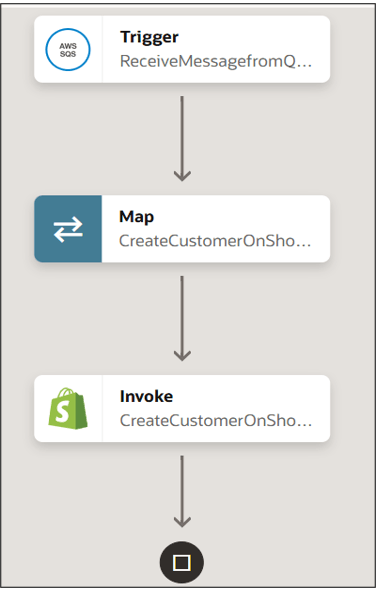
This use case describes how a customer is created in Shopify when a message is sent to an AWS SQS queue by an API or application. SQS polling triggers the integration workflow, which maps the message data and invokes the Shopify API to create the customer.

The following adapters and their operations are used in this use case:
  • Amazon Simple Queue Service (SQS) Adapter (configured as a trigger connection): Triggers the integration by polling an SQS queue.
  • Shopify Adapter (configured as an invoke connection): Invokes the Shopify API to create a new customer.

This implementation pattern provides an overview of the steps.
  1. Create an Amazon Simple Queue Service (SQS) Adapter trigger connection and Shopify Adapter invoke connection.
  2. Create an application integration.
  3. Drag the Amazon Simple Queue Service (SQS) Adapter into the integration canvas as a trigger connection.
  4. Configure the Amazon Simple Queue Service (SQS) Adapter endpoint as follows:
    1. On the Basic Info Page, provide a meaningful name.
    2. On the Configuration page, select the queue on which you want to receive the message.
    3. Select the message format and provide a message sample.
    4. Choose Select dead letter queue to capture undelivered JSON and XML messages.
    5. If you select your dead letter queue as FIFO dead letter queue, enter the group ID.
    6. Enter the maximum number of messages (up to 10) that you want to receive.

      Note:

      You can specify the message count only for JSON format. In case of AVRO, the queue can receive only one message at a time.
    7. If needed, enable message encoding, configure message attribute names, or configure message system attribute names.
    8. On the Summary page, review and confirm your selections.
  5. Drag the Shopify Adapter into the integration canvas as an invoke connection.
  6. Configure the Shopify Adapter endpoint as follows:
    1. On the Basic Info page, provide a meaningful name.
    2. On the Actions page, select Create as the action.
    3. On the Operations page, select Customer as the module and Create Customer as the operation.
    4. On the Summary Page, review and confirm your selections.
  7. In the mapper, map the message body to the Shopify customer fields.
  8. Once complete, activate the integration.

    The completed integration look as follows:


    The integration shows a trigger, map, and invoke.

    Once activated, the integration is triggered whenever a message is sent to the SQS queue (through an API or application). The workflow processes the message and creates a new customer in Shopify.