Invoke an Agent and Get Agent Status in Oracle AI Agent Studio for Fusion Applications

Use the Fusion Agent AI Studio Adapter to invoke an agent in Oracle AI Agent Studio for Fusion Applications and return the agent status. This use case provides a high level overview of the steps required to achieve this goal.

  1. Configure a Fusion Agent AI Studio Adapter connection. See Create a Fusion Agent AI Studio Adapter Connection.
  2. Create a schedule integration.
  3. Drag the Fusion Agent AI Studio Adapter into the integration canvas.
  4. Configure the Fusion Agent AI Studio Adapter as follows:
    1. On the Basic Info page, provide a name (for this example, CallFAAgent is specified) and select Send message from the Actions list. This selection invokes an agent.
    2. On the Configuration page, select the OIC1PAYABLESTEAM1 agent from the Select Agent list. This is the agent to invoke.
    3. On the Summary page, review your selections.
  5. In the mapper, map the prompt and payload to invoke the selected agent:
    1. Expand the target section.
    2. Right-click Role, and select Create target node.
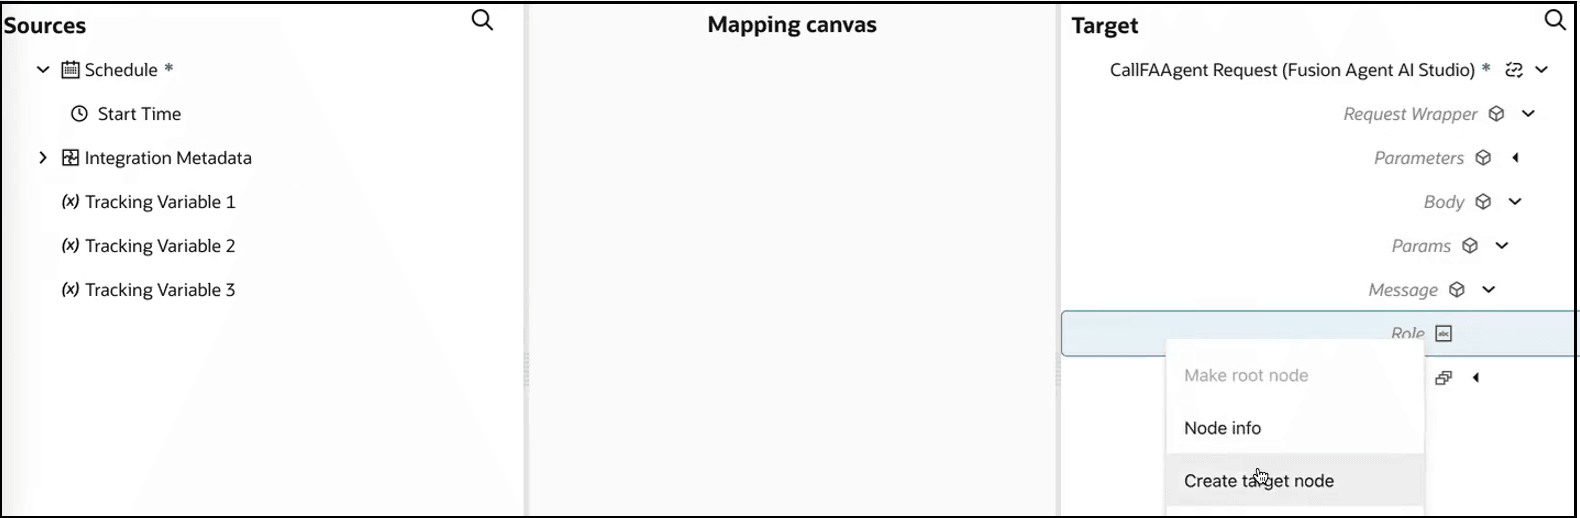

      The Sources, Mapping canvas, and Target sections are shown. The target Role element is being right-clicked and the Create target node option is being selected.

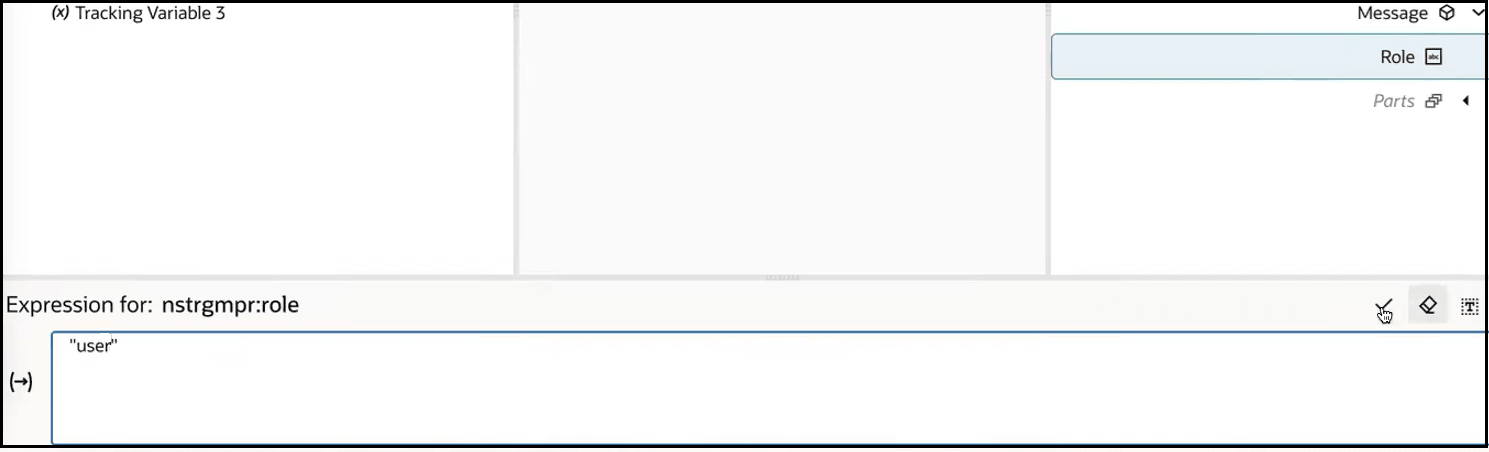
    3. In the Expression Builder, specify "user" for the Role element.


      The target Role element is highlighted. In the Expression Builder, the value is set to "user".

    4. Right-click Text, and select Create target node to specify the content for your prompt.
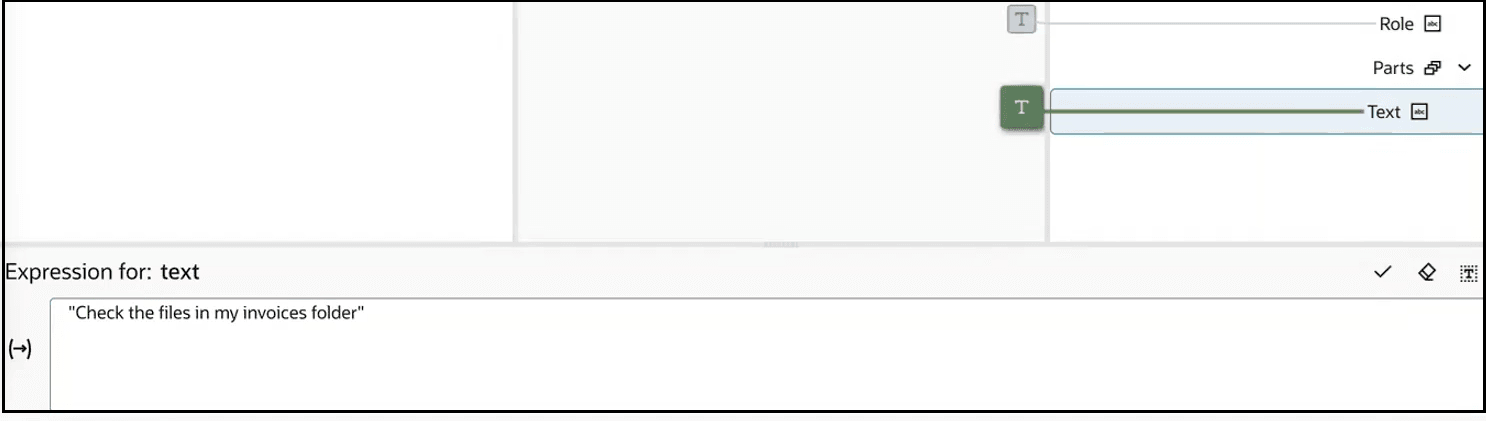
    5. In the Expression Builder, specify the prompt "Check the files in my invoices folder" for the Text element.


      The target Text element is highlighted. In the Expression Builder, the value is set to "Check the files in my invoices folder".

      Note:

      While not demonstrated in this use case, the Agent Id target parameter can be used to override the agent you selected on the Configuration page in the Adapter Endpoint Configuration Wizard.
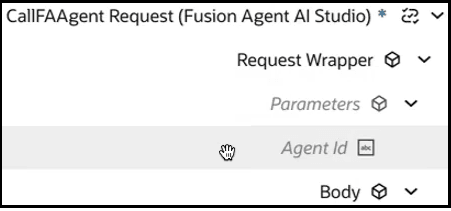

      The Target section in the mapper is expanded to show Agent Id.

  6. Add and configure a wait action to wait 60 seconds for the agent to complete the initial operation before beginning the second operation to return the agent status.
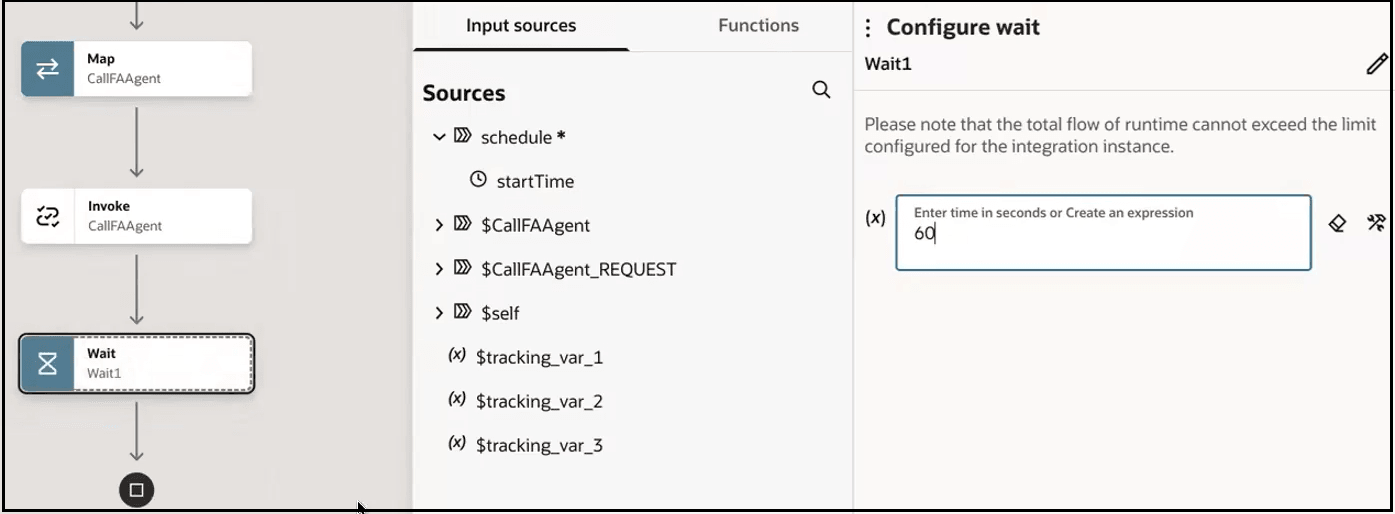
    The wait action is being edited. The Input sources tab is selected. A value of 60 is entered in the Enter time in seconds or create an expression field.

  7. Drag a second Fusion Agent AI Studio Adapter below the wait action in the integration canvas.
  8. Configure the Fusion Agent AI Studio Adapter as follows:
    1. On the Basic Info page, provide a name (for this example, gettaskstatusofagent is specified) and select Get task from the Actions list. This selection gets the status of the agent.
    2. On the Configuration page, again select the OIC1PAYABLESTEAM1 agent from the Select Agent list.
    3. On the Summary page, review your selections.
  9. In the second mapper, map the ID of the agent that was invoked in the first Fusion Agent AI Studio Adapter connection:
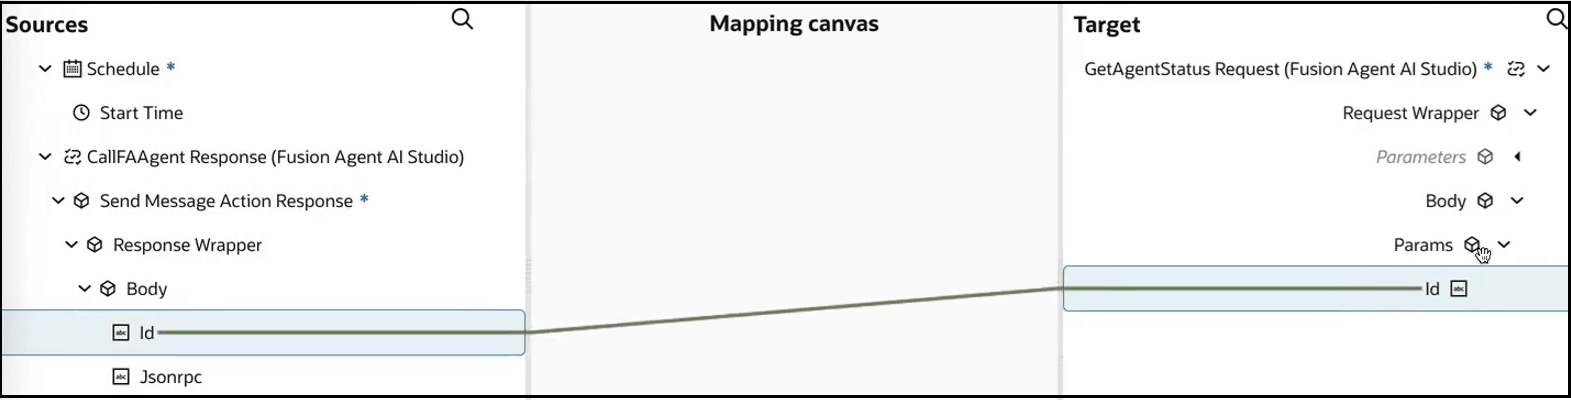
    The Sources, Mapping canvas, and Target sections are shown. The source Id element is mapped to the target Id element.

  10. Specify the tracking variable.
    1. Click Business Identifiers Business identifiers icon.
    2. Drag the required variable to use for the tracking reference (for this example, startTime is selected because this is a schedule integration).
  11. Activate the integration.
  12. From the Actions Actions icon menu of the integration, select Run.
  13. Select Ad hoc request, and click Run.
  14. Expand the activity stream to view the first Fusion Agent AI Studio Adapter connection.
    The request message sent by the Fusion Agent AI Studio Adapter connection shows the role and prompt text you specified in the mapper.
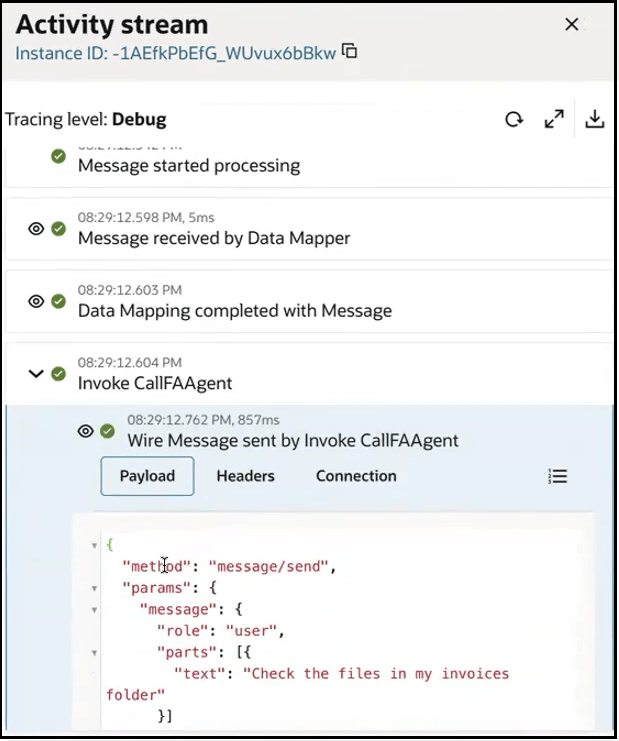

    The activity stream is shown in debug mode. The role with a value of "user" and the text with a value of "Check the files in my invoices" are shown.

    The response received by the Fusion Agent AI Studio Adapter connection shows the state as working.
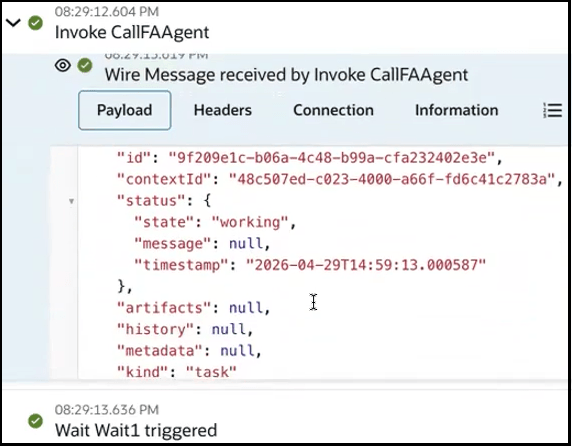

    The activity stream is shown. The state with a value of "working" is shown.

  15. Wait 60 seconds for the wait action to complete.
  16. Expand the activity stream to view the second Fusion Agent AI Studio Adapter connection.

    The state is now completed.
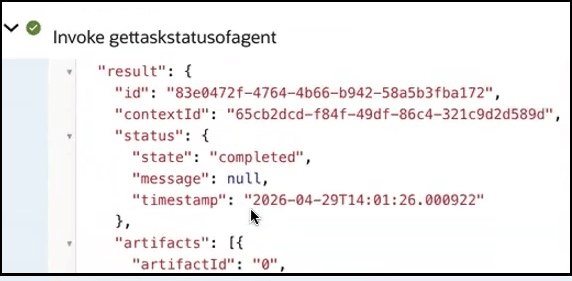

    The activity stream is shown. The state with a value of "completed" is shown.

  17. Scroll down further in the activity stream for that connection and note the text received from the agent in response to the initial prompt. The agent has responded with a followup question asking for more details.
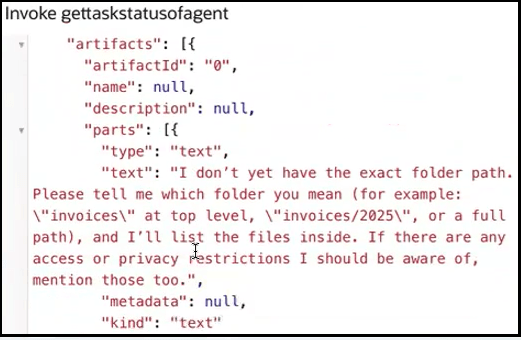
    The activity stream is shown. The text with a followup question asking for more details is shown.