Build Complex Assignment Statements with a Data Stitch Action
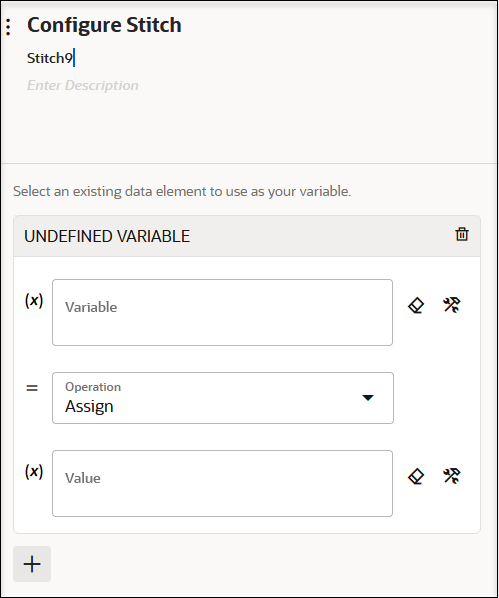
You can incrementally build a message payload from one or more existing payloads with the data stitch action. The data stitch action provides a Configure Stitch panel that enables you to assign values to variables.
The data stitch action supports scalar and complex type variables, arrays, and partial and full message payloads. Complex variables are not limited to message payloads.
The data stitch action differs from the mapper and assign action in the following ways:
| Mapper and Assign Action Capabilities | Data Stitch Action Capabilities |
|---|---|
| Mapper: Only generates full message payloads. If you attempt to map into an existing message payload, a full replacement of that payload occurs. | Supports both partial and full replacement of the message payload. |
| Assign action: Limited to scalar type variables. Complex objects or full payloads are not supported. | Supports both scalar and complex type variables. |
- Append: Appends at the end of the repeating/unbounded target element, the selected element, or the value. For example, you have an existing purchase order payload containing five lines and want to add a sixth line. The data stitch action enables you to append a sixth line to the existing array of lines in the purchase order.
- Assign: Places the selected value/element/attribute into the target element/attribute, overriding any existing data in the target element/attribute. For example, you want to change the current address in an existing purchase order. The data stitch action enables you to change the address. You can either map fields individually or copy the address object itself.
- Remove: Removes the target element/attribute from the variable. For example, you have an existing purchase order payload and want to remove the price to enable the end point application to calculate a new price. The data stitch action enables you to remove the price. For repeating/unbounded elements, all instances are removed unless a specific instance is selected by index or predicates.
- Add a data stitch action to an integration in either of the
following ways:
- On the side of the canvas, click Actions
 and drag the Data stitch action to the
appropriate location.
- Click
 at the location where you want to add the data stitch action,
then select Data stitch.

- On the side of the canvas, click Actions
-
Click Edit
 under Configure Stitch to enter a name and
optional description for the data stitch action.
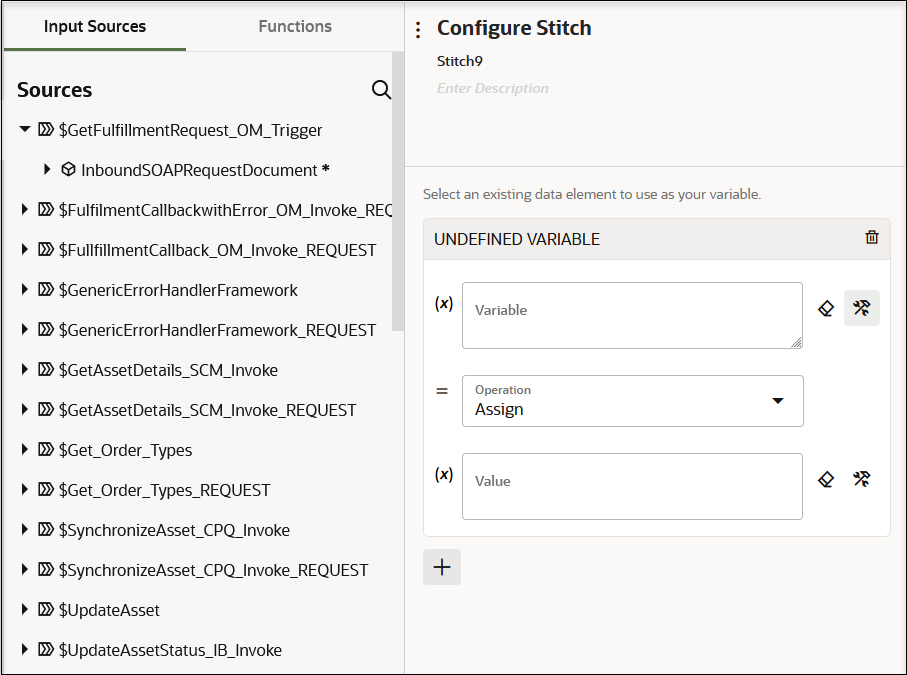
- Click the Variable field and manually enter
a variable name, select a variable from the drop-down list, or click
Switch to Developer View
 to open the Sources tree for dragging a variable
name.

Global variables and business identifier tracking variables are displayed for selection. A data element is a subcomponent of a variable. A complex variable conforms to a series of data elements.
- From the Operation list, select the operation
to perform on the variable:
- Append
- Assign
- Remove
-
Click the Value field and specify a value in any of the following ways:If you selected the Remove operation, the Value field is not displayed.
- Entering manually.
- Selecting from the list.
- Clicking Switch to Developer
View
 to open the Sources tree.
- Click + if you want to create additional complex assignment statements.
- When complete, click Save to save your
statements and close the Configure Stitch panel.
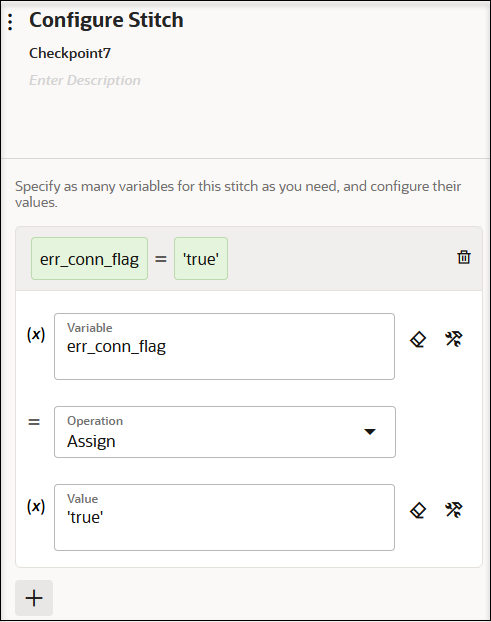
For this example, the following statement was created.

You can also define the sequence of variables to update. For example, if you want to copy an address, and then override a child element such as street, place these statements in the correct order of processing.