Add an Image to a Page
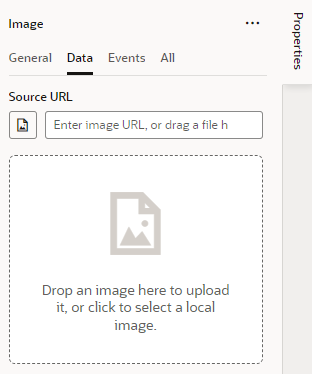
To add an image to a page, you position an image component on the canvas and specify the path to the image in the Properties pane. You can select an existing image in the Image Gallery or import a new image from your local system. Use the tabs in the Properties pane to specify the image’s display properties, the path to the image source, and any component events for triggering action chains.
The images used in pages in your app are stored in an images resource folder. The app contains a default images resource folder, and each flow in your app can also contain an images resource folder. When adding an image to a page, you can use the Image Gallery to select an image that was already imported, or add a new image to the Image Gallery directly from the component’s Data tab in the Properties pane. When you add an image to the Image Gallery, you can choose to import an image as an application resource or a flow resource. If you want to select an image that was already imported into the app, you can click the Image Gallery button in the Data tab and use the Image Gallery dialog box to locate and select the image. When you select images from the Image Gallery, you can select application resources or flow resources.
When you drag an image into the drop target area in the Data tab, the image is imported into the images folder for the flow, and the path to the image location is added to the Source URL field. For example, the path to an image stored in a flow’s images folder will be similar to the following:{{ $flow.path + 'resources/images/myimage.png' }}.
To ensure that the relative path to the image resource is built correctly when the app is staged and published, the path to the image in the Source URL field needs to include the builtin variable $flow.path or $application.path to identify the location of the resource folder. You can use Audits window to help you locate image paths in your app that might not be formed correctly.
To add an image to a page:
