Create a Layout for a Dynamic Table or Form

A layout defines the fields that are displayed in a dynamic component at runtime. You create and configure the layouts for a component's rule set in the Layouts' Rule Sets tab.

You can create multiple layouts for a single component, but only the layout associated with the rule that is found to be true first is the one applied to the component. For example, you might have three layouts that show different fields in a dynamic form based on a device's screen size. At runtime, the rules associated with the component are evaluated in the order they appear to see if the conditions set in that rule are met. If the condition is true—say, the current device's screen size is small—then the layout you selected for that rule is applied to the component and the user will only see the fields he needs in the form.

The fields you can display in a layout are determined by the fields available in the artifact's data source, say, a business object that has five fields. You can choose which of these five fields that you want to display in the dynamic component—and the order in which they should appear—but you can't include fields from other data sources.

To create a new layout:

  1. When your page is open in the Page Designer, click the dynamic form or table you want to work with in the canvas area, or select it in the Properties pane.
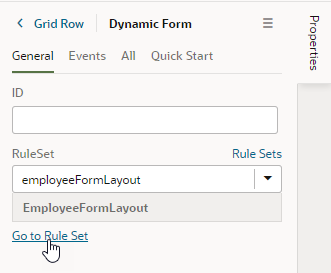
  2. Click Go to Rule Set in the Properties pane for the dynamic form or table:
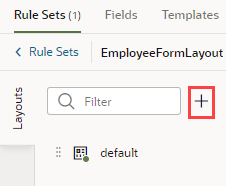
  3. Click Layout iconin the rule set's Layouts pane, then enter a name for the new layout.


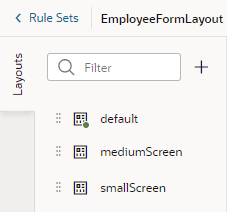
    To illustrate, consider a dynamic form for employee data that displays the following fields in the default layout: Id, Name, Department, Email, and Hire Date. Now, say we want the form to show data based on screen size. To do this, we'll create two other layouts:
    • A SmallScreen layout configured to show only Name and Email
    • A MediumScreen layout configured to show Name, Department, and Email
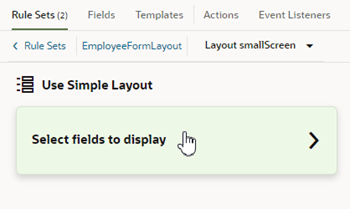
  4. Click the new layout name, then click Select fields to display to open the layout editor.


    When you create a layout and haven't selected any fields for it yet, you'll see the Select fields to display option when you open the layout. (You won't see this option if the layout is a duplicate.) You'll also see the templates that already exist in the rule set listed as layout options. Click a template name if you want apply the template to the layout, otherwise, click Select fields to display.

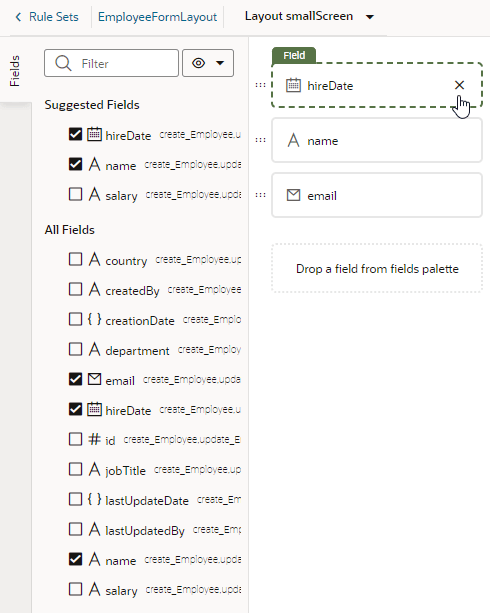
  5. Add fields from the Fields palette to the layout.

    The Fields palette lists all the fields and objects you can add to your layout. Required fields (those that have the Required property set in the Fields tab) are added to the layout by default. They also show as Suggested Fields in the Fields palette, emphasizing that they might be important or relevant to include in your layout.

    To add a field or object, select its check box in the Fields palette or drag it from the palette onto the drop target area on the right. The columns appear in the order selected; use the handles to the left of each field if you want to re-order them. You can also remove a field by clicking its Delete icon.

    For example, here's what our SmallScreen layout might look like:
    Description of layouts_smallscreen.png follows
    Description of the illustration layouts_smallscreen.png

    Because Hire Date and Name are required fields, they've been added automatically to the layout. For the purposes of this layout, we'll keep the Name field and remove Hire Date. (Salary, another required field, has already been removed).

  6. Return to the component's rule set and repeat the steps as required to create other layouts, in our case, the MediumScreen layout.

After a layout is created, you can include it in a display logic rule. You can use the same layout in multiple logic rules.