Manage Applications Created in Visual Builder Studio
The way you manage visual applications created in Visual Builder Studio is fundamentally different from the way you manage Visual Builder-native applications. For starters, VB Studio applications are managed in the context of a project, you do your work within a workspace tied to a Git repository, and your app is typically deployed via a sophisticated CI/CD pipeline; Visual Builder has none of these underlying concepts. So while you'll still be able to use the Visual Builder Home page to manage applications created in VB Studio, just like you manage Visual Builder-native applications, we recommend that you use VB Studio to manage the applications originating in VB Studio.
This table lists all the actions available to native Visual Builder applications and explains a bit about how to perform them for applications created in VB Studio:
Note:
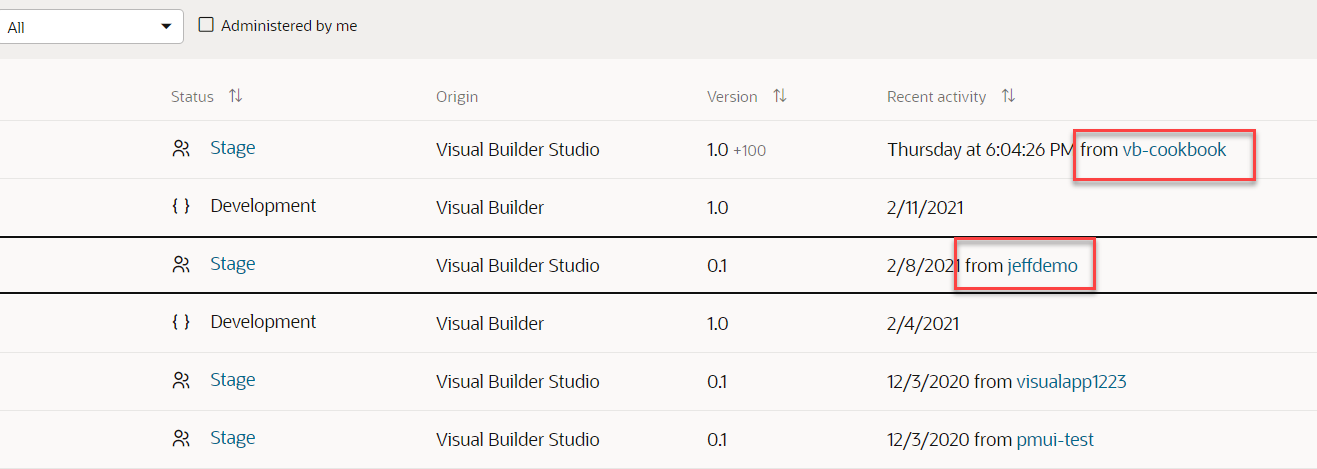
The first step for each of these procedures is to go to the VB Studio project, using either the "from project_name" link in the VB Home page (shown below) or the VB Studio URL.| Visual Builder Action | In VB Studio: |
|---|---|
| Open | On the Project Home page, click your workspace name to open the app in the Designer. (The workspace may have a different name from the visual app as it appears on the VB Home page.) |
| Duplicate | The Duplicate action isn’t exactly the same in VB Studio as it is in Visual Builder, and you shouldn’t have as much of a need for the action in the context of VB Studio. One way to duplicate your app in VB Studio is to:
|
| Rename | In VB Studio, the name of a visual application is determined by the Settings tab’s Root URL field at the time the app is deployed or shared. By default, the Root URL is set to the repository name you specified when you created a workspace for the app. To rename a visual app:
|
| Export |
|
| Import |
|
| New Version | To change the version number of your app:
See Set Version Information for Your Application and Update the Live Version of an Application. |
| Settings |
See Manage Visual Application Settings. Note: While Visual Builder Settings provide a Team tab, in VB Studio, team membership is handled at the project level. See Add and Manage Project Users. |
| Stage | VB Studio does not have the same concept of stage as Visual Builder. In Visual Builder, you staged an app whenever you wanted to make a particular version available to others; in VB Studio, you actually have two options for this, depending on whom you want to share the app with:
For both these options, the status on the VB Home page will be Stage. However, the Share option creates a dummy version number (which you can ignore); the build job lists the version number you specified in the Application Version field. |
| Publish | In Visual Builder, you used the Publish action to move a visual application to Live status. In VB Studio, you can do this from the Designer, as long as you configure the deploy job properly first.
When the job finishes, you will have a permanent URL for this visual app that will remain viable even if you have to republish it later, so you don’t have to keep giving people different URLs. See Deploy a Visual Application Through CI/CD Pipelines. On the VB Home page, you will see your app with a status of Live. If you click the app name you’ll see the URL, which contains the word "live" (unless you’re using a custom domain). Only one version of an app can be live at a time. While the version number is not included in the URL, if you republish this app, you must be sure to increase the version number (in Settings), otherwise, the deploy job will fail. |
| Lock and Unlock | In Visual Builder, you used the Lock action to lock a visual application for maintenance and prevent users from accessing the app in a browser during maintenance. You can do the same thing in VB Studio, except that the application's status changes to Deployed (Locked), instead of Live Locked.
|
| Move to trash |
|
