Set How User Assistance is Rendered in a Layout

You use the User Assistance Density property to set how a field's user assistance text such as messages, help text and hints are displayed in the form.

To edit a field's User Assistance Density property in a layout:
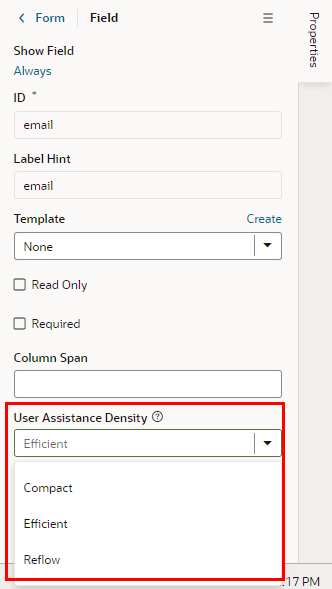
  1. In the Rule Set editor, open the layout and select the field in the center pane.
  2. Select the field's User Assistance Density property from the dropdown list in the Properties pane.


    You can choose from three options:

    • compact - With this option, user assistance text is displayed so that the layout is more compact, such as using a popup for messages and a required icon to indicate a Required field.
    • efficient - With this option, any user assistance text is shown inline under the field. The form is rendered with space under the field for the user assistance text. This is the default option.
    • reflow - With this option, any user assistance text is shown inline under the field. The form is rendered with no space under the field for the user assistance text. The space below the field expands to display the user assisstance text when the insert cursor is in the field.

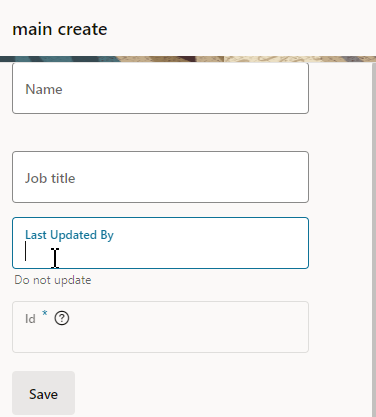
    This image of a form can help you visualize how these settings affect how fields are rendered:

    Description of form-ua-density.png follows
    Description of the illustration form-ua-density.png

    In this form, the User Assistance Density property for the fields are set to different values:

    • the Name field is set to efficient,
    • the Job Title field is set to reflow,
    • the Last Updated By field is set to reflow, and
    • the Id field is set to compact.

    You can see that both the Job Title and Last Updated By fields are set to reflow, but that the space below the Last Updated By field, where the insert cursor is) has expanded so that the user assistance text can be rendered below it.