Retrieve Custom Reports in CSV Format Using RaaS
This section provides an overview of creating an integration that uses the Reports as a Service (Custom Reports) Workday API and its operations to retrieve custom reports in CSV format.
To perform this operation, you create Workday Adapter and FTP Adapter connections in Oracle Integration.
-
Create an application integration.
-
Drag a REST Adapter connection into the integration as a trigger connection.
-
Configure the REST endpoint.
-
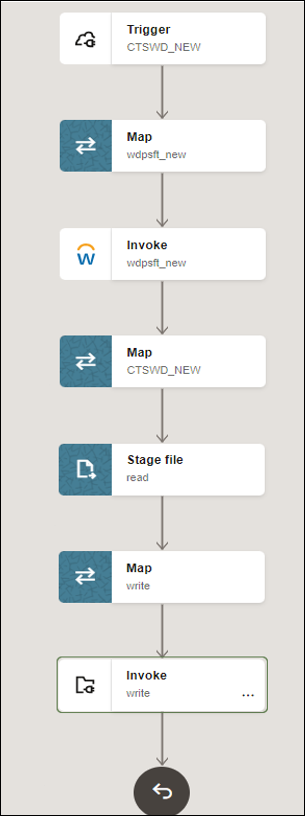
Drag a Workday Adapter connection into the integration canvas.
-
Configure the Workday Adapter as follows:
- On the Basic Info page, provide a name.
- On the Action page, select Extract Bulk Data from Workday.
- On the RaaS Services page, select Reports as a Service (Custom Reports) as the type of Workday report, and select a report.
- On the Summary page, review your selections.
- Perform the required mapping.
- Drag a stage file action into the integration canvas below the Workday Adapter. The stage file action reads the CSV format data downloaded to Oracle Integration.
- On the Basic Info page, provide a name.
- On the Configure Operations page, select Read Entire File from the Choose Stage File Operation field.
- Specify the XPath for the file name in the Specify the File Name field.
- Specify the directory name in the Specify the Directory to read from field.
- On the Scheme Options page, select Yes in the Do you want to specify the structure for the contents of the file? field and select Sample delimited document (e.g. CSV) from the Which one of the following choices would be used to describe the structure of the file contents? list.
- On the Format Definition page, click Choose File and upload the CSV file to create a schema in the Select a New File field.
- Enter the record name, enter the recordset name, select the field delimiter (for example, Comma), and perform other required details.
- Review your selections on the Summary page.
Note:
To process the data, users should add the required headers in the CSV file. - Drag an FTP Adapter below the stage file action to write the file to a target FTP server.
- Specify the following details in the Adapter Endpoint Configuration Wizard.
- On the Basic Info page, provide a name.
- On the Operations page, select Write File from the Select Operation list.
- Select Binary from the Select a Transfer Mode list.
- Specify the output directory (target FTP server location) and file name pattern.
- On the Scheme page, select Yes in the Do you want to specify the structure for the contents of the file? field and select Sample delimited document (e.g. CSV) from the Which one of the following choices would be used to describe the structure of the file contents? list.
- On the File Contents-Definition page, click Choose File and upload the schema source file in the Select a New File field.
- Enter the record name, enter the recordset name, select the field delimiter, and perform other required details.
- Review your selections on the Summary page.
- Perform mapping between the stage file action and the FTP Adapter.
The completed integration looks as follows.
