Getting
Started and Provisioning Autonomous Transaction Processing
Before You Begin
This tutorial shows you how to log in to the Oracle Cloud
Infrastructure console, create an autonomous database instance
with a workload type of Transaction Processing, and create a
database user. This tutorial takes approximately 15 minutes to
complete.
This is the first in a series of tutorials for Oracle
Autonomous Transaction Processing. Perform the tutorials
sequentially.
Getting Started and Provisioning Autonomous Transaction
Processing
Background for Oracle Autonomous Transaction Processing
Oracle Autonomous Transaction Processing is fully-managed,
offers high-performance, and is elastic. You have all of the
performance of the market-leading Oracle Database in an
environment that is tuned and optimized for transaction
processing workloads.
Autonomous Transaction Processing is built upon
the Oracle Database, so that all applications and tools that
support Oracle Database also support Autonomous
Transaction Processing. These tools and applications
connect to the Autonomous Transaction Processing database using
standard SQL*Net connections. The tools and applications can
either be in your data center or in a public cloud.
In this tutorial, you create an Autonomous Transaction
Processing database, connect SQL Developer to the Autonomous
Transaction Processing database, and create a database end user
to use in all subsequent tutorials.
What Do You Need?
Subscription to Oracle Autonomous Transaction Processing
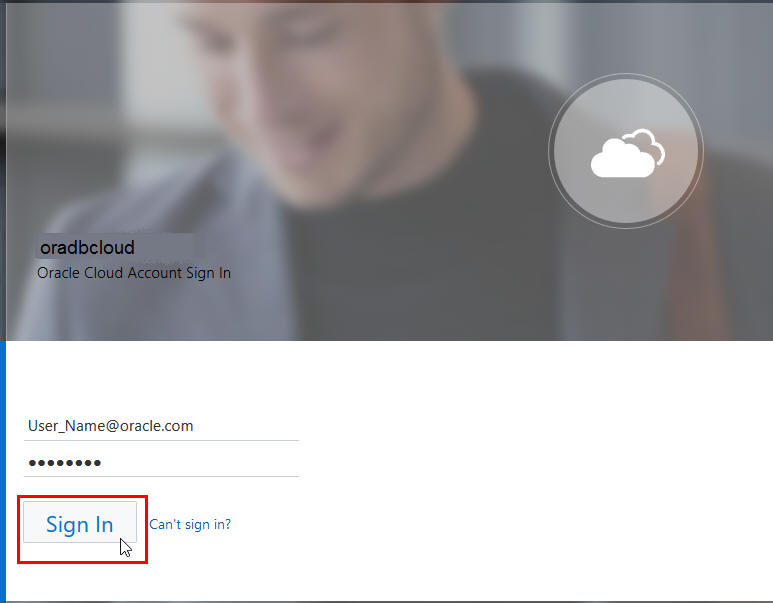
Your Oracle Cloud user name,
password, and identity domain
Locate your account details in the New Account Information
email that you received from Oracle Cloud when your user
account was set up. If you don't have your New Account
Information email, contact your account administrator.
Tenancy in Oracle Cloud Infrastructure, including the
creation of a compartment and the setting of access to
resources (see Oracle
Cloud Infrastructure documentation for setting up your
tenancy).
Oracle SQL Developer (see Oracle
Technology Network download site). Version 19.1 or later
is recommended. Versions 18.2 or later contain enhancements
for key Autonomous Transaction Processing features. Note:
If you are a Windows user on 64-bit platform, download the
'Windows 64-bit with JDK 8 included' distribution as it
includes the files necessary to run SQL Developer and connect
to your Autonomous database.
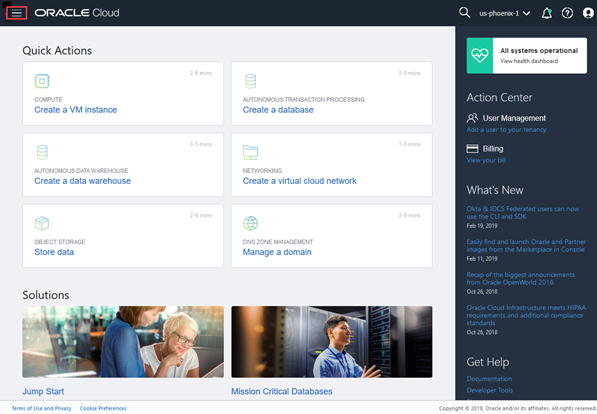
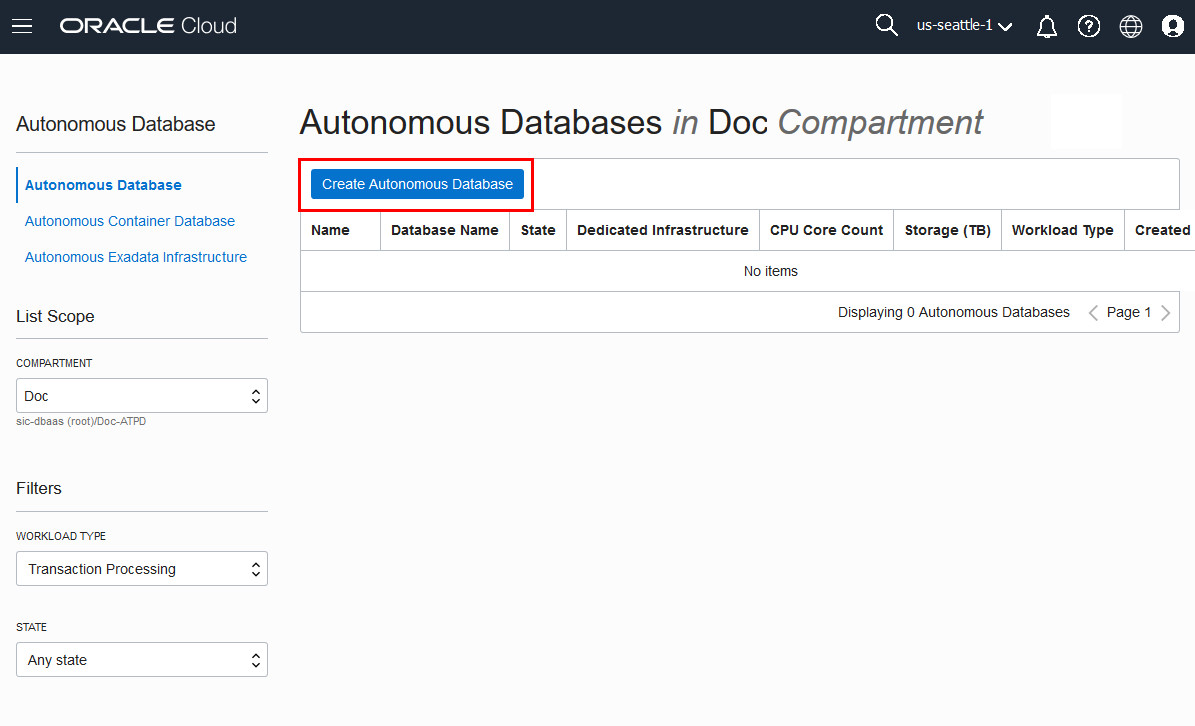
The console for Autonomous Database displays. You can use
the List Scope
drop-down menu to select a compartment; in this example the
Doccompartment is
selected. Click here
for documentation on creating compartments.
This console shows no databases. If there were a long list of
databases, you could filter the list by using the Filters
drop-down menu to filter by the state of the
databases (available, stopped, terminated, and so on). You can
also sort by workload type. Here Transaction Processing is
selected.
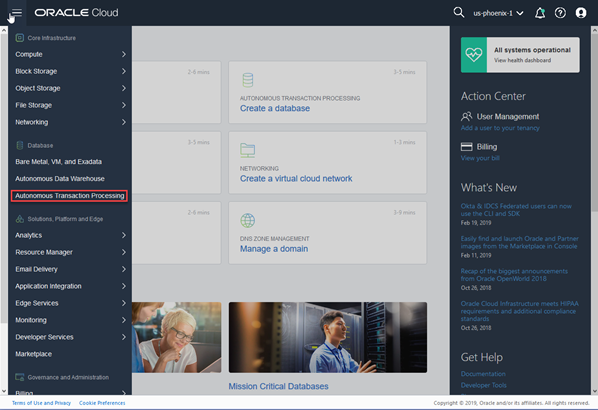
Click Create Autonomous
Database to create a database instance.
Description
of the illustration
create_autonomous_transaction_processing_database
The Create Autonomous Database dialog appears. Enter the
following information:
Provide basic information for the Autonomous Database:
Choose a compartment - Select a compartment for
the database from the drop-down list.
Display Name - Enter a name for the
database for display purposes.
Database Name - Use letters and
numbers only, starting with a letter. Maximum length is 14
characters. (Underscores not initially supported.)
Choose a workload type. Select the workload type for your
database from the choices:
Transaction Processing - this is automatically
selected.
Data Warehouse - select to choose Data
Warehouse as the workload type.
Choose a deployment type:
Serverless - Serverless is automatically
selected. This choice creates the autonomous database
without provisioning a dedicated infrastructure.
Alternately, you can choose the Dedicated Infrastructure
deployment type to create the autonomous database on a
dedicated Exadata infrastructure. This tutorial does not
cover the Dedicated Infrastructure deployment type.
Configure the database:
CPU core count - Number of CPUs for
your service.
Storage (TB) - Select your storage
capacity in terabytes. It is the actual space available to
your service instance, including system-related space
allocations.
Auto Scaling - If you select the auto scaling
option, Autonomous Transaction Processing can use up to
three times more CPU and IO resources than specified by
the number of OCPUs. When auto scaling is enabled, if your
workload requires additional CPU and IO resources, the
database automatically uses the resources without any
manual intervention required.
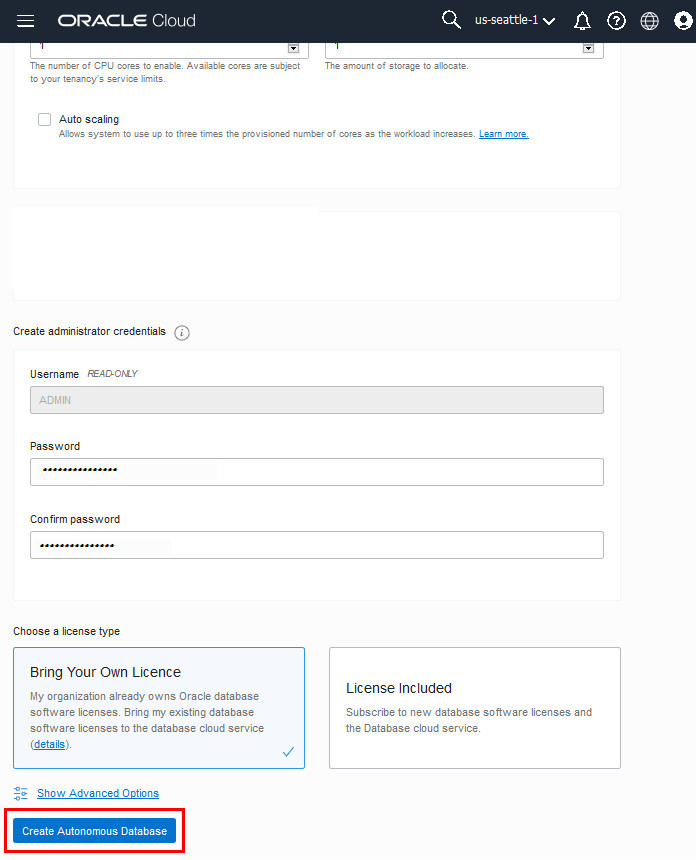
Create administrator credentials:
Password and Confirm Password -
Specify the password for ADMIN user of the service
instance. The password must meet the following
requirements:
The password must be between 12 and 30 characters long
and must include at least one uppercase letter, one
lowercase letter, and one numeric character.
The password cannot contain the username.
The password cannot contain the double quote (")
character.
The password must be different from the last 4 passwords
used.
The password must not be the same password that is set
less than 24 hours ago.
Choose a license type:
Bring Your Own License - Select when you have
existing licenses.
License Included - Select when you want to
subscribe to new database software licenses and the
database cloud service.
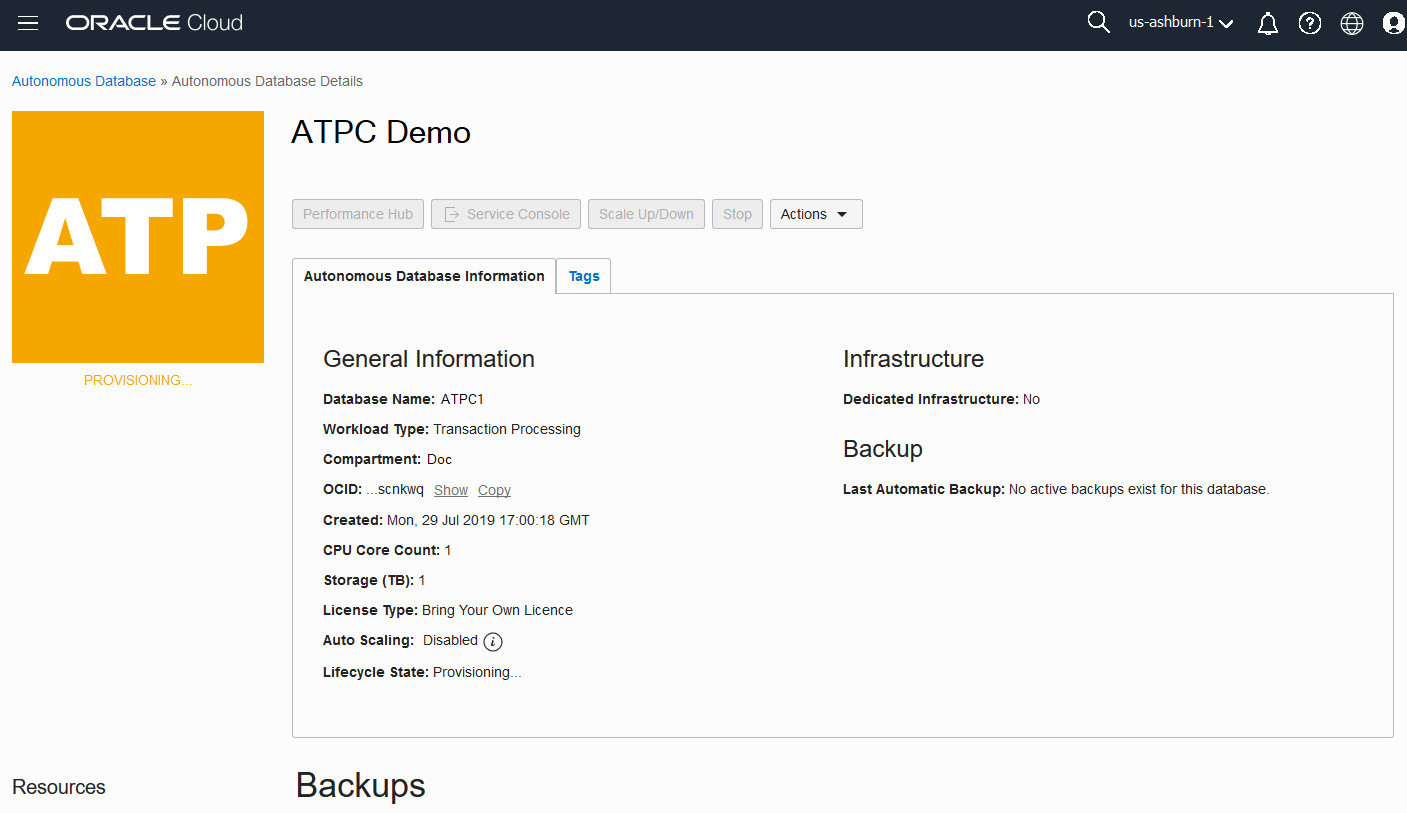
The Create Autonomous Database dialog closes. On the
console, the Lifecycle State field indicates that the database
is Provisioning. When creation is completed, the
Lifecycle State field changes from Provisioning to Available.
Description
of the illustration provisioning_state
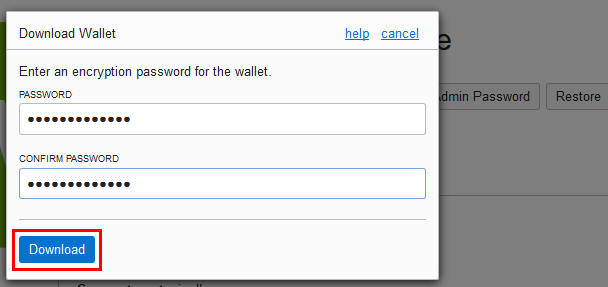
Download
the Credentials Zip File
Once you have created the database, download the credentials
zip file for client access to that database. You will use this
file in the next step, and in the next tutorial to connect SQL
Developer to your Autonomous Transaction Processing database.
Store the zip file and make note of the password. You will
use the zip file in the next step to define a SQL Developer
connection to your Autonomous Transaction Processing
database.
Define
a SQL Developer Connection
Define a SQL Developer connection to the database in your
Autonomous Transaction Processing service.
Open SQL Developer on your local computer. In the
Connections panel, right-click Connections
and select New
Connection. Note:
Depending on your version of SQL Developer, do not
right-click Cloud
Connection or Database
Schema Service Connections. That menu selection is
for connecting to a different Oracle cloud service, the
Oracle Database Schema Service. Description
of the illustration select_new_connection
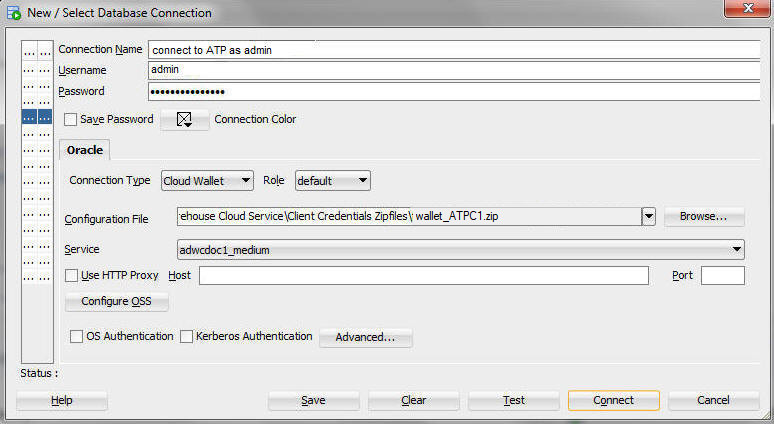
The New/Select Database Connection dialog appears. Enter
the following information:
Connection Name - Enter the name for this cloud
connection.
Username - Enter the database username. Use the default
administrator database account (admin) that
is provided as part of the service.
Password - Enter the admin user's
password that you or your Autonomous Transaction
Processing administrator specified when creating the
service instance.
Connection Type - Select Cloud
Wallet.
Configuration File - Click Browse,
and select the Client
Credentials zip file, downloaded from the
Autonomous Transaction Processing service console by you,
or given to you by your Autonomous Transaction Processing
administrator.
Service - In the drop-down menu, service selections are
prepended with database names. Select the tpurgent, tp,
high, medium, or low menu item for your database. These
service levels map to the TPURGENT, TP, HIGH, MEDIUM and
LOW consumer groups, which provide different levels of
priority for your session. Note: Earlier
versions of SQL Developer may not support this
feature.
Click Test.
Status: Success displays at the left-most bottom of the
New/Select Database Connection dialog.
Click Connect.
An entry for the new connection appears under Connections.
Create
a User in your Autonomous Transaction Processing Database
Once you have connected SQL Developer to your Autonomous
Transaction Processing database, use a SQL Developer worksheet
to define a create user statement to create the
user atpc_user. In the next tutorial, you will
create sales history tables in the atpc_user
schema and load data into these tables from an object store.
Open a SQL Developer worksheet and run the following SQL
statements to create the user atpc_user,
swapping in a password with the guidelines provided in the
following Note section.
create user atpc_user identified by "<password>";
grant dwrole to atpc_user;
Description
of the illustration
sql_developer_commands_create_atpc_userNote: Autonomous Transaction Processing requires
strong passwords. The password you specify must meet the
default password complexity rules. This database checks for
the following requirements when you create or modify
passwords:
The password must be between 12 and 30 characters long
and must include at least one uppercase letter, one
lowercase letter, and one numeric character.
The password cannot contain the username.
The password cannot be one of the last four passwords
used for the same username.
The password cannot contain the double quote (")
character
Note: Autonomous Transaction Processing databases
come with a pre-defined database role named DWROLE.
This role provides the common privileges for a database
user: CREATE ANALYTIC VIEW, CREATE ATTRIBUTE
DIMENSION, ALTER SESSION, CREATE HIERARCHY, CREATE JOB,
CREATE MINING MODEL, CREATE PROCEDURE, CREATE SEQUENCE,
CREATE SESSION, CREATE SYNONYM, CREATE TABLE, CREATE
TRIGGER, CREATE TYPE, CREATE VIEW, READ,WRITE ON directory
DATA_PUMP_DIR, EXECUTE privilege on the PL/SQL
package DBMS_CLOUD
In the next tutorial, "Connecting SQL Developer to
Autonomous Transaction Processing", you will connect SQL
Developer to your Autonomous Transaction Processing database
as user atpc_user, and define SH
tables(sales history tables from an Oracle sample schema)
for that user. Later, you will load data into those tables
from an Object Store.
 Getting
Started and Provisioning Autonomous Transaction Processing
Getting
Started and Provisioning Autonomous Transaction Processing Before You Begin
 Create
an Instance
Create
an Instance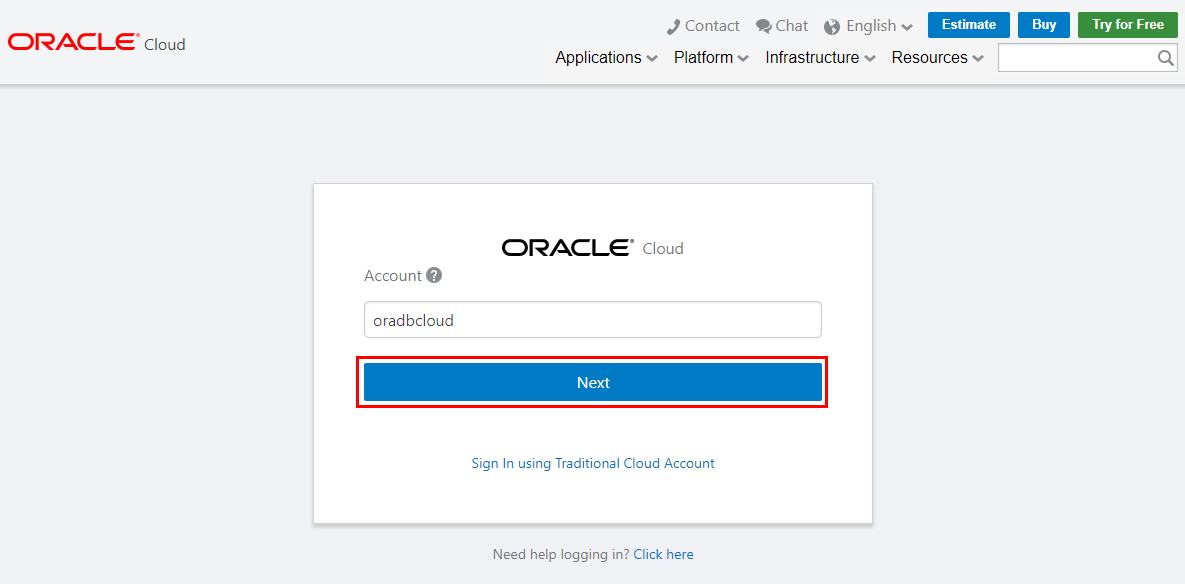

 Download
the Credentials Zip File
Download
the Credentials Zip File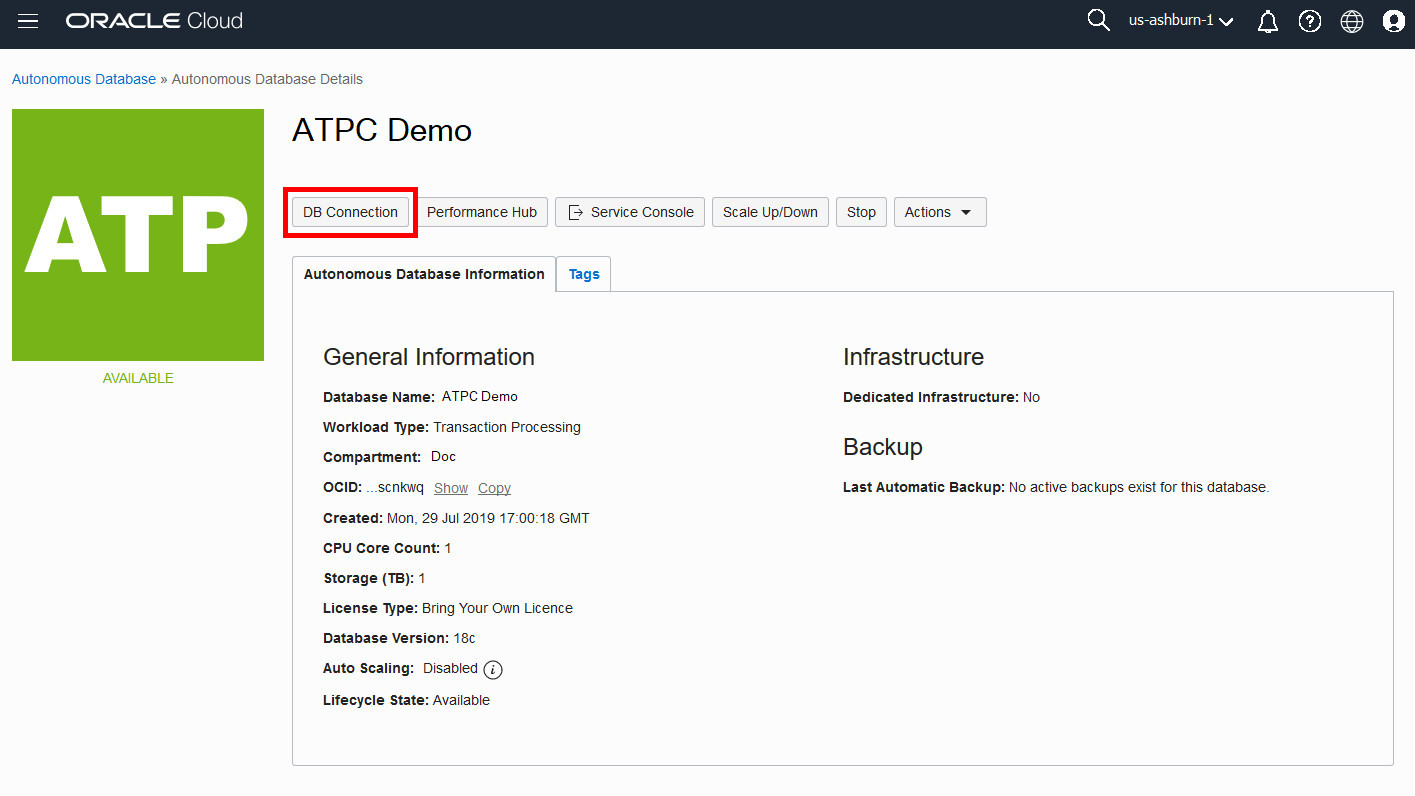

 Define
a SQL Developer Connection
Define
a SQL Developer Connection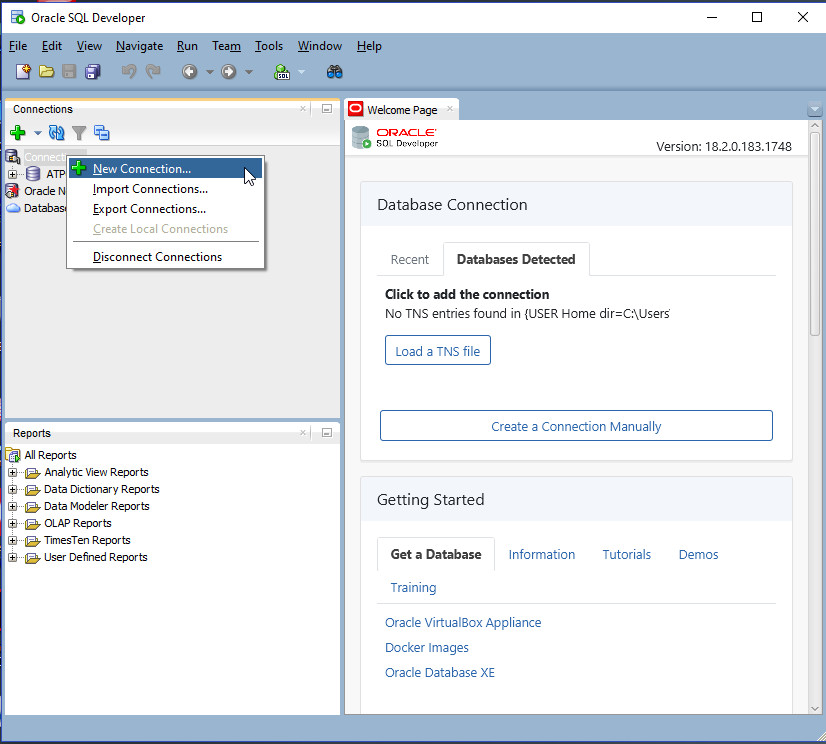
 Create
a User in your Autonomous Transaction Processing Database
Create
a User in your Autonomous Transaction Processing Database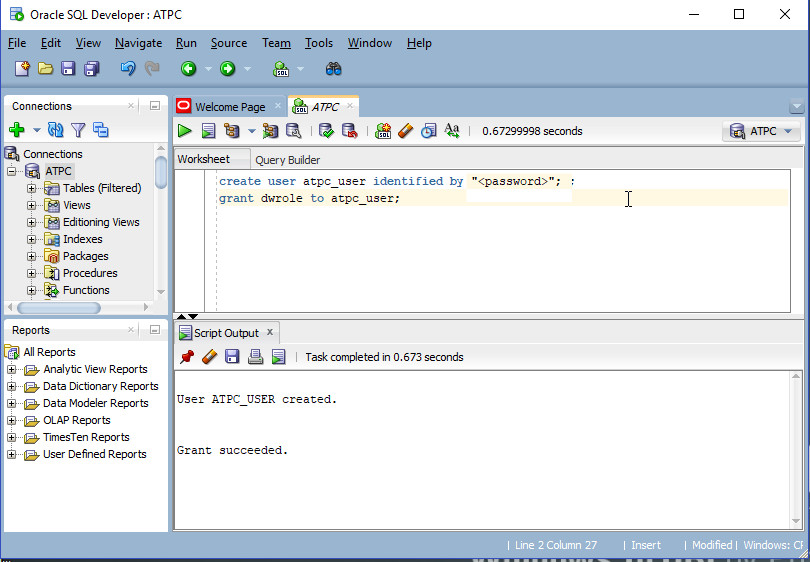
 Next
Tutorial
Next
Tutorial Want
to Learn More?
Want
to Learn More?