Use GraphQL with Vue and Oracle Content Management
Introduction
GraphQL is a query language for APIs and a runtime for fulfilling those queries with your existing data.
In this tutorial, we’ll show how to use GraphQL with Vue connected to Oracle Content Management. In particular, we’ll be focusing on the existing ‘People’ page on the Vue minimal sample site by querying the necessary data using GraphQL. The other pages (‘Home’ and ‘Contact Us’) are currently using a REST API.
Prerequisites
Before proceeding with this tutorial, we recommend that you read the following information first:
To follow this tutorial, you’ll need:
- an Oracle Content Management subscription
- an Oracle Content Management account with the Content Administrator role
- the completed tutorial to build a minimal site in Vue
What We’re Building
With the minimal site built in Vue, you can easily retrieve images and other content from your Oracle Content Management repository.
To take a look at what we’re building, here’s the end state of our tutorial, a basic Vue minimal site that consumes content from Oracle Content Management:
https://headless.mycontentdemo.com/samples/oce-vue-minimal-sample/
This tutorial will focus solely on the ‘People’ page of this site.
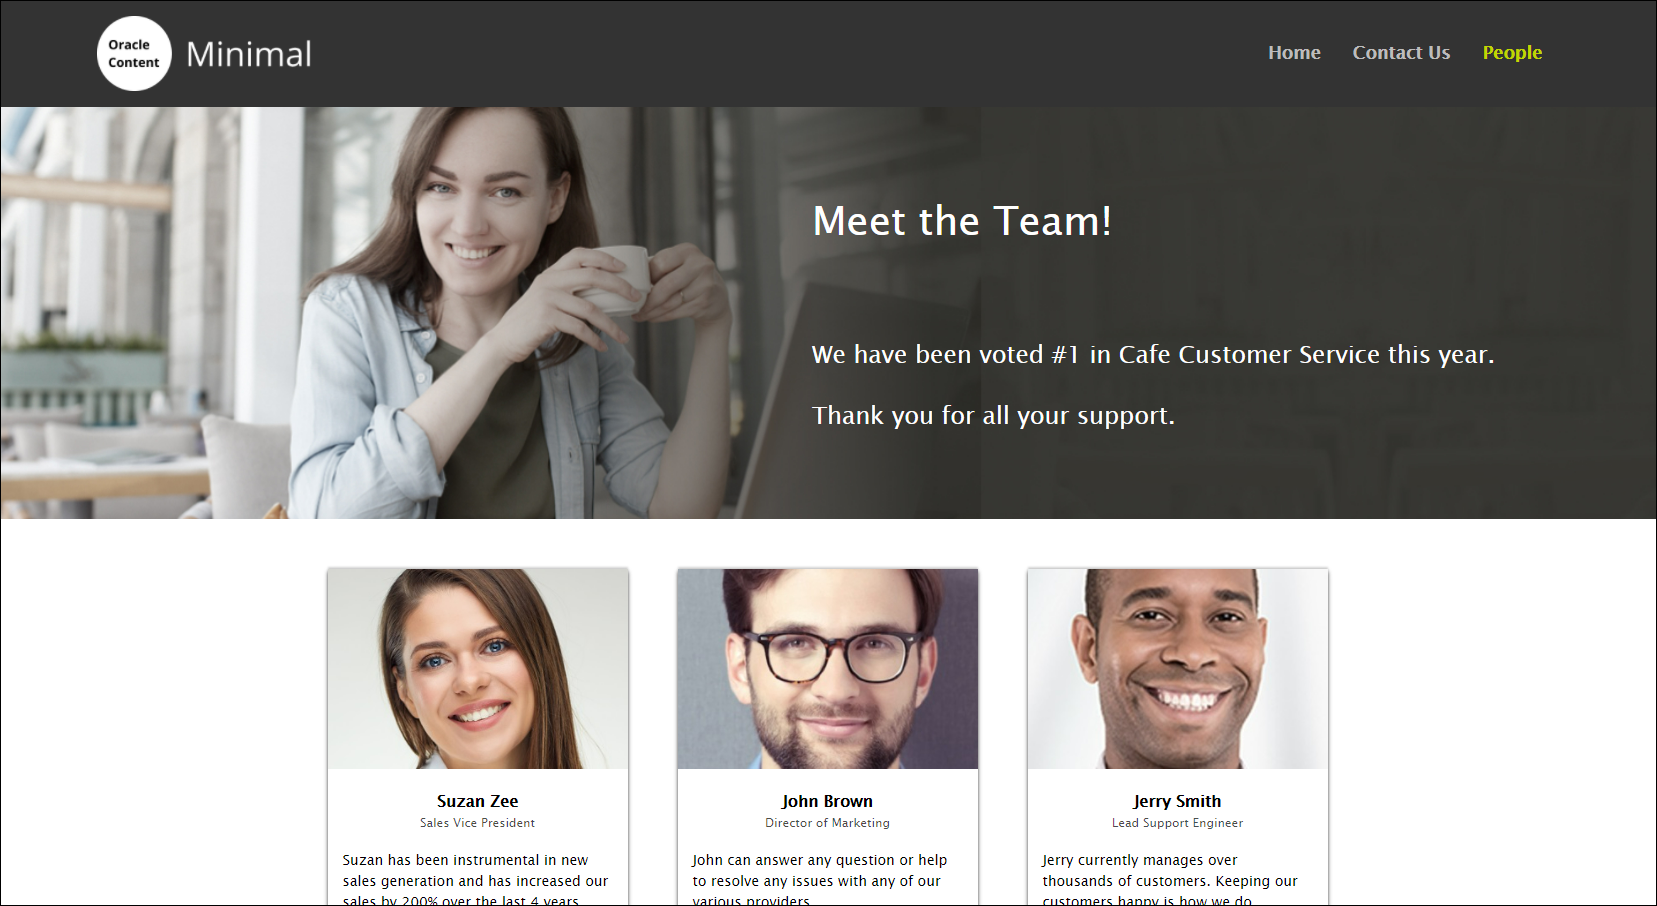
This is what the People page will look like at the end of this tutorial:

To proceed, you’ll need to have an active subscription to Oracle Content Management and be logged in with the Content Administrator role.
Task 1: Understand the People Page Taxonomy
The downloadable asset pack contains an asset called Minimal Main GraphQL with the slug ‘minimalmaingraphql’.
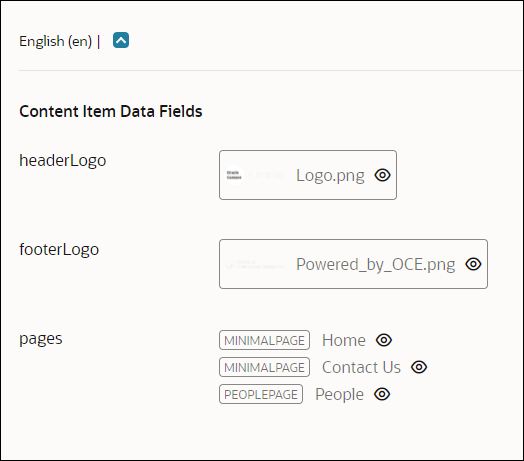
The Minimal Main GraphQL asset contains a page of type PeoplePage called People. This is what it looks like:

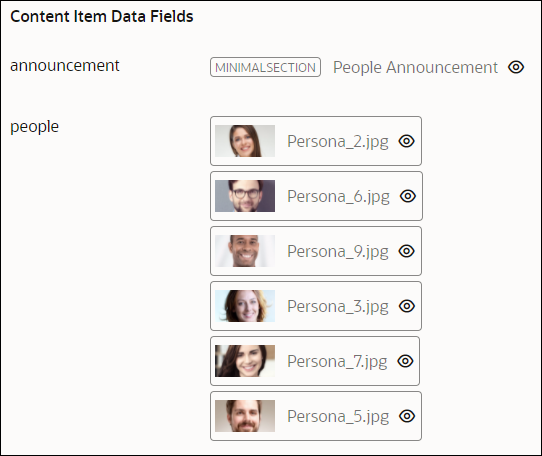
The People asset is of type PeoplePage, and it contains subtypes of people. This is what it looks like:

This is what an example people asset looks like (note all the metadata in the Attributes panel):

Task 2: Interface with GraphQL in Vue
Application Layout
Data Retrieval
The original minimal Vue sample used REST calls to populate two pages: the ‘home’ page and the ‘contact us’ page. Both are dynamic pages that are referenced via a unique slug value, and both of these pages contain one or more ‘section’ entries that represent HTML blocks to render on the page. Because of this common layout, both pages can use the same page template, Page.vue, to display their data. The People page that’s being added in the sample has a very similar structure, but is built on data retrieved using GraphQL. The data obtained using GraphQL is done so by calling a built in ‘graphql’ method available in the Content SDK, which is a dependency for this project and gets all the data for all the pages. In the SDK, the GraphQL query is ultimately just a POST request, which contains a bit more low-level data manipulation.
Page Routing
The routing of pages in the application is handled using the Vue Router extension. This allows the pages to be broken into two special cases: a home page and any number of pages referenced by unique slug values. This makes it possible to add further child pages to the application by simply adding a reference to them in the main asset of the application and then defining a people asset as described above.
VueX State Management
All data displayed in the pages is managed using a VueX store. This is responsible for making the calls to the Content SDK, which are used to retrieve the contents of each page.
Updates to Include GraphQL Support
Install Dependencies
The first step is to install the Content SDK that we need for the GraphQL support. The package https-proxy-agent may also be needed to provide proxy support if a proxy is required. This is done by running this command:
npm install @oracle/content-management-sdk https-proxy-agentNote: These packages are already dependencies in the package.json
file, so simply running npm install should be enough as
well.
Add in New Code to Run the GraphQL Queries
We then create a new file called src/scripts/graphql-service.js. This file will execute a GraphQL query via the Content SDK and then extract the useful fields from the result.
export default async function fetchPeopleData(peopleSlug) {
  try {
    const peopleQuery = {
      query: `
      {
        getPeoplePage(slug: "${peopleSlug}", channelToken: "${process.env.CHANNEL_TOKEN}" ) {
          id
          slug
          name
          fields {
            announcement {
              id
              fields {
                type: fieldType
                heading
                body
                actions
                image {
                  ...sectionImages
                }
              }
            }
            people {
              id
              fields {
                fullname
                title
                biodata
                file {
                  metadata {
                    width
                    height
                  }
                }
                renditions {
                  name
                  format
                  file {
                    url
                    metadata {
                      height
                      width
                    }
                  }
                }
              }
            }
          }
        }
      }
      fragment sectionImages on image {
        id
        fields {
          file {
            metadata {
              width
              height
            }
          }
          renditions {
            name
            format
            file {
              url
              metadata {
                height
                width
              }
            }
          }
        }
      }
      `,
    };
    const client = getClient();
    const queryResult = await client.graphql(peopleQuery);
    return extractRequiredPeopleFields(queryResult);
  } catch (error) {
    console.log(error);
    return ('');
  }
}
There is also a small utility function that’s used to simplify the JavaScript object returned from the call. It reduces unnecessary nesting of data in the result.
function extractRequiredPeopleFields(queryResult) {
  const result = { announcement: {}, people: [] };

  result.slug = queryResult.data.getPeoplePage.slug;
  result.name = queryResult.data.getPeoplePage.name;
  const base = queryResult.data.getPeoplePage.fields;
  if (base.announcement) {
    result.announcement = base.announcement.fields;
  }
  if (base.people) {
    result.people = base.people;
  }
  return result;
}
Integrate the Query Code in the VueX Store
Now that we can retrieve the data, the next step is to put it in the VueX store that the application uses to manage its data. This is done in src/vuex/index.js by adding the following utility functions and storage:
    state.peoplePageData // storage for the object data
    // get the data for the People Page given its slug
    fetchPeoplePage({ commit }, pageSlug) {
      return fetchPeopleData(pageSlug).then((data) => {
        commit('setPeoplePageData', data);
      });
    },
    // setter function used to update the state
    setPeoplePageData(state, data) {
      state.peoplePageData = data;
    },
Branch the Code to Render the People Page
Next we’ll create the integration point where the application can call the code to render a Person page. This is done by modifying the existing code in Page.vue to render conditionally based on the slug value. This can be found in src/pages/Page.vue.
<!-- Component for the Page. -->
// The template will conditionally render different sections depending
// on the value of the unique slug of the current page.
<template>
  <div v-if="data.hasError">
    <Error :errorObj="data" />
  </div>
  <div v-else-if="data.slug === 'people'">
    <Person :gqldata ="data"/>
  </div>
  <div v-else>
    <div v-if="data.fields && data.fields.sections">
      <section :class="`content ${section.fields.type}`" :key="section.id"
        v-for="(section) in data.fields.sections">
        <Section :section="section" />
      </section>
    </div>
  </div>
</template>

....
// Likewise, the fetch data call will seek out different data from the VueX store depending on
// the desired slug
methods: {
    fetchData() {
      let data = {};
      // People is a special case and is handled by GraphQL in the store
      if (this.slug === 'people') {
        data = this.$store.dispatch('fetchPeoplePage', this.slug);
      } else {
      // return the Promise from the action
        data = this.$store.dispatch('fetchPage', this.slug);
      }
      return data;
    },
  },
Add Code to Render the People Page Content
Next, we create the component that generates the content of the People page. This code is in src/components/Person.vue. Rendering is fairly straightforward. The executable code in the component takes the passed-in page slug (always ‘people’ in this case) and then retrieves the corresponding data from the VueX cache. This returns a simple JavaScript object which is then used in the template below.
<template>
  <div >
    <section  class="announcement">
        <div>
      <picture v-if="gqldata.announcement.image && renditionURLs">
      <source type="image/webp" :srcSet="renditionURLs.srcset" />
      <source :srcSet="renditionURLs.jpgSrcset" />
      <img
        id="header-image"
        :src="renditionURLs.large"
        alt="Company Logo"
        :width="renditionURLs.width"
        :height="renditionURLs.height"
      />
      </picture>
          <div class="textcontent">
            <h1>{{gqldata.announcement.heading}}</h1>
          </div>
          <div class="text">
            <div v-html=cleanContent></div>
          </div>
        </div>
    </section>
      <div class="all_people">
      <div v-for="person in gqldata.people" :key="person.id" >
        <section className="person">
          <img className="profile_picture"
          :src="person.fields.renditions[0].file.url" :alt="person.fields.fullname" />
          <div className="profile">
            <div className="profile_name">{{person.fields.fullname}}</div>
            <div className="profile_position">{{person.fields.title}}</div>
            <div className="profile_description">{{person.fields.biodata}}</div>
          </div>
        </section>
      </div>
    </div>
  </div>
</template>
The remaining code in the component is used to pull the data from the VueX store.
Add the New CSS
Finally we add the required CSS styling to the application. This can be found in src/assets/global.css.
/*
* Styles for the people cards
*/
.all_people {
  margin: 0 auto;
  max-width: 1000px;
  display: grid;
  grid-template-columns: repeat(auto-fill, minmax(300px, 1fr));
  gap: 50px;
  margin-top: 50px;
  margin-bottom: 50px;
}

.person {
  margin: 0 auto;
  width: 300px;
  box-shadow: 0px 4px 4px rgba(0, 0, 0, 0.25), 0px 2px 4px rgba(0, 0, 0, 0.5), 0px -2px 2px rgba(0, 0, 0, 0.15);
  height: 100%;
}

.profile {
  padding: 20px 15px;
}

.profile_picture {
  width: 100%;
  height: 200px;
  object-fit: cover;
  display: block;
}

.profile_name {
  text-align: center;
  font-size: 16px;
  font-weight: bold;
}

.profile_position {
  text-align: center;
  font-size: 12px;
  color: rgba(0, 0, 0, 0.7);
  margin-bottom: 18px;
}

.profile_description {
  font-size: 14px;
  display: flex;
  justify-content: center;
}
Preview API content using GraphQL
GraphQL support for Content Preview is also available as well and is fairly simple to implement. More information about using the preview API with GraphQL can be found here. Notice that the GraphQL endpoint changes from ‘published’ to ‘preview’ in the request, but this change is handled in the Content SDK.
To switch over to using preview mode, the change is as simple as updating the .env file for the project to include additional variables. A complete guide about preview mode settings and how to obtain these environment variables for your instance can be found here. Most notably, you will need to set PREVIEW, OPTIONS, and AUTH/AUTH_PARAMS in the .env file according to the linked documentation for setting the AUTH/AUTH_PARAMS for your specific instance.
Once you switch over to the preview mode for the Vue application, the Content SDK will recognize this and send the requests to Oracle Content Management in preview mode for both REST and GraphQL requests. No additional modifications are needed, and you can verify the use of preview mode in the browser by inspecting elements.
Conclusion
In this tutorial, we added a ‘People’ page to the Vue minimal sample site using GraphQL to obtain the data for that page. The other pages (‘Home’ and ‘Contact Us’) still use the REST API.
Additional information on GraphQL in Oracle Content Management can be found in the documentation.
Use GraphQL with Vue and Oracle Content Management
F51097-02
February 2023
Copyright © 2021, 2023, Oracle and/or its affiliates.
Primary Author: Oracle Corporation