Email Builder App for Oracle Content Management
Introduction
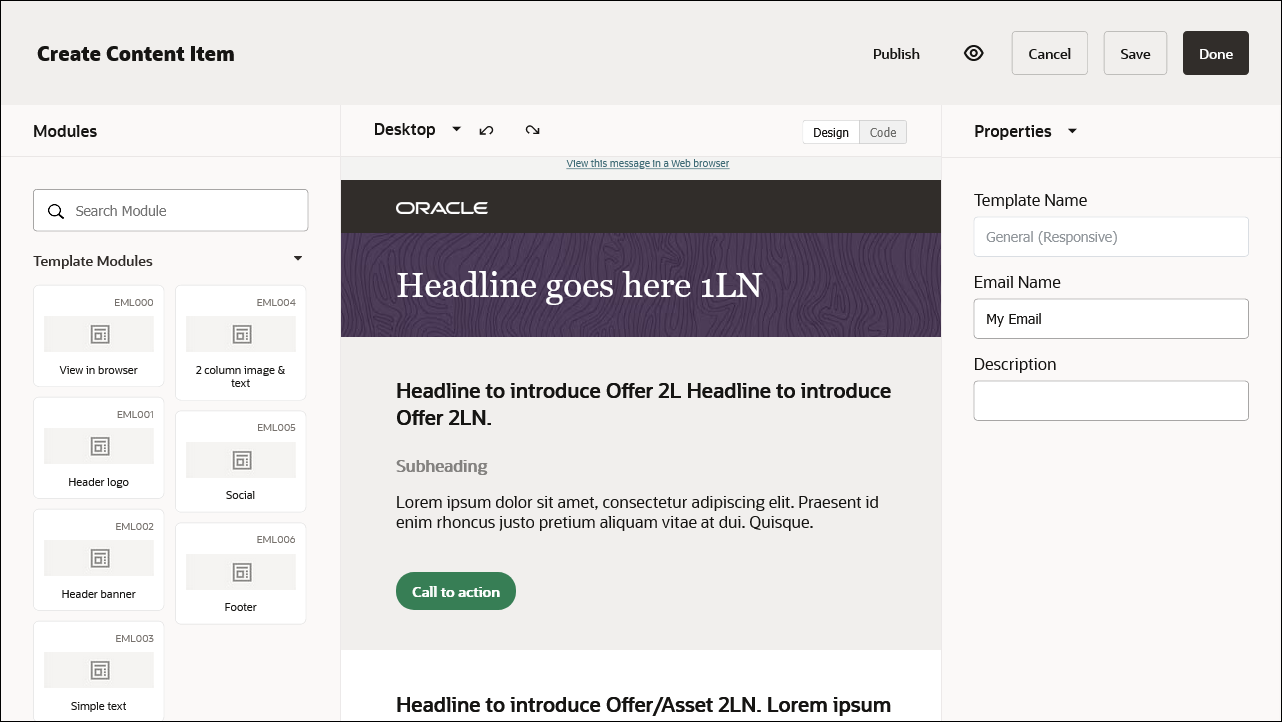
Email Builder is an application for Oracle Content Management (OCM) which provides an easy-to-use, drag-and-drop interface for marketers to create e-mails. You can choose from a variety of predefined sample templates to ensure consistent branding for your organization. Since the application is built on top of the Oracle Content Management platform, you have access to features such as a digital asset picker, translations, and approval workflows. It’s easy to create, edit, preview, and download e-mails for use with e-mail campaign management tools of your choice, including Oracle Responsys.
The application framework and demo apps, including Email Builder, are not available in the Starter Edition of Oracle Content Management.
Prerequisites
To install the Email Builder app, you need the following:
- an Oracle Content Management Premium Edition subscription
- an Oracle Content Management account with these application roles:
- Enterprise user (CECEnterpriseUser)
- Service administrator (CECServiceAdministrator)
- Content administrator (CECContentAdministrator)
- Sites administrator (CECSitesAdministrator)
- Repository administrator (CECRepositoryAdministrator)
- a configured asset management environment in Oracle Content Management
Once Email Builder has been installed and configured, all enterprise users in Oracle Content Management can create emails based on the available templates. They do need to have access to the asset repository used for Email Builder.
Configure Oracle Content Management
Before installing the Email Builder app, you first need to configure some things in Oracle Content Management:
Create a Publishing Channel
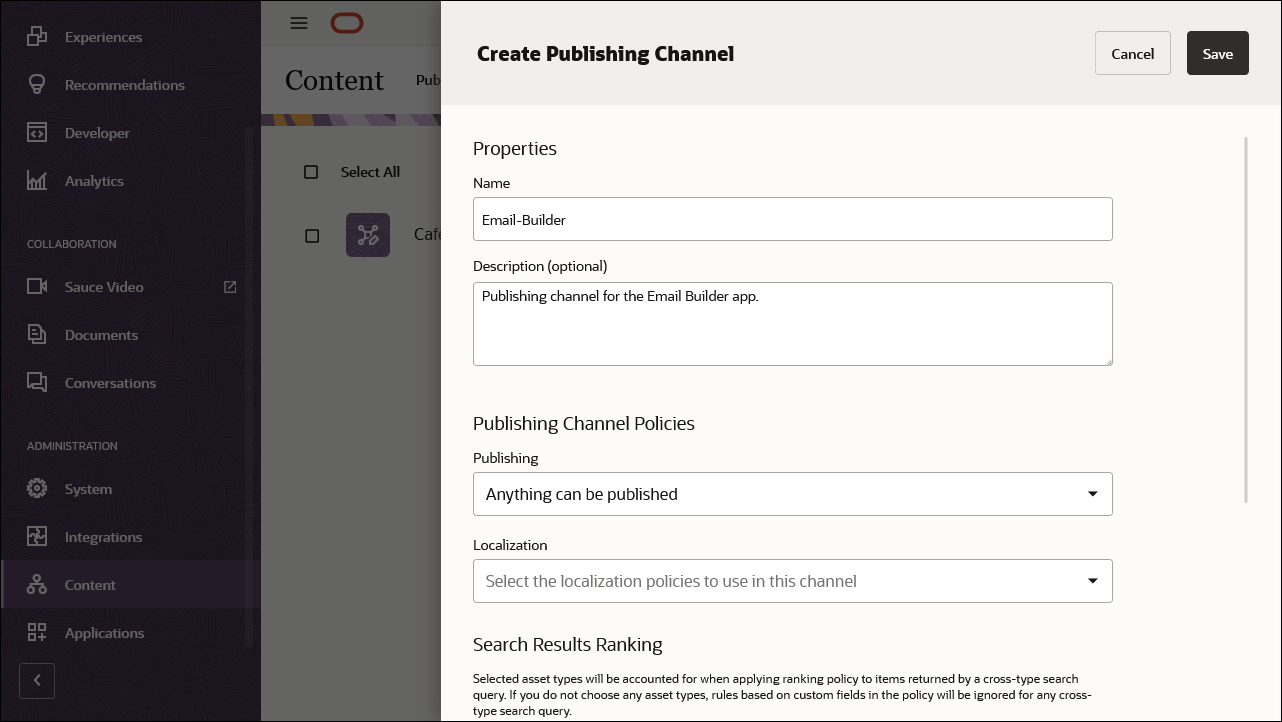
The first step is to create a publishing channel for your Email Builder application:
Sign in to the Oracle Content Management web interface as an administrator.
Choose Content in the left navigation menu.
On the Content page, choose Publishing Channels in the Content dropdown menu.
On the Publishing Channels page, click Create.
Provide a name and, optionally, a description for the publishing channel, and set the other options to suit your needs.
Click Save when you’re done.
The publishing channel is now available for use, but you do need to add it to a repository before users can publish to it.
For more information on publishing channels, see Managing Assets with Oracle Content Management.
Create an Asset Repository
Next, create an asset repository that will store your email images, templates, and other assets:
Sign in to the Oracle Content Management web interface as an administrator.
Choose Content in the left navigation menu.
On the Content page, choose Repositories in the Content dropdown menu.
On the Repositories page, click Create.
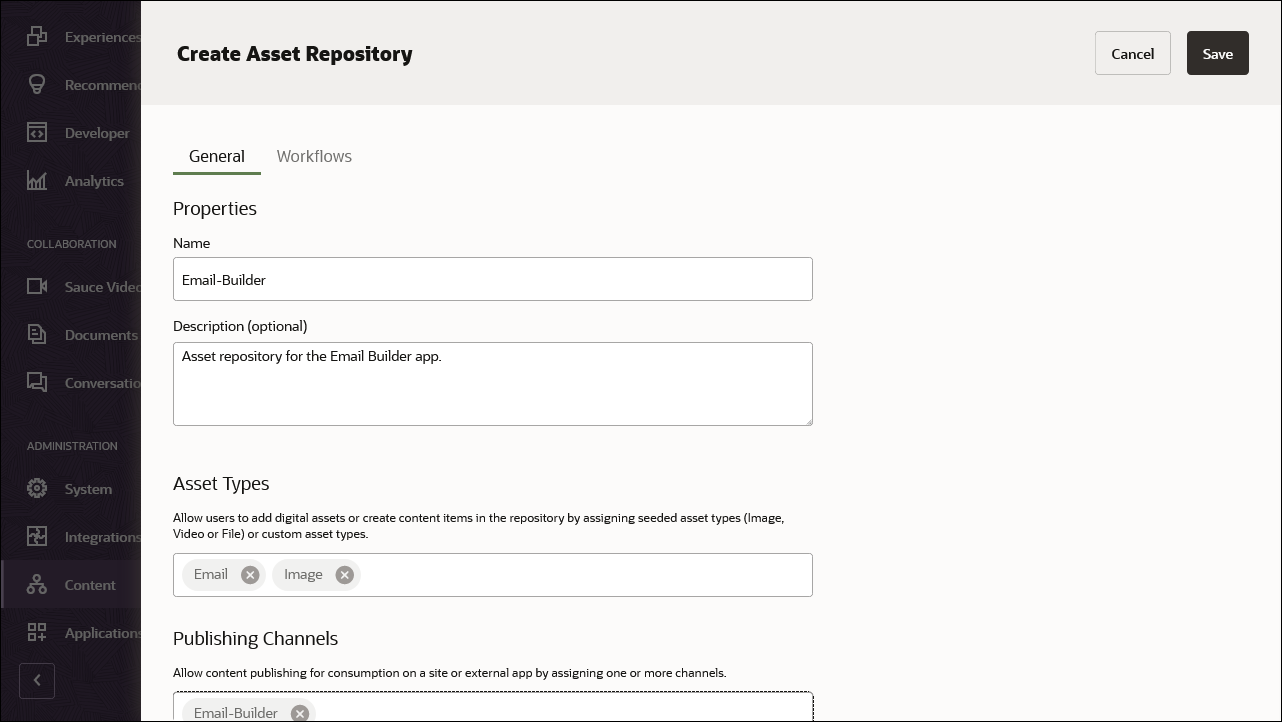
Make sure to create an asset repository, not a business repository.Provide a name and, optionally, a description for the repository.
Under Asset Types, make sure Email and Image are included. This should already be the case, but if not, add them. You can start typing to narrow down the list of options.
Under Publishing Channel, select the publishing channel you created earlier. You can start typing to narrow down the list of options.
If you want to create multilingual emails, choose a default language and the additional languages that will be available for assets in the repository. These languages will be available when localizing emails.
Click Save when you’re done.
The repository is now available for use. If you want other people to access your Email Builder instance, make sure to share the repository with them.
For more information on repositories, see Managing Assets with Oracle Content Management.
Install the App
After configuring Oracle Content Management, you can install the Email Builder app:
In the Oracle Content Management web interface, click Applications in the left navigation menu (under ADMINISTRATION). If you don’t see this option, then you don’t have the required user privileges to install apps.
On the Applications page, open the Discover tab.
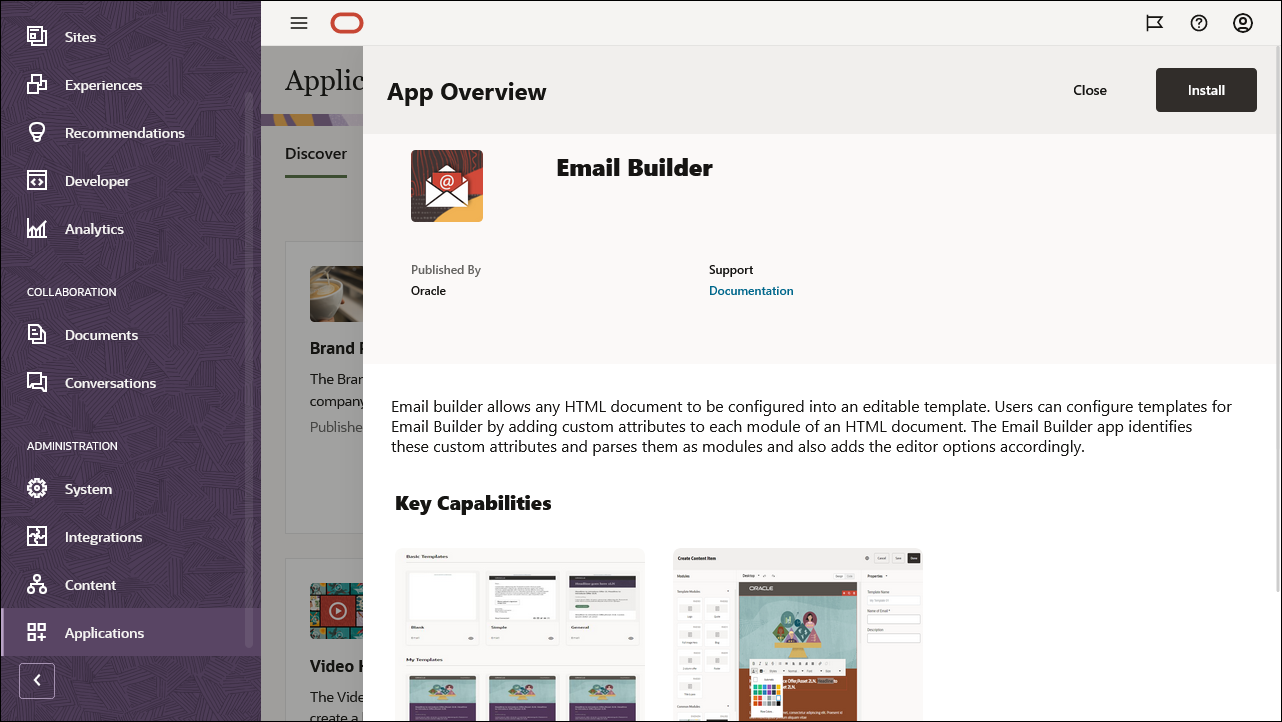
Click Email Builder.
On the application overview page, click Install.
Provide a name for the Email Builder instance, and select the asset repository that you created earlier to store your email assets, then click Confirm.
The application is now installed.
You can see your installed Email Builder instance by opening the Applications page, then Installed Apps, and then View instances in the Email Builder tile.
You can only install one Email Builder app on any Oracle Content Management instance.
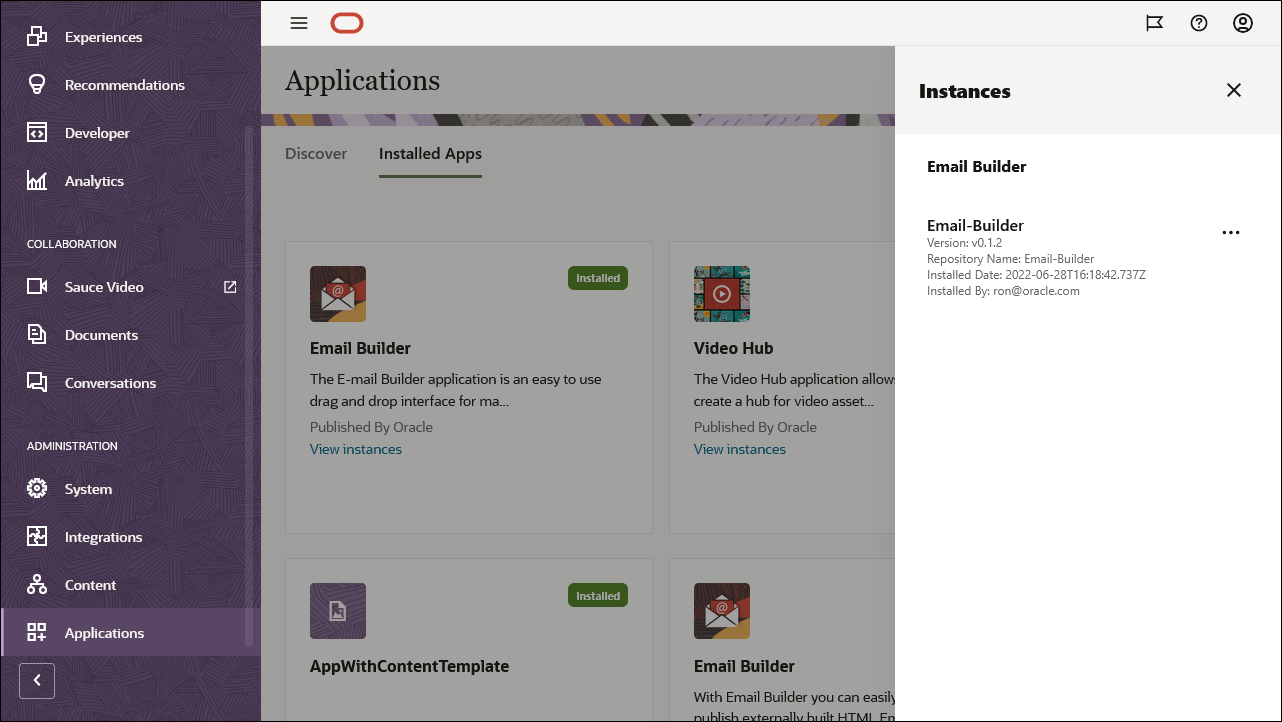
To uninstall an Email Builder app instance, go to the
Installed Apps page and then click View
instances in the Email Builder tile. Open the  menu for the app, and choose
Uninstall. You can only uninstall app instances
that you installed yourself or for which you were granted admin
privileges.
If you uninstall the Email Builder app, its associated repository, publishing channel, and any created email assets will remain in the system. They’re not removed automatically with the app.
Create an Email
After installing the app, you can create new emails that you can download for use with an e-mail campaign management tool of your choice, including Oracle Responsys.
All enterprise users in Oracle Content Management can create emails based on the available templates, but they do need to have access to the asset repository used for Email Builder.
Log in to Oracle Content Management and open the Assets page.
Open the asset repository that was created for Email Builder.
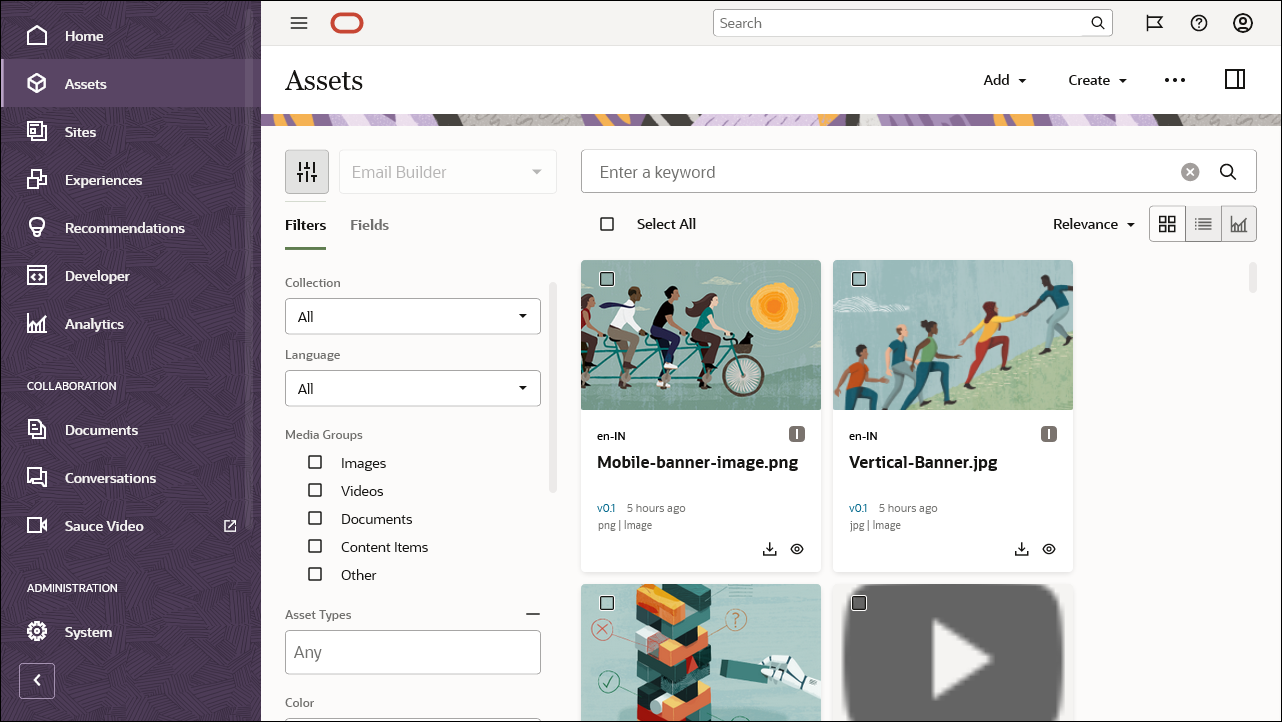
In the top right, click Create and then Create a New Content Item.
Select Email as the content type and click OK.
Start with a blank email, or choose a template for the email content and click Select.
In addition to predefined basic templates, there may also be custom email templates, which will be listed under My Templates.
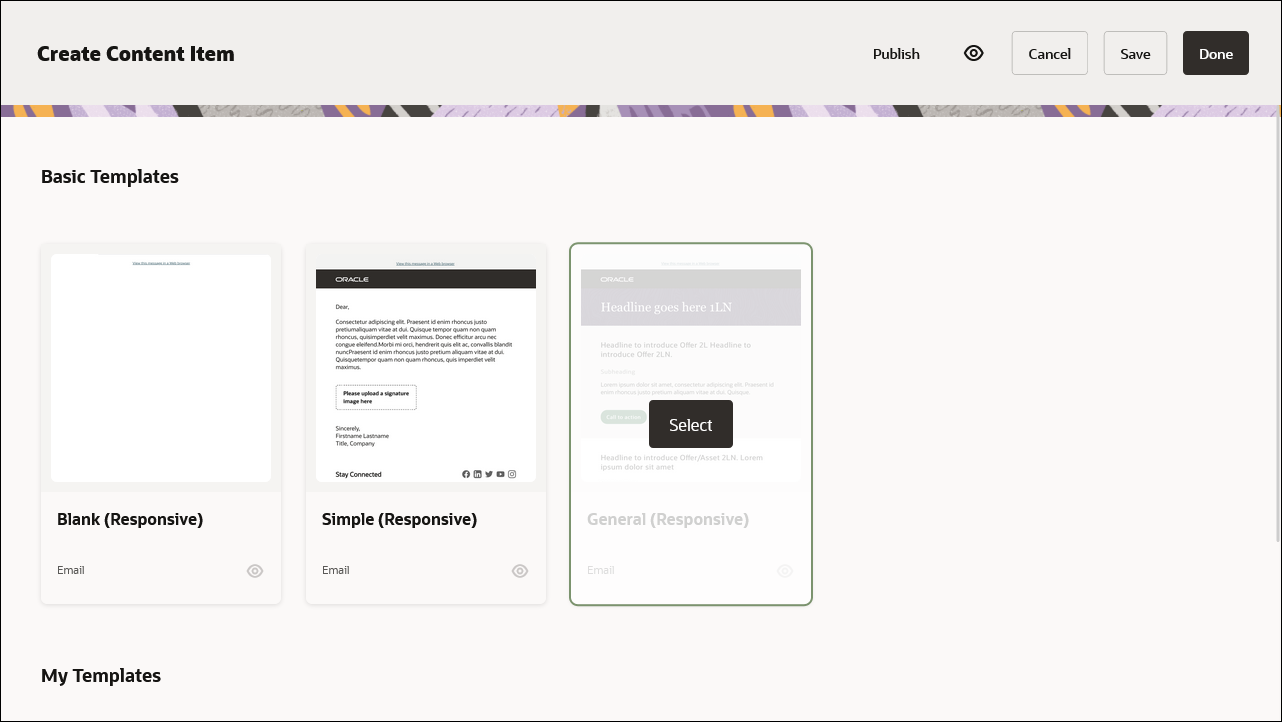
A new content item based on the selected template opens in an editor (the “canvas”).
Enter a name and, optionally, a description for the email.A new, unpublished email content item starts with version number 0.1.
Modify the email as needed.
You can add, move, or edit template modules. For example, enter headings and text, add a header logo or social media bar, include images or text columns, or add additional email modules. Add or edit text in the email as needed.Switch between desktop, tablet, or mobile view to see what the email looks like on different screen sizes, or switch between design mode and code view.
As you’re working on the email, click Save to store a snapshot while remaining in the editor. Every time you save an email, its minor version number is incremented (from v0.1 to v0.2, etc.).
When you’ve completed your work, click Done to close the editor and go to the Assets page. This also increments the minor version number of the email.
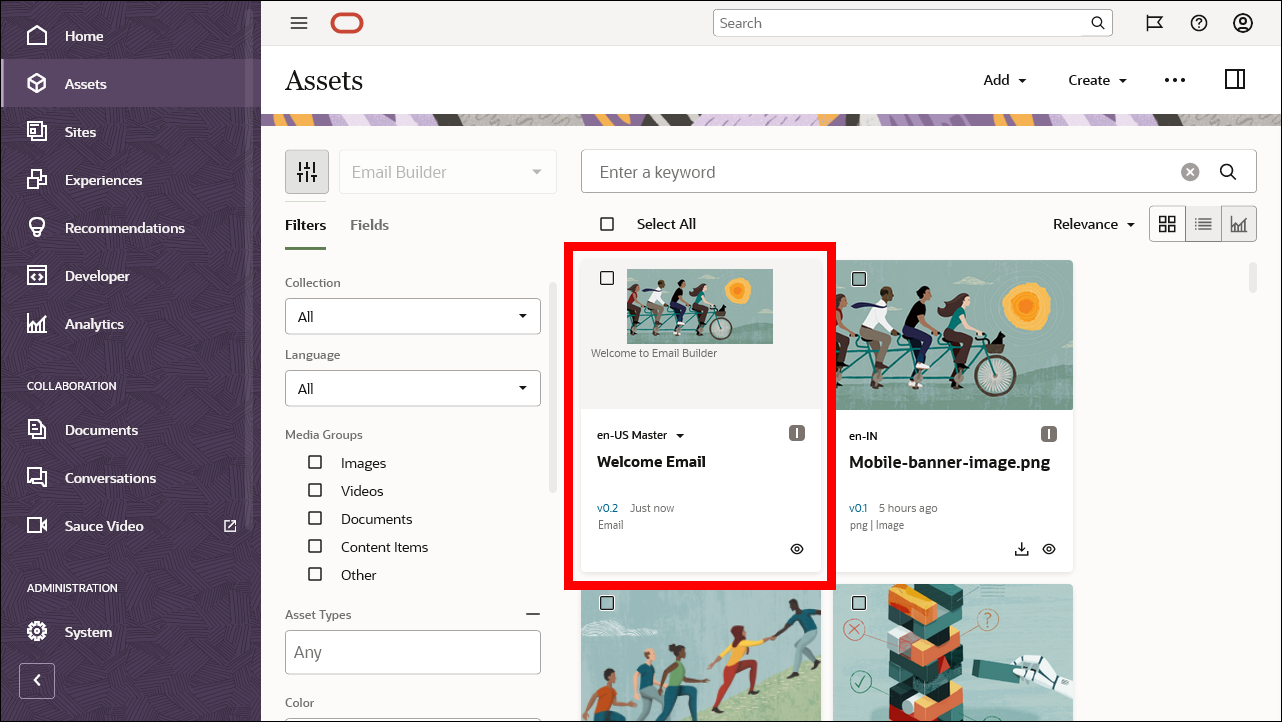
The email is now available in Oracle Content Management as a content item in the asset repository used for Email Builder. Anyone with access to this repository can view and download the email for further use.
You don’t need to publish an email for it to be available to other users.
View an Email
View an email to see what it looks like in different contexts:
On the Assets page, click the title of the email content item.
On the Assets page, select the email content item and click the
 icon in the actions bar.
In the email editor, click the
 icon. (Note that the email is saved first and the minor version
number goes up.)
If an email has multiple language versions, choose the language you want to view.
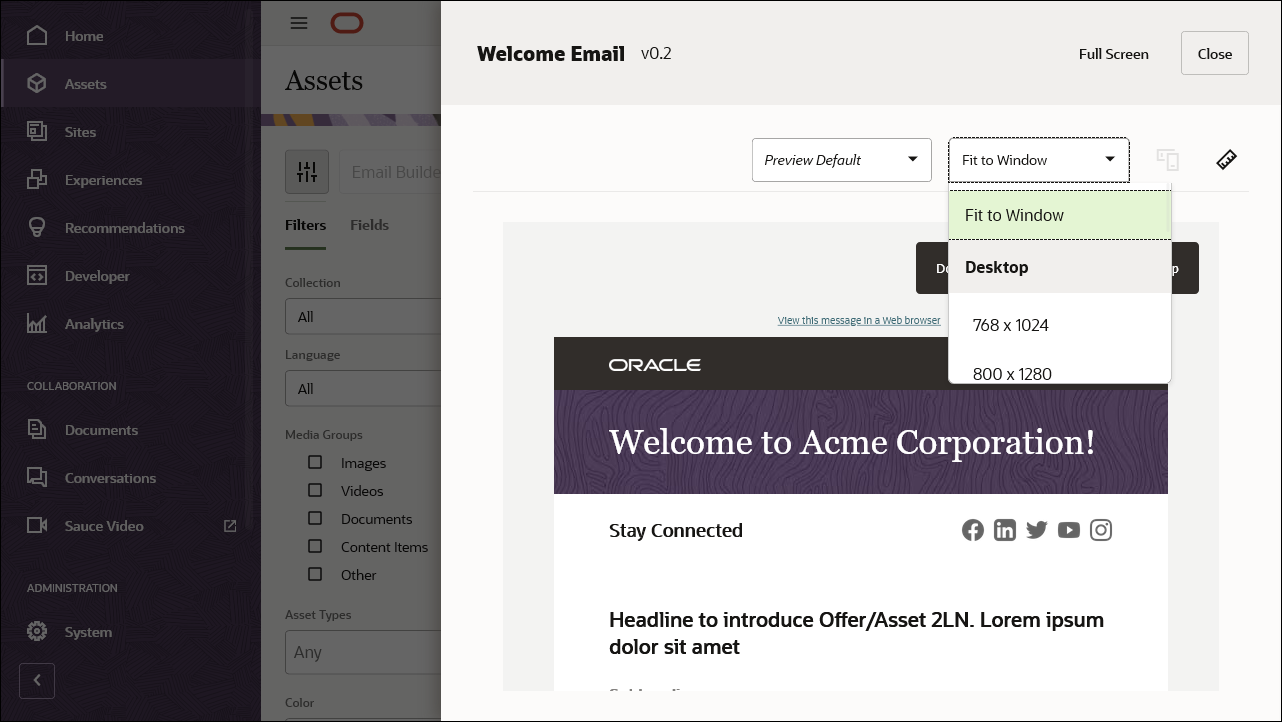
The email opens in a viewer, where you can change the display resolution and orientation, or view the email in full screen.
Edit an Email
After creating an email, you can easily make changes to it:
Find the email on the Assets page. (Make sure that you’re looking in the correct repository.)
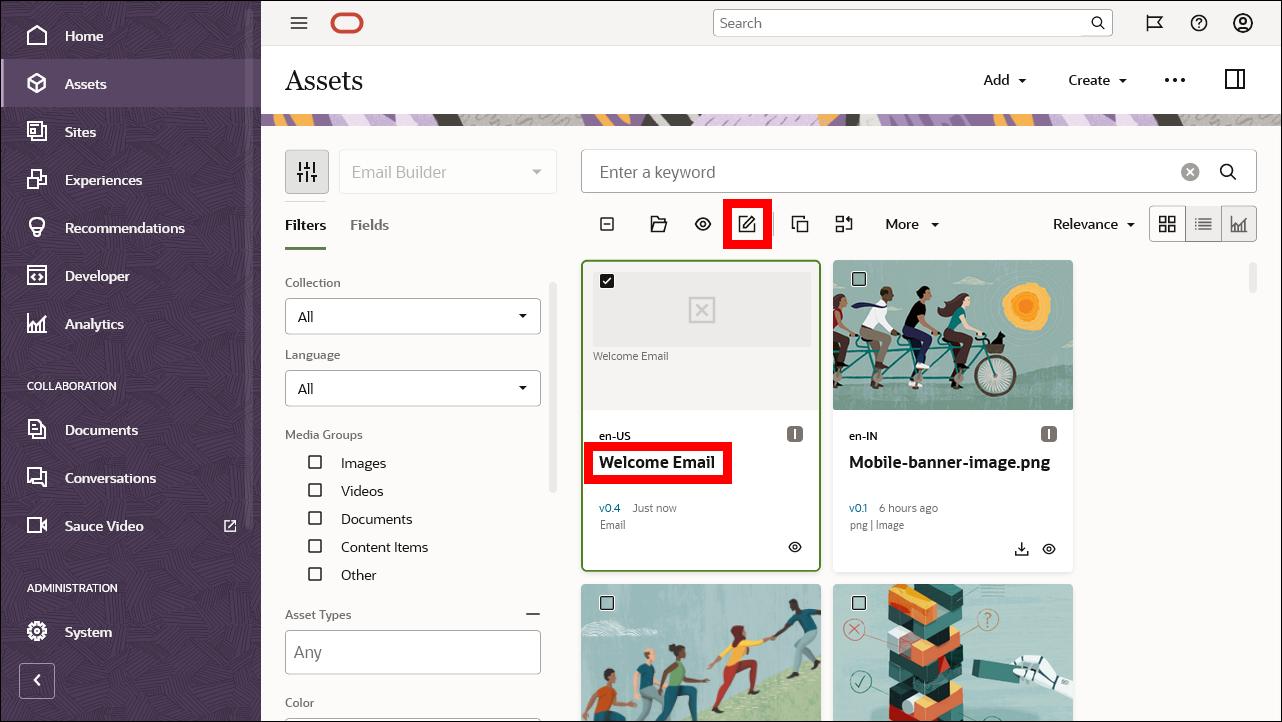
Select the email in the list and click the
 icon in the
actions bar. Alternatively, click the email title to open it and
click Edit.
icon in the
actions bar. Alternatively, click the email title to open it and
click Edit.Make the changes you need and click Save (to store a snapshot while remaining in the editor) or Done (to close the editor and go to the Assets page). Every time you save an email, its minor version number is incremented (from v0.4 to v0.5, etc.).
Localize an Email
After creating an email, you may also want to create translated versions of that email, so it can be used for audiences in different parts of the world.
To localize an email:
Find the email on the Assets page. (Make sure that you’re looking in the correct repository.)
Select the email in the list and click Manage Languages. Depending on your display width, this will either be in a Languages or More menu on the actions bar.

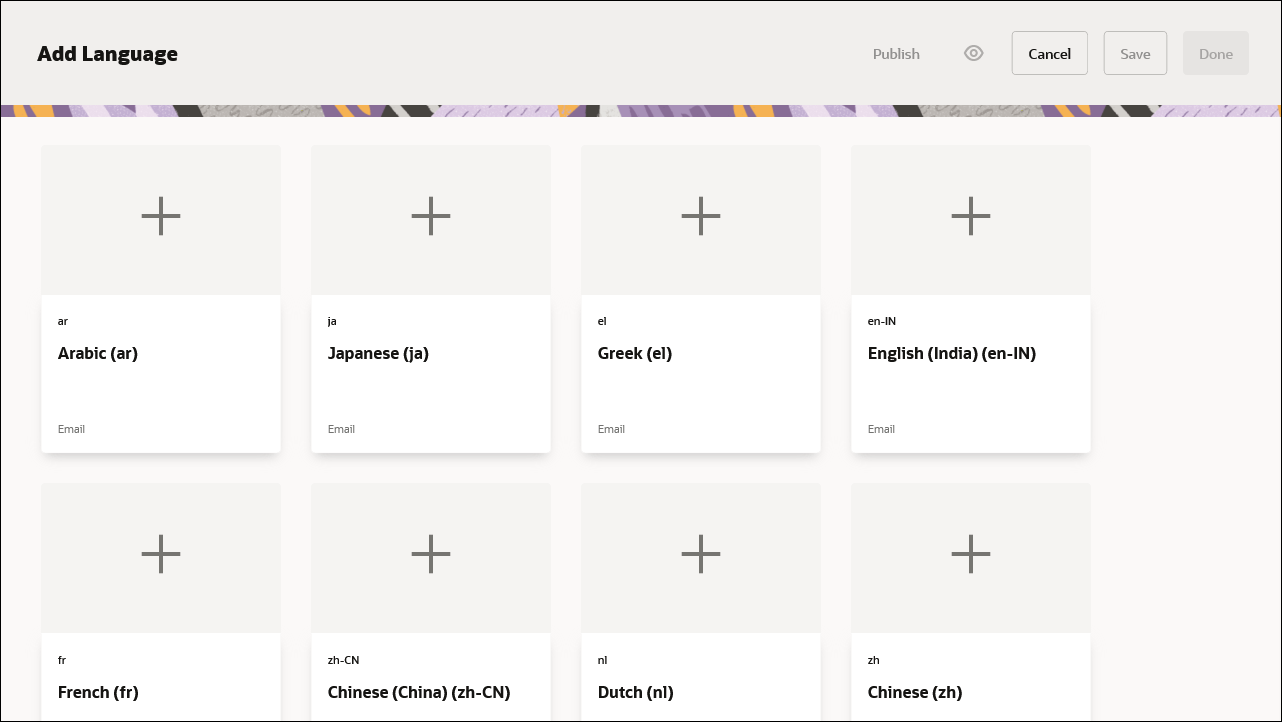
Click Add Language.
On the Add Language page, click + for the language you want to add. You’ll only see languages that are enabled for the asset repository used for Email Builder.
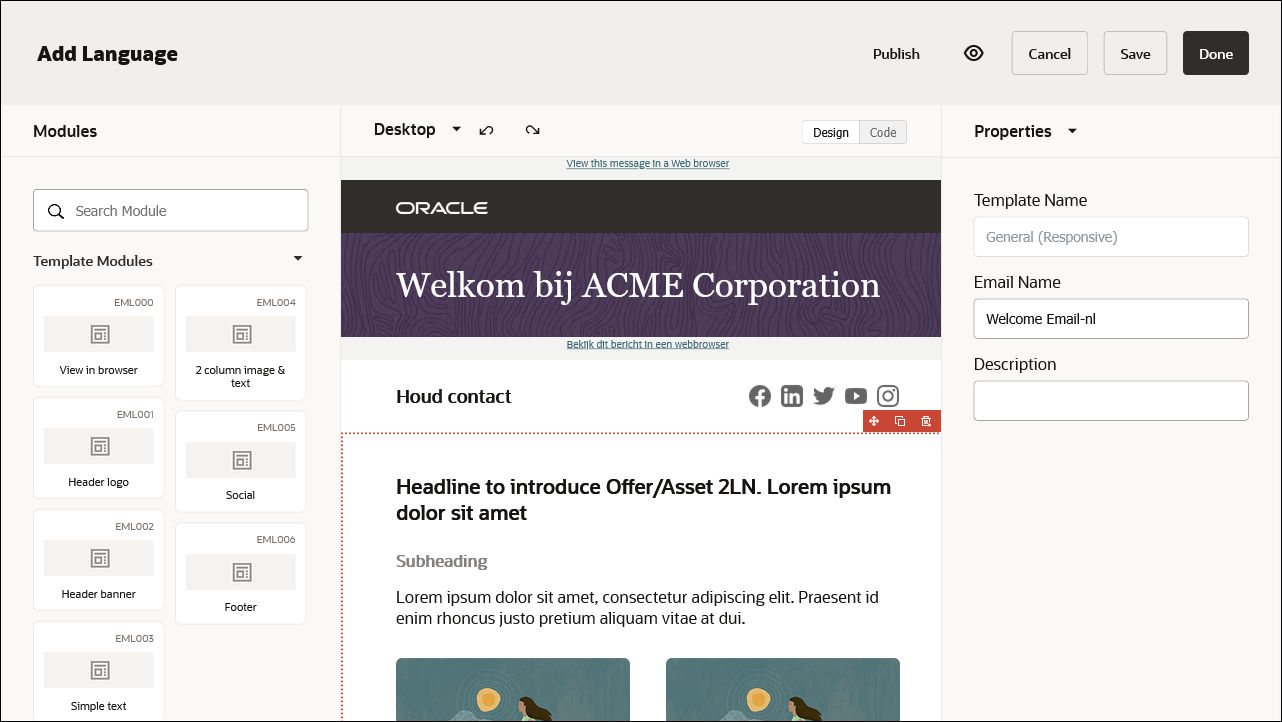
This opens a copy of the email content item in the editor for the selected language. You can translate the email here directly or enter the email into your translation workflow later.
Please note that the language code is appended to the email name by default (for example ‘-nl’).
Click Done when you’re done. The localized email is now available as a separate content item.
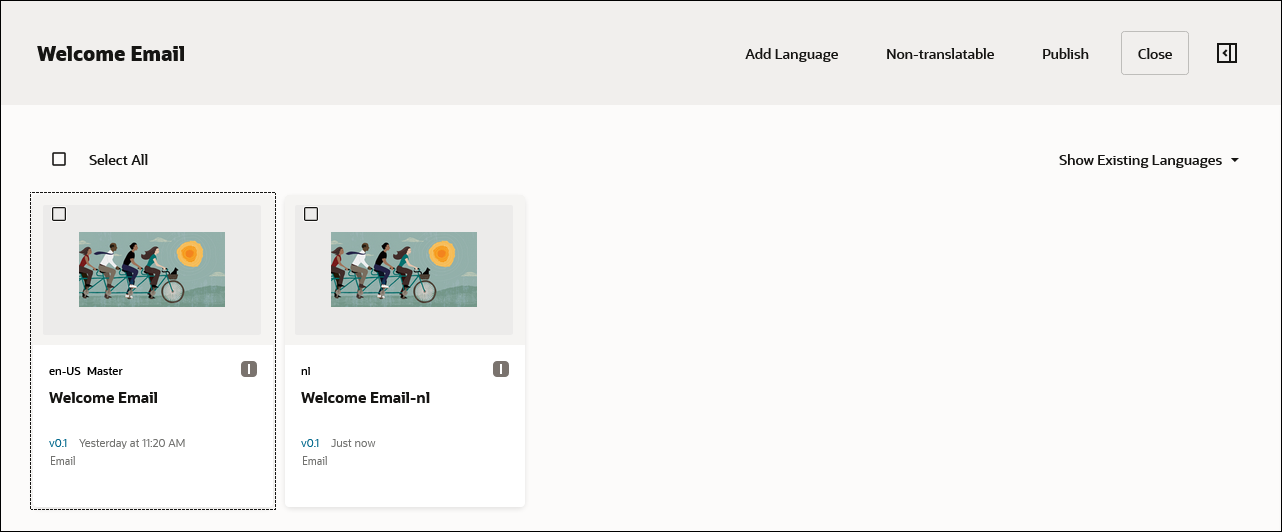
Click Close to return to the Assets page.
If an email content item has multiple language versions, you can choose a specific language to work with.

For more information on localizing assets, see Managing Assets with Oracle Content Management.
Download an Email
When you’re ready, download the email so you can use it in your email campaign management system or processes, including Oracle Responsys.
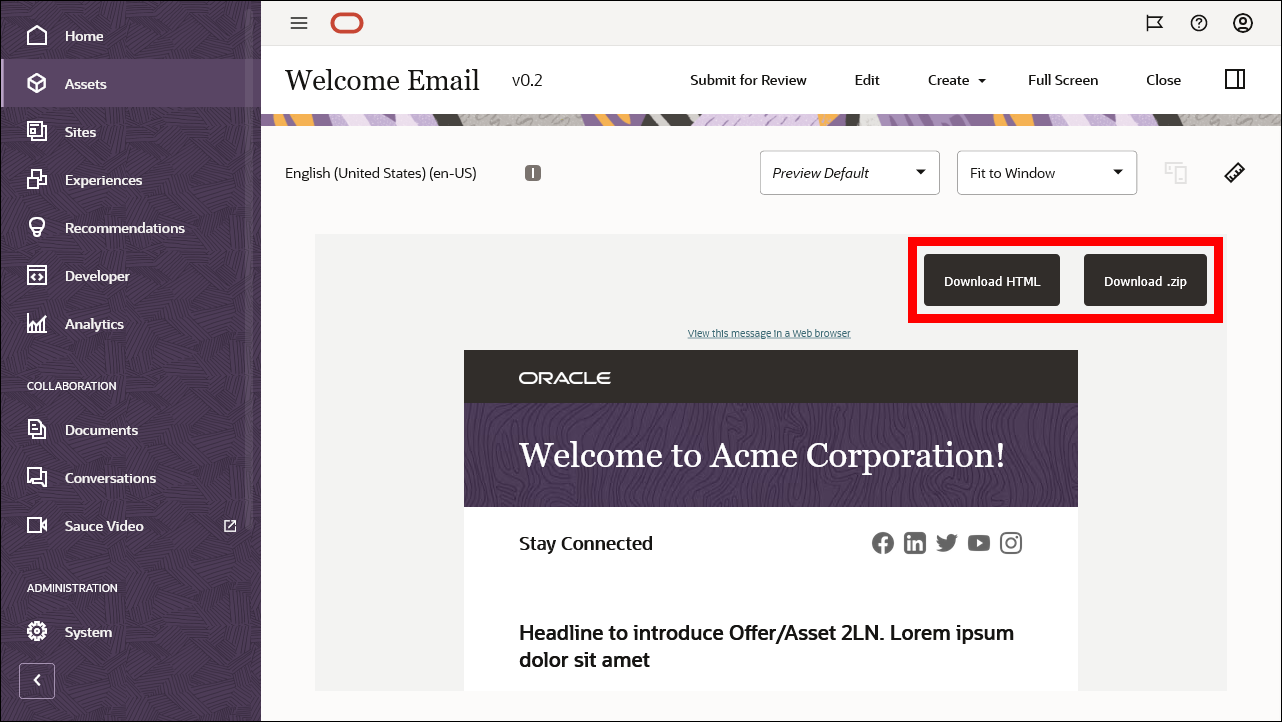
View the email.
Click the Download HTML or Download .zip button.
The Download HTML button is enabled only if the email doesn’t contain any URLs to unpublished images or assets in Oracle Content Management. This is to avoid users launching an email with unpublished URLs (which wouldn’t resolve properly). If there are no unpublished URL references in the email, you can download the email as HTML with the URL references included.
The Download .zip button will download the HTML rendition and the referenced images, if any, in a folder.
Download the HTML or zip file to your computer.
The downloaded HTML rendition won’t contain any custom Email Builder attributes.
You can open the HTML email in your local web browser and use it however you want. For example, use it with an email campaign management tool such as Oracle Responsys.
You don’t need to publish an email content item in Oracle Content Management to make it available for download.
Understand Email Templates
Let’s have a closer look at email templates which are used to create the emails.
Basic Email Template Structure
A fully designed email document is an
<HTML>...</HTML> structure that complies
with W3 standards and email coding best practices.
The basic HTML template structure looks like this:
<!DOCTYPE>
<html>
  <head>
    <meta>
    <title>Title</title>
    <style>
      Style information for your desktop and mobile appearance.
    </style>
  </head>
  <body>
    <table>Module 1</table>
    <table>Module 2</table>
    <table>Module 3</table>
  </body>
</html>
It’s important to note that Email Builder won’t add or manage any email client rendering or responsiveness for your email code. Before configuring your template, the HTML code must be clean in accordance with email standards, including media queries, for a responsive experience.
Template Modules
Modules are reusable content blocks that can be put together in different combinations to create emails or a range of full email templates.
Each email template module must be a
<table>...</table> code block, as shown
below.
All of your modules can be housed in a pattern library as part of your broader email design system or brand guidelines. This will enable your team to know exactly how to mix and match in order to build brand-compliant emails that won’t break. In essence, modular email design revolves around smaller sections or modules put together to create larger designs.
Make sure your email modules are compliant for use with Email Builder:
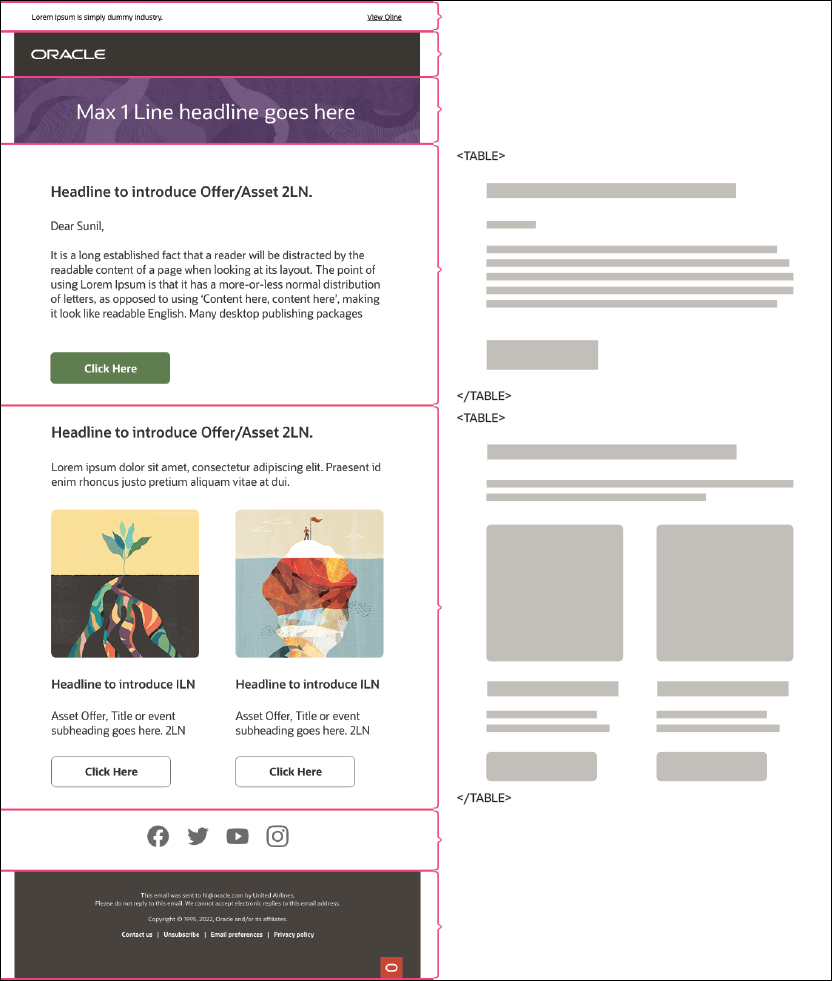
View or download a sample template:
Configure Templates and Modules for Email Builder
You can add configuration parameters to the HTML code for your email templates and modules to control what they look like and how they can be used or edited within the Email Builder app. You can configure the following:
For example, here’s a configured template module (note the added
attributes to the <table> tag, such as
builder-module-features):
<table class="edtrBtnParent devicewidth builder-module" builder-module-id="EML001" builder-module-features="drag,copy,delete" builder-module-label="Header logo" role="presentation" id="pm2" width="614" cellspacing="0" cellpadding="0" border="0" align="center">
    <tbody>
      <tr>
        <td class="pad-lr24 pad-tb14 dark-bg" style="padding:19px 55px; vertical-align: middle; background-color: #312D2A;" valign="middle" align="left"><table class="devicewidth" style="border:none; mso-table-lspace:0px; mso-table-rspace:0px; border-collapse:collapse;" width="30%" cellspacing="0" cellpadding="0" border="0" align="left">
          <tbody>
            <tr>
              <td style="padding-top:3px; font-size:0; min-height: 16px;" valign="bottom" align="left"><a name="top" id="top"></a> <img builder-image-features="Browse,Update,Link,Unlink" src="https://www.oracle.com/oce/dc/assets/CONT01489EC078214170985966B7D8E5C11D/native/tb-oracle-white-123x16px.png" alt="Oracle Logo" style="display:block;" width="92" border="0" /></td>
            </tr>
          </tbody>
        </table></td>
      </tr>
    </tbody>
</table>
Enable Modules and Module Features
Add attributes to the HTML code for your modules to control their functionality.
Configurable Attributes and Variables
These are the configurable attributes and variables for modules:
| Attribute | Value | Required | Usage |
|---|---|---|---|
|
class="" |
builder-module | Yes | Add this class to the parent module <table> tag to identify it as a module. |
|
builder-module-id |
Add a unique ID of your choice. | Yes |
Unique identifier for component. Make sure to use the same module ID as when you create the module. Otherwise the module won’t show up in the Common Modules list for a template. |
|
builder-module-label |
Provide any short name. | Yes | Give your module a short and easy-to-recognize name. This name will be used as a display name for your module in the Email Builder editor under the ‘Template Modules’ section. |
|
builder-module-show |
‘true’ or ‘false’. The default is ‘true’. |
Optional |
Only when required to hide a module in a template. You can use this
attribute basically to make it |
|
builder-module-reuse |
‘true’ or ‘false’. The default is ‘true’. |
Optional |
Use this attribute only when a module doesn’t need to be reused or if you don’t want to show it in Email Builder editor under ‘Template Modules’. |
|
builder-module-features |
drag, copy, or delete | Optional |
All options by default are set to false. You must include the appropriate features for your template modules:
|
Examples
Here are some examples on how to configure a module with attributes.
Example 1
I want to declare a module, and allow drag, copy, and delete. In addition, I want to configure the module to be available in the Email Builder editor (displayed under Template Modules), and also allow it to be reused within the same email template.
<table class="builder-module" \
       builder-module-features="drag,copy,delete" \
       builder-module-id="EML004" \
       builder-module-label="2 column cards">
  <tr>
    <td>Your module design</td>
  </tr>
</table>
Example 2
I want to declare a module, allow only drag and delete, and I don’t want to reuse this module in the template or display it under Template Modules in the Email Builder editor.
<table class="builder-module" \
       builder-module-features="drag, delete" \
       builder-module-reuse="false">
  <tr>
    <td>Your module design</td>
  </tr>
</table>
Enable Text Editing Features
When creating email templates, you can enable or disable features available to users in the text editor.
Configurable Attributes and Variables
These are the configurable attributes and variables for the text editor:
| Attribute | Value | Required | Description |
|---|---|---|---|
| builder-text-features="" | Optional |
By default, all text elements are allowed with normal text editing on the canvas. Add the options below in double quotes to enable specific text editing features that you want to allow for each text element. For example: builder-text-features="Bold,Italic,Underline" |
|
|
|
Bold |
Optional | Displays the selected text bold. |
|
|
Italic |
Optional | Displays the selected text in italics. |
|
Underline |
Optional | Displays the selected text underlined. | |
|
|
Strike | Optional |
Displays the selected text in |
|
|
Link |
Optional | The selected text can be hyperlinked to an external web page or other resource. |
|
|
Unlink |
Optional | Unlink if the text is already linked. |
|
|
Format |
Optional | Formatting for the H1-H6 title styles and Normal. |
|
|
Font |
Optional | Sets the default system fonts. You can use appropriate fontfaces based on your branding or email design. |
|
|
FontSize |
Optional | Allows normal text to be resized to sizes 8, 9, 10, 11, 12, 14, etc. |
|
|
TextColor |
Optional | Applies a text color to the selected text. |
|
|
BGColor | Optional | Allows adding a background color for the selected text. |
|
|
Align |
Optional | Allows aligning text left, right, or center. |
|
|
BulletedList |
Optional | Creates a bulleted list. |
|
|
NumberedList |
Optional | Creates a numbered list. |
|
|
All |
Optional | Provides all the features above in the text editing menu. This is the default. |
Examples
Text editing features should be used in
<div>...</div> wrappers.
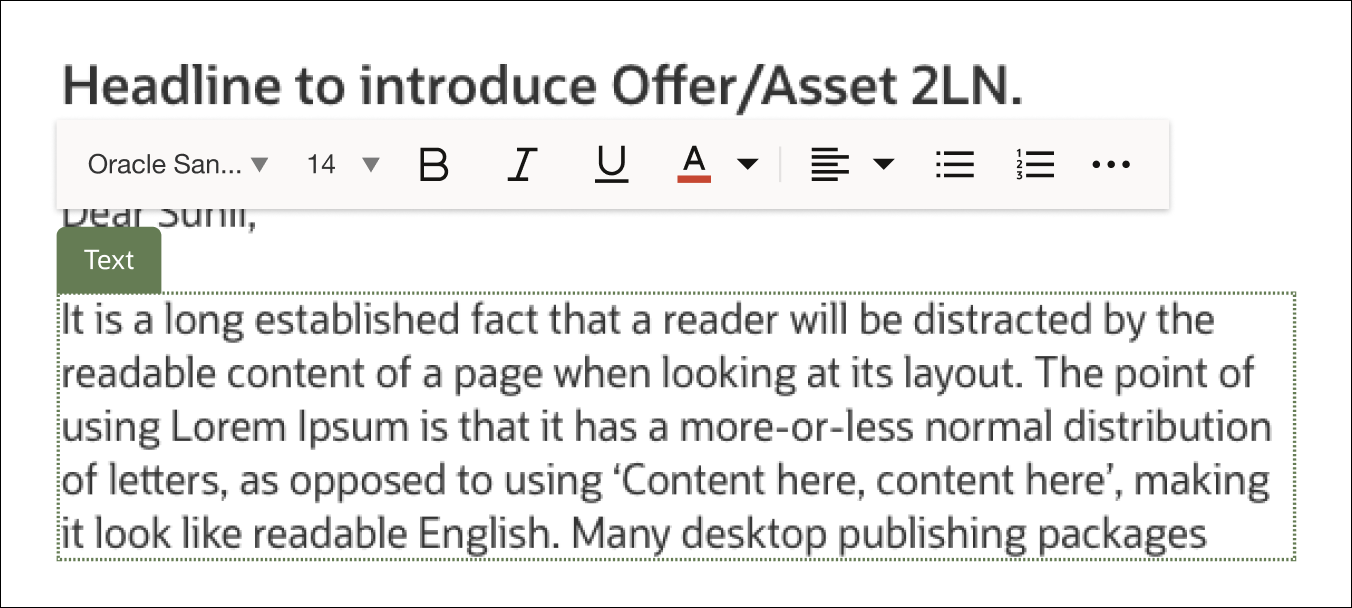
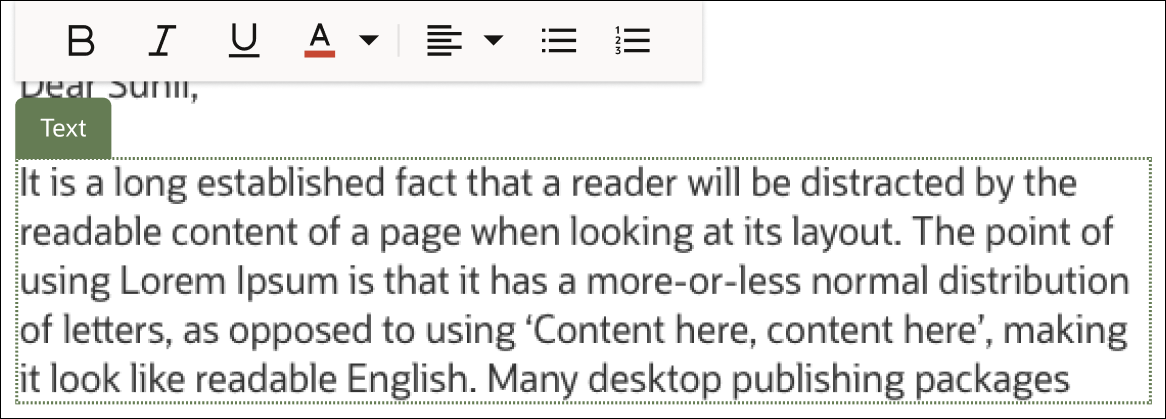
You can set the available features for the text editor as follows:
|
Example 1: enable all editing features in the text editor.
|
|
|
Example 2: enable specific editing features in the text editor.
|
|
Enable Image Features
When creating email templates, you can enable or disable features available to users for images in the template.
Configurable Attributes and Variables
These are the configurable attributes and variables for the image editor:
| Attribute | Value | Required | Description |
|---|---|---|---|
| builder-image-features="" | Optional | ||
|
|
Browse |
Optional | This allows you to browse and change the image from your Oracle Content Management channel assets. |
|
|
Update |
Optional | This allows you to enter an external image URL which is not in Oracle Content Management. |
|
|
Link |
Optional | This allows you to link the image to an external web page or other resource. |
|
|
Unlink |
Optional | Unlink the image if it’s already linked. |
| builder-image-assetTypes="" |
“ASSET_TYPE_NAME_1, ASSET_TYPE_NAME_2” |
Optional |
This allows you to create a digital asset type in Oracle Content Management with a specific collection of images. If there are multiple asset types, you can include them as comma-separated values. In the editor, that particular image browse option will open a media browser with the specified asset types auto-filtered. |
| builder-image-channel="" |
“Email Builder Channel” |
Optional |
You can pass the publishing channel name in this attribute to list only the images published to the specified channel in the image picker. Example: builder-image-channel=“Email Builder Channel” |
Examples
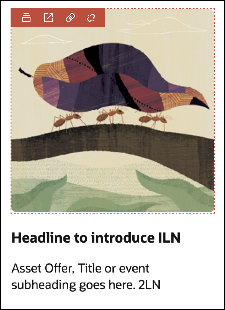
You can set the available features for the image editor as follows:
|
|
|
You can add only published images from the image picker. If you want to enable the Download HTML button, you need to assign the
builder-image-channelattribute in the module HTML code to specify the publishing channel. Otherwise you could only download the email as a zip file which includes any referenced images in an images folder.
Create Templates and Modules for Email Builder
When you install the Email Builder app, a number of predefined email templates and modules are available. In addition to using these built-in templates and modules, you can also create your own in Oracle Content Management.
Create Email Templates
When you create an email template, it will be included in the list of available templates when creating an email, so it can easily be reused for different purposes.
To create an email template:
Log in to the Oracle Content Management web interface.
Open the Assets page from the left navigation menu.
Click Create and then Create a New Content Item.
Choose Builder Template as the content type.
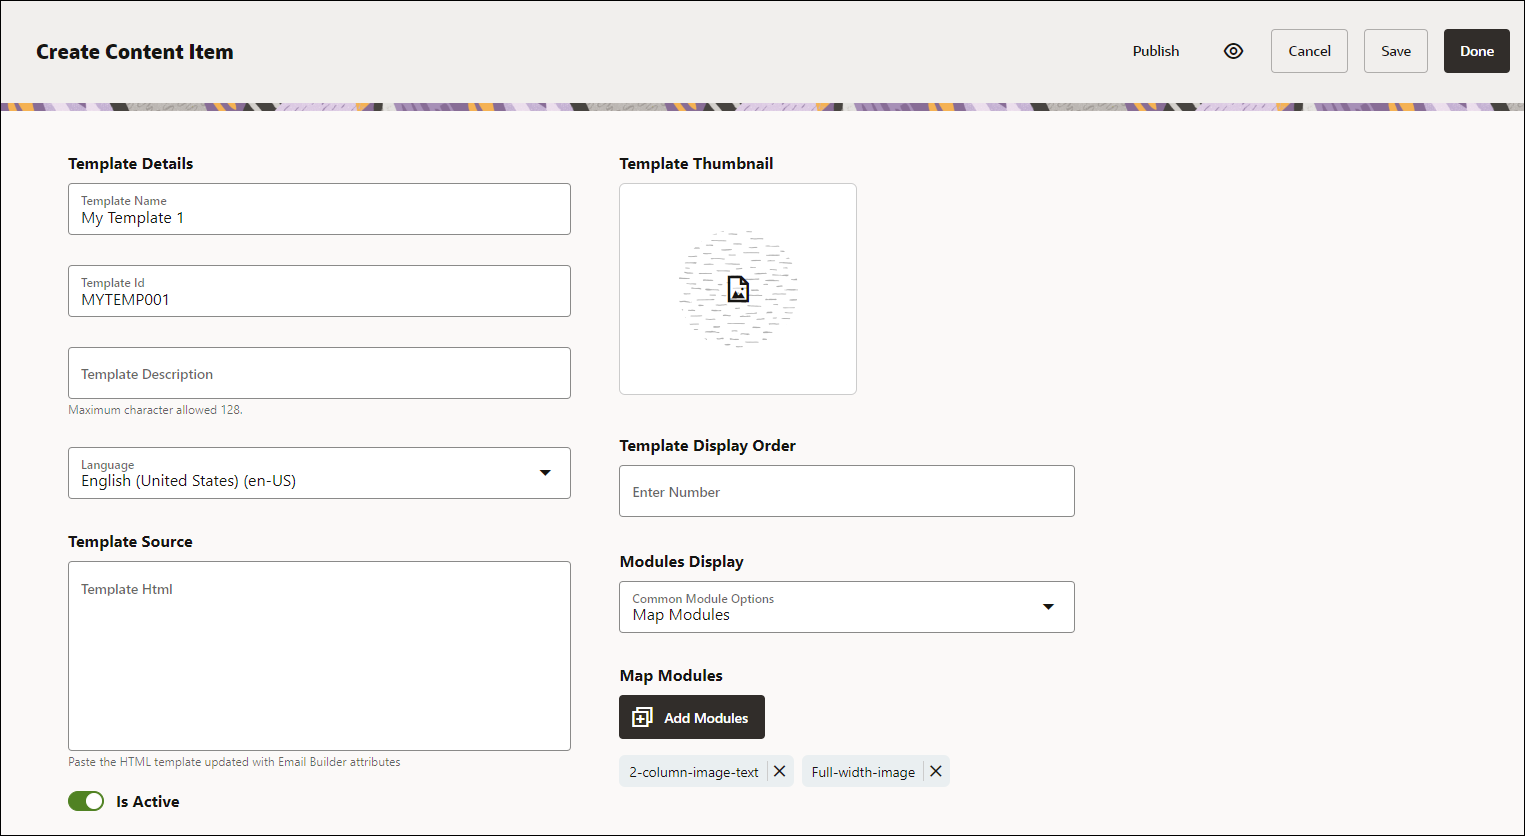
In the Create Content Item form, enter the template details.
- Template Name—Provide a template name, which will be displayed on the template selection screen.
- Template Id—Use a unique identifier for the template.
- Template Description—Provide a description for the template.
- Language—Select a language for the template. The default is English.
- Template Source—Copy and paste your full template HTML source code.
- Is Active—Enable or disable this option to show or hide the template in the template selection screen. The default is to show the template.
- Thumbnail—Add a thumbnail image for the email template, which will be displayed on the template selection screen.
- Display Order—Specify a number to define where the template is shown in the list. The lower the number, the more towards the top the template appears in the list.
- Modules Display—Select whether all available common email modules should be shown or hidden in the editor.
- Map Modules—You can select specific common modules to be available for the email template in the editor. If you don’t specify any, all available modules will be shown.
Optionally, assign the template to one or more collections, or assign tags to the template. These will make it easier to find the template in the repository.
As you’re working on the template, click Save to store a snapshot while remaining in the editor. Every time you save a template, its minor version number is incremented (from v0.1 to v0.2, etc.).
When you’ve completed your work, click Done to close the editor and go to the Assets page. This also increments the minor version number of the template. You’ll see the newly created template in the list of assets.
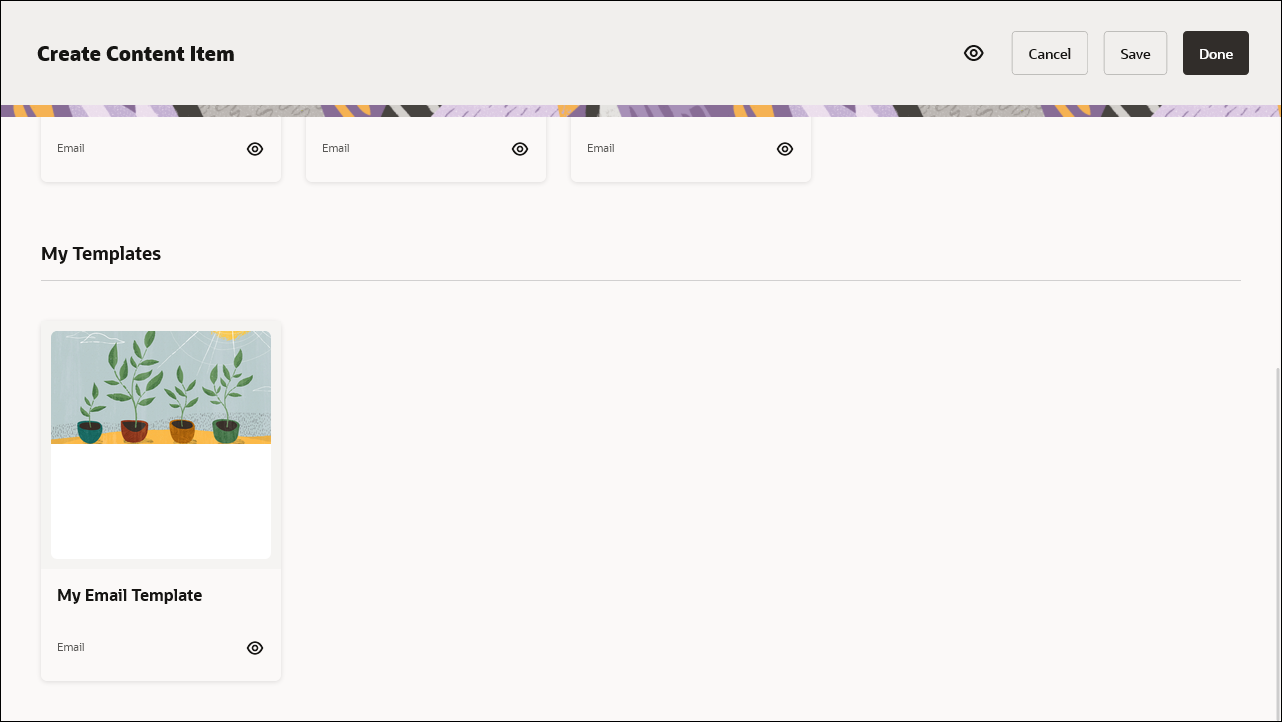
When creating an email, you’ll see the template listed under My Templates (unless you chose to hide it).
Create Common Modules
When you create common modules, they’ll be included in the list of available modules when creating an email, so you can easily reuse them as building blocks in your emails.
Each email template module must be a
<table>...</table> code block as shown in
Template Modules above. You can add
attributes to the <table> HTML tag to configure
the module’s functionality and appearance.
To create a common template module:
Log in to the Oracle Content Management web interface.
Open the Assets page from the left navigation menu.
Click Create and then Create a New Content Item.
Choose Builder Module as the content type.
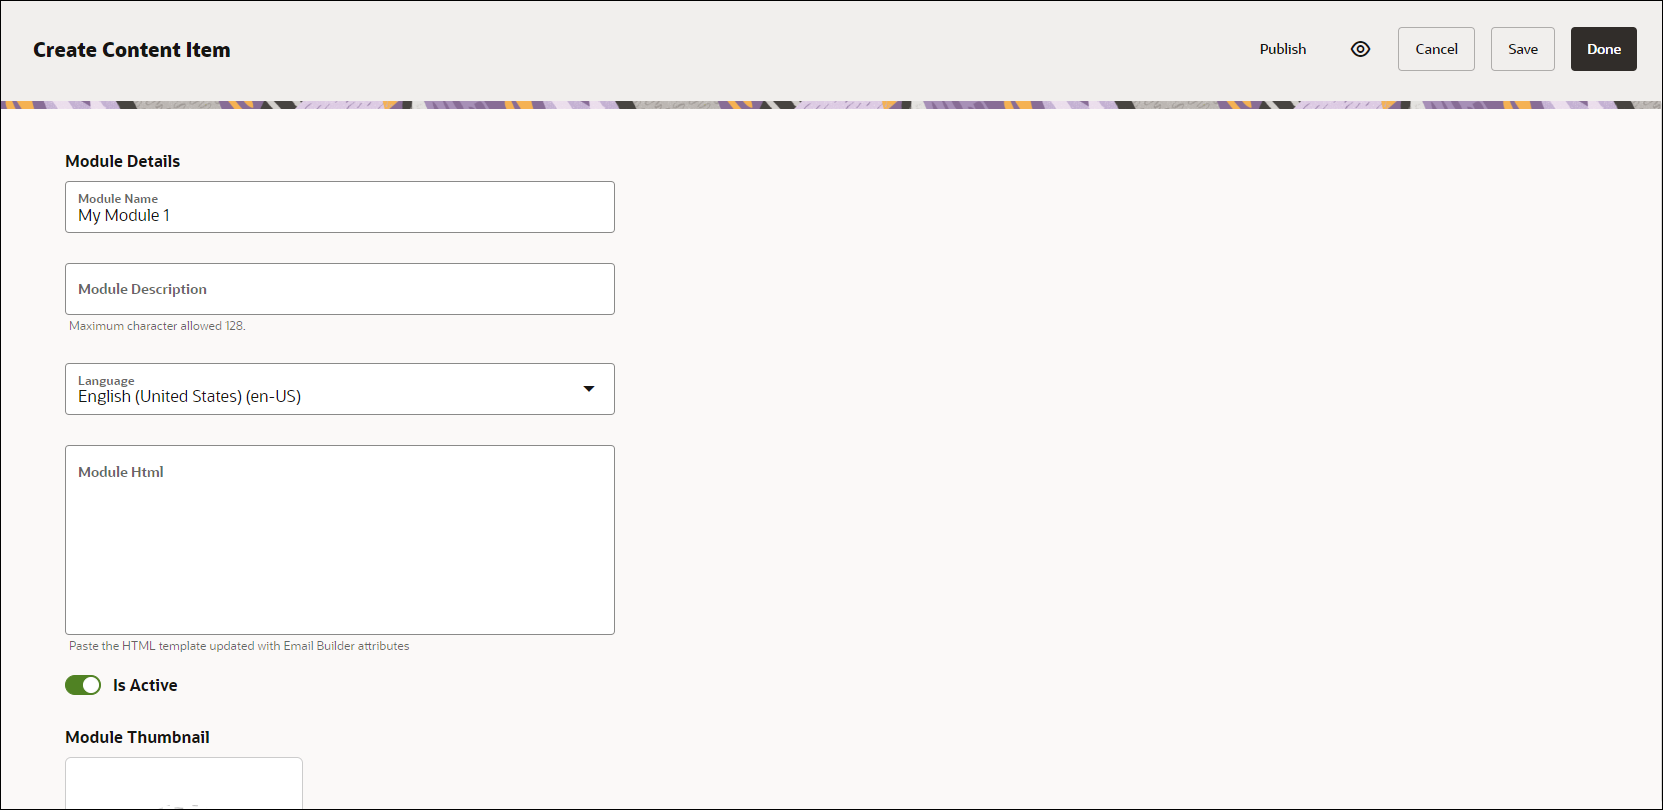
In the Create Content Item form, enter the module details and click Done.
- Module Name—Provide a module name, which will be displayed in the Common Modules section of the editor.
- Module Description—Provide a description for your module.
- Language—Select a language for the module. The default is English.
- Module HTML—Copy and paste your module HTML
source code (as a
<table>...</table>code block). - Is Active—Enable or disable this option to show or hide the module in the Common Modules section of the editor. The default is to show the module.
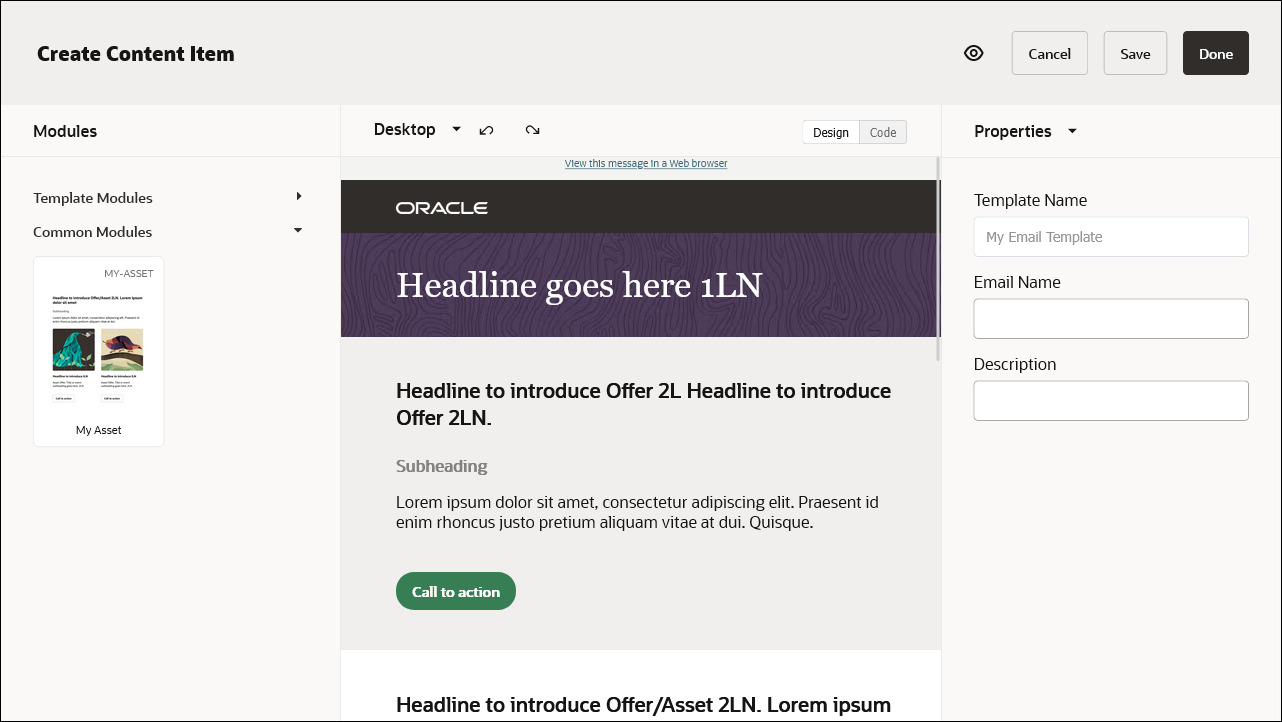
- Thumbnail—Add a thumbnail image for the template module, which will be displayed in the Common Modules section of the editor.
Optionally, assign the module to one or more collections, or assign tags to the template. These will make it easier to find the module in the repository.
As you’re working on the module, click Save to store a snapshot while remaining in the editor. Every time you save a module, its minor version number is incremented (from v0.1 to v0.2, etc.).
When you’ve completed your work, click Done to close the editor and go to the Assets page. This also increments the minor version number of the module. You’ll see the newly created module in the list of assets.
When creating an email, you’ll see the module listed under Common Modules (unless you chose to hide it).
Advanced Configuration
Here are some advanced configuration options for your emails:
- Add tracking URLs or parameters to links
- Add custom link names with fields
- Fetch clean source HTML source code
Add Tracking URLs/Parameters to Links
You can append or prepend tracking URLs or parameters to all links, including image links, in your email by adding the following custom meta attribute to the header section of the template HTML code:
To append tracking parameters:
<meta name="builder-url-track" content="append, ?Example=XYZ&country=DE">This will update all links in the email with the given parameters when downloaded. For example,
https://www.example.com
will become
https://www.example.com?Example=XYZ&country=DETo prepend tracking parameters:
<meta name="builder-url-track" content="prepend, https://sometracking.com?Example=XYZ&country=DE&URL=">This will update all links in the email with the given parameters when downloaded. For example,
https://www.example.com
will become
https://sometracking.com?Example=XYZ&country=DE&URL=https://www.example.com
Add Custom Link Names with Fields
You can add link name or custom link parameters to all links , including image links, in your email by adding the following custom meta attribute to the header section of the template HTML code.
<meta name="builder-link-parameters" content="Field1: Link Title>
The first parameter of the content attribute defines
the key name which will be added to the link tag in the HTML code.
The second parameter defines the label of the custom field in the
link menu in the editor.
The custom meta attribute above displays one custom field in the
link section and the value entered by the user will be painted
inside that <a href> tag in the HTML, for
example:
<a href=https://www.oracle.com Field1="Entered Text">CTA</a>
You can define multiple fields in this attribute with comma-separated key-value pairs.
For example, when you add the following custom meta attribute, the link menu in the editor will display the fields as shown in the screenshot below.
<meta name="builder-link-parameters" content="RILT: Responsys Link Title, Field2: Label 2">

Once the user enters the values, the respective parameters will be painted inside that link tag:
<a href=https://www.oracle.com RILT="Entered Text" Field2="Entered Text">CTA</a>
Fetch Clean Source HTML Code
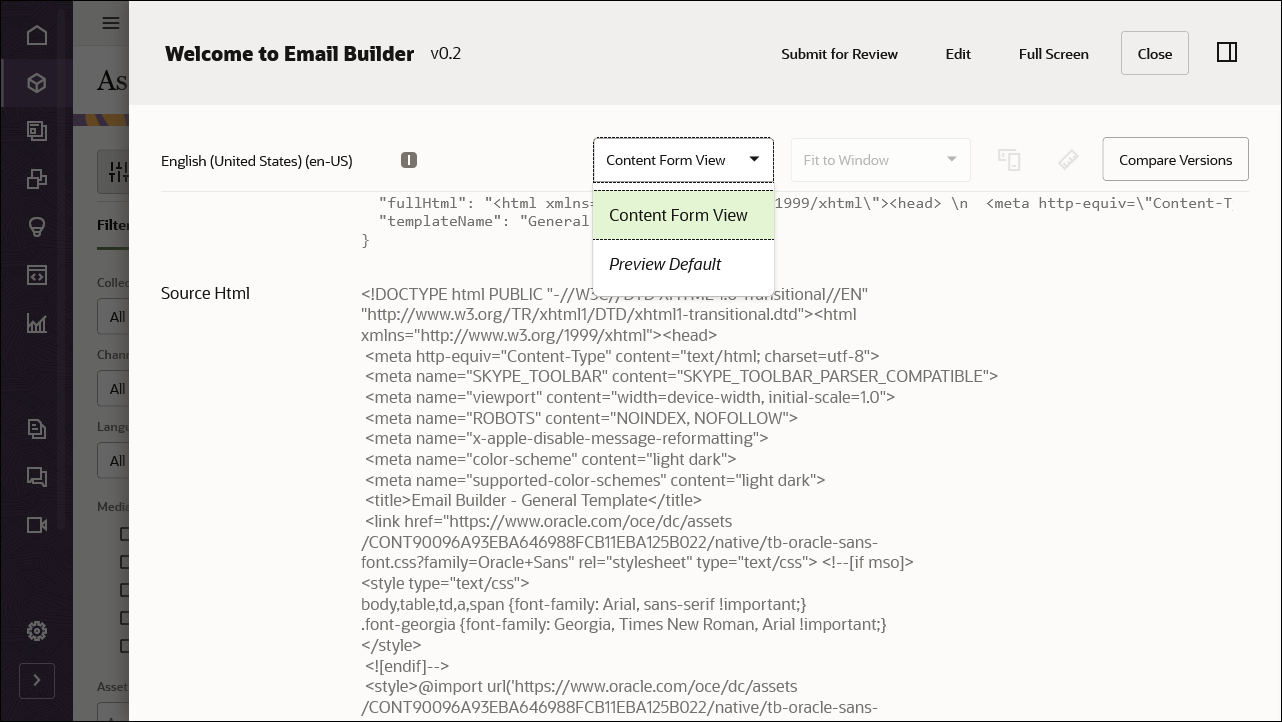
Every time an email is saved, the clean source HTML code is posted to the sourceHtml data field of that email item in Oracle Content Management. To see the source HTML code, open the email and switch to Content Form View.
The HTML code needs to be stored in different formats to make it
editable when users opens the email to edit. The
HTML field contains the raw code with Email Builder
attributes and only the <table>...</table>
structure, whereas the Source Html field will have
the complete, clean HTML code.
If the email is published, advanced users can fetch this clean source HTML code through the REST APIs for Content Management or Content Delivery.
Email Builder App for Oracle Content Management
F57192-03
May 2023
Copyright © 2021, 2023, Oracle and/or its affiliates.
Primary Author: Oracle Corporation