Before you Begin
This 30-minute tutorial shows you how to crowdsource training data with the Data Manufacturing feature in Oracle Digital Assistant. This tutorial is a companion to the Create Machine Learning Entities tutorial, which focuses on how ML entities work.
Background
To create a quality training corpus for your skills, it is useful to get multiple people involved so that you can get a large set of data with a lot of natural variance. Oracle Digital Assistant's Data Manufacturing feature helps you crowdsource the work of creating training sets for both intents and ML entities.
In this tutorial we'll walk through the process of crowdsourcing the creation of training utterances and annotating entity values in those utterances for an ML entity that contains names of TV shows.
This is the general workflow for building an ML entity's dataset:
- Collect training utterances that include examples of values for the entity.
- For the collected training utterances, mark occurrences of entity values.
- Once the crowdsource users complete the entity annotation job, validate and make adjustments to the training data.
- Add the validated dataset to the ML entity.
- Do a final review of the dataset within Digital Assistant.
What Do You Need?
- Access to Oracle Digital Assistant.
- The contents of the DM_Materials.zip file.
Set Up the Starter Skill
We'll start by importing a skill that already has an ML entity defined.
- Download DM_Materials.zip file and extract it to your local system.
In the extracted folder, you should see the following files:
DataManufacturingDemoStarter(1.0).zip10-tv-show-utterances.csv
- With the Oracle Digital Assistant UI open in your browser, click the main menu (
 ) to open the side menu.
 - Click Development and select Skills.
- Click the main menu () again to collapse the side menu.
- Click Import Skill (on the upper right part of the page).

Description of the illustration screenshot-import-skill.png - Browse to the
DataManufacturingDemoStarter(1.0).zipfile then click Open.The process of importing the skill might take a few seconds.
- Once the skill has finished importing, click the DataManufacturingDemoStarter tile to open it.
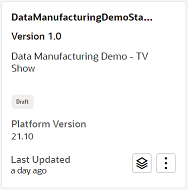
Description of the illustration screenshot-starter-tutorial-tile.png - In the skill's left navigation, click Entities
 .
. - In the list of entities, select ml.tvshownames.
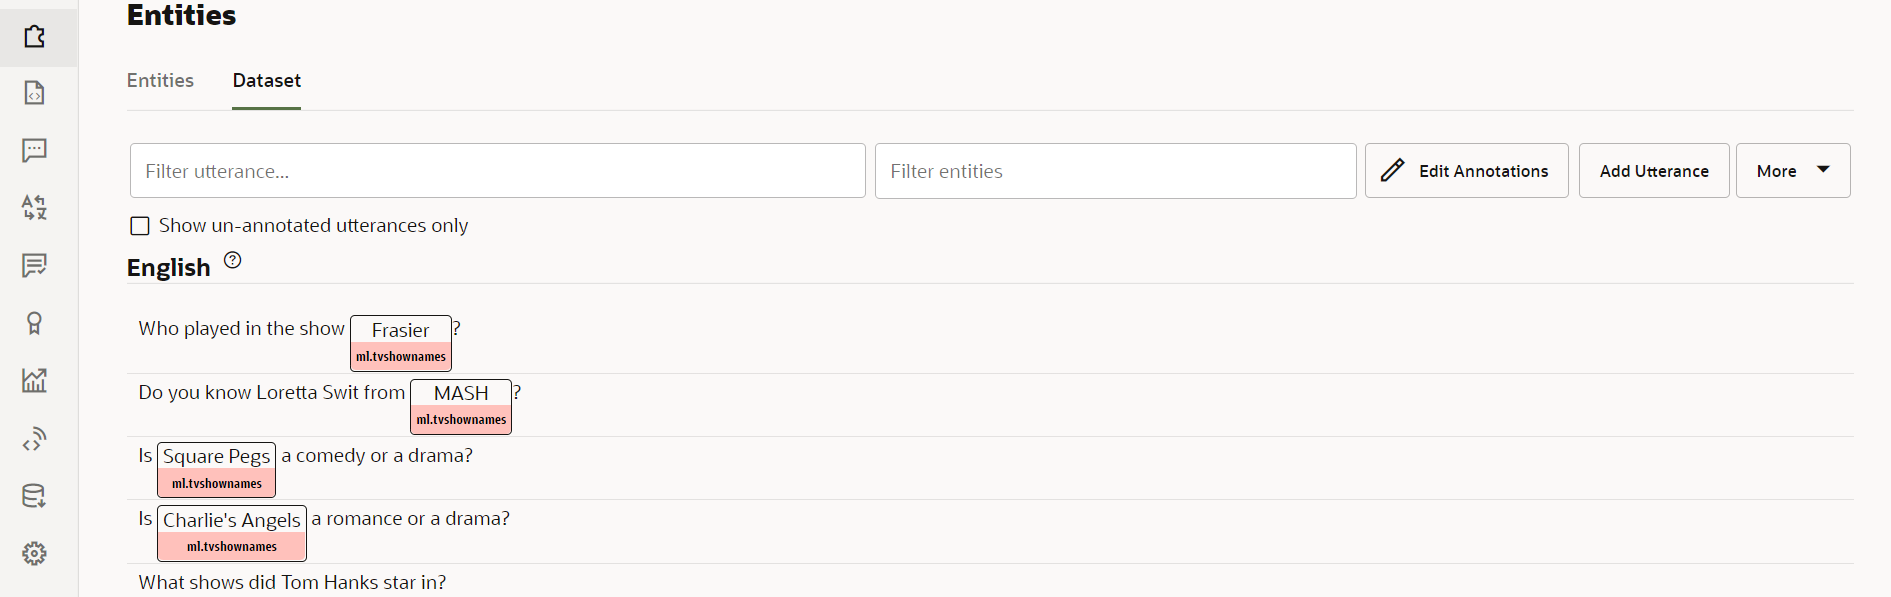
- Click the Dataset tab.
You should see a list of utterances that are annotated with the
ml.tvshownamesentity.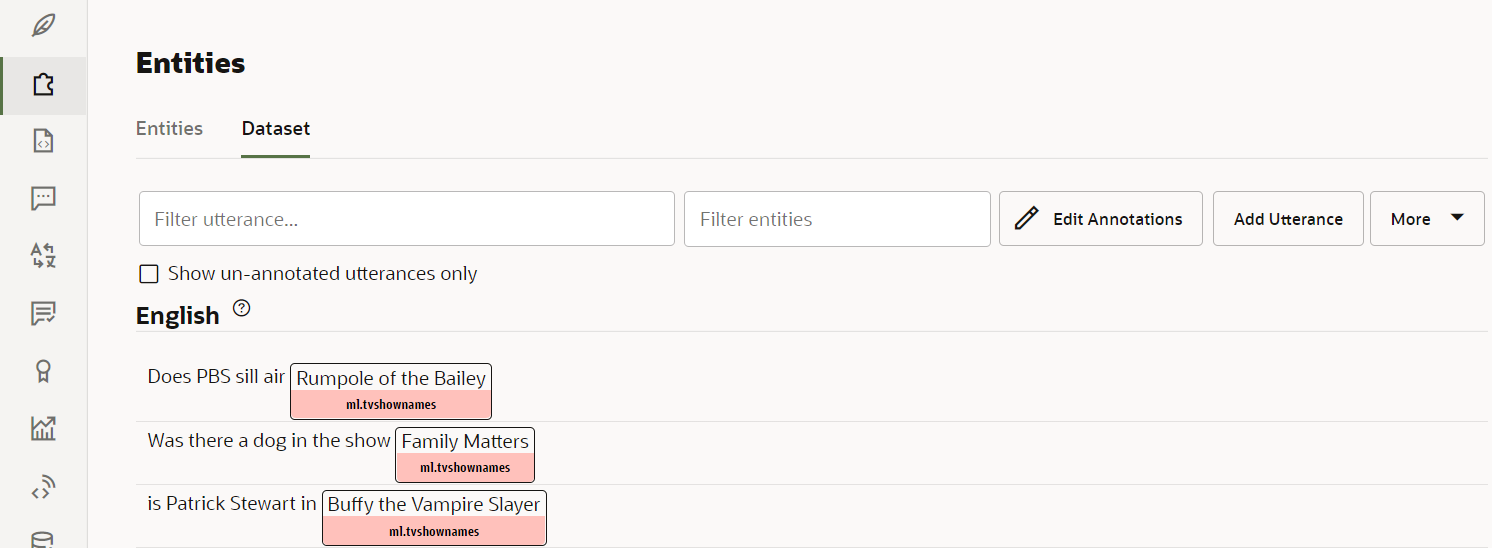
Description of the illustration screenshot-entity-dataset.png In the following section of the tutorial, we will use the Data Manufacturing feature to crowdsource additional annotated utterances for the ML entity.
Collect Training Utterances
The first step of building the dataset is to collect utterances relevant to your skill, the majority of which should contain values for the ML entity. These utterances should reflect the kinds of phrases you expect users to input into the bot and include variance in structure and wording.
For this tutorial, we'll use with the phrases in the 10-tv-show-utterances.csv file.
Note:
For future reference, see Guidelines for ML Entities for detailed guidelines on writing training utterances for ML entities.Annotate the Utterances in the ML Entity's Dataset
Create an Entity Annotation Job
For an ML entity's training model to work, the training utterances need to be annotated to show which words are entity values. We'll create a Data Manufacturing entity annotation job for annotating the utterances that we have collected in the CSV file.
- In the skill's left navigation, click Manufacturing
 .
. - On the Jobs tab, click + New Job.
- In the New Job dialog:
- For Job Type, select Entity Annotation.
- For Job Name, enter TVShowEntityAnnotation.
- For Maximum Number of Tasks per Contributor, enter
10. - For Add entities, select ml.tvshownames.
- Click Upload and select the
10-tv-show-utterances.csvfile that you previously extracted from theDM_Materials.zipfile. - Click the Continue button (which is at the top of the dialog).
- Click Launch.
An item for TVShowEntityAnnotation should now appear in the list of jobs.
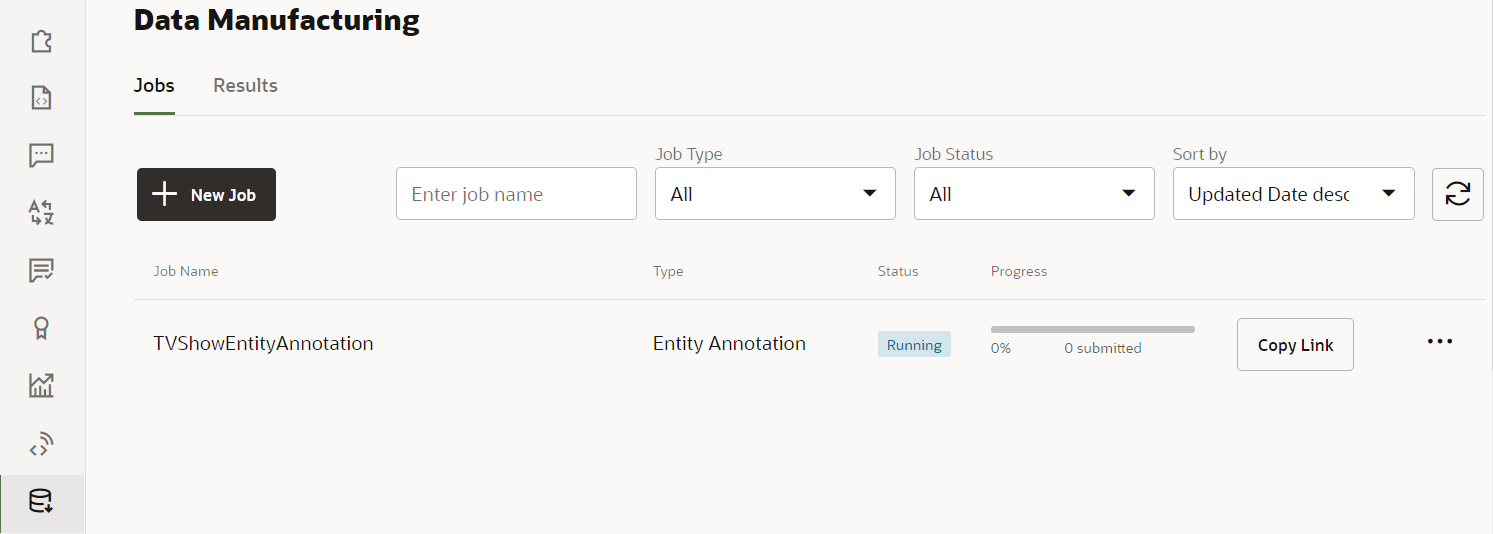
Description of the illustration screenshot-annotation-job-running.png - Click Copy Link.
- In a convenient text file, paste the copied link.
This link points to the interface for the crowdsourding job.
Note:
For the purposes of this tutorial, you'll be acting as the sole crowd worker and will be addressing all the provided utterances. More typically, the size of the job would be much larger, you'd be counting on multiple crowd workers, and you would decide on the number tasks for each contributor accordingly.Mark the Entity Values
Now it's time to use the just-created Entity Annotation job to mark where the entity values are in the utterances. For real world jobs, you'd share this link with crowd workers. For this tutorial you'll be playing the role of a crowd worker yourself. Your job will be to select the entity values you find in each utterance and assign it the ml.tvshownames ML entity.
Here are the steps for completing the crowdsourcing job:
- Open a new browser tab and paste in the link for the entity annotation job.
- Enter a user name and email address and click Start.
- Dismiss the Help dialog that appears.
Note:
You can later redisplay the Help dialog by clicking the Help icon that appears next to the Submit button at the top of the page.
Description of the illustration help-button-in-top-nav.png Once the Help dialog is closed, you should see a page that shows one of the utterances that you uploaded for the job.
- If the utterance contains a TV show name:
- In the utterance, select the text of the TV show name (the same way you'd select text in a browser on a normal web page).
- Click ml.tvshownames (which appears below the Unassigned heading).
The page should now look like this:
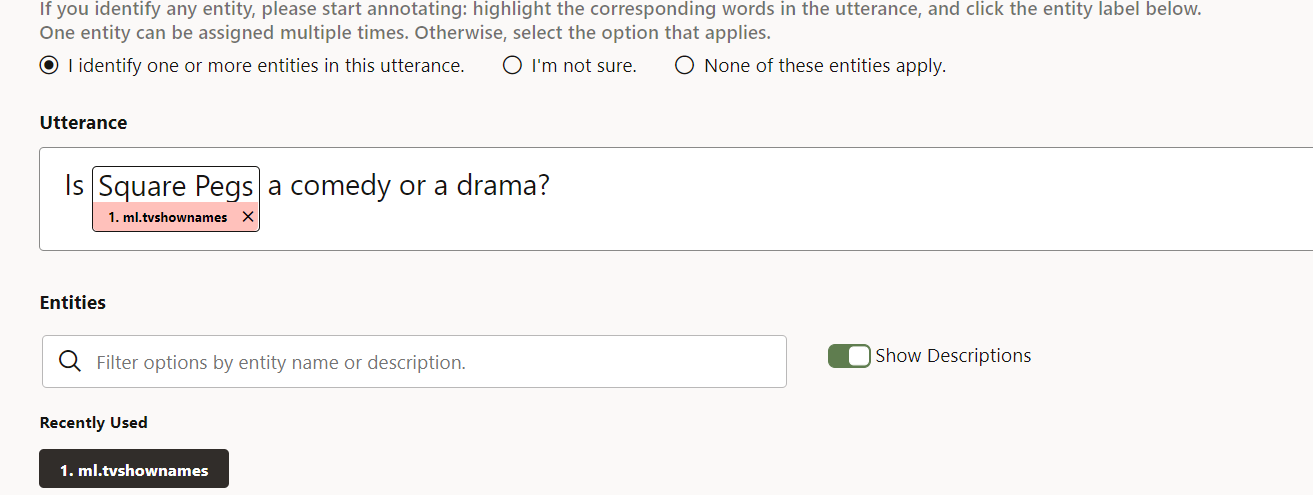
Description of the illustration screenshot-entity-applies.png
- If the utterance doesn't contain a show name, select the None of these entities apply radio button.
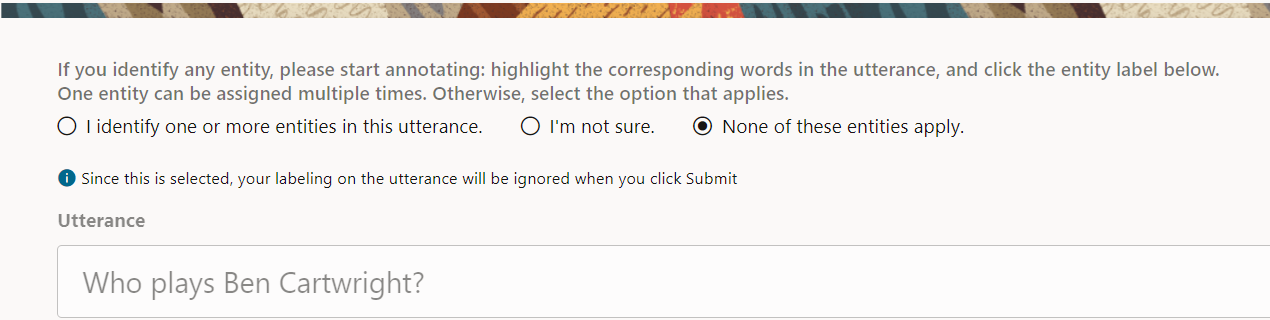
Description of the illustration screenshot-no-entities-apply.png - Click Submit.
Another utterance should appear on the page.
- Repeat the process for the remaining utterances.
After submitting your work for all the utterances, you'll get a confirmation that your work is completed.

Description of the illustration screenshot-thank-you-for-participating.png
Confirm Completion of the Entity Annotation Job
Now, returning to your role as the person who created the entity annotation job, you'll confirm that the job has been completed.
- Navigate to your browser tab that has the running Digital Assistant instance.
You should see that the Status field for the entity annotation job has a value of Finished.
Note:
If it appears that the job hasn't been completed, reload the browser page to refresh its contents.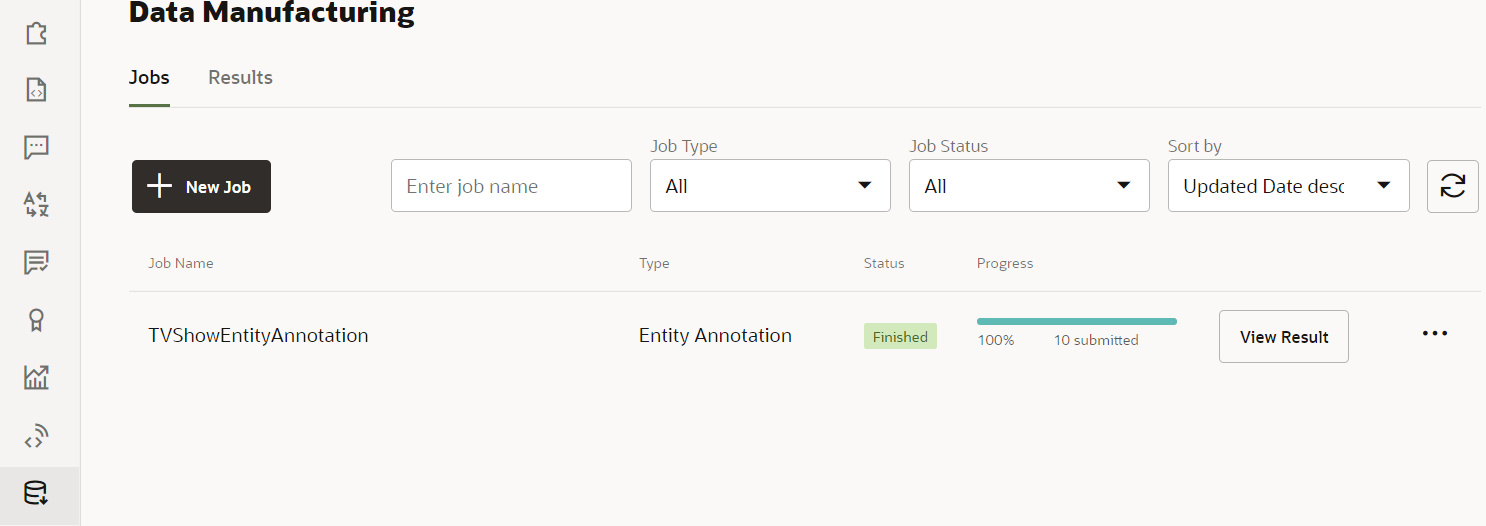
At this point, we could go to the job and review its results and potentially add them to our dataset. However, for a typical entity annotation job, that could involve reviewing thousands of utterances. So instead we'll use the next section of the tutorial to walk through the process of crowdsourcing the validation work.
Validate the Entity Annotation Job Results
Based on the results of the entity annotation job, we'll now create an entity validation job and then act as a crowd worker to complete that job.
Create Entity Validation Job
- Click + New Job.
- In the New Job dialog:
- For Job Type, select Entity Validation.
- For Job Name, enter
TVShowValidation. - For Maximum Number of Tasks per Contributor, enter
10. - For Select the source for validation, click Previous Jobs.
- In the Add Jobs field, select
TVShowEntityAnnotation. - Click the Continue button (which is at the top of the dialog).
- Click Launch.
An item for TVShowEntityValidation should now appear in the list of jobs.
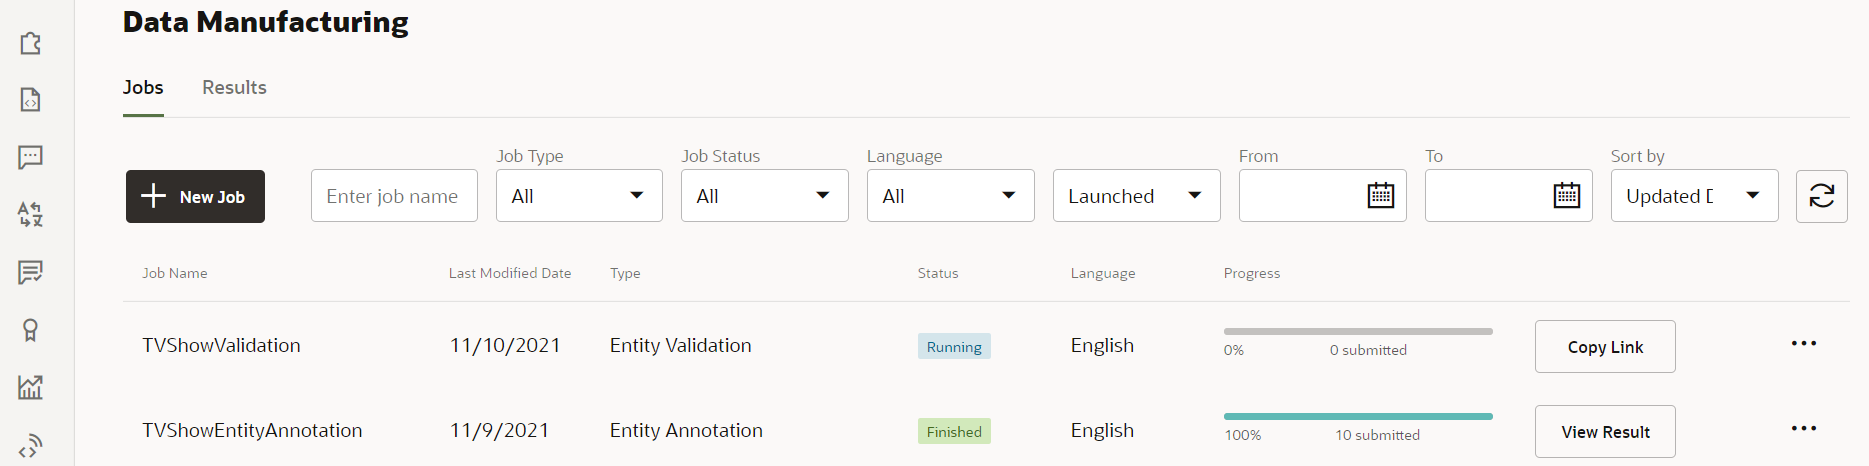
Description of the illustration screenshot-validation-job-running.png - Click Copy Link.
This link points to the interface for the crowdsourding job.
Validate the Entity Annotations
Now, acting as a crowdworker, do the following:
- Open a new browser tab and paste in the link for the entity validation job.
- Enter a user name and email address and click Start.
- Dismiss the Help dialog that appears.
You should see a page that shows one of the annotated utterances that you uploaded for the job.

Description of the illustration screenshot-validation-job.png - Review the utterance and its annotation and then click Correct, Incorrect, or Not Sure.
When Correct is selected, the utterance is marked for addition to the training dataset.
When Incorrect is selected, the utterance is marked to not be included in the dataset.
When Not Sure is selected, the utterance remains unevaluated, which means that it will still be available for another crowd worker to evaulate it.
- Click Submit.
Another utterance should appear on the page.
- Repeat the previous two steps for the remaining utterances.
After submitting your work for all the utterances, you'll get a confirmation that your work is completed.
Add the Crowdsourced Data to the Dataset
With the validation job completed, we'll do one final review and add the data to the entity's dataset.
Accept the Crowdsourced Data
- In your browser, return to your Digital Assistant instance.
On the Jobs tab of the Data Manufacturing page, you should see that the TVShowEntityValidation job has a status of Finished.
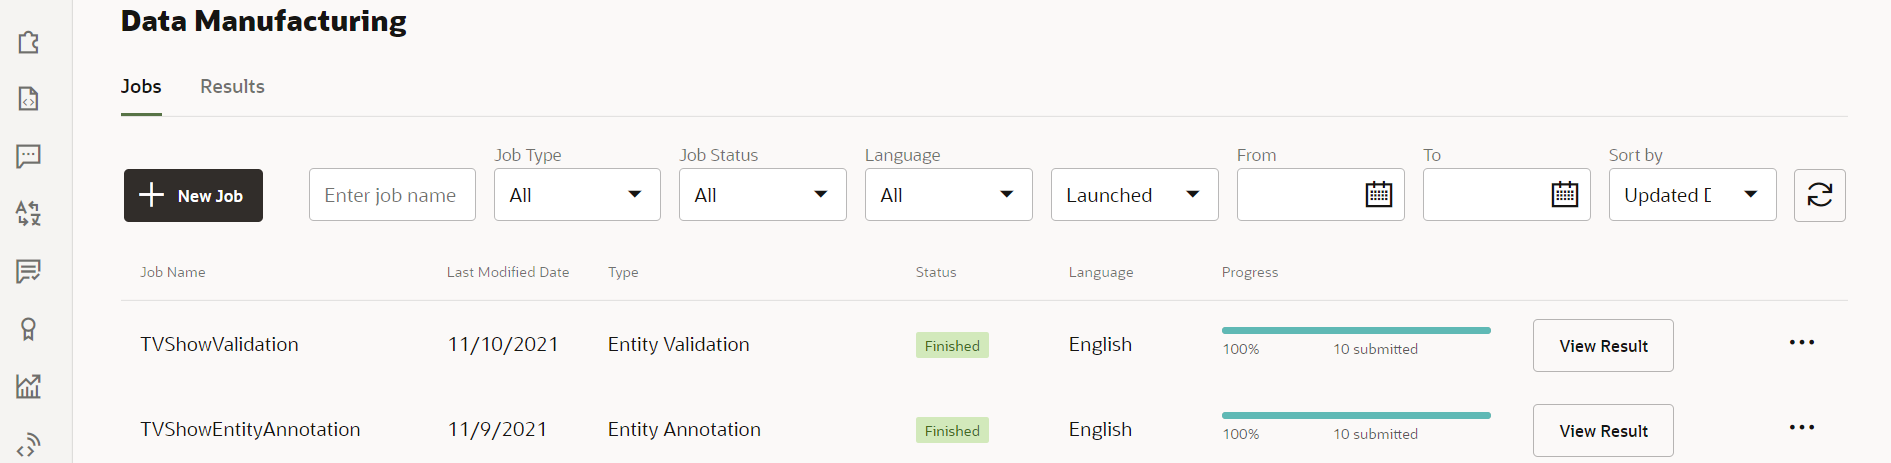
Description of the illustration screenshot-entity-validation-finished.png Note:
If it appears that the job hasn't been completed, reload the browser page to refresh its contents.
Note:
When you click Accept, all the results are applied. However, it is possible to later adjust the training data on the Dataset tab of the ML entity, so it makes sense to accept the results even when there are a few that you later need to change.Review the Updated Dataset
- In the skill's left navigation, click Entities .
- In the list of entities, select ml.tvshownames and select its Dataset tab.
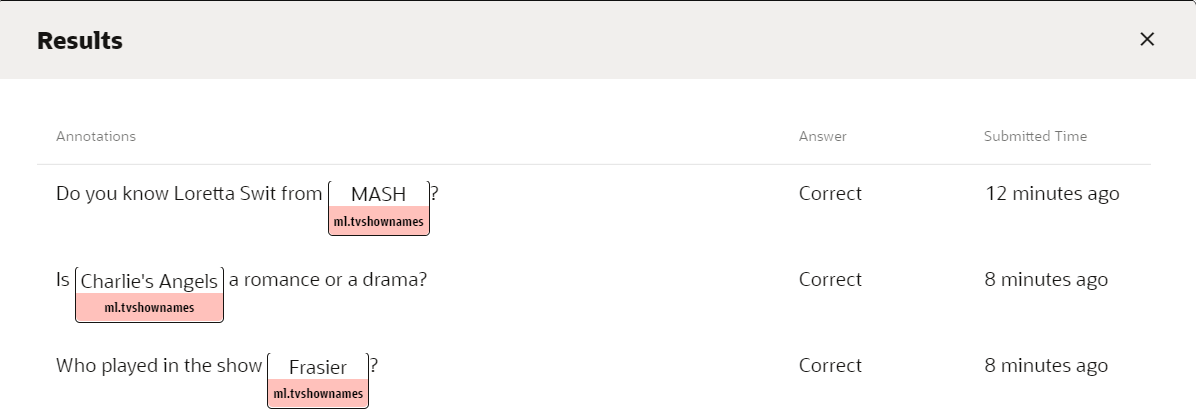
You should see the utterances from the entity validation job at the top of the list.
Description of the illustration screenshot-added-entity-values.png - Scroll through the entries to make sure that they were added correctly.
If you'd like to make any adjustments to utterances and their annotations, you can do so directly here.
With that, you have completed the crowdsourcing of 10 training utterances for the ml.tvshownames ML entity. When you train the skill, your training model will be updated with those utterances.
Learn More
Crowdsource Training Data for ML Entities with Data Manufacturing
F49850-01
November 2021
Copyright © 2021, Oracle and/or its affiliates.
Shows how to crowdsource training data for ML entities with the Data Manufacturing feature in Oracle Digital Assistant.
This software and related documentation are provided under a license agreement containing restrictions on use and disclosure and are protected by intellectual property laws. Except as expressly permitted in your license agreement or allowed by law, you may not use, copy, reproduce, translate, broadcast, modify, license, transmit, distribute, exhibit, perform, publish, or display any part, in any form, or by any means. Reverse engineering, disassembly, or decompilation of this software, unless required by law for interoperability, is prohibited.
If this is software or related documentation that is delivered to the U.S. Government or anyone licensing it on behalf of the U.S. Government, then the following notice is applicable:
U.S. GOVERNMENT END USERS: Oracle programs (including any operating system, integrated software, any programs embedded, installed or activated on delivered hardware, and modifications of such programs) and Oracle computer documentation or other Oracle data delivered to or accessed by U.S. Government end users are "commercial computer software" or "commercial computer software documentation" pursuant to the applicable Federal Acquisition Regulation and agency-specific supplemental regulations. As such, the use, reproduction, duplication, release, display, disclosure, modification, preparation of derivative works, and/or adaptation of i) Oracle programs (including any operating system, integrated software, any programs embedded, installed or activated on delivered hardware, and modifications of such programs), ii) Oracle computer documentation and/or iii) other Oracle data, is subject to the rights and limitations specified in the license contained in the applicable contract. The terms governing the U.S. Government's use of Oracle cloud services are defined by the applicable contract for such services. No other rights are granted to the U.S. Government.
This software or hardware is developed for general use in a variety of information management applications. It is not developed or intended for use in any inherently dangerous applications, including applications that may create a risk of personal injury. If you use this software or hardware in dangerous applications, then you shall be responsible to take all appropriate fail-safe, backup, redundancy, and other measures to ensure its safe use. Oracle Corporation and its affiliates disclaim any liability for any damages caused by use of this software or hardware in dangerous applications.
Oracle and Java are registered trademarks of Oracle and/or its affiliates. Other names may be trademarks of their respective owners.
Intel and Intel Inside are trademarks or registered trademarks of Intel Corporation. All SPARC trademarks are used under license and are trademarks or registered trademarks of SPARC International, Inc. AMD, Epyc, and the AMD logo are trademarks or registered trademarks of Advanced Micro Devices. UNIX is a registered trademark of The Open Group.
This software or hardware and documentation may provide access to or information about content, products, and services from third parties. Oracle Corporation and its affiliates are not responsible for and expressly disclaim all warranties of any kind with respect to third-party content, products, and services unless otherwise set forth in an applicable agreement between you and Oracle. Oracle Corporation and its affiliates will not be responsible for any loss, costs, or damages incurred due to your access to or use of third-party content, products, or services, except as set forth in an applicable agreement between you and Oracle.