 Expose Your Digital Assistant through
Facebook Messenger
Expose Your Digital Assistant through
Facebook Messenger Before You Begin
This 15-minute tutorial shows you how to make a digital assistant available to users through Facebook Messenger.
Background
You’re part of a project team that just completed a digital assistant (DA). You now want to expose it though multiple channels, including Facebook Messenger.
In this tutorial, you'll configure and publish your DA through a channel for Facebook Messenger. Because this allows users to access your DA through a Facebook page, it’s within easy reach of a multitude of users.
What Do You Need?
- Access to Oracle Digital Assistant.
- A digital assistant or skill.
- A Facebook account.
For purposes of this tutorial and testing, you can either use your own Facebook account or create a separate account. For production, you'll probably need an organizational Facebook account.
Important: When you create a Facebook account, you need to supply an active mobile phone number. This number can’t be shared with any other Facebook account, including your personal account. If you create a separate Facebook account for testing, be sure not to supply the same phone number that you have for your personal account. Doing so could result in Facebook removing that phone number from your personal account.
 Create and Configure a Facebook Page for Your Digital Assistant
To start this lab, configure a Facebook page for your digital assistant.
- Open a new tab in your browser and then log in to https://www.facebook.com/pages/create using your Facebook account.
- In left navigation of Facebook, select Pages.
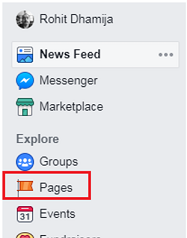
If you can't see that link, go directly to the Create Page option via https://www.facebook.com/pages/create.
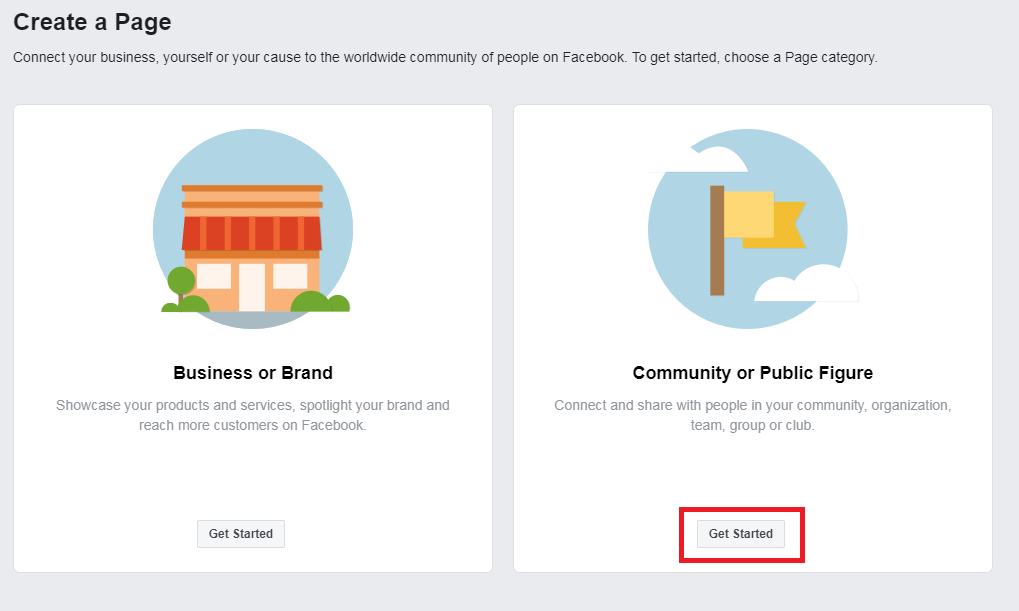
Click Get Started on the panel for the type of page that you'd like to create.
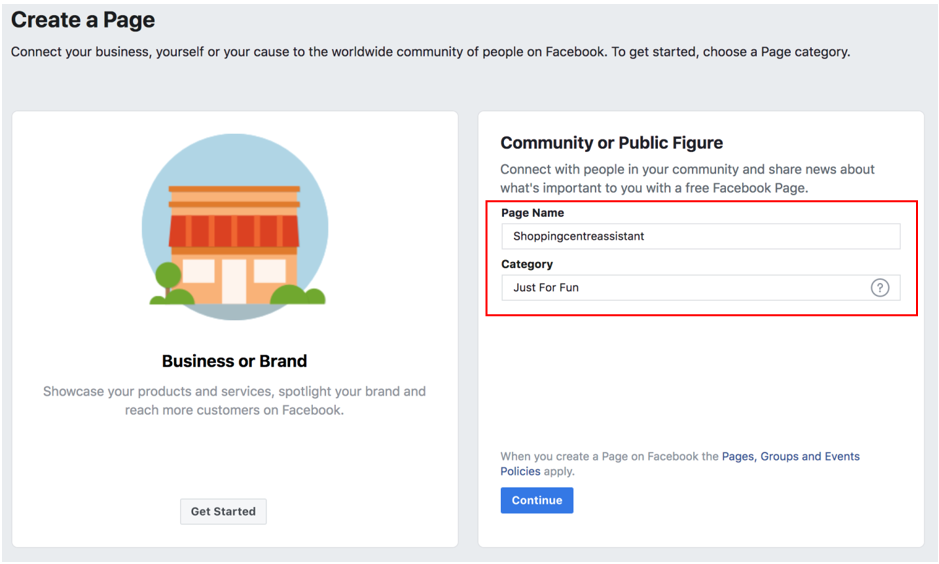
- Provide a page name, choose a category, and click Continue.
- Skip the profile picture and cover photo steps and complete the wizard.
You can return to those steps later, if you wish.
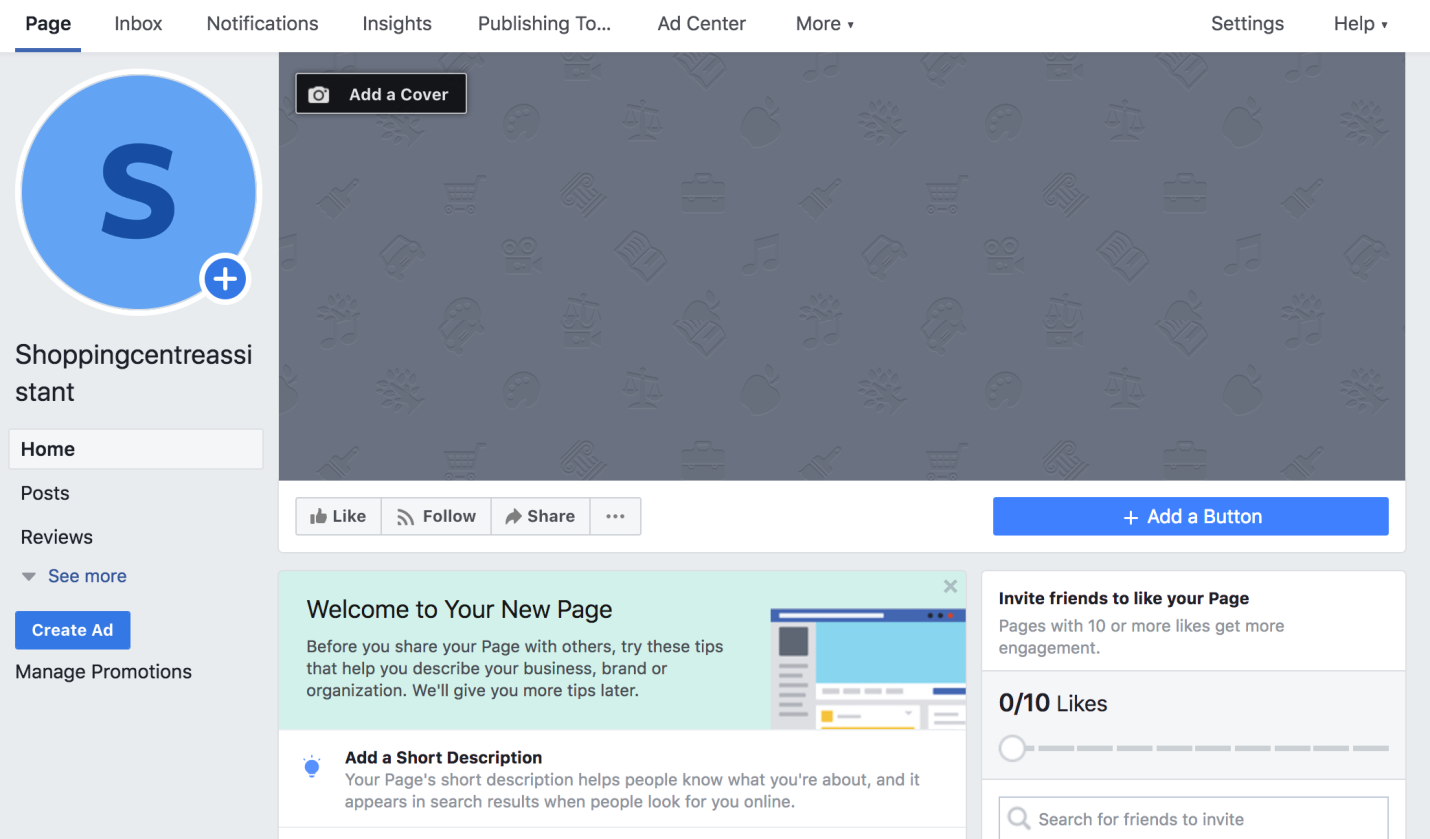
Facebook will create the new page and then display it.
Tip: If you ever want to get back to this page from your personal account, first select the question mark icon's drop down in the top right, then select your page from the displayed list of options.
- If you haven't already done so, enable your Facebook account as a Facebook Developer Account. To do this, go to https://developers.facebook.com, click Register and complete the dialog.
If you're already a registered Facebook developer, then you'll be logged in and are ready to create an app.
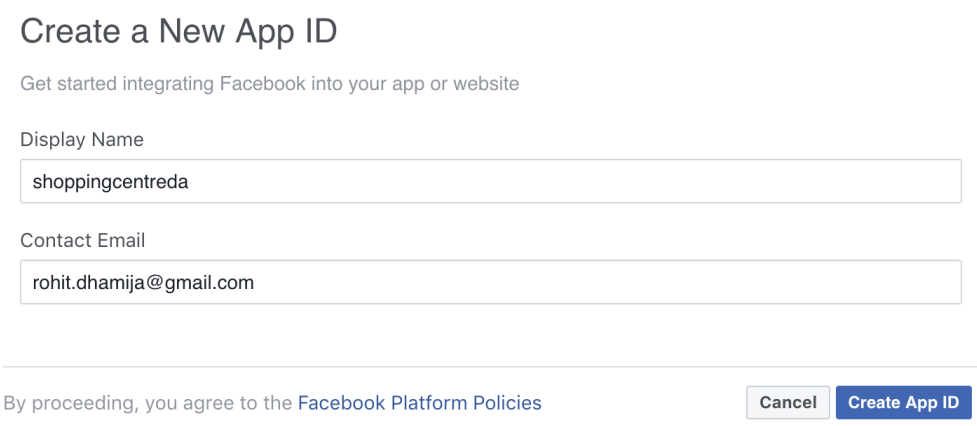
- When prompted to create a new application, select Create App ID.
- In the Create a New App ID dialog, enter a name to represent your digital assistant in Facebook.
- Next, supply a contact email address then click Create App ID.
The name of this Facebook app is not yet connected to the name of your digital assistant. You will connect your DA and the Facebook App in later steps.
- Select the Dashboard option in the left navbar.
The Dashboard page shows you high-level information about your application, such as the App Secret key, which you will need for channel configuration in Oracle Digital Assistant.
- Click Settings and then click Basic.
- Click the Show button in the right corner of the screen to reveal the app secret and then copy it to a text file.
Note: You need to provide your Facebook password to view the App Secret key value.
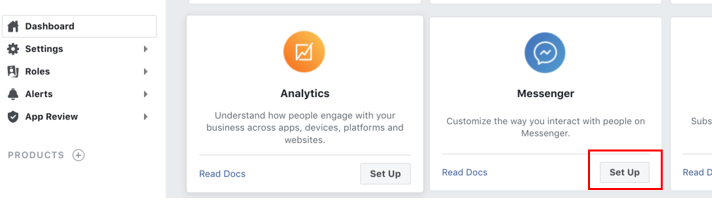
- Go back to the Dashboard tab and click Set Up in the Messenger tile.
- Scroll down to the Token Generation section and select the page you have created from the Page drop down menu.
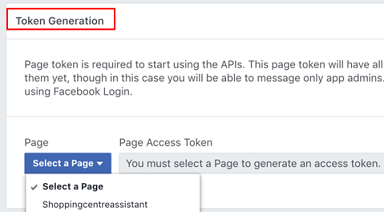
When you select your page, Facebook asks for your permission to continue.
- On the Continue as <Your Name> page, click the Continue as <Your Name> button.
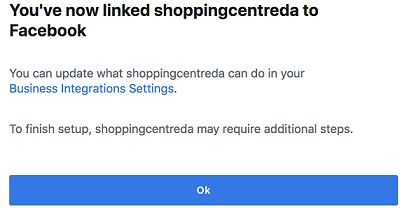
- Go through the wizard to specify which of your pages you want to use the app and what you'll allow the app to do.
- Once you've completed the wizard, click OK.
- Copy the generated page access token into a text file.
- Leave this browser tab open.
You'll return to it later to enter the channel webhook URL that you generate in the next section.
 Configure a New Facebook Messenger Channel for Your DA
Now you'll create a channel in Oracle Digital Assistant using the page access token and app secret that you generated in the previous section.
- Open a new tab in your browser and navigate to your Oracle Digital Assistant instance.
- Click
 to open the side menu.
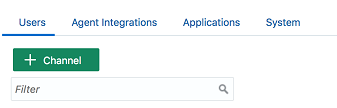
 - Click Development and select Channels.
- On the Users tab, click + Channel.
- In the Create Channel dialog, fill in the Name and (optionally) Description fields.
- From the Channel Type dropdown, select Facebook Messenger.
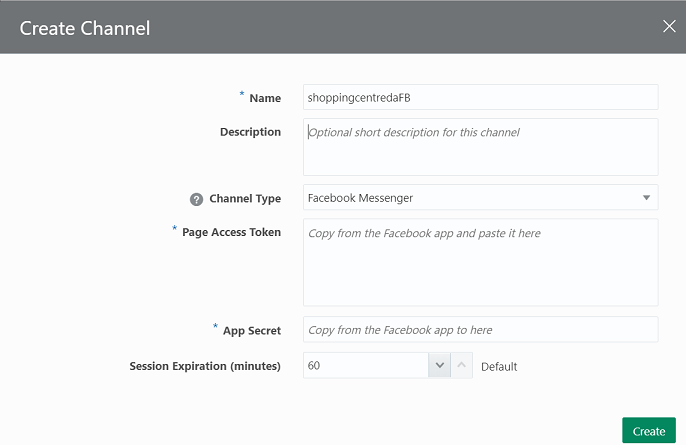
- Fill in the Page Access Token and App Secret fields with the values that you generated in the previous section.
- Click Create.
You are returned to the page for the channel. At this point you need to route this channel to the digital assistant you created.

- Open the Route To dropdown menu, enter your DA name in the Filter box, and select your DA.
- Switch Channel Enabled to ON.
- Copy the Verify Token and Webhook URL values to a text editor.
You will use them to hook up your DA to your Facebook application.
- Return to the browser tab where you set up the Facebook app.
- Under Products, select Messenger, and click Settings.
- Scroll to the Token Generation section of the page and click Subscribe to Events.
The New Page Subscription dialog opens.
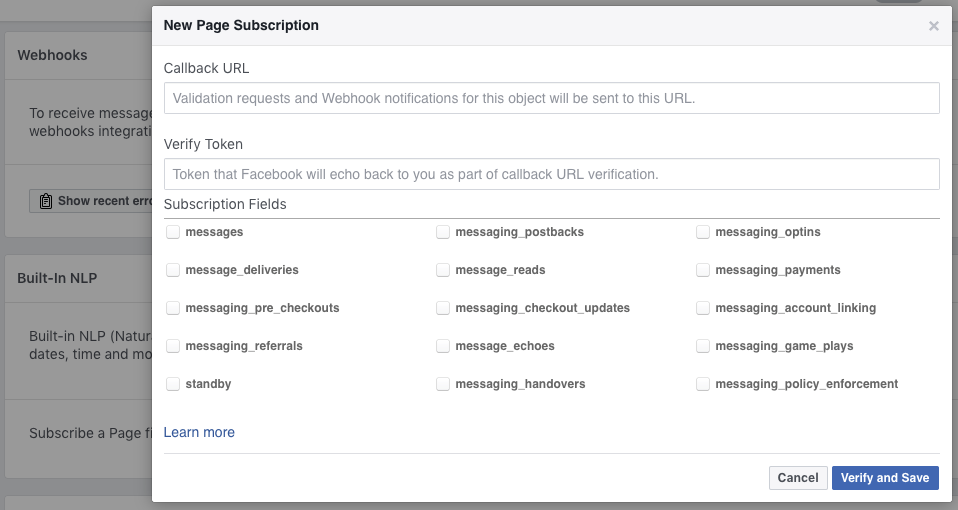
- Fill in the Callback URL field with the webhook URL that you generated when creating the channel in Oracle Digital Assistant.
- Fill in the Verify Token field with the verify token that you generated in Oracle Digital Assistant.
- In the Subscription Fields section, select the following radio buttons:
- messages
- messaging_postbacks
- Click Verify and Save.
 Test Your Channel in Facebook
Now you're ready to test your DA in:
- Your Facebook page.
- Facebook Messenger (https://www.messenger.com/).
- The Facebook Messenger app on your phone.
Test in Your Facebook Page
- Return to your personal Facebook account, go to the page you have created, and click Add a Button.
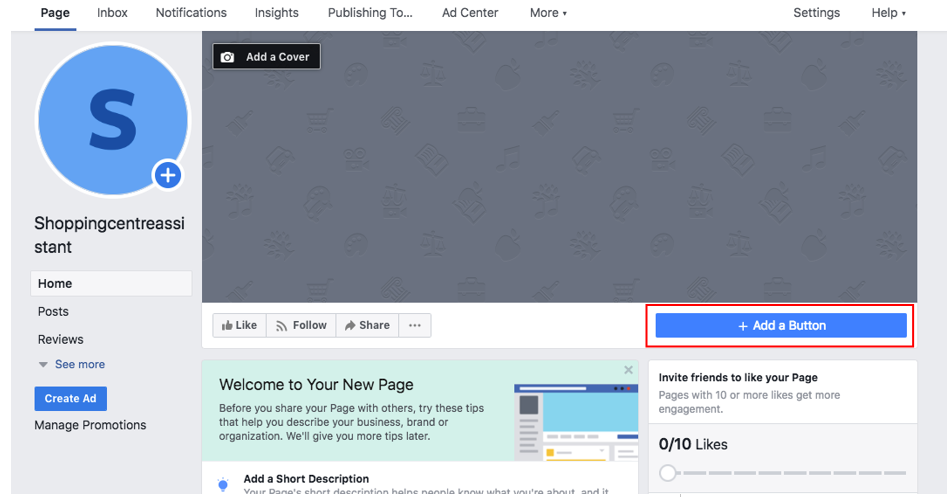
- Click Contact you and select the Send Message Button radio button.
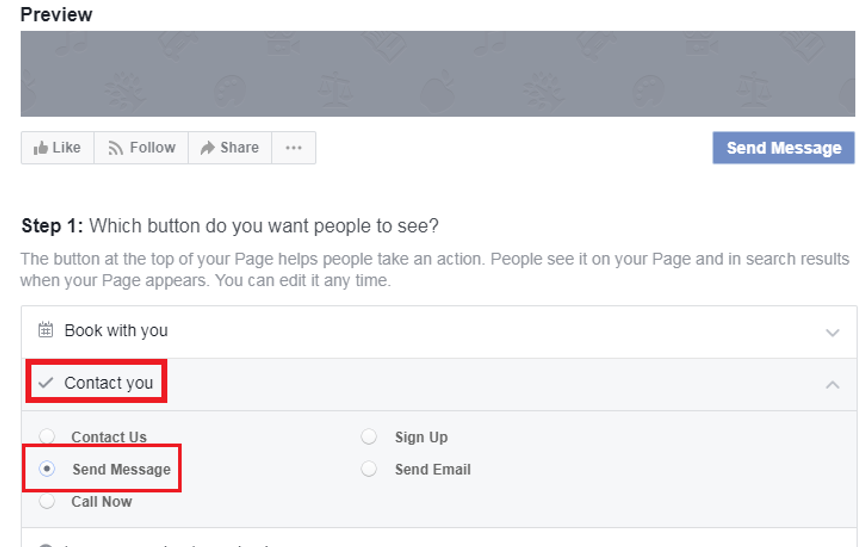
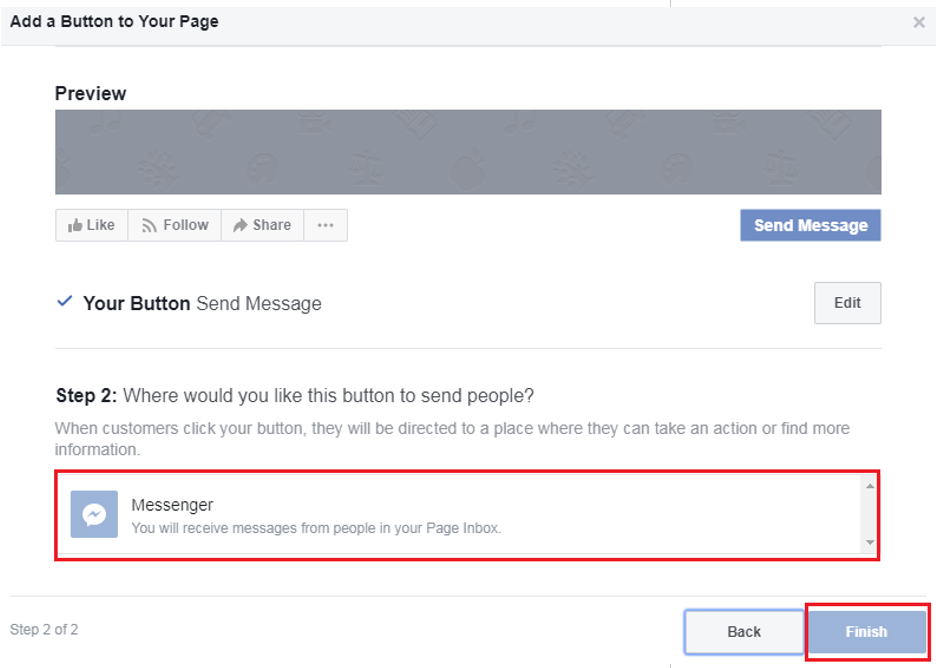
- Click Next.
- Select Messenger and click Finish.
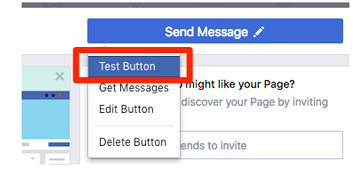
- Hover over the Send Message button and then click Test Button to send messages.
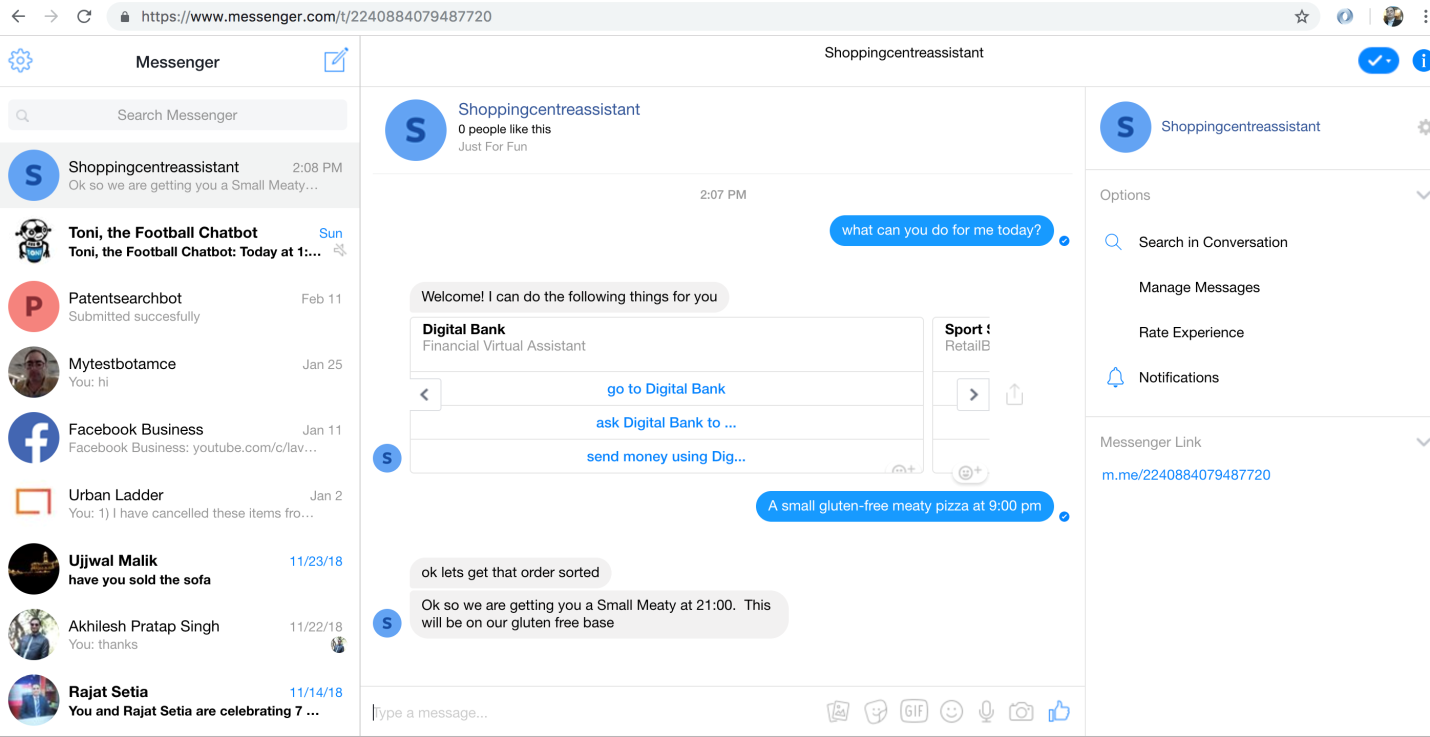
Test in Facebook Messenger
To start testing in Facebook Messenger:
- Use the Search Messenger field to locate your DA.
- Start typing in the chat window.
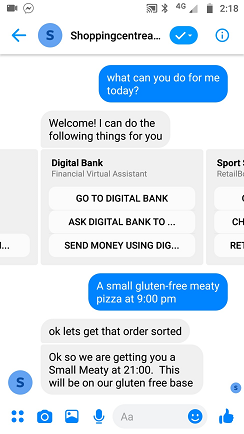
Here's what a test conversation might look like in Facebook Messenger:
And here's what a test conversation might look like in Facebook Messenger on a mobile device:
 Want to Learn More?
- Channels in Using Oracle Digital Assistant