Configure a Stage File Action to Read Individual Files
Add a stage file action to read the contents of the individual files within the zip file. For the files to be successfully read, you must also specify the schema file (by loading a comma-separated value (CSV) or .txt file) that contains the required data structure.
- On the right side of the canvas, click Actions
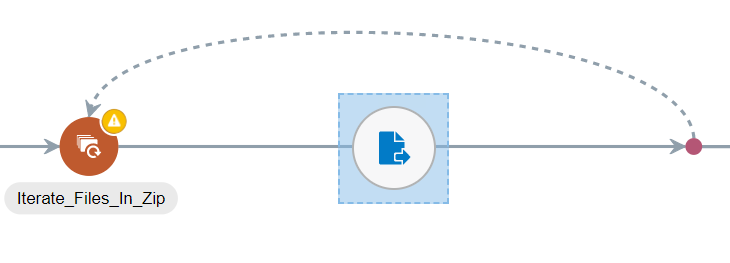
 and drag and drop the Stage File action (present under Data) inside the Iterate_Files_In_Zip action. Placing the stage file action within the loop ensures that each file is read iteratively.

Description of the illustration add-stage-file.pngThe Configure Stage File Action dialog is displayed.
- On the Basic Info page, enter a name for the action (
Process_Single_File). Click Next. - On the Configure Operation page, enter the following details.
Field Information to Enter Choose Stage File Operation
Select Read Entire File. Configure File Reference
Select No to process files using names. Specify the File Name Click Edit
 to build an expression to specify the name of the file to be read. We'll use the alias you specified for the current file under iteration in the previous action (that is, OneTextFile) and extract the actual file name from it.
In the Source tree, search for OneTextFile. Select the
filenamefield present under$OneTextFile > ICSFile > Properties, and click Move to populate the Expression field on the right.
Click Save and then Exit Expression Builder.
Specify the Directory to read from Click Edit
 to build an expression to specify the directory from which to read files.
Select the
directoryfield present under$OneTextFile > ICSFile > Properties, and click Move to populate the Expression field on the right.
Click Save and then Exit Expression Builder.
Click Next.
- Leave the configurations on the Schema Options page as they are. Click Next.
- On the Format Definition page, perform the following actions to upload a file from which to create a schema.
Field Information to Enter Select the Delimited Data File Click Choose File and upload the
test-file3.txtfile you created. See Create a Sample Zip File.The content of the file is then displayed at the bottom of the page.
Enter the Record Name Enter the name you want to assign to the records in the schema file. This becomes the parent element in the created schema file for the record names selected as column headers from the CSV file.
Enter
Row.Enter the Recordset Name Enter the name you want to assign to the recordset in the schema file. This becomes the root element of the created schema file.
Enter
RowSet.Use the First Row as Column Headers Deselect this check box.
The rest of the fields are automatically populated from the uploaded CSV file. Click Next.
- On the Summary page, review the data you've entered and click Done.