Use Conditional Mappings

You may have a requirement to map data dynamically depending on other data in your integration. This requirement can be achieved with conditional mappings.

Consider the following pseudo code sample of the mapping logic. Three conditions are provided.

if PER03 == 'TE' {
    Contact.Phone = PER04
}
if PER05 == 'TE' {
    Contact.Phone = PER06
}
if PER07 == 'TE' {
    Contact.Phone = PER08
}
  1. Click XSLT link.
  2. In the upper right corner, click function icon.
  3. Expand XSLT to display the statements required to create conditional mappings.
  4. Locate the target element (for this example, named phone) in the tree.
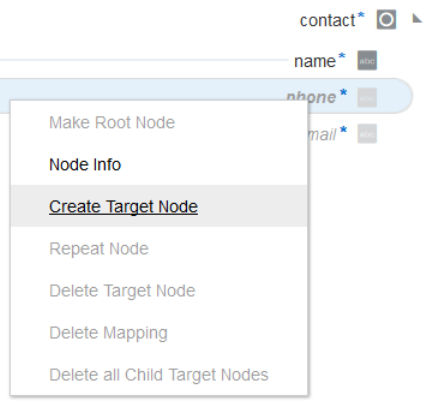
    The phone element has been right-clicked to display enabled selections for Node Info and Create Target node.

    This is the element for which to create conditional mappings.
  5. If the selected element is a lighter color and italicized, that means the element does not exist in the mapper’s output. Right-click and select Create Target Node. You cannot insert conditions around phone without this step.
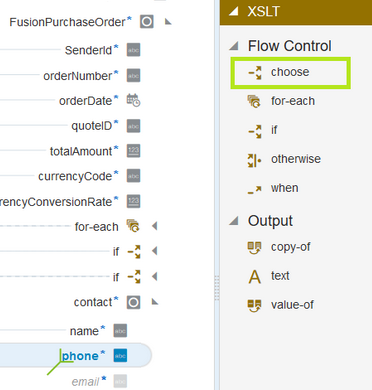
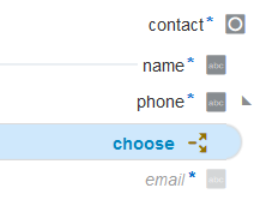
  6. Drag and drop the choose statement as a child of phone.
    The choose element in the XSLT right navigation pane has been dragged to the lower left corner of the phone target element.

    The cursor position surrounding phone indicates whether the choose statement can be inserted as a child (bottom left) or a parent (upper right). For this case, choose is inserted as a child.
    The choose statement is displayed as a child of the phone element in the target mapper tree.

  7. Drag and drop a when statement as a child of the choose statement three times to create placeholders for the three conditions. You can also drop a when statement as a sibling before or as a sibling after another when statement.
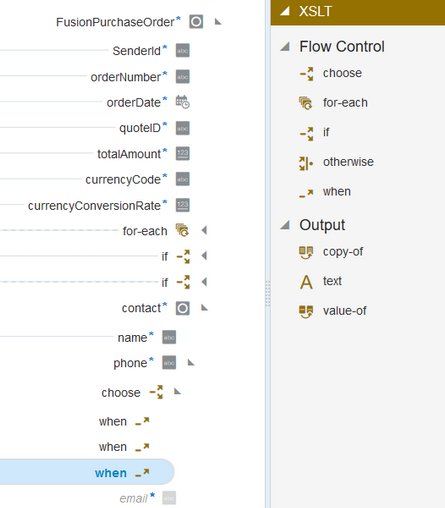
    Three when statements have been placed below the choose statement in the target mapper tree. The XSLT navigation pane of statements is displayed to the right.

    Each condition also needs a corresponding mapping value.
  8. Drag and drop a value-of statement as a child of each when statement. The tree structure needed to create conditional expressions and mapping expressions is now complete.
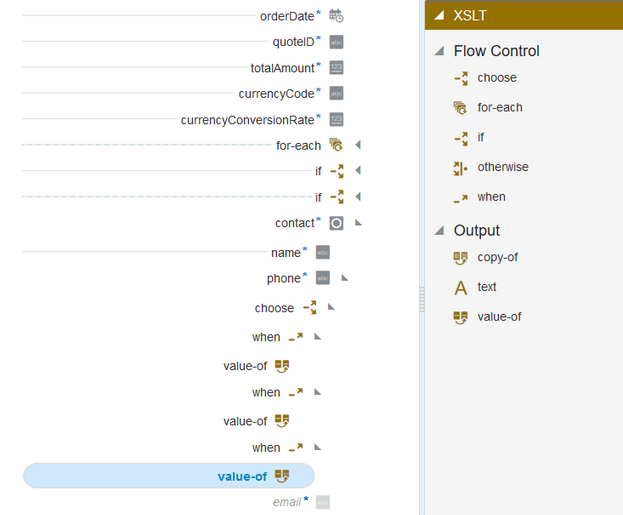
    value-of statements have been placed below all three when statement as child entries in the target mapper tree.
    Expressions for the first condition and mapping can now be created.
    if PER03 == 'TE' { Contact.Phone = PER04 }
  9. Select the first when statement in the target tree to create the first condition.
  10. Drag and drop PER03 from the source tree into the expression.
  11. Enter = "TE" to complete the expression.
    The PER03 source element has been connected to the first when statement in the target mapper tree. The Expression Builder is open at the bottom of the page with the corresponding mapping logic (with "TE" added at the end of the logic statement).

  12. Click the checkmark to save the expression.
  13. To create the mapping, select the value-of statement under the first when.
  14. Drag and drop PER04 into the target value-of statement.
    The PER04 source element has been connected to the value-of statement of the first when statement in the target mapper tree.

    The first conditional mapping is complete.
  15. Repeat these steps for the second and third conditional mappings to complete the mapping logic.
    
    if PER05 == 'TE' {
        Contact.Phone = PER06
    }
    if PER07 == 'TE' {
        Contact.Phone = PER08
    }
  16. Save the mapping and integration.
    The completed design looks as follows.
    The PER03, PER05, and PER07 target elements are all connected to target when statements. The PER04, PER06, and PER08 target elements are all connected to target value-of statements.