Attach and Detach a Contact with the Oracle NetSuite Adapter

You can attach and detach contacts and files in the Oracle NetSuite Adapter. This section provides a use case in which a contact value is first attached to a customer and then detached from that customer.
  1. Create an orchestration integration.
  2. Add and configure a REST Adapter as a trigger connection.
    1. On the Basic Info page, enter a name.
    2. On the Resource Configuration page, select the Get verb.
    3. Select the Add and review parameters for this endpoint and Configure this endpoint to receive the response configuration options.
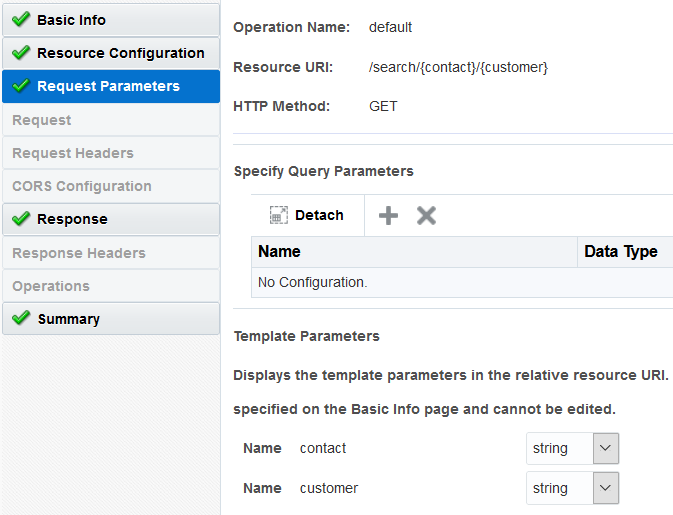
    4. On the Request Parameters page, the customer and contact parameters and data types are set as follows:
      The Request Parameters page shows the following fields: Resource URI, HTTP Method, Specify Query Parameters (with Detach, Add, and Delete buttons), and Template Parameters (with Name contact and Name customer)

    5. On the Response page, select JSON sample as the response payload format and enter the JSON sample.
    6. Select response-mapper from the Element list.
    7. Select JSON as the media type.
  3. Add and configure an Oracle NetSuite Adapter as an invoke connection to attach a contact value to a customer.
    1. On the Basic Info page, enter a name.
    2. On the Operations page, select the Miscellaneous operation type, then select Attach.
    3. Select Contact as the attach object type and Customer as the business object to which to attach Contact details.
      The Operations tab is selected in the left navigation pane. The fields shown are the Select an Operation Type list, with Miscellaneous and Attach selected, the Select Attach Object Type list with Contact selected, and the Select Business Object list with Customer selected.

  4. In the mapper between the REST Adapter and Oracle NetSuite Adapter, specify concrete values for the target Customer > internalId element (for this example, 1298) and the target Contact > internalId element (for this example, 1307).
    The target element InternalId under Customer is selected. A line is attached to an "A" on the left. Below this, the target element InternalId under Contact is selected. A line is attached to an "A" on the left.

  5. Add and configure a second Oracle NetSuite Adapter to detach the contact value from the customer.
    1. On the Basic Info page, enter a name.
    2. On the Operations page, select the Miscellaneous operation type, then select Detach.
    3. Select Contact as the detach object type and Customer as the business object from which to detach Contact details.
      The Operations tab, with fields for Select an Operation Type (Miscellaneous and Detach are selected), Select Detach Object Type (with Contact selected), and Select Business Objects (with Customer selected).

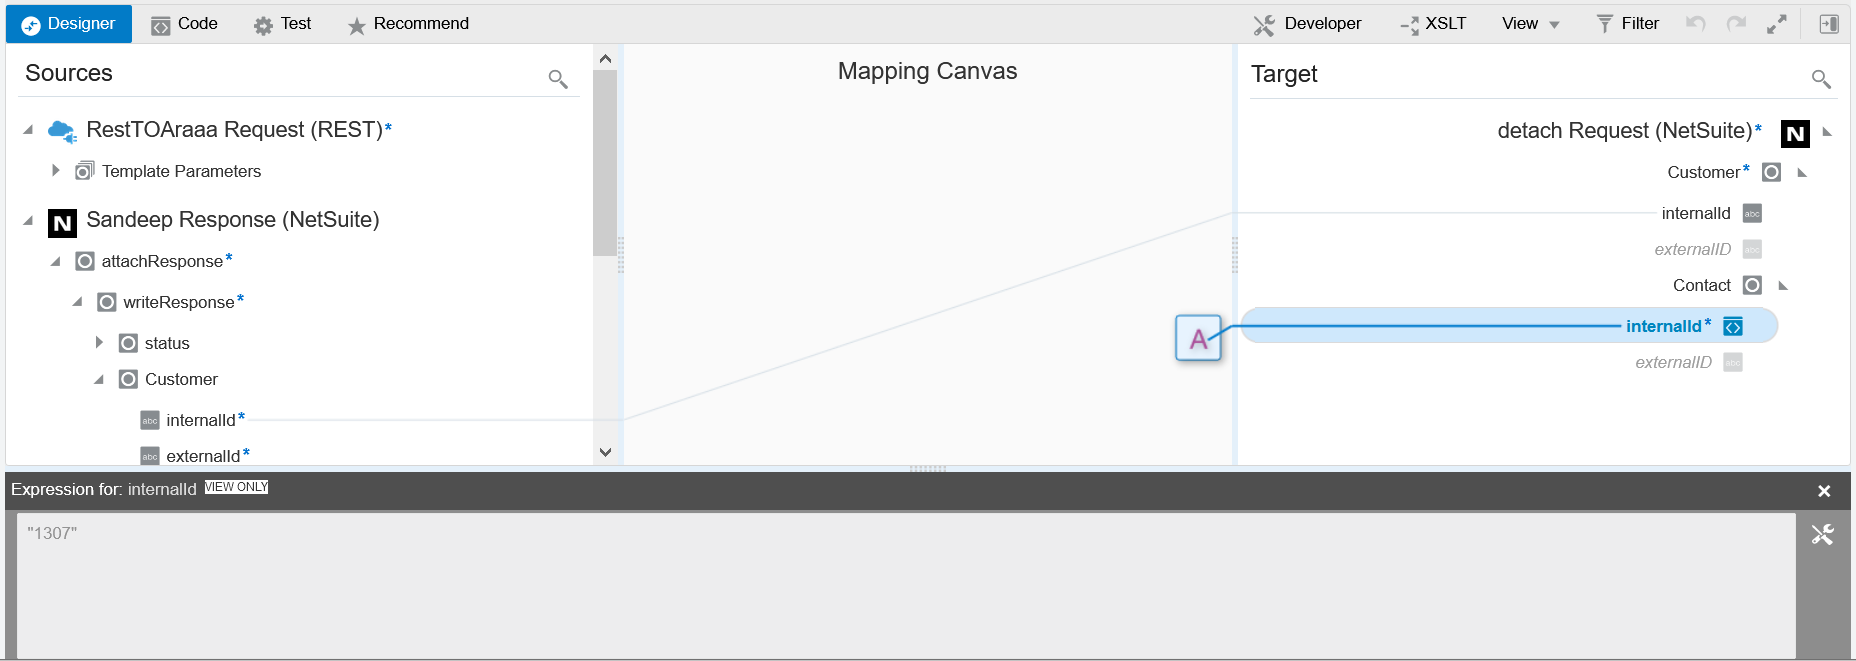
  6. In the request mapper between the two Oracle NetSuite Adapters, map the source Customer > internalId element to the target Customer > internalId element and set a concrete value of 1307 for the target Contact > internalId element in the Expression Builder.
    The source element internalId under Customer is mapped to the target element internalId under Customer. Under the target Contact, internalId is selected. An "A" appears to the left, which shows a value of 1307 in the Expression Builder at the bottom.

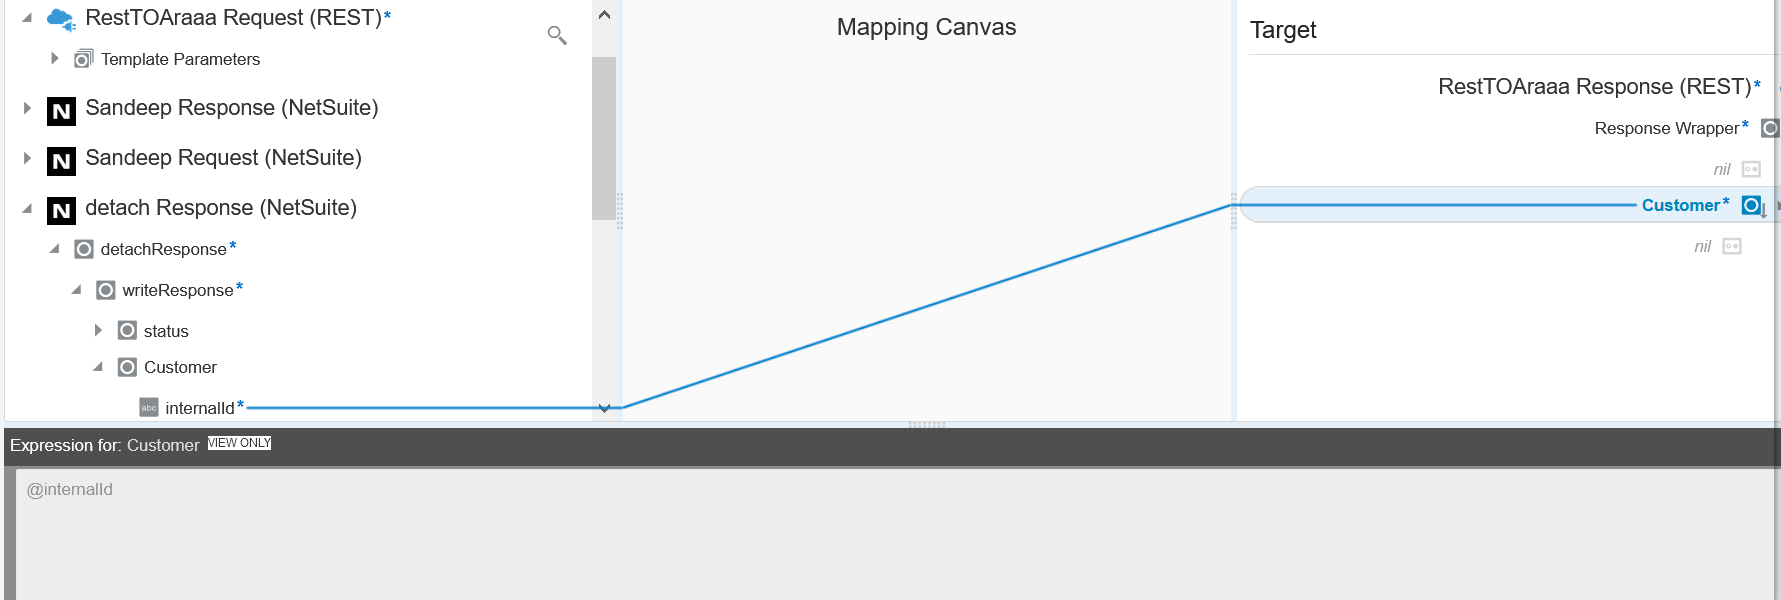
  7. In the response mapper after the second Oracle NetSuite Adapter, map the source Customer > internalId element to the target Customer. Ensure that you use @internalId and do not set a concrete value in the Expression Builder.
    The source internalId under Customer is mapped to the target Customer. A value of @internalId is displayed in the Expression Builder.

    The completed integration looks as follows:
    The completed integration with a REST Adapter, mapper, NetSuite Adapter, mapper, NetSuite Adapter, mapper, and return icon.

  8. Invoke the integration. Because this is a REST Adapter-trigger based integration, you can invoke it from the Test page in Oracle Integration). See Test REST Adapter Trigger Connection-Based Integrations in Using Integrations in Oracle Integration Generation 2.