Import Resources

To add resources that you want to use in your application's pages, you import individual files or ZIP archives by using the Import command available when you right-click the resources folder in the Navigator or any artifact, or by dragging the file directly from your local file system onto a folder in the Navigator.

You can import resources into the application’s resources folder and sub-folders, or any other artifact in the Navigator. The location you select will determine the scope of the resources you import. The import location is also important to make sure you're importing the resource file where you can access it. For example, you can import an image into the flows folder, but the expected location for an image is in an images folder in one of your application’s resources folders. Images that are not in an images folder will not appear in the Image Gallery, so you won't be able to apply the image you've imported to a UI component.

To import resources for use in an application:
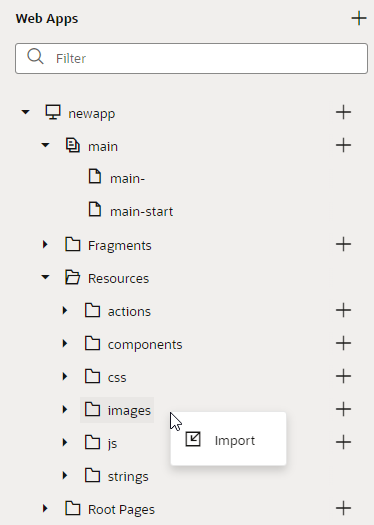
  1. Open your web (or mobile) application in the Navigator and locate the folder or artifact where you want to import the resource.
  2. Right-click the folder or artifact and choose Import in the pop-up menu.

    Description of artifact-browser-import-resource.png follows
    Description of the illustration artifact-browser-import-resource.png

    Alternatively, drag a file from your local file system onto the folder or artifact in the tree view to open the Import Resources dialog box.

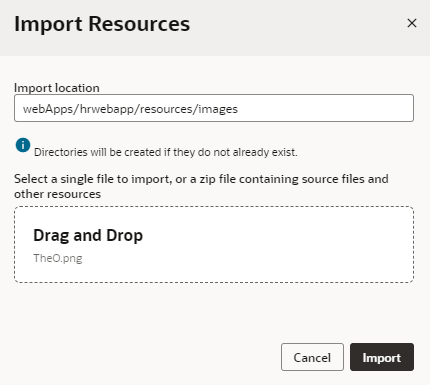
  3. In the Import Resources dialog box, choose the file or archive with the resources you want to import. You can drag the resource into the drop target area or click the drop target area to navigate to the resource on your local system.

    Optionally, you can edit the path in the Import location field to create new folders.


    Description of artifact-browser-import-resource-dialog.png follows
    Description of the illustration artifact-browser-import-resource-dialog.png

    Optionally, edit the path in the Import location field to create new folders.

  4. Click Import.
    A confirmation appears and your resource file is added at the location you specified.