4 Create a Form-over-Table Layout in an Excel Workbook
You can create a Form-over-Table layout in an Excel worksheet when a parent-child relationship exists in the data that the add-in downloads from an Oracle RAMP REST Service.
The add-in displays a window where you can choose the Form-over-Table layout if the business object you chose has one or more child business objects. If the add-in finds more than one such child business object, it prompts you to pick the business object you want to use in the Form-over-Table layout.
Run Excel and create a blank workbook using the standard Excel workbook file format type (.XLSX) or the macro-enabled workbook type (.XLSM). The Oracle Visual Builder Add-in for Excel does not support other Excel formats (.XLS, and so on).
-
In the Excel ribbon, select the Oracle Visual Builder tab.

Description of the illustration excel-configure.png -
Click on the cell where you want to locate the form and table.
-
In the Oracle Visual Builder tab, click Designer.
-
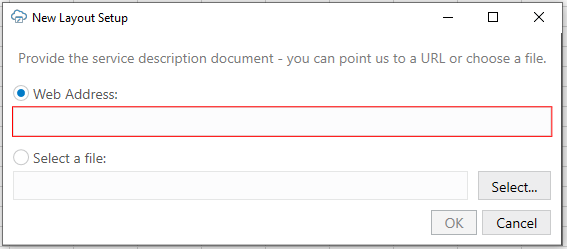
When prompted, provide the service description document. Use the Web Address option (the default) if you access the service description from a URL. Use the Select a file option if the service description document is a local file on your computer.

Description of the illustration excel-apiinput.pngNote:
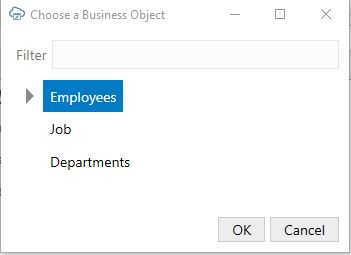
If your OpenAPI service description includes multiple business objects, a window similar to the following prompts you to choose from the available business objects.
Description of the illustration vbcs-excel-available-bo-fot.png -
Choose a business object, such as Employees as illustrated in the previous image, where a parent-child relationship exists, and choose Form-over-Table Layout in the New Layout Setup window that appears, and then click OK.
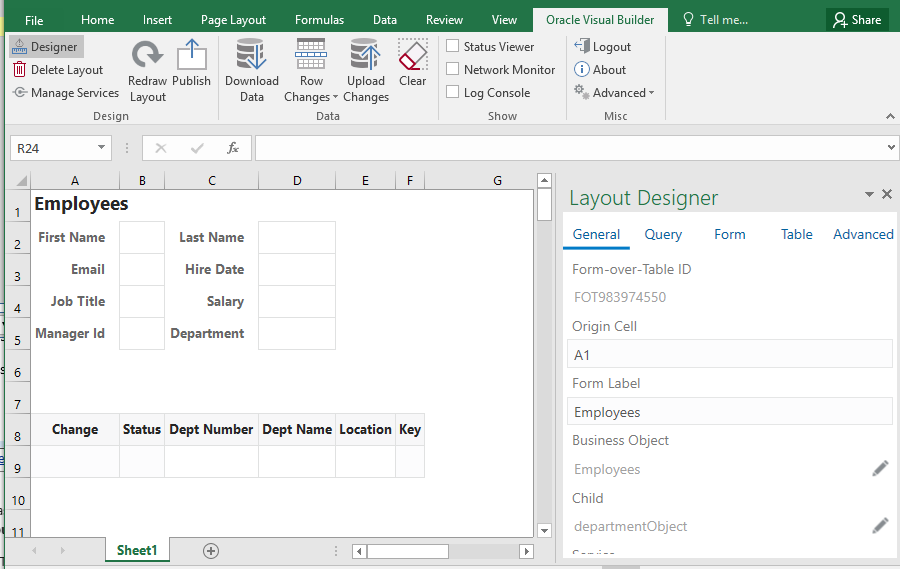
The add-in creates a Form-over-Table in the Excel worksheet and opens the Layout Designer that you use to modify the newly-inserted form and table, as illustrated in the following image.

Description of the illustration form-table.png -
Customize the form and table by modifying the automatically populated properties in the Layout Designer that appears in the Excel Task Pane. Click Redraw Layout to see changes you make in the Layout Designer reflected in the form and table.
If, for example, you do not specify a value for the Search field or Finder property, as described in Configure Search Options for Download, the add-in downloads the first parent item it encounters in the REST service to the form, and the child items, if any, to the table.
The Form tab enables you to add or remove fields to the form. The Table tab performs a similar function for the table under the form.
Tip:
In the Form or Table tab of the designer, right-click a field or column to see choices for changing the order.
Configuration is now complete and you can publish the workbook. We recommend you test the workbook before you publish it to distribute it to users. Alternatively, you can configure the workbook further so that the add-in limits the data that it downloads, as described in Configure Search Options for Download.