 Configuring a Mobile App in Oracle MAX
 Before You Begin
This tutorial shows you how to configure a mobile app by using Oracle Mobile Application Accelerator (Oracle MAX). This tutorial takes approximately 15 minutes to complete.
Background
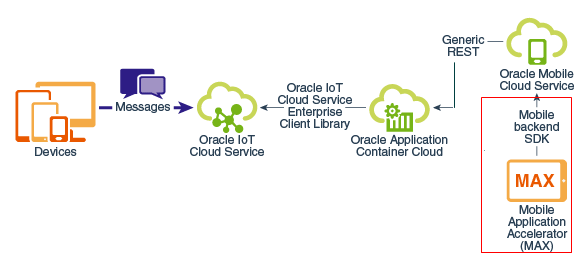
With Oracle MAX, you can create, test, and publish a cross-platform mobile app without writing a single line of code. After you use Oracle Application Container Cloud to integrate Oracle IoT Cloud Service and Oracle Mobile Cloud Service, the mobile app receives messages from an instance of Oracle IoT Cloud Service.
The following image illustrates the integration of Oracle IoT Cloud Service and Oracle Mobile Cloud Service by using Oracle Application Container Cloud. This tutorial covers the bordered area.
What Do You Need?
- Completion of Configuring Oracle IoT Asset Monitoring Cloud Service
- Oracle MAX, installed and set up with an account (see What Do I Need to Access MAX?)
- Ability to use Oracle MAX to create a mobile app (see Create a Mobile App in Record Time with MAX!)
- A test account created in your instance of Oracle Mobile Cloud Service
 Create a Mobile App
- Log in to Oracle MAX, click New Application, and enter
IOTCS_MCSfor the name. - To add your custom API as a data service, click Devices
 , and then click Add next to APPLICATION SERVICES.
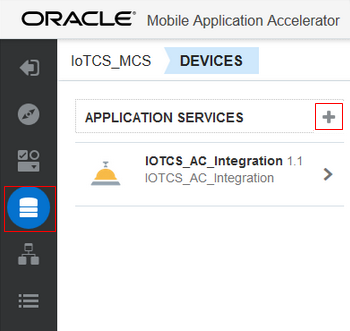
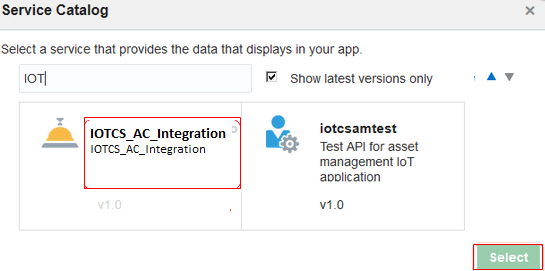
Description of the illustration max_app.png - On the Service Catalog page, select IOTCS_AC_Integration and click Select.
Description of the illustration serv_catlg.png - Create four screens to represent the API calls in your custom API. Name the screens Devices, Device Monitor, Device HistoryT, and Device HistoryH.
 Design the Screens
- On the Devices screen, create six fields named
name0, id0, name1, id1, name2,andid2.When you run the app, this screen lists the active devices.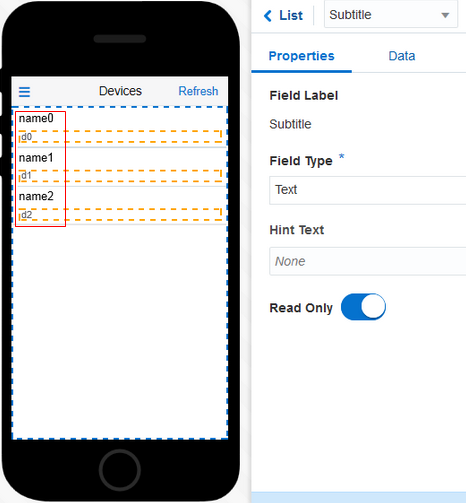
Description of the illustration device_screen.png - Click the Data tab. To bind the value of the name and ID fields with the name and ID property of the
/devicesendpoint, select devices for Business Object and enternamefor Field Value.

Description of the illustration device_data.png - On the Device Monitor screen, add four fields named
id0, Humidity, Temperature,andLocation.When you run the app, the ID that you enter in the Devices screen appears in theidfield of this screen.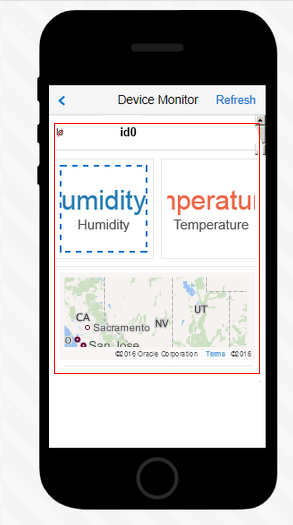
Description of the illustration device_monitor.png - To associate the field data with the
/devices/{id}endpoint, on the Data tab, select devices for Business Object. On the screen, select the Humidity text area and on the Data tab, enterhumidityfor Value.

Description of the illustration monitor_data.png - Select the Temperature text area and then, on the Data tab, enter
temperaturefor Value. - Select the Location text area and then, on the Data tab, select Geolocation Code for Location and enter
locationfor Location Value.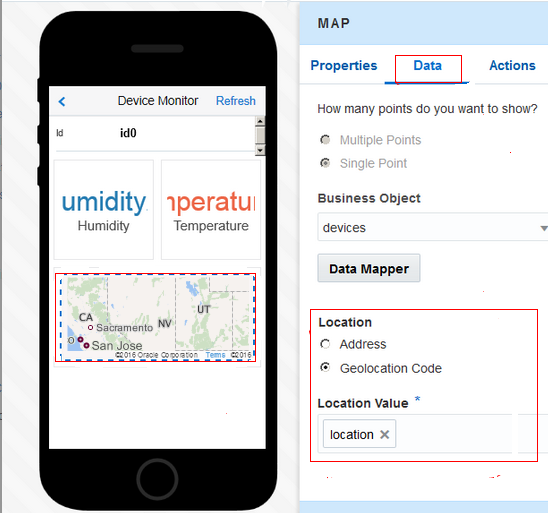
Description of the illustration monitor_location.png - On the Device HistoryH screen, design a line chart and repeat the same on the Device HistoryT screen.
You view device history in two screens, Device HistoryH and Device HistoryT. The displayed screen depends on the user's selection of humidity or temperature on the Device Monitor screen.
- On the Device HistoryT screen, click the Data tab. To bind the chart with the
/devices/{id}/historyendpoint, select the following values:- Business Object: history
- Values (Y Axis): temperature
- Categories (X Axis): timeAsString
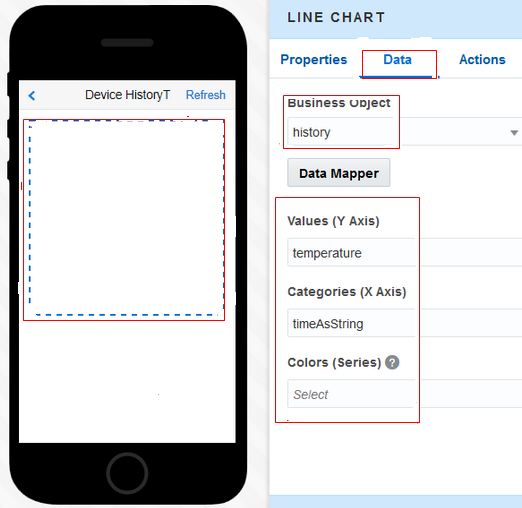
Description of the illustration linechart_temp.png - On the Device HistoryH screen, click the Data tab. To bind the chart with the
/devices/{id}/historyendpoint, select the following values:- Business Object: history
- Values (Y Axis): humidity
- Categories (X Axis): timeAsString
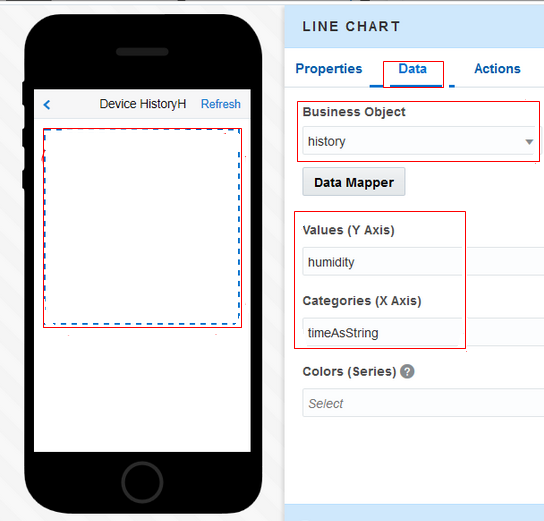
Description of the illustration linechart_h.png - To preview your app, click Test
 .
Log in with your test account (created in your Oracle Mobile Cloud service instance) and test the navigation and actions of your mobile app.
.
Log in with your test account (created in your Oracle Mobile Cloud service instance) and test the navigation and actions of your mobile app.
Note: To view the complete Oracle MAX app, download and extract package-IoTCS_MCS.zip. Rename your app in Oracle MAX, and then import the downloaded app into Oracle MAX. (You must rename your app because you can’t give the same name to different apps in Oracle MAX.)