 Developing a Streaming Analytics Processor in Oracle IoT Cloud Service
 Before You Begin
This 15-minute tutorial shows you how to create, code, and deploy a streaming analytics processor for your Internet of Things (IoT) application in the Oracle IoT Cloud Service instance. You also learn how to invoke a data link endpoint to verify the implementation of the streaming analytics processor.
Background
Your analytics powered IoT application can process, learn, and analyze big volumes of constantly changing data collected from sensors and devices.
The following image illustrates the components of an IoT Application that implements a streaming analytics processor and three batch analytics processors. It also shows the sequence of steps that the components perform with other Oracle Cloud Services and sensor devices to implement the use case. This tutorial covers the bordered area.
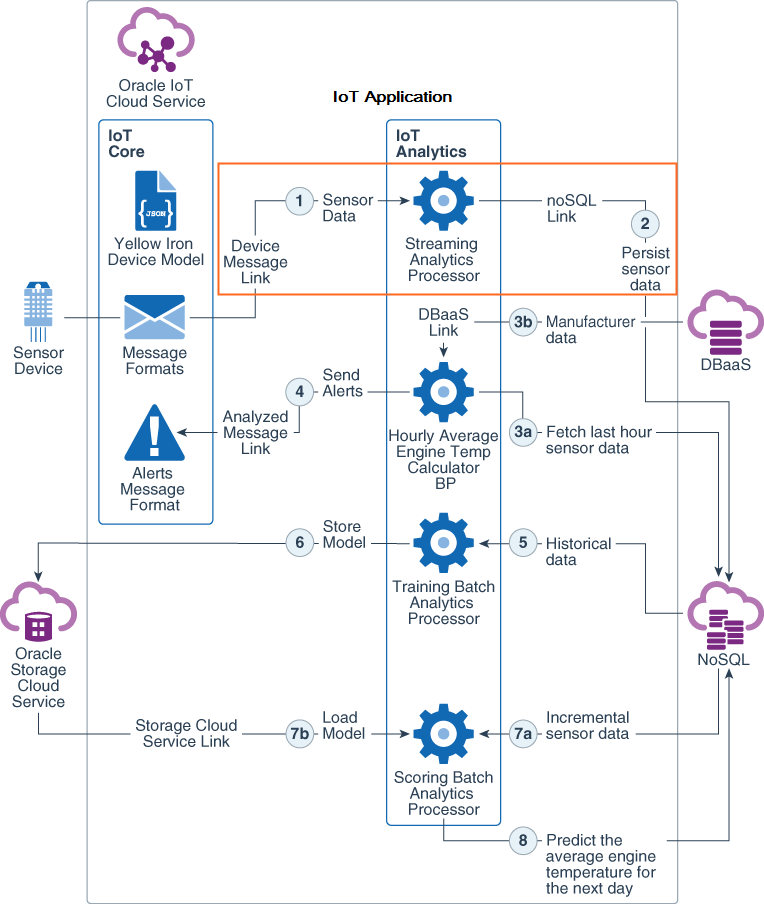
You use a streaming analytics processor to analyze high volume of dynamic data that is streamed from sensors and devices through a device message link. Once deployed, a streaming analytics processor runs continuously waiting for the device to stream data.
In this tutorial, you develop a streaming analytics processor that fetches data from the sensor device through a device message link, and then saves the data into a NoSQL link. You also invoke the data link CRUD endpoint of the NoSQL link to view the results of your analytics processor.
What Do You Need?
- Access to an instance of Oracle Internet of Things Cloud Service with Analytics
- streaming_processor_code.zip downloaded and extracted
- A REST client plug-in added to your web browser such as RESTlet Client for Chrome
 Create a Streaming Analytics Processor
You use the sensor-data-nosql NoSQL link and the sensor-data-dml device message link that you created in the previous tutorial, for this streaming analytics processor.
- Sign in to your instance of Oracle IoT Cloud Service.
- On the Oracle IoT Cloud Service home page, click Menu
 , click Applications, and then click Vision Heavy Machines.
 - On the Vision Heavy Machines menu, click Analytics, and then click Analytics Processors.
- On the Vision Heavy Machines page, click Create Analytics Processor.
- On the Create Analytics Processor page, enter or select the following, and click Create:
- Name: sensor-data-collector-sp
- Description: This streaming analytics processor collects data from a sensor and persists into NoSQL
- Type: Java
- On the sensor-data-collector-sp page, select or enter the following:
- Type: Streaming
- Links: sensor-data-nosql and sensor-data-dml
- Implementation Class:
com.visionHeavyMachines.processors.SensorDataCollectorSAP
- In the Overview tab, notice the component diagram, and verify that the links associated with the streaming analytics processor are accurate.
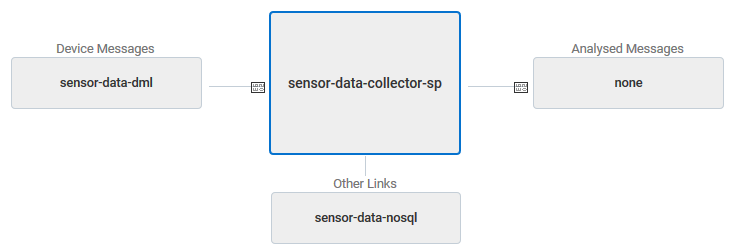
Description of the illustration sap.png - Click Generate Source Template. Verify that a message Template Generation Successful appears next to the Generate Source Template button.
- On the sensor-data-collector-sp page, click the Code tab, and review the code. The code that is generated contains the underlying infrastructure for your streaming analytics processor to interact with the links.
 Develop the Code for the Processor
In this section, you use Java Spark APIs to develop your streaming analytics processor that saves the sensor device data into Oracle NoSQL database.
- In a text editor, open the
streaming_processor_code.txtfile from the location where you extracted it fromstreaming_processor_code.zip. - Navigate to your Oracle IoT Cloud Service instance. On the sensor-data-collector-sp page, in the Code tab, below the
import javax.inject.Inject;statement, copy the code from the text file and paste it. - Review the lines of code in the
setup()method. Notice that the sensor data is:- Represented as an analytics object that maps to the attributes of the yellow iron device model
- Read from the device message link and written to the NoSQL link
 Deploy Your IoT Application
To build the code and run your analytics processor, you'll deploy your IoT application in Oracle IoT Cloud Service.
- On the Vision Heavy Machines menu, click Analytics, and then click Deployment Information.
- On the Applications | Vision Heavy Machines page, click Deploy Vision Heavy Machines that appears next to the page title.
- On the Deploy Application page, accept the default values , and click Deploy.
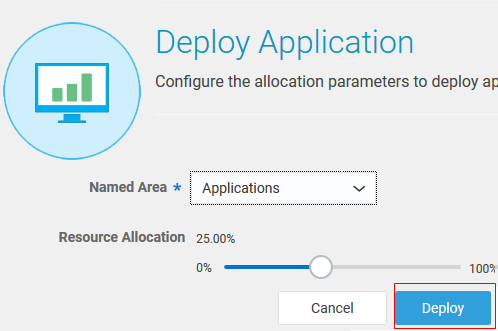
Description of the illustration deploy.png - Notice that an Output for Deploy window appears that displays the status of the build and deployment. After the deployment is complete, notice that a BUILD SUCCESS message is displayed.
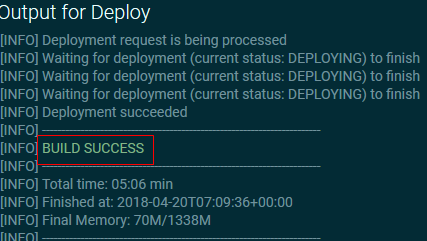
Description of the illustration deploy_success.png - Click the Analytics menu, and then Deployment Information. On the Overview tab, notice that the Links section displays the count of the number of records written by sensor-data-nosql and the number of messages read by sensor-data-dml. This verifies that the sensor-data-collector-sp processor is running.
 Invoke the Data Link CRUD Endpoint
In this section, you run a data link CRUD endpoint of the sensor-data-nosql link, and view the data that the sensor-data-collector-sp analytics processor has processed.
- Sign in to the Oracle IoT Digital Twin Simulator application at
https://your Oracle IoT Cloud Service instance name/ds. - On the Simulations page, click Yellow Iron Simulator. On the Yellow Iron Simulator page, verify that the device is running. If the device is not running, then click Status
 next to device ID.
 - Navigate to your Oracle IoT Cloud Service home page.
- Click Menu , click Applications, and then click Vision Heavy Machines.
- On the Vision Heavy Machines menu, click Analytics, and then click Deployment Information.
- On the Service API Documentation tab, scroll to the Data Link CRUD Endpoint section.
- Notice that the
sensor-data-nosqlname appears. Copy the value of URL for the noSQL link.
Description of the illustration data_link.png - On a new tab of your web browser, open the REST client plugin. To invoke the endpoint, in the REQUEST section, select or enter the following information:
- Method: GET
- URL: value of URL
?limit=10 - Headers: Content-Type:application/json
- Authorization:
- Username:
username to access Oracle IoT Cloud Service - Password:
password
- Username:
- Click SEND. Verify that in the RESPONSE section, you notice a 200 OK message.
- On the BODY tab, verify that 10 records of data about the sensor attributes are displayed.
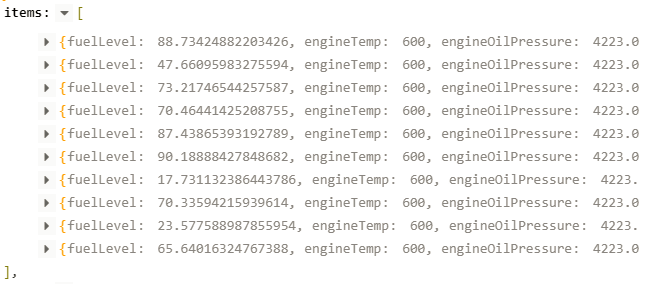
You have successfully implemented, deployed, and verified a streaming analytics processor of an IoT application.