Reserve IP Addresses

Not Oracle Cloud Infrastructure This topic does not apply to Oracle Cloud Infrastructure. Identify the Cloud Infrastructure Used by a Service Instance.

You can reserve IP addresses for your service by using the IP Reservations tab on the Oracle Java Cloud Service Console.

The IP Reservations tab appears in the console if either of these conditions are true:

  • Your account already has one or more existing IP reservations.

  • You are in the process of creating a new service instance and you have selected a specific Region to which to deploy the service instance.

To reserve IP addresses:
  1. Navigate to the Oracle Java Cloud Service console.
  2. If the IP Reservations tab is shown in the console, click this tab and skip to step 7.
  3. Click Create Service and select Java Cloud Service.
    The Create Service dialog is displayed.
  4. Select a specific Region and click OK. You cannot reserve IP addresses if you select the No Preference option.
    The Service page of the instance creation wizard is displayed.
  5. Fill out the fields and click Next.
    You are going to reserve IPs, so leave the IP Network field at No Preference.
    The Details page of the instance creation wizard is displayed.
  6. Click the gear icon beside the Reserved IPs field.
    You are directed to the IP Reservations page.
  7. Create one reserved IP for each node in the service instance you want to create.
    1. On the IP Reservations page, click Create.
    2. Enter a Name for the reservation.
    3. Select the Region in which you want the IP reservation to be created.
    4. If you intend to use this reservation for an instance that you attach to an IP network, select the On IP Network check box.
      If you leave this check box deselected, the IP reservation can be assigned to only an instance that you attach to the shared network.
    5. Click OK.
      The reservation will be created, a process that takes a few moments. During this time, the reservation icon on the line item will be overlaid by an hourglass and the status will show creation progress:
    6. Click Refresh icon to refresh the page.
      If the creation process has completed, the hourglass will disappear from the IP Reservation icon and the status will change to UNUSED.

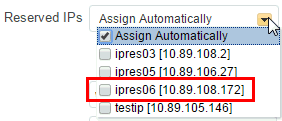
Your new IP reservations will be available on the Reserved IPs drop-down list in the service instance creation wizard.

If an IP reservation is not in use by a service instance, you can also use the IP Reservations page to delete the IP reservation. You cannot delete an IP reservation that is allocated to a service instance.