 Deploying an Application to an Oracle Java Cloud Service Instance by
Using Oracle JDeveloper
Deploying an Application to an Oracle Java Cloud Service Instance by
Using Oracle JDeveloperBefore You Begin
Purpose
This tutorial explains how to use Oracle JDeveloper to deploy an application to Oracle Java Cloud Service.
Last Updated
May 2019, Release 19.2.2
Note that Oracle develops cloud services in an agile manner and makes rapid changes to meet our users' needs. This tutorial may not reflect all of the changes since the last update to this service. For the latest information, see:
Time to Complete
Approximately 45 minutes
Background
Oracle JDeveloper is a free integrated development environment that simplifies the development of Java-based SOA and Java EE applications. Oracle JDeveloper offers complete end-to-end development to Oracle Fusion Middleware and Oracle Fusion Applications with support for the full development life cycle.
Scenario
This tutorial explains how Oracle JDeveloper on a
local machine can be used to deploy an
application to a remote Oracle Java Cloud Service
instance.
What Do You Need
This tutorial assumes you have a Windows 7 PC.
A web browser is required for working with Oracle Cloud services. These are the minimum requirements:
-
Microsoft Internet Explorer 9 or 10.
- Set Browser Mode to IE9 or IE10
- Set Document Mode to IE9 or IE10 standards
- Google Chrome 29 and later
- Mozilla Firefox 24 and later
- Apple Safari 6 and later
Before starting this tutorial, you should have:
- Created an Oracle Java Cloud Service instance that has load balancer enabled. For more information, see the Creating and Managing an Oracle Java Cloud Service—Coherence Instance tutorial. (You can create a service instance without enabling Oracle Coherence for the instance, as you don't need to have a Coherence data tier to follow the instructions in this tutorial.)
- Installed Oracle JDeveloper 12c Studio Version (12.1.3) on your local machine.
- A sample application WAR file to deploy to the
Oracle Java Cloud Service instance. The example in
this tutorial uses
benefits.war, which is available in the default workspace in Oracle JDeveloper.
Service Instance Details
You need the user name and password you specified for the WebLogic administrator when you created the service instance, the Administration Server Domain name, and the cluster name. The examples shown in this tutorial use the following service instance details:
- Oracle Java Cloud Service instance: MyServiceInstance
- Administration Server Domain: MyServic_domain
- Cluster: MyServic_cluster
Note: You might have different service instance details for performing this tutorial.
Establishing a Connection to an Oracle Java Cloud Service Instance through Oracle JDeveloper
Before you start deploying an application to your Oracle Java Cloud Service instance using Oracle JDeveloper, you must establish a connection with the remote server from JDeveloper.
-
Log in to the JDeveloper 12c Studio Console with the Studio Developer role.
-
From the menu, choose Window > Application Servers.
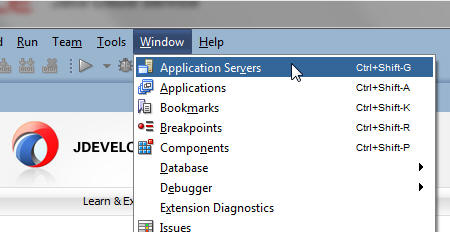
Description of the illustration snap1.jpg -
In the left pane, right-click Application Servers and then click New Application Server.
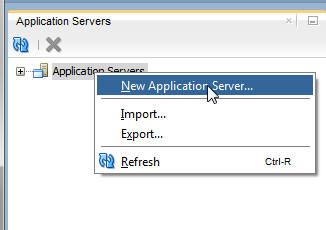
Description of the illustration snap2.jpg -
The Create Application Server Connection dialog is displayed. Proceed as follows:
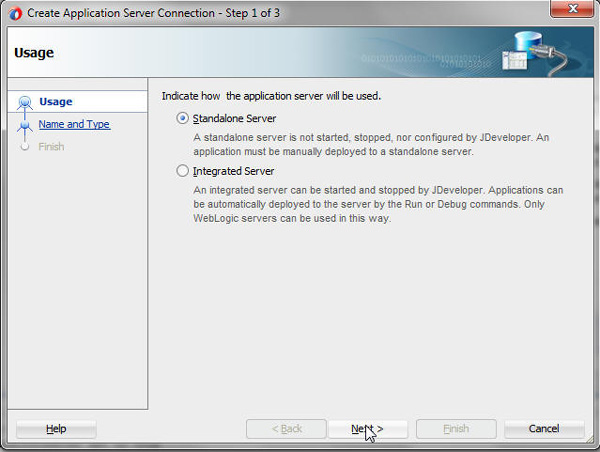
On the Usage page, select Standalone Server and click Next.
-
On the Name and Type page, enter the Connection Name as
ServerInstance1. From the Connection Type drop-down list, select WebLogic 12.x. Click Next.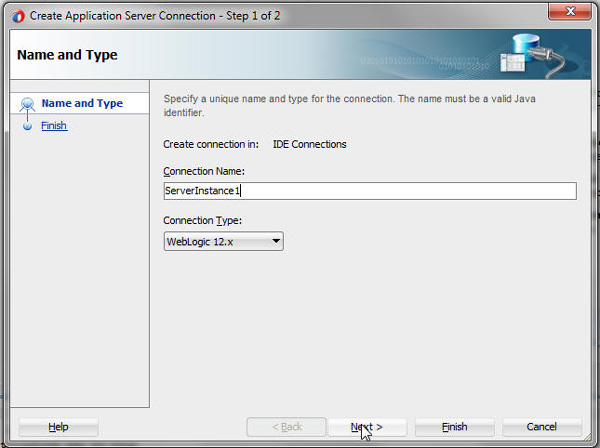
Description of the illustration snap3a.jpg -
On the Authentication page, enter the user name and password for the WebLogic administrator (for example,
weblogic/examplepassword) and click Next.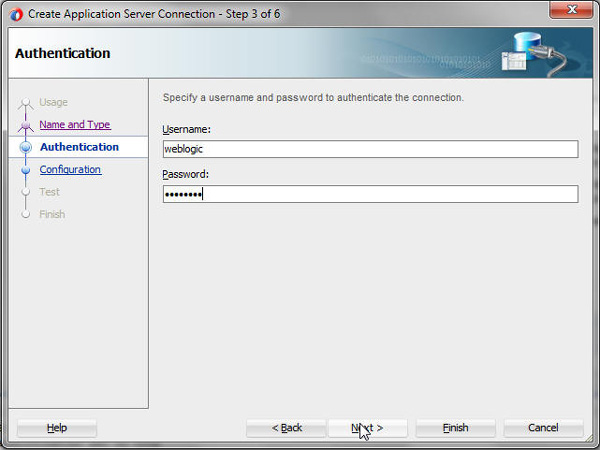
Description of the illustration snap31.jpg Note: The WebLogic administrator user name and password must be the credentials you specified when you created the Oracle Java Cloud Service instance.
-
On the Configuration page, enter the WebLogic Hostname as the IP address of your remote cloud server. and Port as
7001.The SSL port should be set to
7002. Select the Always Use SSL checkbox.In the WebLogic Domain field, enter the Administration Domain Server name for your service instance (for example
Click Next.MyServic_domain).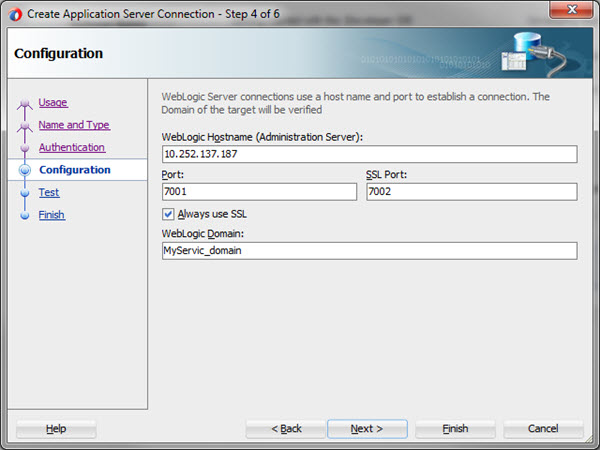
Description of the illustration snap32.jpg -
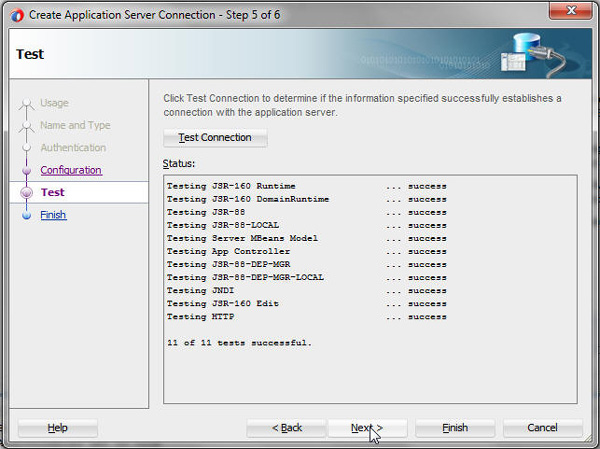
On the Test page, click Test
Connection. After you see that
all the tests are successful, click Next.
Description of the illustration snap33.jpg -
On the Finish page, click Finish
after you complete creating the connection.

Description of the illustration snap34.jpg -
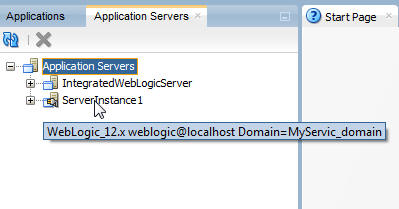
In the left pane under Application Servers,
notice that ServerInstance1 is displayed.
Description of the illustration snap35.jpg
Description of the illustration snap29.jpg Note: If any of the tests failed, make sure your connection session to the remote instance is not expired. If it has expired, reestablish the connection session and try again.
You have established a connection to the remote WebLogic Server host running on an Oracle Java Cloud Service instance.
Preparing the WAR file to be Deployed
In this section, you will learn how to prepare the WAR file that you want to deploy to your Oracle Java Cloud Service instance.
- In Oracle JDeveloper, open the DefaultWorkspace that was created when JDeveloper was installed.
-
From the menu, choose File > Open.
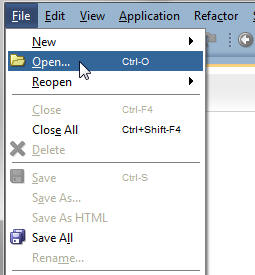
Description of the illustration snap4.jpg -
Browse to the location where DefaultWorkspace is. In Windows, it is located in the default directory
C:\Users\<User_Name>\AppData\Roaming\JDeveloper. Open theDefaultWorkspace.jwsfile.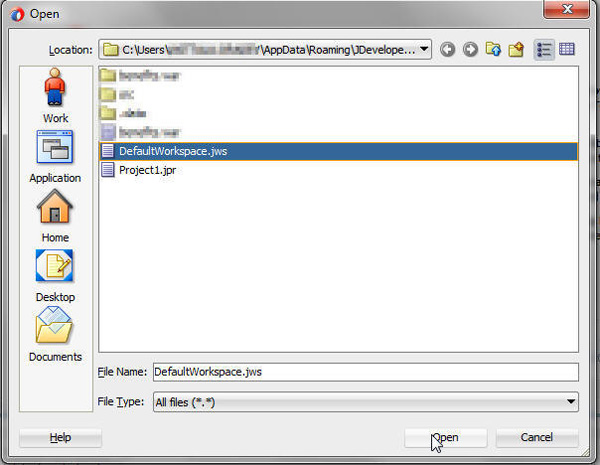
Description of the illustration snap5.jpg -
In the left pane, verify that DefaultWorkspace is opened.
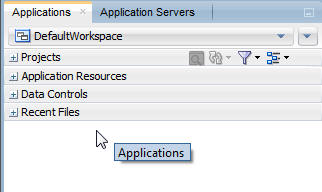
Description of the illustration snap6.jpg -
From the File menu, choose Import.
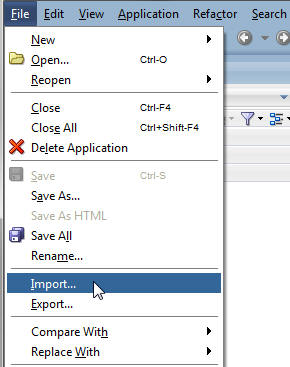
Description of the illustration snap7.jpg -
In the Import dialog, scroll down a bit and select WAR File, then click OK.
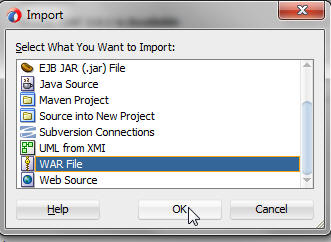
Description of the illustration snap8.jpg -
The Create Project from WAR File, Location page, is displayed. For this tutorial, accept the default project name (Project1) and directory. Click Next .
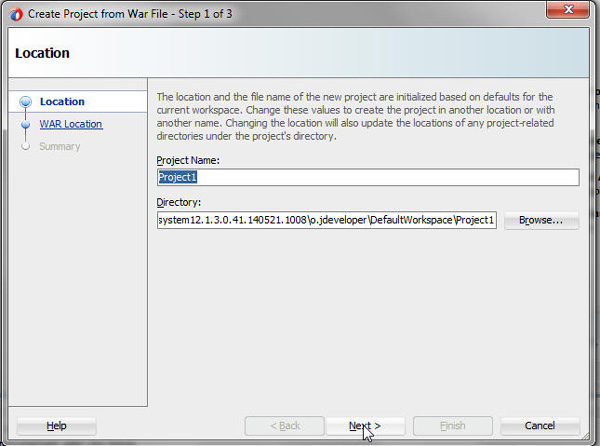
Description of the illustration snap9.jpg -
On the WAR Location page, click Browse to locate the application WAR file. For this tutorial, navigate to the location of
benefits.warand click Open.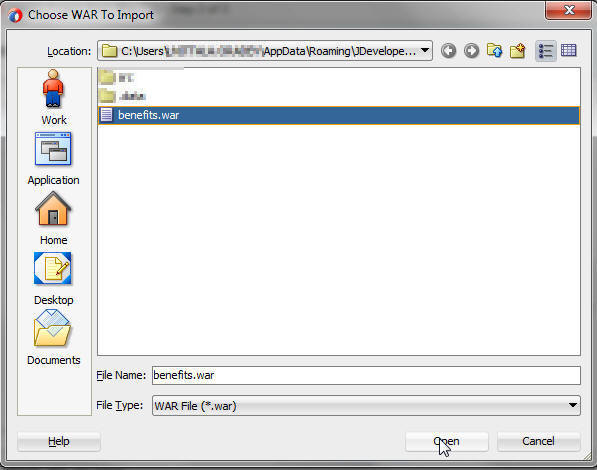
Description of the illustration snap11.jpg -
Click Next. On the Summary page, click Finish.
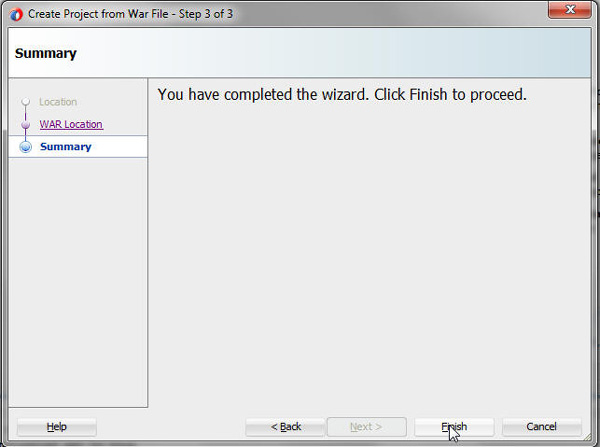
Description of the illustration snap13.jpg -
Verify that a Web Application Project,
Project1is created under Projects in the left pane.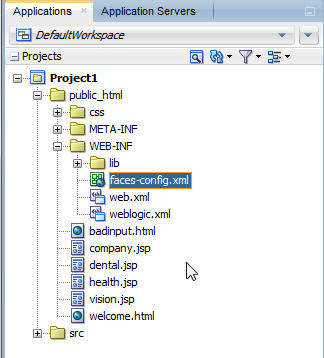
Description of the illustration snap.jpg
You have prepared the WAR file for deploying to Oracle Java Cloud Service.
Deploying the Application to the Oracle Java Cloud Service Instance
In this section, you will learn how to deploy the prepared WAR File to your Oracle Java Cloud Service instance.
-
In the Projects pane in Oracle JDeveloper, right-click Project1 and select Deploy > benefits.
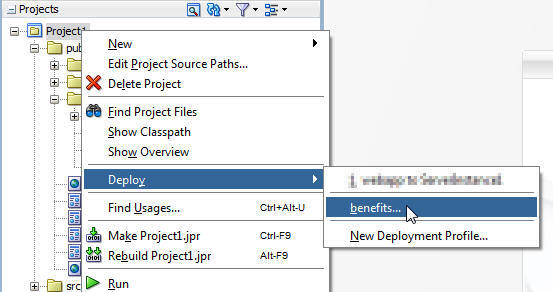
Description of the illustration snap15.jpg -
The Deploy benefits, Deployment Action page, is displayed. Select Deploy to Application Server and click Next.
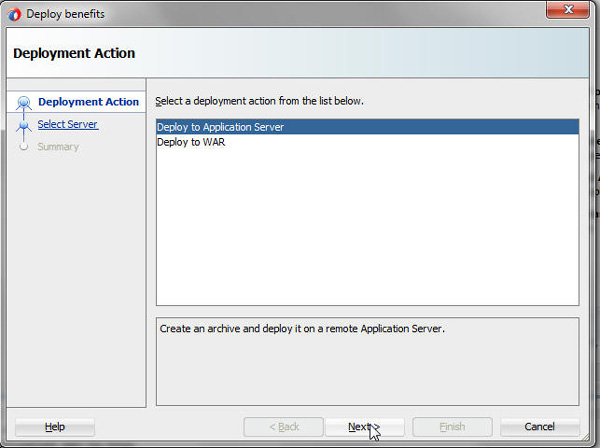
Description of the illustration snap16.jpg -
On the Select Server page, select the application server you want the WAR file to be deployed to. For this tutorial, select ServerInstance1 and click Next.
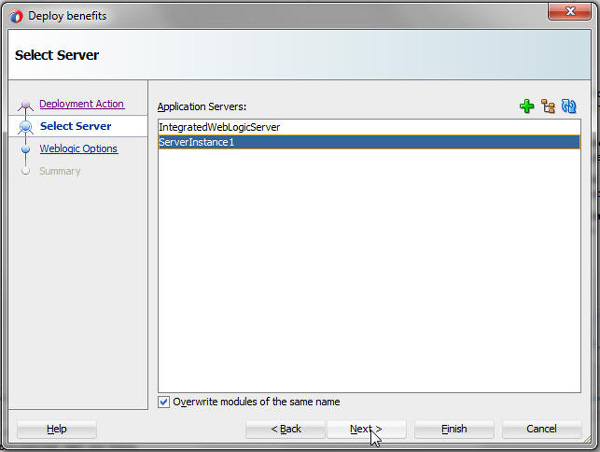
Description of the illustration snap17.jpg -
On the WebLogic Options page, select Deploy to selected instances in the domain. Select the cluster name in your Oracle Java Cloud Service instance (for example,
MyServic_cluster). Verify that Deploy as a standalone Application is selected. Click Next.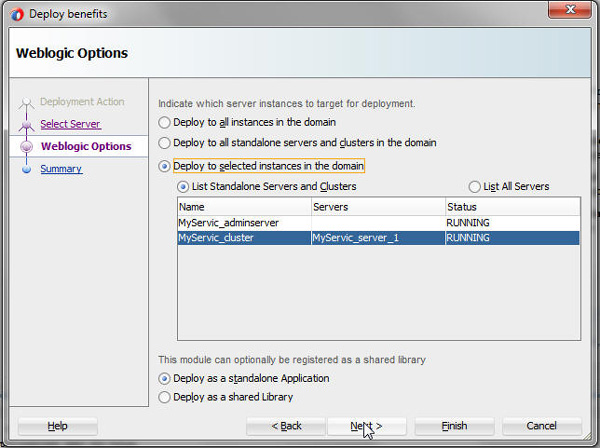
Description of the illustration snap19.jpg -
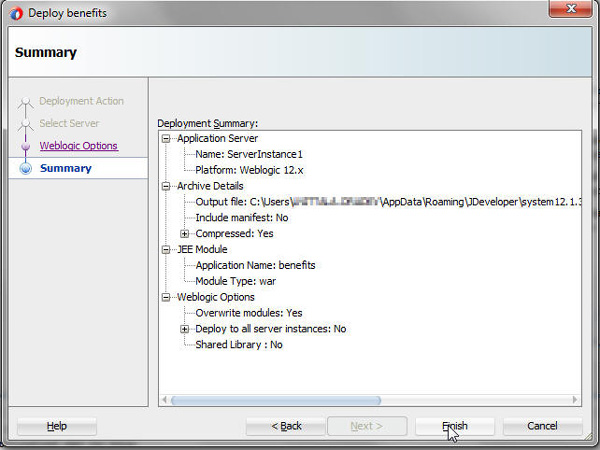
On the Summary page, verify the values and click Finish.
Description of the illustration snap20.jpg -
In the Log pane, verify that
Deploying
                                  benefits
is in progress. Verify also that you see the messagesApplication Deployed SuccessfullyandDeployment Finished.
Description of the illustration snap21.jpg 
Description of snap36.jpg
Note: While Oracle JDeveloper supports deploying to server clusters, you cannot use JDeveloper to deploy to individual managed servers that are members of a cluster.
Verifying the Application Deployment
After the application is deployed, you will learn how to verify if the deployment has been successful. Since you have deployed the application on the cluster, you will verify it using the IP address of the load balancer that was configured for your Oracle Java Cloud Service instance.
-
Sign in to the My Services application by clicking the link in your Welcome email. Or, you can go to http://cloud.oracle.com, click Sign In, and select the Public Cloud Services value for your region from the My Services Data Center dropdown list. Either way you must provide an identity domain, user name, and password to sign in.
When logged in, you will see the My Services Dashboard or a cloud service console.
-
If necessary, from the
 navigation menu at the top of
the page, choose Oracle Java Cloud
Service.
navigation menu at the top of
the page, choose Oracle Java Cloud
Service.The Oracle Java Cloud Service Console is displayed.
-
On your Oracle Java Cloud Service Console, click the name of the service instance to which the application was deployed.
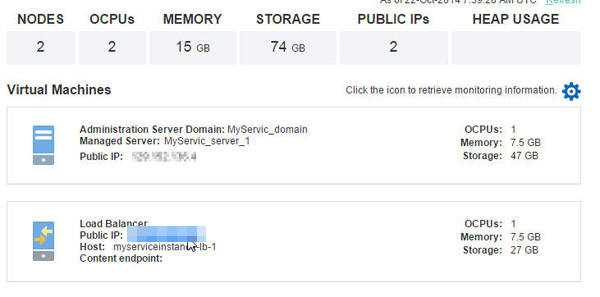
The service instance Overview page is displayed, showing details about the instance.
-
On the Overview page, copy the IP address of the load balancer configured for your service instance.
Description of the illustration snap.37.blur.jpg -
Enter the URL,
https://IP_load_balancer:443/benefitsin a web browser.
Description of the illustration https_443_blur.jpg -
Verify that you see the benefits application.

Description of the illustration https_443_benefits_blur.jpg
Note: 443 is the default HTTPS user access port.
You have successfully deployed the application using Oracle JDeveloper.
Undeploying the Application
-
In Oracle JDeveloper, navigate to the Application Servers pane.
-
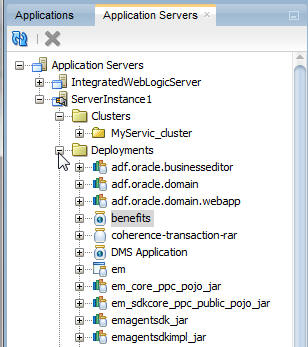
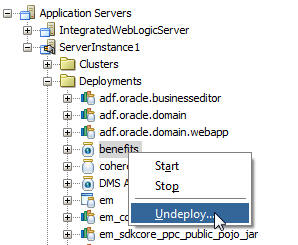
Under the application server connection you created (for example, ServerInstance1), expand Deployments.
Description of the illustration snap40.jpg -
Find the application that you want to undeploy (for example, benefits). Right-click the application and select Undeploy. When prompted, click Yes to confirm you want to undeploy.
Description of the illustration snap26.jpg -
In the Log pane, verify you see the message:
Application
                                  Undeployed Successfully
. You have undeployed the application.
Description of the illustration snap41.jpg Note: If you see the message
The task cannot be processed further until the current edit session is activated. When this occurs, task processing will continue.The user can exit the deployer tool without affecting the task, log in to the WebLogic Server Administration Console using the URLhttp://localhost:9001/console. When prompted, supply the user name and password you specified for the WebLogic administrator when you created the service instance. See that you click Activate Changes.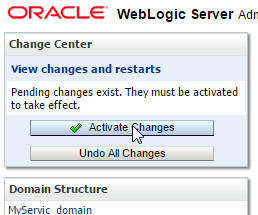
Description of the illustration snap42.jpg
Want to Learn More?
- Using Oracle Java Cloud Service in the Oracle Help Center
- Oracle Java Cloud Service Tutorials
- cloud.oracle.com