 Use
Groups and Roles to Protect an Oracle Java Cloud Service Application
Use
Groups and Roles to Protect an Oracle Java Cloud Service Application Before You Begin
This 15-minute tutorial shows you how to configure role-based access for Java Applications in an Oracle Java Cloud Service instance.
This is the fifth tutorial in Secure access to Java Cloud Service and Java EE applications by using Identity Cloud Service. Read them sequentially.
- Create an Oracle Java Cloud Service Administrator
- Create an Oracle Java Cloud Service Instance with Oracle Identity Cloud Service
- Create a WebLogic Administrator in Oracle Java Cloud Service with Oracle Identity Cloud Service
- Secure an Oracle Java Cloud Service Application with Oracle Identity Cloud Service
Background
Oracle WebLogic Server supports the Java EE declarative model for securing web applications with XML deployment descriptors. In this tutorial, you configure the deployment descriptors of a sample application to allow only HR managers to access certain pages of the application.
What Do You Need?
- Credentials for an Oracle Cloud user who has been granted the Identity Domain Administrator role. This is required to create new users and groups
- Download the sample-app.war file
 Create
Users
Create
Users
Create two users to validate the role-based access to the sample-app Java application that is deployed by default when you create an Oracle Java Cloud Service Instance with Oracle Identity Cloud Service.
- Sign in to Oracle Cloud as an Identity Domain Administrator.
- From the top of the My Services Dashboard, click Users.
- From the top of the User Management page, click Identity Console.
- From the Users page of the Identity Cloud Service console, click Add.
- Configure a new HRExecutive user in the Step
1: Add User Details page:
- First Name: Enter the first name as HR.
- Last Name: Enter the last name as Executive.
- Uncheck Use the email address as the user name.
- User Name: Enter the user name as HRExecutive.
- Email: Enter an email address.
- Click Finish.
- Verify that the specified email address receives an Oracle Cloud welcome message. Click the link in this message and, when prompted, enter a password for the new user.
- From the Users page of the Identity Cloud Service console, click Add.
- Configure a new HRAdmin user in the Step
1: Add User Details page:
- First Name: Enter the first name as HR.
- Last Name: Enter the last name as Admin.
- Uncheck Use the email address as the user name.
- User Name: Enter the user name as HRAdmin.
- Email: Enter an email address.
- Click Finish.
- Verify that the specified email address receives an Oracle Cloud welcome message. Click the link in this message and, when prompted, enter a password for the new user.

 Create
a Group and Add a User
Create
a Group and Add a User
- From the Identity Cloud Service console, click the Navigation
Drawer
 icon at the top left
corner of the page, and then select Groups.
icon at the top left
corner of the page, and then select Groups. - From the Groups page of the Identity Cloud Service console, click Add.
- Configure a new HRManagersGroup group in the Step
1: Group Details page. Enter the name for the group
as HRManagersGroup in the Name
field and click Next.
Note: The rest of the fields in this page are not mandatory.
- In the Step 2: Assign Users to Group page, search for the HRAdmin user, select the checkbox next to the First Name of the HRAdmin user and then click Finish.
 Update
the Deployment Descriptors
Update
the Deployment Descriptors
- Extract the sample-app.war file in your local computer.
- Go to the
WEB-INFfolder, and edit theweb.xmlwith a text editor such as a Notepad. - You can edit the web.xml file for your application
to create one or more user roles for your application. In
addition, you can also create one or more security constraints
that grant access to one or more URL patterns in your
application, and to specific roles. Copy and paste the
following text into the
web.xmlfile. This configuration grants access to only members with the HRAdmin role to access the HTML files of the application.<?xml version = '1.0' encoding = 'ISO-8859-1'?> <!-- ~ Copyright (c) 2015 Oracle and/or its affiliates. All rights reserved. --> <welcome-file-list> <welcome-file>index.html</welcome-file> </welcome-file-list> <security-role> <role-name>HRAdmin</role-name> </security-role> <security-constraint> <web-resource-collection> <web-resource-name>IndexPage</web-resource-name> <url-pattern>*.html</url-pattern> </web-resource-collection> <auth-constraint> <role-name>HRAdmin</role-name> </auth-constraint> </security-constraint> <web-app> - Save the
web.xmlfile. - You can edit the weblogic.xml file for your
application to create one or more assignments that map your
application roles to specific users and groups found in Oracle
Identity Cloud Service. Copy and paste the following text into
the
weblogic.xmlfile. This configuration assigns the HRAdmin user in the HRManagersGroup group access to IndexPage.html page of the sample-app application and restricts the access for the HRExecutive user.<?xml version = '1.0' encoding = 'ISO-8859-1'?> <!--~ Copyright (c) 2015 Oracle and/or its affiliates. All rights reserved.--> <weblogic-web-app xmlns:xsi="http://www.w3.org/2001/XMLSchema-instance" xsi:schemaLocation="http://xmlns.oracle.com/weblogic/weblogic-web-app http://xmlns.oracle.com/weblogic/weblogic-web-app/1.1/weblogic-web-app.xsd" xmlns="http://xmlns.oracle.com/weblogic/weblogic-web-app"> <security-role-assignment> <role-name>HRAdmin</role-name> <principal-name>HRManagersGroup</principal-name> </security-role-assignment> <context-root>/__protected/sample-app</context-root> </weblogic-web-app> - Save the
weblogic.xmlfile. - Go to the
sample-appdirectory. Use an archive tool such as JAR, ZIP, or WinZip to create a newsample-app.warfile.
 Redeploy
the Application in WebLogic Administration Console
Redeploy
the Application in WebLogic Administration Console
- From the My Services Dashboard, click the Navigation
Drawer icon at the top left
corner of the page, expand Services, and
then select Java.
- From the Instances page, click the Manage this
Instance
 icon next to the
service instance, and then select Open WebLogic
Server Administration Console.
icon next to the
service instance, and then select Open WebLogic
Server Administration Console. - Sign in to the WebLogic console as the WebLogic Administrator.
- Update the sample-app application:
- In the Change Center box at the top left corner of the page, click Lock & Edit.
- In the Domain Structure box, click Deployments. The Summary of Deployments page displays.
- In the Configuration tab, select the checkbox next to the sample-app.
- In the Deployments table, click Update.
- In the Update Application Assistant page, click Change Path for Source path:
- In the Update Application Assistant page, click upload your file(s) in the note listed under Locate new deployment files.
- In the Update Application Assistant page, for Deployment
Archive: use your browser to select the new
sample-app.warfile in your local computer. - Click Next. In the Update Application Assistant page, The file sample-app.war has been uploaded successfully to /u01/data/domains/MyJCS_domain/servers/MyJCS__adminserver/upload message appears.
- Click Next. The updated path appears for the Source path:
- Click Next.
- In the Update Application Assistant page, review your choices and click Finish.
- In the Change Center box at the top left corner of the page, click Activate Changes. In the Summary of Deployments page All changes have been activated. No restarts are necessary. message appears.
- Redeploy the sample-app application:
- In the Change Center box at the top left corner of the page, click Lock & Edit.
- Click the Control tab.
- In the Control tab, select the checkbox next to the sample-app.
- In the Deployments table click Start and select Servicing all requests.
- In the Start Application Assistant page, click Yes. The state of sample-app changes to Active.
 Test
the Role Based Access to the Application
Test
the Role Based Access to the Application
- Return to the Java Cloud Service Console.
- In the Instance Overview section of the MyJCS details page,
copy the Sample Application URL. For example,
https://MyJCS-ocloud700.us.oraclecloud.com/sample-app/. - Start a different browser session (where you are not already
logged in), add
/__protectedbefore/sample-appin the Sample Application link that you copied, and navigate to this updated URL. For example,https://MyJCS-ocloud700.us.oraclecloud.com/__protected/sample-app/. - Sign in to the sample-app on Oracle Cloud as HRExecutive
user. The Error 403--Forbidden page appears.
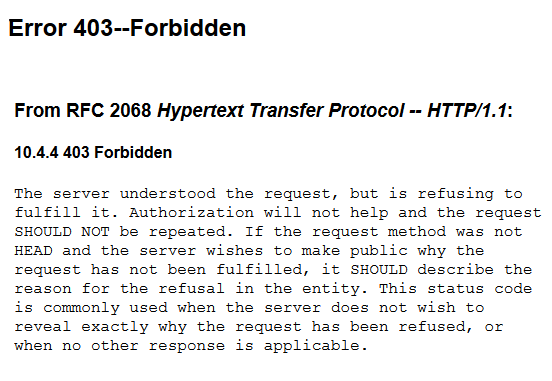
Description of the illustration error_403.png - Sign out of Oracle Cloud as HRExecutive user.
- Start a different browser session (where you are not already
logged in), add
/__protectedbefore/sample-appin the Sample Application link that you copied, and navigate to this updated URL. For example,https://MyJCS-ocloud700.us.oraclecloud.com/__protected/sample-app/. - Sign in to the sample-app on Oracle Cloud as HRAdmin
user. The browser might prompt you to sign in twice. The
Oracle Java Cloud Service page appears.
Description of the illustration oracle_java_cloud_service