 Analyzing Compliance Violations of Your Infrastructure
 Before You Begin
This 15-minute tutorial shows you how to run compliance assessments against the U.S. Government Commercial Cloud Services (C2S) baseline using Oracle Management Cloud Configuration and Compliance.
Background
This tutorial will go over the basic flow of assessing compliance of your infrastructure against a standard OpenSCAP configuration setting.
You will focus on creating, running, and automating a compliance assessment on one or more of your Linux hosts. After the assessment completes, you evaluate the results and create an alert rule to be notified in the future whenever one of the hosts has a compliance score value under 50%.
What Do You Need?
- An Oracle Management Cloud instance, with valid Oracle Management Cloud licenses: at a minimum the Oracle Management Cloud – Standard Edition or, the Oracle Management Cloud – Enterprise Edition. In addition, you will require the Oracle Security Monitoring and Compliance – Configuration and Compliance Edition. For more information, see Oracle Management Cloud Offerings.
- At least one host that you are monitoring using Oracle Configuration and Compliance.
- Pre-configured cloud credentials in order to access the information from your resources, if your entities reside on a cloud. For more information, see Configuring Cloud Credentials.
- Pre-configured Cloud agent, if your host resides on-premises: If you have not already done so, follow along the tutorial series: Getting Started with Monitoring an IT Infrastructure Using Oracle Management Cloud.
 Run a Industry-Standard Benchmark Assessment
An industry-standard benchmark assessment can be scheduled to run once or on a recurring schedule. For this tutorial, create and run an assessment based on a pre-existing template PCI-DSS-Baseline (Payment Card Industry Data Security Standard).
Create your SSH Host Credential
Adding a SSH Host Credential is a requirement before you are able to run custom and industry-standard assessments.
This example uses omcagentuser as the username and host1.oracle.com as the entity.
- Create a new JSON file and copy and paste the following format.
[ { "entity": "omc_host_linux.host1.oracle.com", "name": "omc_oracle_host1.oracle.com-HostSSHCreds", "type": "HostSSHCreds", "globalName": "emcosComplianceCred", "description": "SSH Credential for the agent omcagentuser", "properties": [ { "name":"USERNAME", "value":"CLEAR[omcagentuser]" }, { "name":"SSH_PVT_KEY", "value":"FILE[omcagentuser/.ssh/id_rsa]" }, { "name":"SSH_PUB_KEY", "value":"FILE[omcagentuser/.ssh/id_rsa.pub]" } ] } ] - Open a terminal and stop the Cloud Agent using the following command:
$ omcli stop agent - Configure the agent to use a wallet-based credential store:
$ omcli add_credential_store agent -no_password - Restart the agent:
$ omcli start agent - Add the credential file you created in step 1 to the credential store:
$ omcli add_credentials agent -credential_file /omcagentuser/scratch/cred.jsonConnect to Oracle Management Cloud
Once you sign up for an Oracle Cloud account, you (the Oracle Cloud administrator) can create an Oracle Management Cloud instance, along with special users for accessing this Oracle Management Cloud instance.
- On your Management Cloud tile, click the Action Menu
 , then click Open Service Console. You are now viewing the Oracle Management Cloud instances page.
 - On the instance you want to access, click the Manage this instance menu and select OMC URL. The Oracle Management Cloud console home page is displayed.
Create Assessment
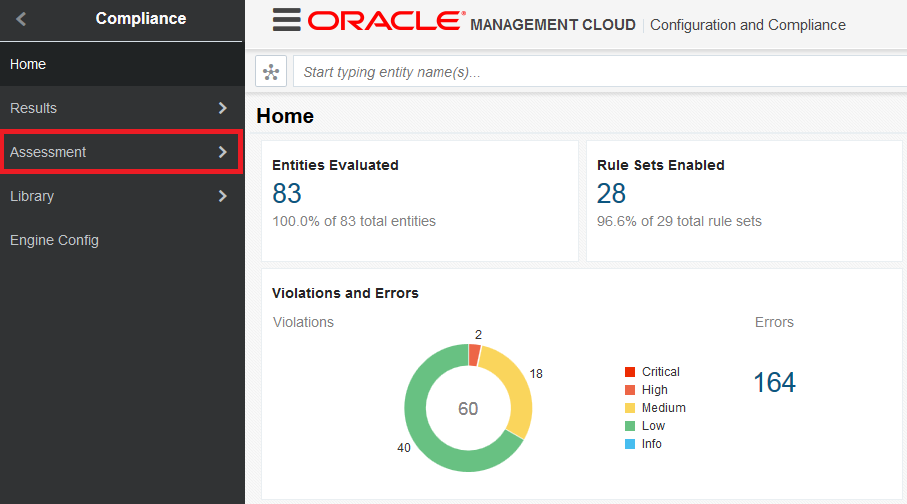
- On the Oracle Management Cloud home page, click the Global Navigation Menu on the top-left corner and navigate to Compliance
- From the menu, click Assessment.
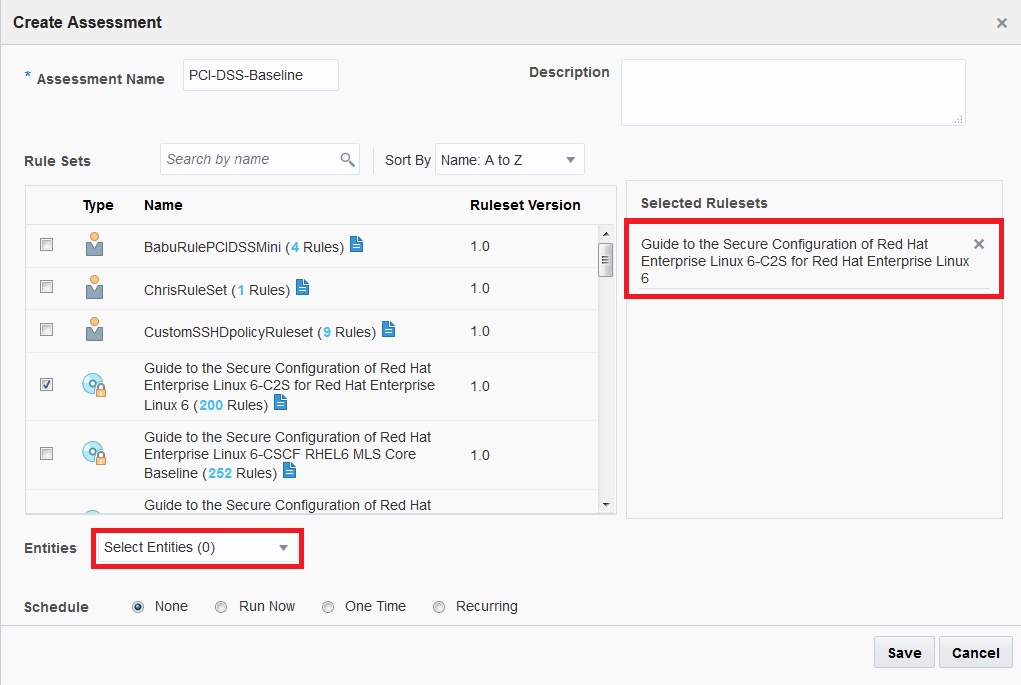
- Click Templates, check the template PCI-DSS-Baseline and then click Edit.
- Select only the Rule Set
Guide to the Secure Configuration of Red Hat Enterprise Linux 6-C2S for Red Hat Enterprise Linux 6 (200 Rules)then, click Select Entities. - Type Linux in the filters box and select your Linux hosts.
- Select Recurring, customize the dates on a schedule of your choice and click Save.
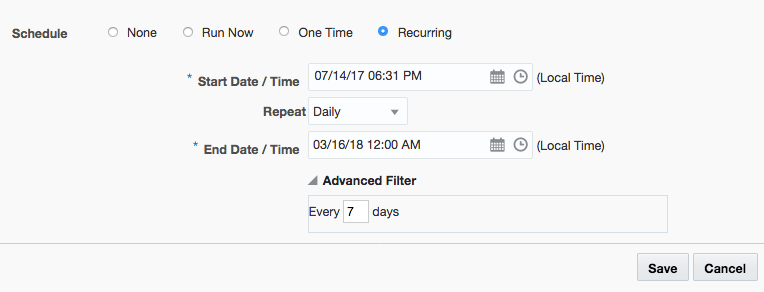
Description of the illustration assessment8.png
The assessment will now start running and will run again on the schedule you selected. Allow this first run of the assessment to complete.
 Evaluate Your Results
Evaluate the compliance violation results so you can plan an optimal remediation for your system.
- From the Compliance menu, select Assessments > Runs and click the Completed tab.
- Drill down into the assessment you just ran, click its Assessment ID to be taken to the Run Details. Note the Violations in the first tab.

Description of the illustration assessment6.png - Click on any Violation message to see more details. For example, take a look at a violation with a severity level
HIGH:
Description of the illustration assessment7.png - Review the recommended remedy page and plan your remediation based on that.
 Create alert rules
To proactively manage your systems, you can create alerts in order to be notified automatically when specific entities and alert conditions happen.
For the purpose of this tutorial enable alert notifications when the a compliance score threshold on the assessment your setup is less than 50%.
- From the main Compliance menu, click Library > Alert Rules.
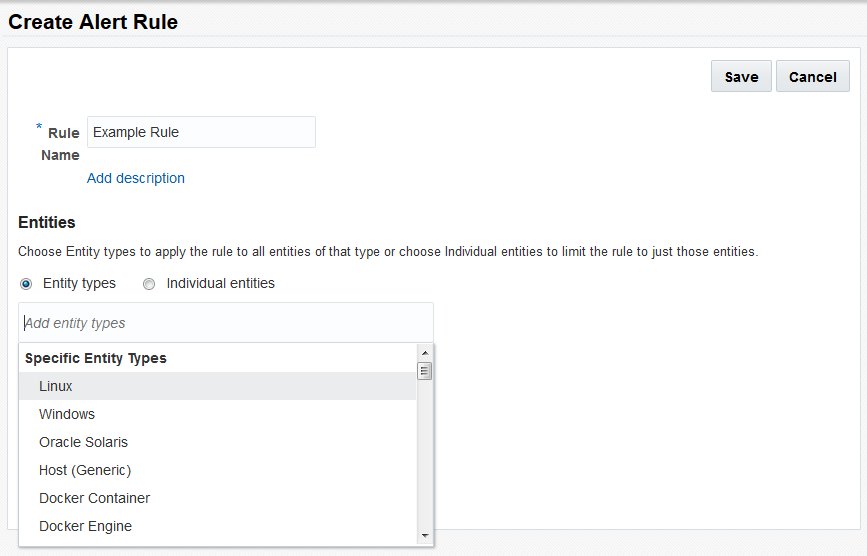
- Click Create Alert Rule.
- Click the Add Entity Types message box. Select Linux since your assessment runs against your Linux hosts.
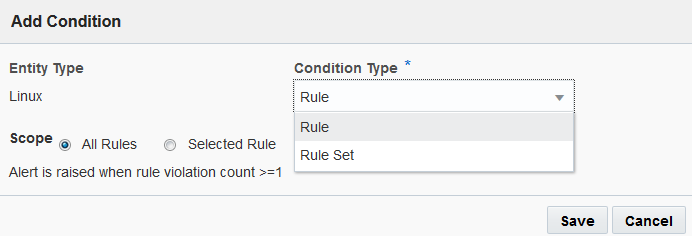
- Click Add Condition.
- Click Condition Type and select Rule Set. The recurring assessment you set up includes a Rule Set, so the condition applies here.
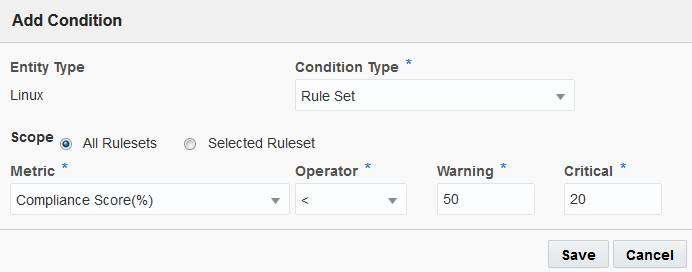
- Select the Compliance Score(%) metric and set the Warning alert below 50% and the Critical Alert below 20%. Click Save.
- Add the response team emails in the notification channel. Click Save.

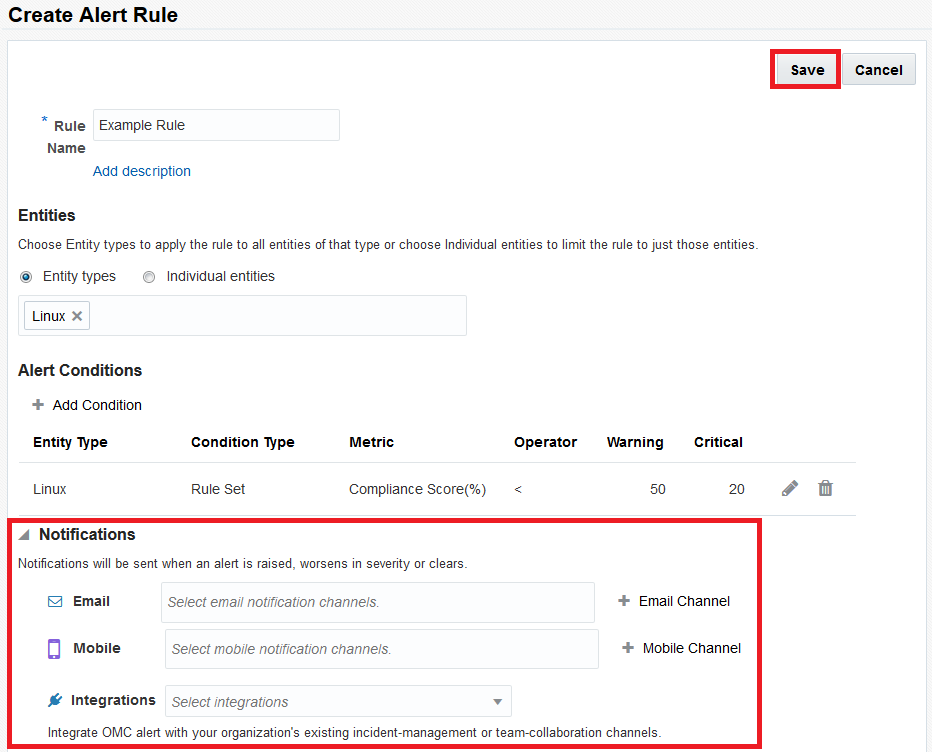
The addresses in the notification channels will be notified any time this alert rule activates.
 Want to Learn More?
- For more configuration and compliance features see Using Oracle Configuration and Compliance.
- For other management features see Oracle Management Cloud.