Installing
Oracle Application Performance Management Agent on a JBoss Wildfly
Server
Installing
Oracle Application Performance Management Agent on a JBoss Wildfly
Server Before You Begin
This 10 minute tutorial shows you how to install the APM Java Agent on a JBoss Wildfly Server to monitor the Java applications that are running on the application server.
What Do You Need?
- A valid Oracle Cloud account, an Oracle Management Cloud instance, and OMC Administrator role credentials.
- A host with Oracle Linux 6.7
- A running JBoss Wildfly Server version 9.0.2
- JDK version 1.7 or above
- A Java web application on the host. For example: benefits.war
 Prerequisites
Ensure that the following prerequisites are met:
- The JBoss Server user should have read and write permissions to the directories that host the APM Java Agent, as well as the JBOSS Home.
- Generate or download a registration key.
- Download and save a Java web application on the host. For example: benefits.war. This is a sample Java web application archive.
 Downloading
and Installing the APM Agent in a JBoss Server
Downloading
and Installing the APM Agent in a JBoss Server
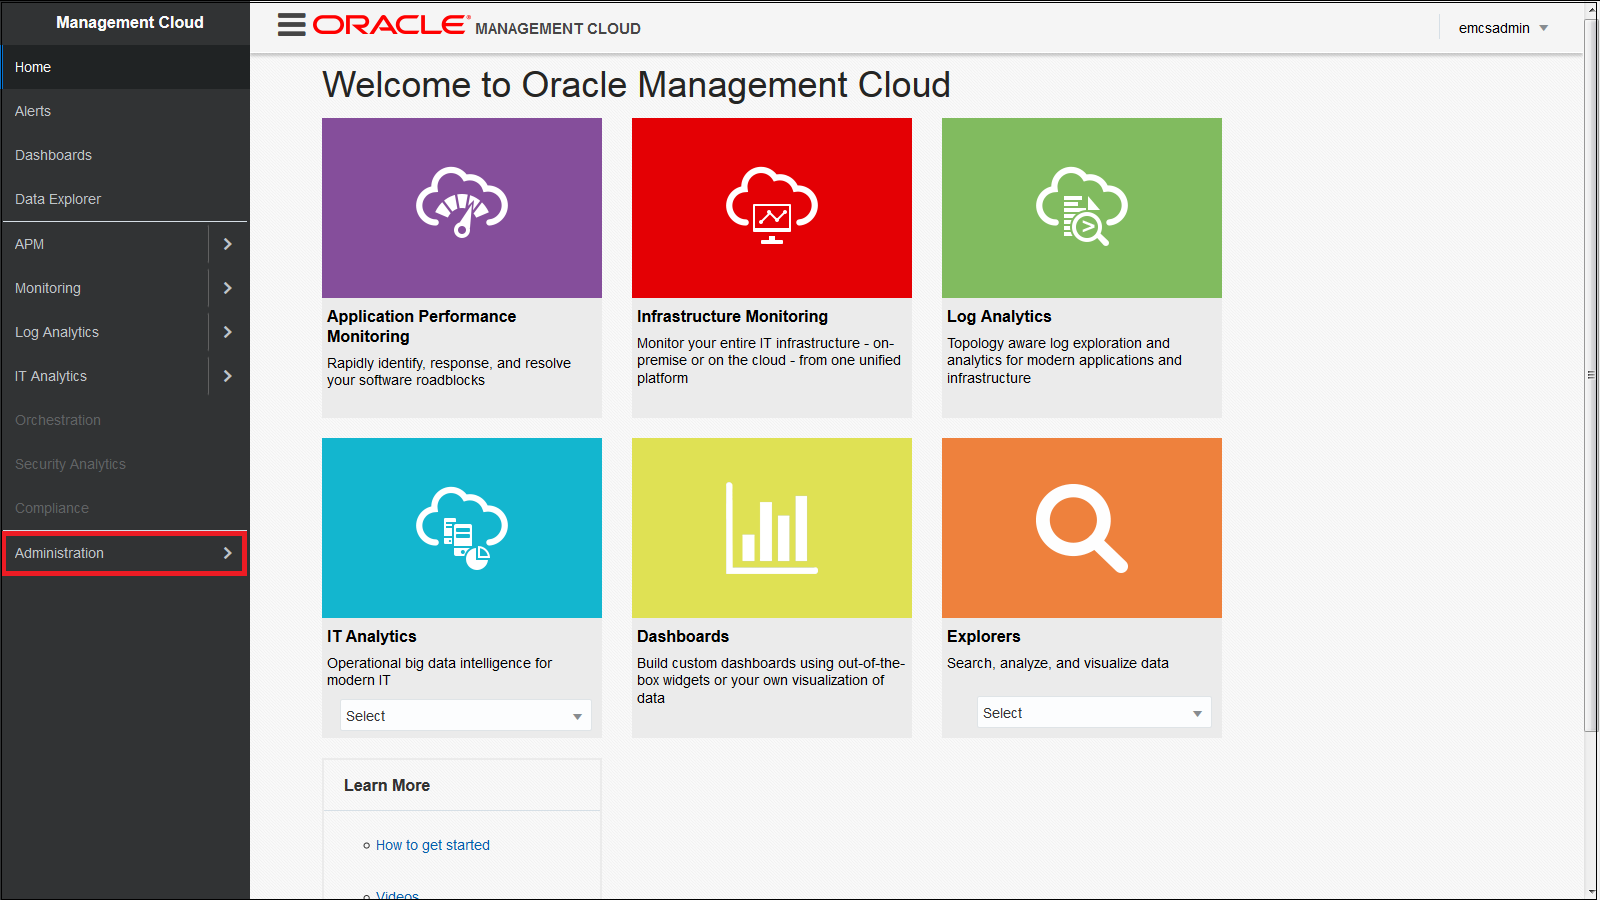
- Log in as administrator to Oracle Management Cloud and click Administration > Agents > Downloads.
- Download and extract the APM Java Agent zip files in a new folder.
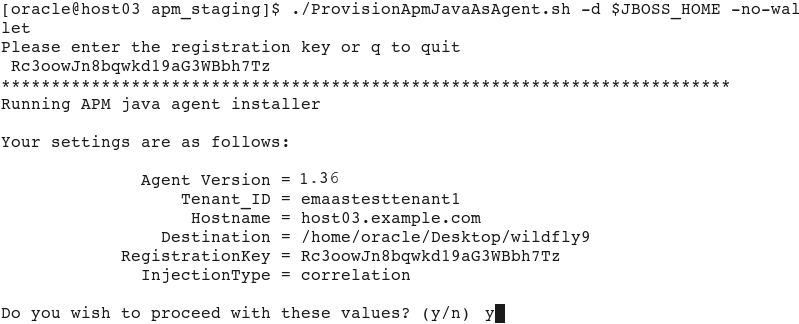
- Run chmod with the provisioning script ProvisionAPMJavaAsAgent.sh:
chmod +x ProvisionAPMJavaAsAgent.sh - Run ProvisionApmJavaAsAgent with the following parameters:
- When prompted, provide the value of the registration key that you've created or downloaded earlier.
- Press y to confirm and install the agent.
$ ./ProvisionApmJavaAsAgent.sh -d $JBOSS_HOME -no-wallet
-d is the absolute path of the home directory of the WebLogic Server domain.
-no-wallet means that you will not use Oracle Wallet for this installation.
 Provisioning
the APM Java Agent in a JBoss Wildfly Server
Provisioning
the APM Java Agent in a JBoss Wildfly Server
- Navigate to $JBOSS_HOME/bin:
$ cd $JBOSS_HOME/bin - Make a copy of standalone.conf:
- Open standalone.conf with your text editor.
- Scroll to the end of the standalone.conf file and add the following Java options:
- Stop and restart the JBoss server:
$ ./jboss-cli.sh -c :shutdown $ nohup ./standalone.sh -b 0.0.0.0&> startup.log & - Navigate to the JBoss Wildfly administration console and
login with the required user credentials.
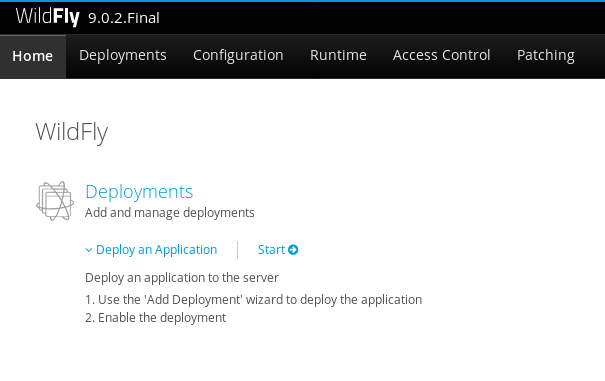
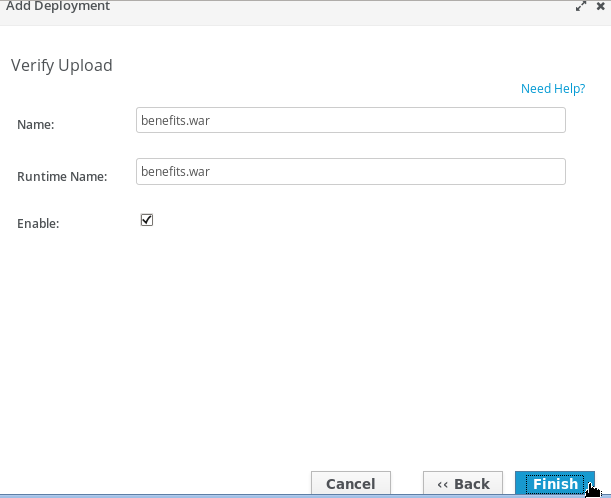
The default URL is: localhost:9990/console. - In Deployments, click Start.
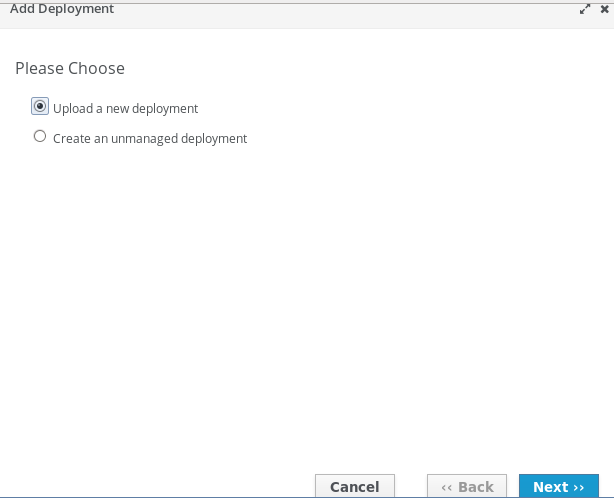
- Click Add.
- Select Upload a new deployment.
- Select the benefits.war file and upload it.
$ cp standalone.conf standalone.conf.origJAVA_OPTS="$JAVA_OPTS
-Djboss.modules.system.pkgs=org.jboss.byteman,oracle.security.pki,oracle.apmaas.agent,oracle.apmaas.repackaged"
JAVA_OPTS="$JAVA_OPTS -javaagent:$JBOSS_HOME/apmagent/lib/system/ApmAgentInstrumentation.jar"
 Verifying
the APM Java Agent Installation
Verifying
the APM Java Agent Installation
- Log in to the Oracle Management Cloud home page.
- Click Administration.
- Click Agents and then click APM Agents.
The status of the APM Java agent is displayed.