 Getting Started with Custom APIs
Ready to get started?
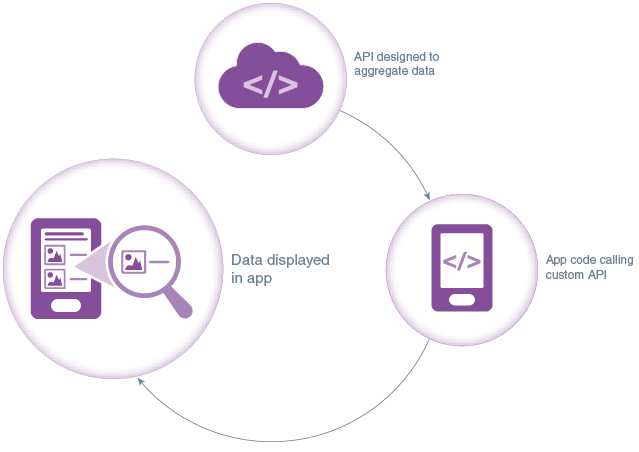
You can create custom REST APIs to build up a library of services that can be used by your mobile apps and intelligent bots. Custom APIs are particularly useful for aggregating data from other sources, adding any relevant business logic, and returning results in a mobile-friendly way.
 Create a custom API and define its endpoints
In creating a REST API, you define a set of endpoints
that can be called by an application. These endpoints consist of
resources, REST methods to act on those resources, and request
and response details. Let's take a look at how we might create
an API with an incidents resource, a GET
method to retrieve those resources, and a POST
method to add a new object to incidents.
First let's create the API.
- If the left panel is not already open, click
 .
. - In the left panel, expand Development and click APIs.
- Click New API and select API.
- In the New API dialog, fill in the following fields:
- API Display Name: Incident Report
- Short Description: Custom API for Getting Started tutorial
- Click Create.
For the purposes of this tutorial, we'll turn off the login requirement.
- Click Security to open the Security view.
- Set the Login Required switch to the off position.
- Click Save.
Now let's create a resource.
- In the Designer, click Endpoints.
- Click New Resource.
- Fill in the fields as follows:
- Resource Path: incidents
- Display Name: Incidents
- Resource Description: All incident reports.
And for the resource, we need to add methods in order to create
endpoints. First we'll create a GET method to
retrieve all incident reports.
- Click Methods.
- Click Add Method and select GET.
- Click Add Parameter.
- Fill in the fields as follows:
- Query: Query
- Parameter: technician
- Display Name: Technician ID
- String: String
- Click Add Parameter.
- For the second parameter, fill in the fields as follows:
- Query: Query
- Parameter: location
- Display Name: Location
- String: String
- For the
locationparameter, click Click to add a parameter description. - Insert the following description into the text area:
location of contact or technician
- For the
locationparameter, click Click to add an example. - Insert the following description into the text area:
39.355589 -120.652492
- Click Responses.
- Click Add Response.
- Leave the response as 200 - OK.
- Click Add Media Type.
- Leave the Media Type as application/json.
- In the Example text
area, paste the following code:
{ "items": [ { "id": 100, "title": "Leaking Water Heater", "createdon": "2014-07-18 17:21:55 PST", "contact": { "name": "Lynn Adams", "street": "45 O'Connor Street", "city": "Ottawa", "postalcode": "a1a1a1", "username": "johnbeta" }, "status" : "New", "priority" : "High", "driveTime" : 30, "imageLink": "storage/collections/2e029813-d1a9-4957-a69a-fbd0d7431d77/objects/6cdaa3a8-097e-49f7-9bd2-88966c45668f?user=lynn1014" }, { "id": 101, "title": "Smoking Oven", "createdon": "2014-07-18 17:21:55 PST", "contact": { "name": "Lynn Adams", "street": "45 O'Connor Street", "city": "Ottawa", "postalcode": "a1a1a1", "username": "johnbeta" }, "status" : "In Progress", "priority" : "Medium", "driveTime" : 10, "imageLink": "storage/collections/2e029813-d1a9-4957-a69a-fbd0d7431d77/objects/6cdaa3a8-097e-49f7-9bd2-88966c45668f?user=lynn1014" } ], "uris": [ "/mobile/custom/IncidentReport/incidents/100", "/mobile/custom/IncidentReport/incidents/101" ], "etags": [ "100", "101" ] } - Scroll upward and click Add Response again.
- Scroll back down, and for the new response select 404 - Not Found.
- Scroll back to the top click Save.
Now we'll create a POST method to add a new incident to the
collection.
- Click Add Method and select POST.
- Click Add Media Type.
- In the Media Type drop-down, select
application/json. - In the Example text
area, paste the following JSON:
{ "id": 100, "title": "Leaking Water Heater", "createdon": "2014-07-18 17:21:55 PST", "contact": [ { "email": "lynn.smith@a.com", "name": "Lynn Smith", "street": "555 America Way", "city": "Austin", "postalcode" : "78731" } ], "status" : "New", "priority" : "High", "driveTime" : 30, "imageLink": "/mobile/platform/storage/1.0/collections/Foo/objects/FD37E8D4A7152B4EE0435D329C0AFFD0?type=guid" } - Click Responses and then Add Response.
- In the Response drop-down box, select 201 - Created.
- Click Add Media Type
and in the Media Type drop-down, select
application/json. - Scroll back up and click Save.
 Associate the API with a
backend
Associate the API with a
backend
Before you can deploy an API, it has to be associated with a backend. The backend provides the security context for accessing the API, including the users that have permissions.
- In the the left panel, click Backends.
- Click New Backend.
- In the Name field, enter IncidentReports.
- In the Analytics section, click None.
- Click Create. After the backend is created, the Settings page opens.
- Click APIs.
- Click Select APIs to open the API Catalog.
- For the Incident Report API, click the
 icon.
icon.
 Test the endpoints with mock data
To make sure that the API generally works as expected, let's test it with some mock data.
- Navigate back to the API designer by clicking APIs in the left panel.
- Select the Incident Report 1.0 API and click Test.
- For the
GET /incidentsendpoint, go to the Authentication section and set the Backend to IncidentReports and the Authentication Method to Current User. - Click Test Endpoint.
In the Response Status section, you should see a 200 code and the example data that you entered when you defined the API.
- For the
POST /incidentsendpoint, click Use Example. - For the Authentication Method select Current User.
- Click Test Endpoint.
In the Test Response Status section, you should see a 201 code.
 Implement the API
Now that you have the API defined, it's time to implement the API with JavaScript code. You can get started by downloading a scaffold that provides stubs for the functions that you need to implement for each endpoint, as well as some sample code.
- Navigate back to the API designer by clicking Development > APIs in the main menu. (If you have hidden the menu, click and then select Development > APIs.)
- Select the Incident Report API and click Open.
- Click Implementation.
- Click the JavaScript Scaffold button to download the scaffold.
- On your system, unzip the scaffold file.
- Open
incidentreports.jsand add a console.log command to each endpoint, as shown in the following snippet:module.exports = function(service) { service.post('/mobile/custom/IncidentReport/incidents', function(req,res) { console.log('getting ready to call POST /mobile/custom/IncidentReport/incidents'); var result = {}; var statusCode = 201; res.status(statusCode).send(result); }); service.get('/mobile/custom/IncidentReport/incidents', function(req,res) { console.log('getting ready to call GET /mobile/custom/IncidentReport/incidents'); var result = {}; var statusCode = 200; if (statusCode == 200){ . . . - Open the
package.jsonfile to view the contents of the manifest for your custom code implementation. In this file you include the version of the implementation as well as any information about dependencies or libraries that you are including. - In the
package.jsonfile, change the version number for the implementation from1.0to1.0.0to prevent version warnings when you runnpm installin the next step.If somebody else on your team has already done this tutorial and uploaded an implementation with a version number of 1.0.0, you may wish to change the version number so that you don't overwrite the other implementation.
- Run
npm installwithin the directory containing thepackage.jsonfile. (Strictly speaking, this step isn't necessary for this simple example, but you will need to do this whenever you have added dependencies or extra libraries to your implementation.) - Create a zip file of these artifacts, including the root
folder containing the
package.jsonfile.You can name the zip anything you want.
- In the API designer, open the
IncidentReportAPI. - In the left navigation bar, click Implementation.
- At the bottom of the API Implementation page, click the Upload an implementation archive link and navigate to the implementation zip on your system.
The system will do a quick check to make sure that the
basics of the implementation, such as the contents of package.json, are in order. If they
are, you will get confirmation that the file has been
uploaded and validated.
 Test the implementation
Now that you have uploaded an implementation, you can test the API against that implementation.
- On the Implementations page, click Test.
- In the Endpoints page, navigate to
GET/incidents, set the Authentication Method to Current User, and click Test Endpoint.You should see the static data that's in the
incidentreport.jsfrom your implementation. - In the Endpoints page, navigate to
POST/incidents, and click Use Example. - Set the Authentication Method to Current User and click Test Endpoint.
You should see a HTTP 201 response code.
Now let's take a look at how all of this is logged.
- In the menu on the left, click Backends. (If you have hidden the menu, click and select Development > Backends.)
- Double-click your backend, IncidentReports 1.0. The backend page opens at the Diagnostic view.
- Click the Logs tab.
- Double-click individual entries to view detail.
You will see both messages logged by the system automatically, and those that result from
consolemessages that you inserted in the custom code.
Note: When you upload an implementation, that implementation becomes the default that you test against. If you want to switch implementations (or go back to testing with example data), go the Implementations page, select the implementation you want to test against (or Mock for testing against examples provided in the API definition), and click Set as Default.
 What's next?
- Learn the fine points of designing custom APIs.
- Learn more about writing custom code.
- Learn how to call AMCe platform APIs from custom code.