 Get Started with Connectors
 Before You Begin
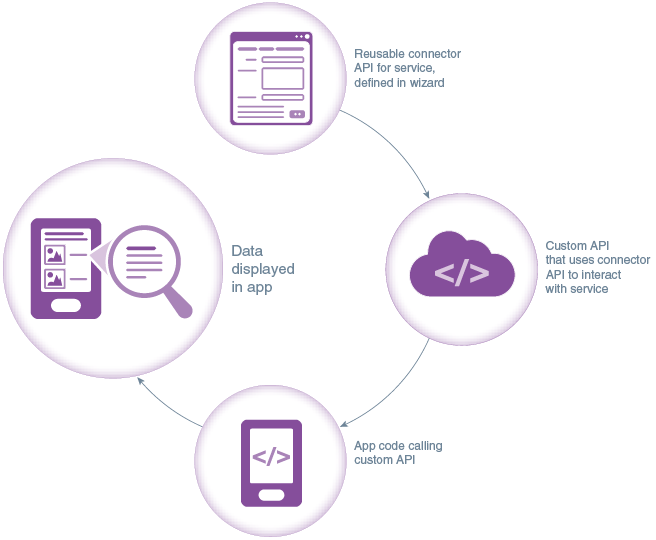
Connectors allow you to declaratively create APIs that simplify access to, and standardize the use of backend systems (such as enterprise middleware) and web services. Connector types are available for REST web services, SOAP web services, the Oracle Integration Cloud Service (ICS), and Oracle Cloud applications based on Fusion Applications (FA).
After you create a connector API to access the service, you can use it in custom APIs which you can then call from your apps using standard REST calls just as you would any other service in OMH. Other service developers on your team can then use this connector API without having to bother learning about how the service is implemented, or having to deal with other complexities (like security and identity propagation) that can crop up when using the service directly.
In this tutorial, we'll create a REST connector API that enables the calling code to access an external REST service to get directions. We'll then use the web interface to make a test call with the connector API (where we specify Boston and Seattle as the origin and destination), and see what directions are returned.
What Do You Need?
- Access to Oracle Mobile Hub
 Obtain your API key
This step is optional.
Often you'll need an API key to be able to use publicly-available REST APIs. If you'd like to see how to incorporate such a key into a connector API definition, get your Google API key ready. If you don't already have one, see https://developers.google.com/console/help/new/#api-keys for information on getting one.
 Create a REST Connector API
- Log in to your OMH instance and click Development > Connectors.
- Click the REST icon. (If other connectors have already been created, click New Connector and choose REST from the dropdown.)
- Fill in the following values:
Display API Name -
Customer Map LocationAPI Name -
CustomerMapLocationShort Description -
Takes two locations and returns directions from the origin to the destination. - Click Create.
- On the General page of the wizard, click Descriptor.
- Make sure the I don't have a descriptor option is selected.
- In the Remote URL field, enter
https://maps.googleapis.com/maps/api/directions/json. - Click Save.
 Add a Rule
This step is optional
Connector API rules provide a way for you to add default parameter values for calls to resources on the service. For each rule, you can also specify whether it applies to lower level resources and which HTTP methods it is triggered by.
Here's how to add a rule for the key query
parameter, which you can use to pass in your Google API
key.
- On the Rules page, click New Rule.
- Click Add Parameter.
- Leave Query selected in the dropdown list.
- In the Name field,
type:
key - In the Value field,
enter your Google API key.
- Click Save.
 Test the Connector API
Before using the connector API in your app, test it in the user interface to make sure that it works as expected.
- Click Development > Connectors to make sure that the Connectors page is open, and select the Customer Map Location connector.
- Click Test.
- In the HTTP Method
field, select
GET. - In the Local URI
field, append the following:
?origin=Boston&destination=Seattle - Scroll down to the Authentication section, and in the Backend field, select the backend that you want to use.
- For Authentication Method, select Current User.
- Click Test Endpoint.
In the Response section of the page, the output of the response should appear, including the status code (hopefully 200) and the body of the response in JSON format showing directions from Boston to Seattle.
 Access the Connector API from the Custom Code API Catalog
Once you have created the connector API, you can browse that API from the Custom Code API Catalog. (Remember, connector APIs are not accessible directly from client apps. They can only be called from implementations of custom APIs.)
- If you have created an API, open the API in the API designer. Click Development > APIs.
- Select your API and click Open.
- Click API Catalog.
- In the Show dropdown list, select Connector APIs.
- Click the connector API that you created.
- Note the value in the Local URI field. You need this when calling the connector API from custom code. In the example used for this tutorial, the Local URI is
/mobile/connector/CustomerMapLocation.
Here's an example of implementation code in a custom API that calls a connector. The highlighted code shows where the connector API is invoked:
exports.findDistanceToCustomer = function(agg, cache, sdk,  callback) {
  var email = agg.email;
  var customer;
  if (agg.customers && agg.customers[email]){
    customer = agg.customers[email];
  } else if (cache.customers && cache.customers[email]){
    customer = cache.customers[email];
  }
  if (!agg.gps || !customer){
    return callback(null, null);
  }
  if (cache.durations && cache.durations[email]){
    return callback(null, cache.durations[email]);
  }
  var handler=function(error,response,body) {
    if(error !=null && error!=undefined ){
      callback(error, null);
    }
    var result = JSON.parse(body);
    if (!cache.durations){
      cache.durations = [];
    }
    cache.durations[agg.email] = result.rows[0].elements[0].duration.text;
    return callback(null, result.rows[0].elements[0].duration.text);
  };
  var optionsList={};
  optionsList.uri='/mobile/connector/CustomerMapLocation?origin=Boston&destination=Seattle';
  var queryObject={};
  queryObject.origins=agg.gps;
  queryObject.destinations= customer.AddressLine + "+" + customer.City;
  optionsList.qs=queryObject;
  var r=sdk.rest.get(optionsList,handler);
}
 Want to Learn More?
- Learn about using connectors in custom code
- Learn about REST connector APIs
- Learn about SOAP connector APIs
- Learn about Integration Cloud Service (ICS) connector APIs
- Learn about Fusion Applications connector APIs.