Localize Applications

Process Automation supports localization for a number of components such as process applications, processes (structured and dynamic), UIs (forms and external UIs), and decisions.

In addition, localization is also supported for dynamic labels of the following:

  • Forms
  • Structured process - activity name in process flow, human task title, and start form title
  • Dynamic process - stage name, activity name, human task title
  • Process application title and description

By default, all process applications are created in English. To localize an application, first choose and add a locale from the available languages, and then provide localized strings for the new locale in the Localization editor. The editor’s interface provides a consolidated view of all default and translated resources and allows you to manage them from one place.

When the process application is activated in Workspace, users can view labels in the localized language based on their browser language setting.

Note that if the browser language chosen by the user was not added as a locale in Designer, then labels are displayed in the default language (English).

To localize an application:
  1. Open an application.
  2. Click Main menu Main menu icon on the top right of the application page, and select View Localization.
  3. In the Localization pane, click Add.
  4. Choose a locale from the Select Locale drop-down field.
    You can also search for a language in the resulting Search field while you choose a language.
  5. Optionally, select the Make it default check box to make it the application’s default language.
  6. Click Create.

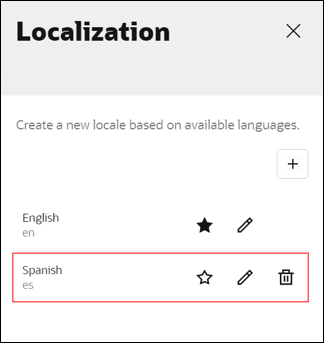
    The new locale is displayed in the Localization pane.

    Description of localization-pane.png follows
    Description of the illustration localization-pane.png

    Notice the three icons.

    • Make it default icon: Click to make the selected locale the default language of the application.
    • Edit icon: Click to open the Localization editor.
    • Delete icon: Click to delete the locale.
  7. Click Edit to open the application's artifacts in the Localization editor.
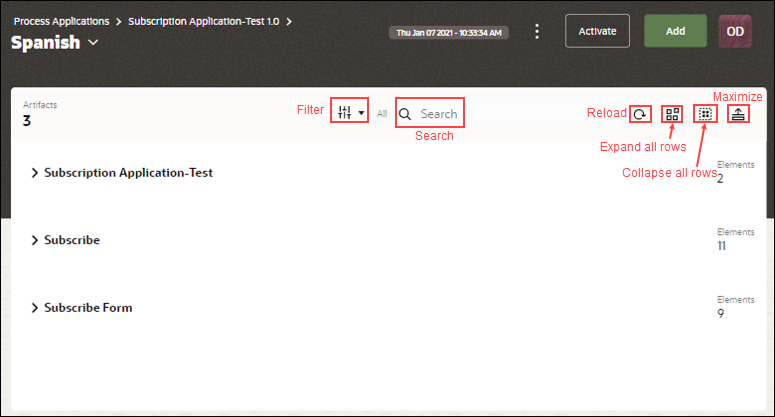
  8. Notice the following in the Localization editor:
    1. The main canvas of the editor displays the process application’s artifacts. You can view the total number of artifacts displayed on the page in the top left corner.
    2. At the right of each artifact, you can see the number of components or elements present under each artifact.
    3. Filter with a drop-down arrow next to it lets you select the artifacts (Project, Process, and Form) that are to be displayed on the page.
    4. A search field lets you search components by property. For example, if you search by Title, all components in the application with property Title get displayed.
    5. Reload icon lets you reload the page so that the latest changes get reflected.
    6. Expand all rows icon expands all artifacts so that you can view or edit any of the elements.
    7. Collapse all rows icon collapses all artifacts, and gives you a concise view of the artifacts.
    8. Maximize icon expands the central pane with the four columns – Component, Property, Default Text, and Translation Text.
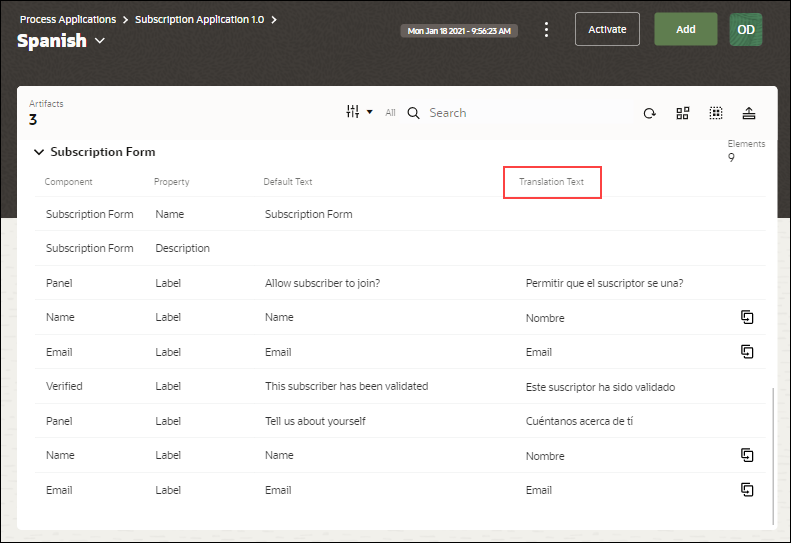
  9. Click the Translation Text field of a component, and enter the translated text.
    The localization editor automatically saves the changes.Description of translated-text.png follows
    Description of the illustration translated-text.png

    Note the Duplicate Duplicate icon icon besides some of the rows. When you click the Duplicate icon besides a row, changes made to the translated text of that row gets applied to all its duplicate counterparts.