Generate the Migration Report

The migration report highlights the differences between the Oracle SOA Cloud Service and the Oracle SOA Suite on Marketplace instances. You can generate the migration report before you run the migration. This is an optional feature that is available as part of the migration stack.

Note:

  • You can generate multiple migration reports. Each report’s file name is suffixed with a timestamp. For example, migration_report_<timestamp>.txt.
  • You can either generate the report before the migration or while you migrate the Oracle SOA Cloud Service instance to the Oracle SOA Suite on Marketplace. See step 4 in Run the Migration.
  • The migration report is generated on the admin virtual machine in the Oracle SOA Suite on Marketplace.
  • Once the report generation is complete, you can find the report in the following location: /u01/logs/migration_report_<timestamp>.txt.
The migration report has the following sections that highlight the differences between the Oracle SOA Cloud Service and the Oracle SOA Suite on Marketplace instances.
  1. Patches applied in the Oracle SOA Cloud Service instance but not in the Oracle SOA Suite on Marketplace instance.
  2. Patches applied in the Oracle SOA Suite on Marketplace instance but not in the Oracle SOA Cloud Service instance.
  3. Custom mount paths in the Oracle SOA Cloud Service instance.
  4. Custom deployments (EAR/WAR) in the Oracle SOA Cloud Service instance.
  5. Custom libraries in the Oracle SOA Cloud Service instance.

Perform the following steps to generate the migration report.

  1. In the OCI marketplace, choose Oracle SOA Suite – Migration Manager.
    The home page of the migration stack listing is displayed.
  2. Click Launch Stack.
    The Create Stack page is displayed.
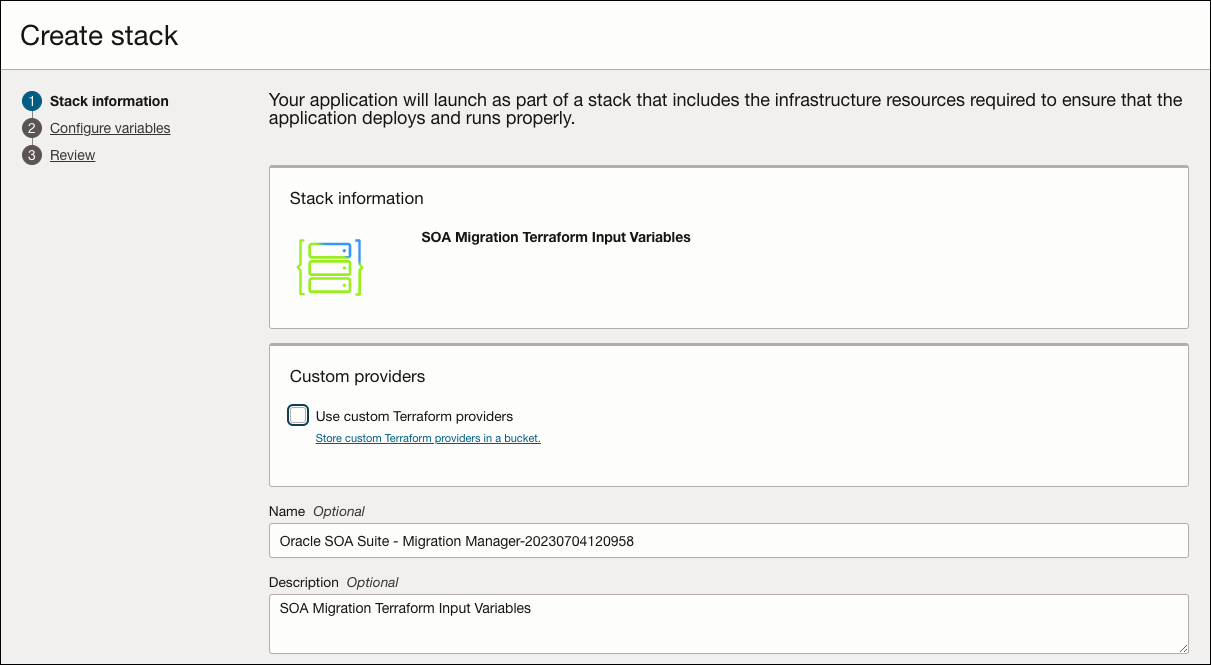
  3. In the Stack information section, specify the name and description of the migration stack, and click Next.
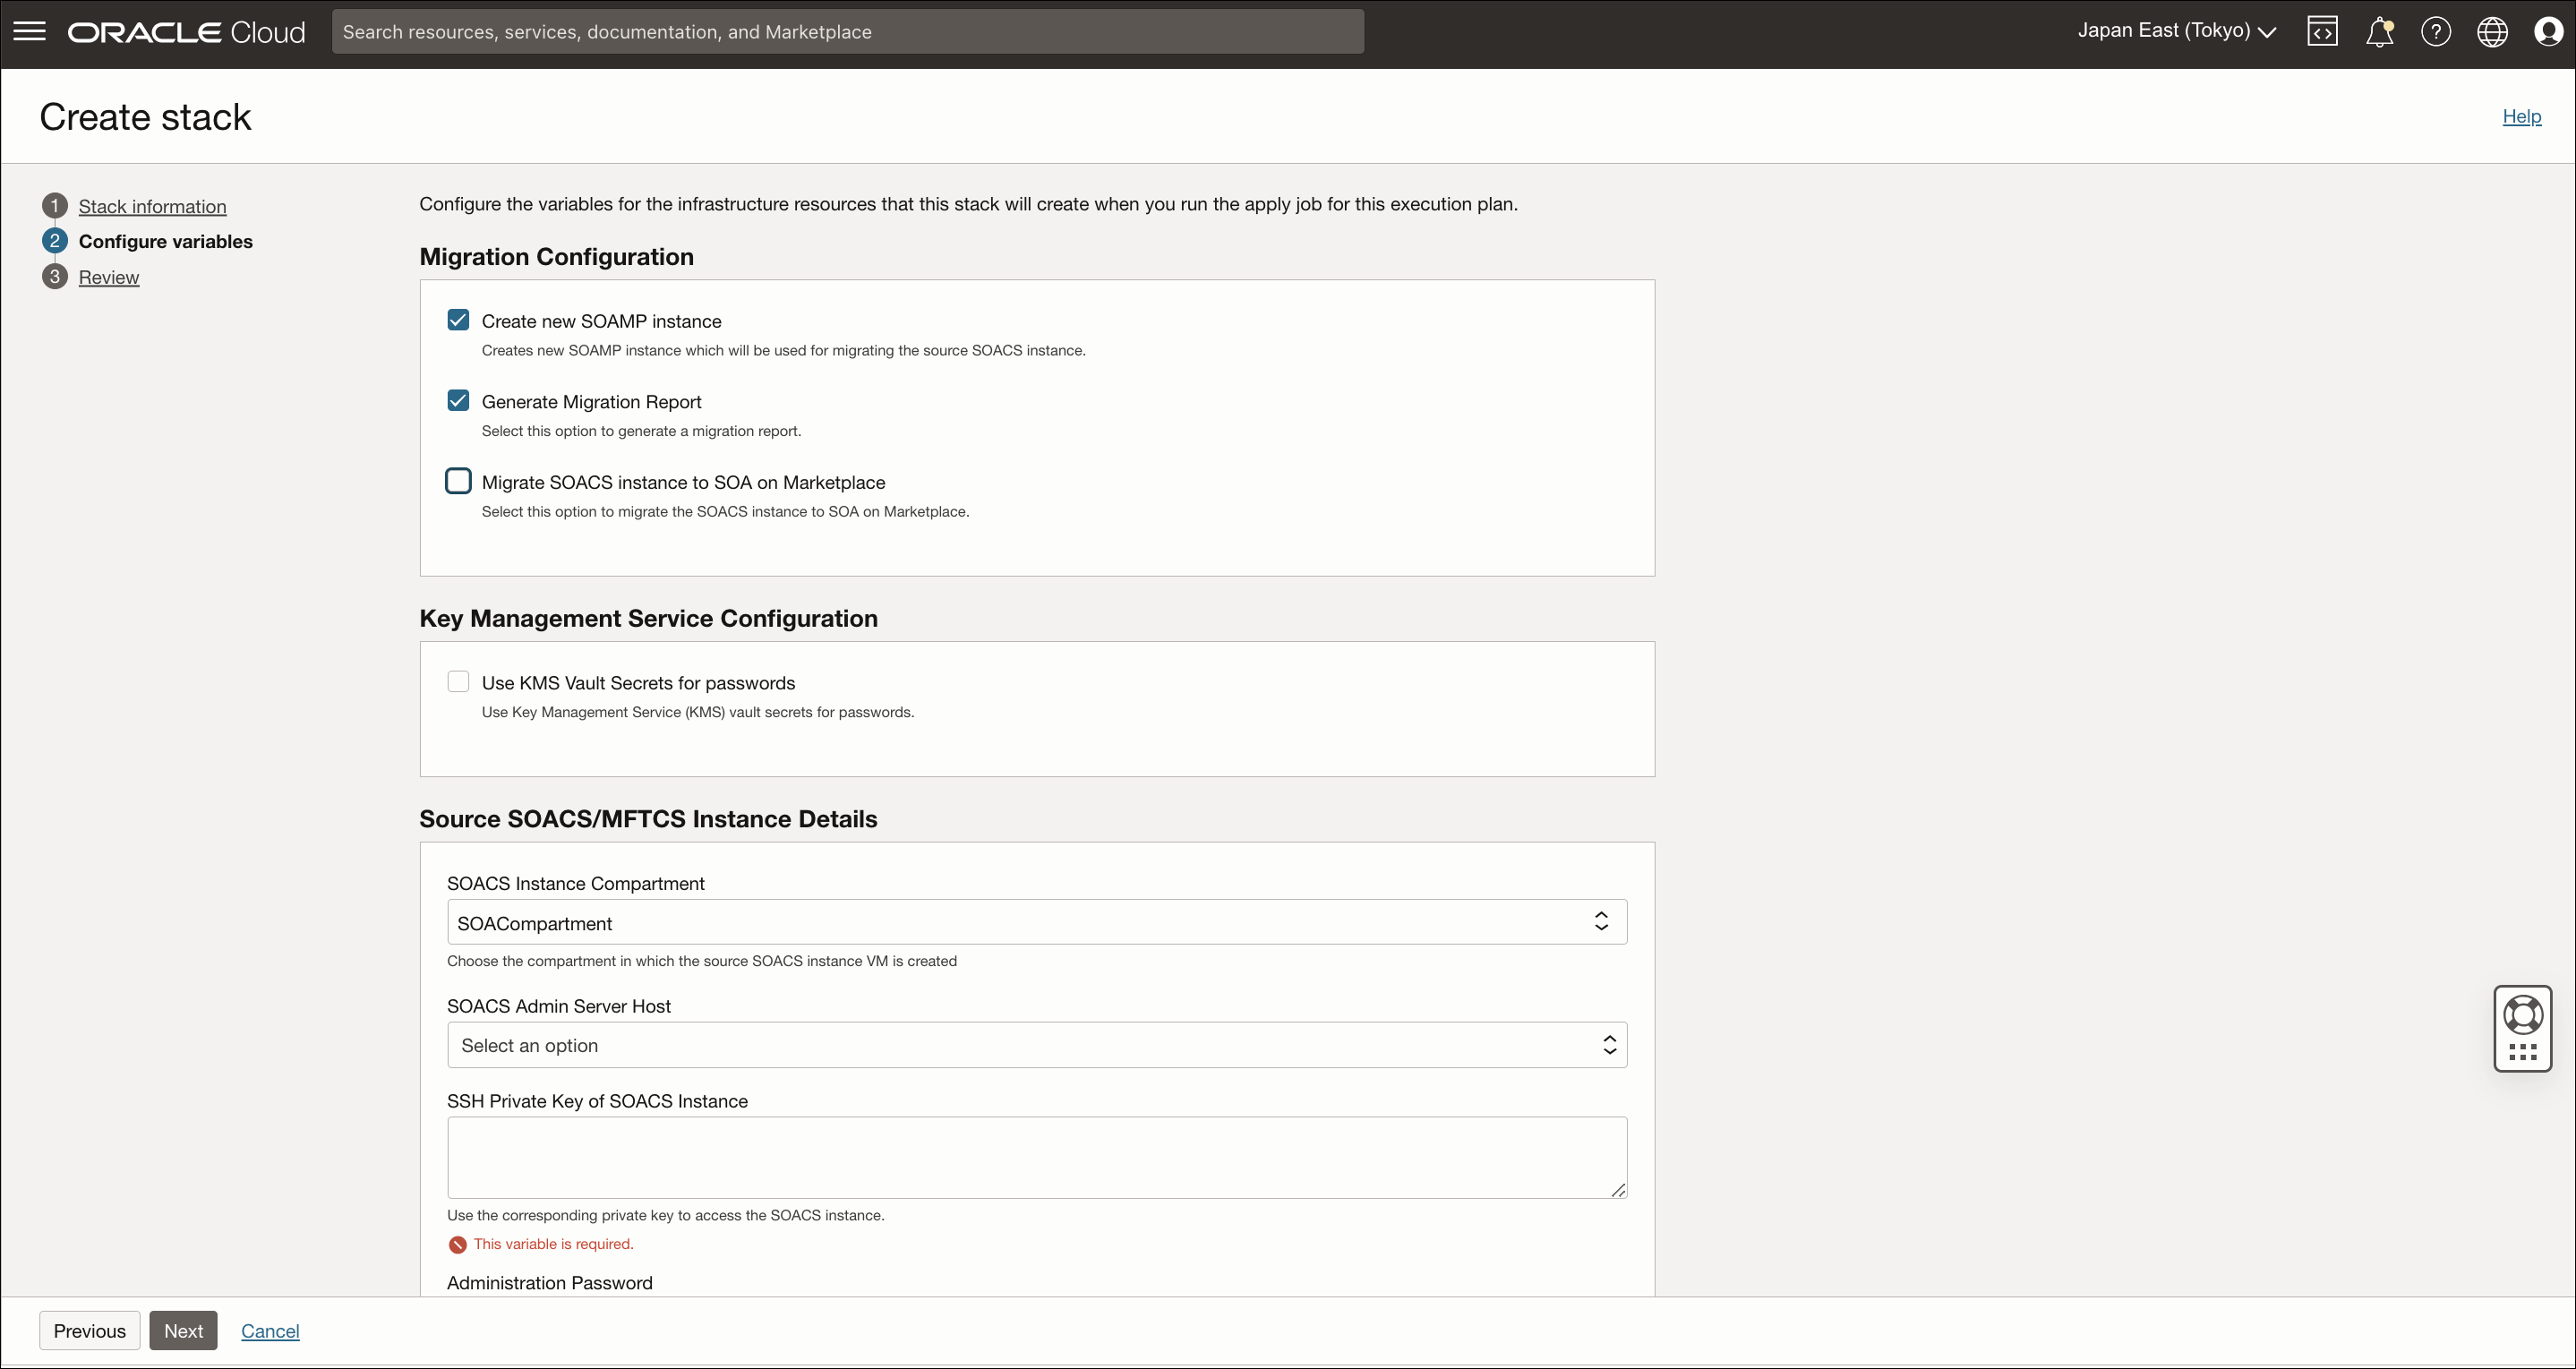
  4. In the Configure variables section, specify the following details.
    1. Select Generate Migration Report.
    2. To auto-provision a Oracle SOA Suite on Marketplace instance, select Create new SOAMP instance.
    3. Specify the Instance Compartment, Admin Server Host, SSH Private Key, Administration Password, Database Administrator Password, and RCU Schema Password of the source Oracle SOA Cloud Service instance.
    4. Specify the Pricing Type, Instance Compartment, Name Prefix, Domain Volume Size (GB), SSH Public Key, and SSH Private Key of the target Oracle SOA Suite on Marketplace.
  5. If either the source Oracle SOA Cloud Service or the target Oracle SOA Suite on Marketplace instances are in a private subnet, specify either the private endpoint or the Bastion host details to establish SSH connection.
  6. Click Next.
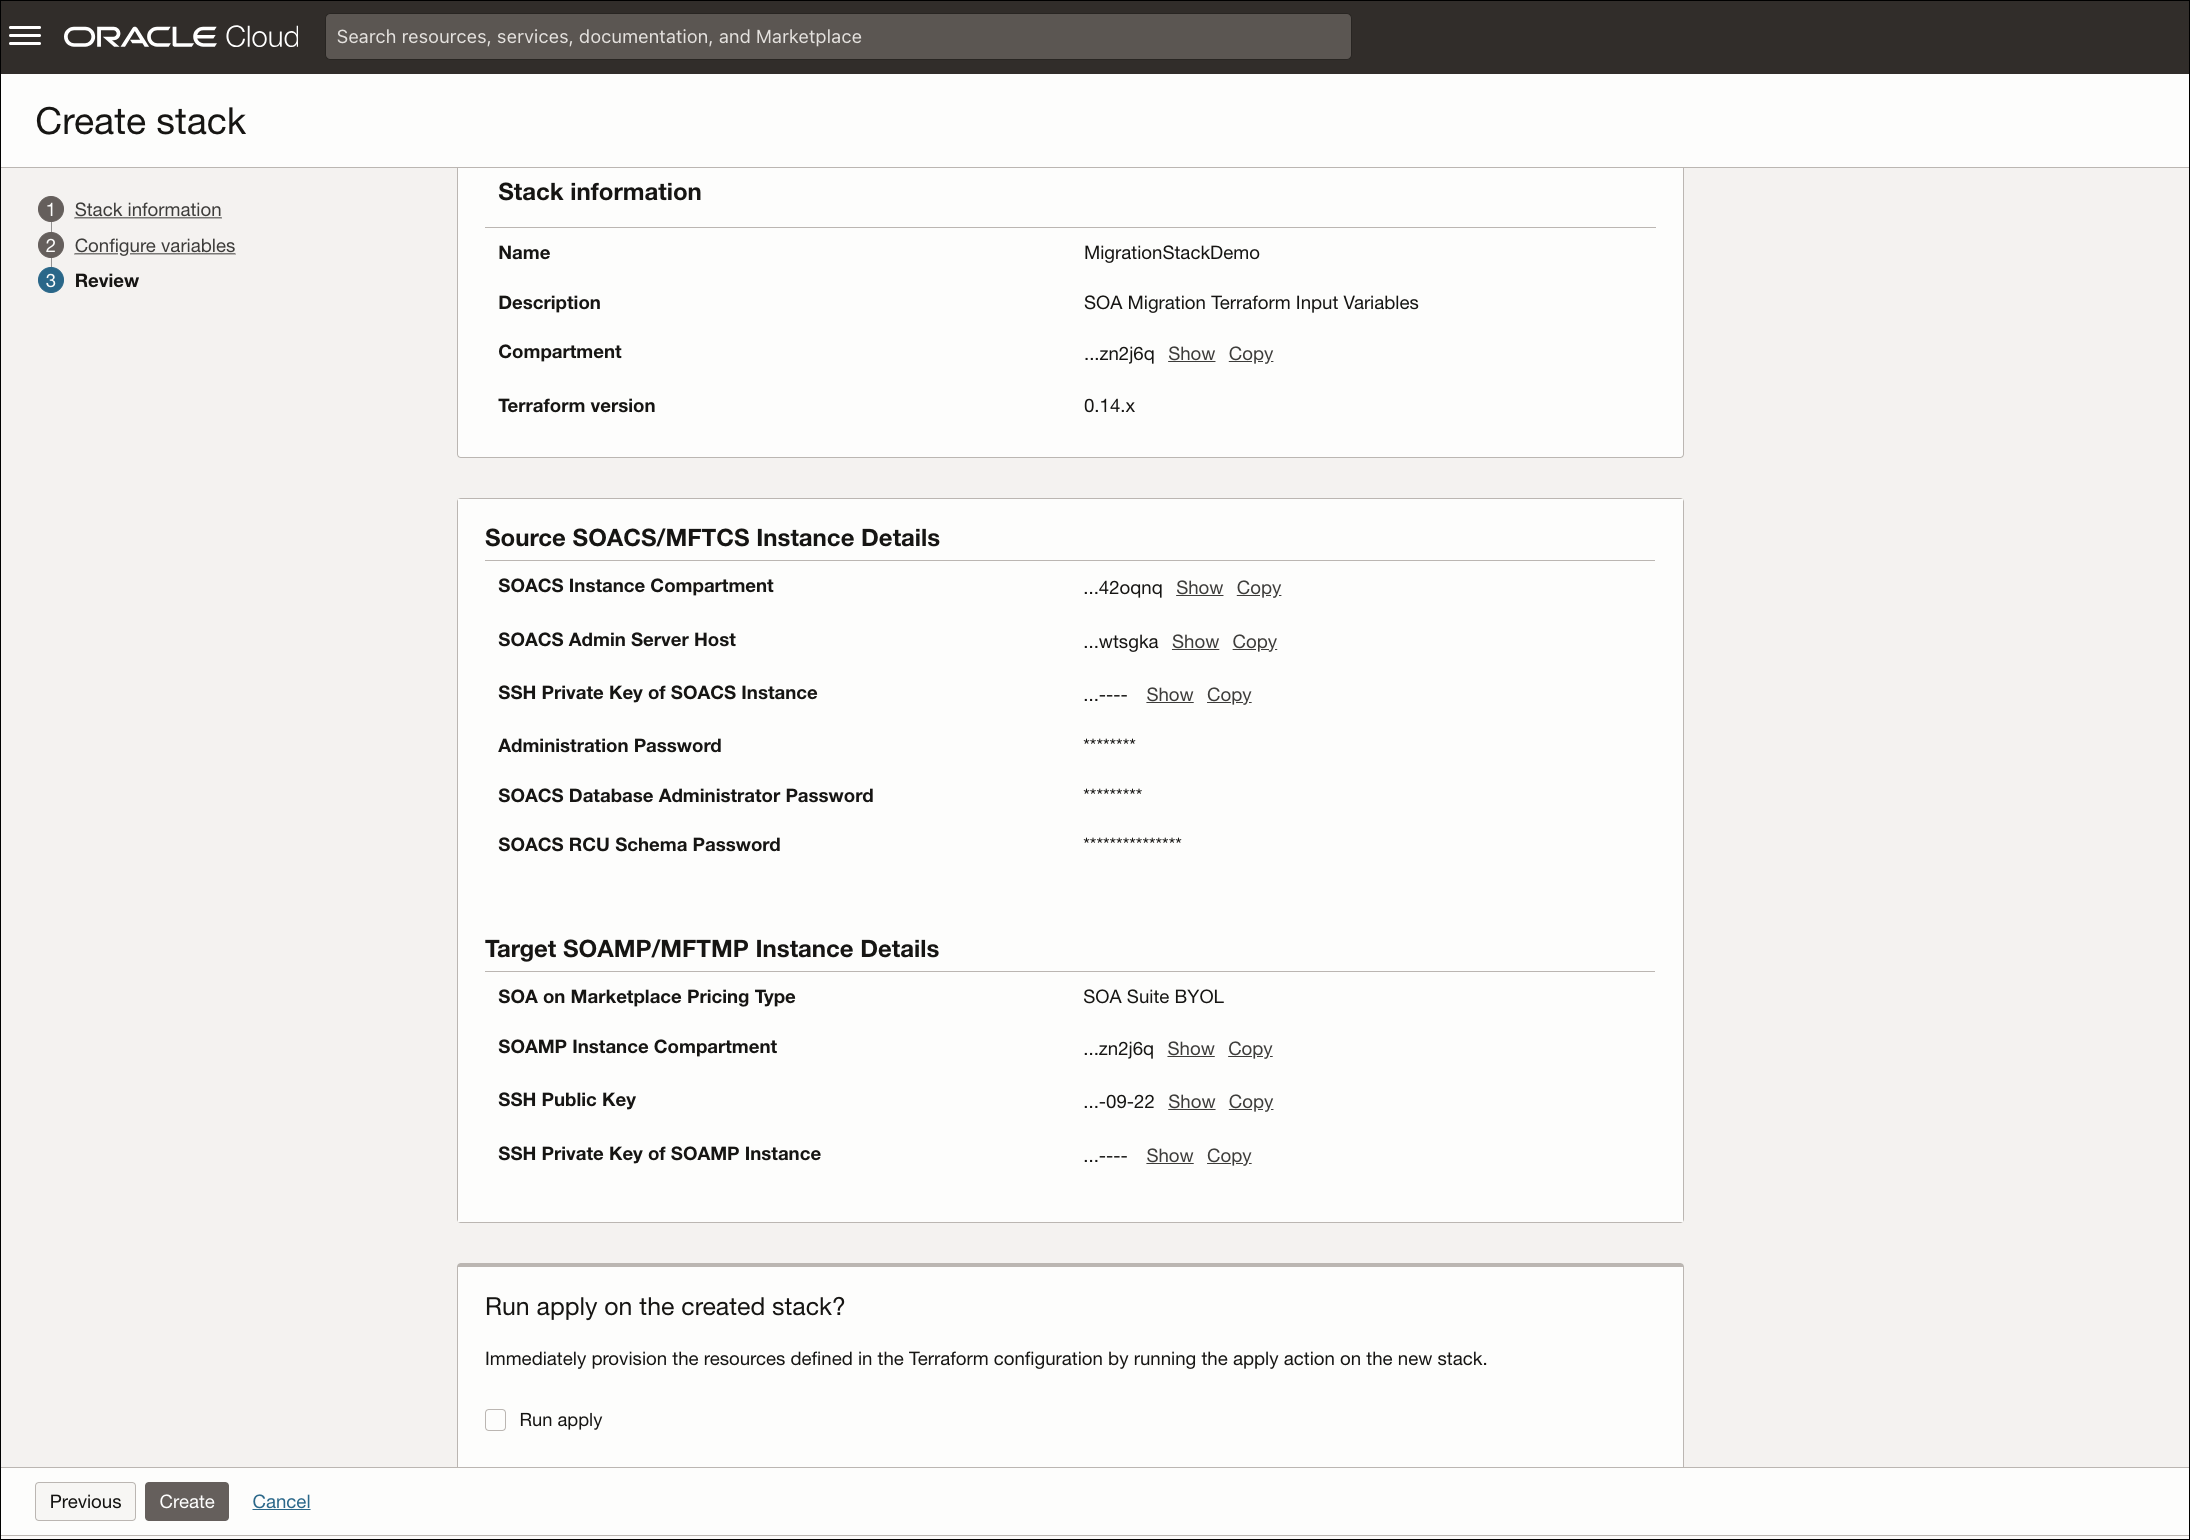
  7. In the Review section, review the details of the source and target instances. Select Run apply to automatically trigger the apply job operation when the migration stack is created.
  8. Click Create to create the migration stack. The apply job operation is automatically triggered.
    Once the report generation is complete, you can find the report in the following location: /u01/logs/migration_report_<timestamp>.txt.

Run the Migration Manager by Editing the Migration Stack

After generating the report, you can edit the migration stack to run the migration manager.

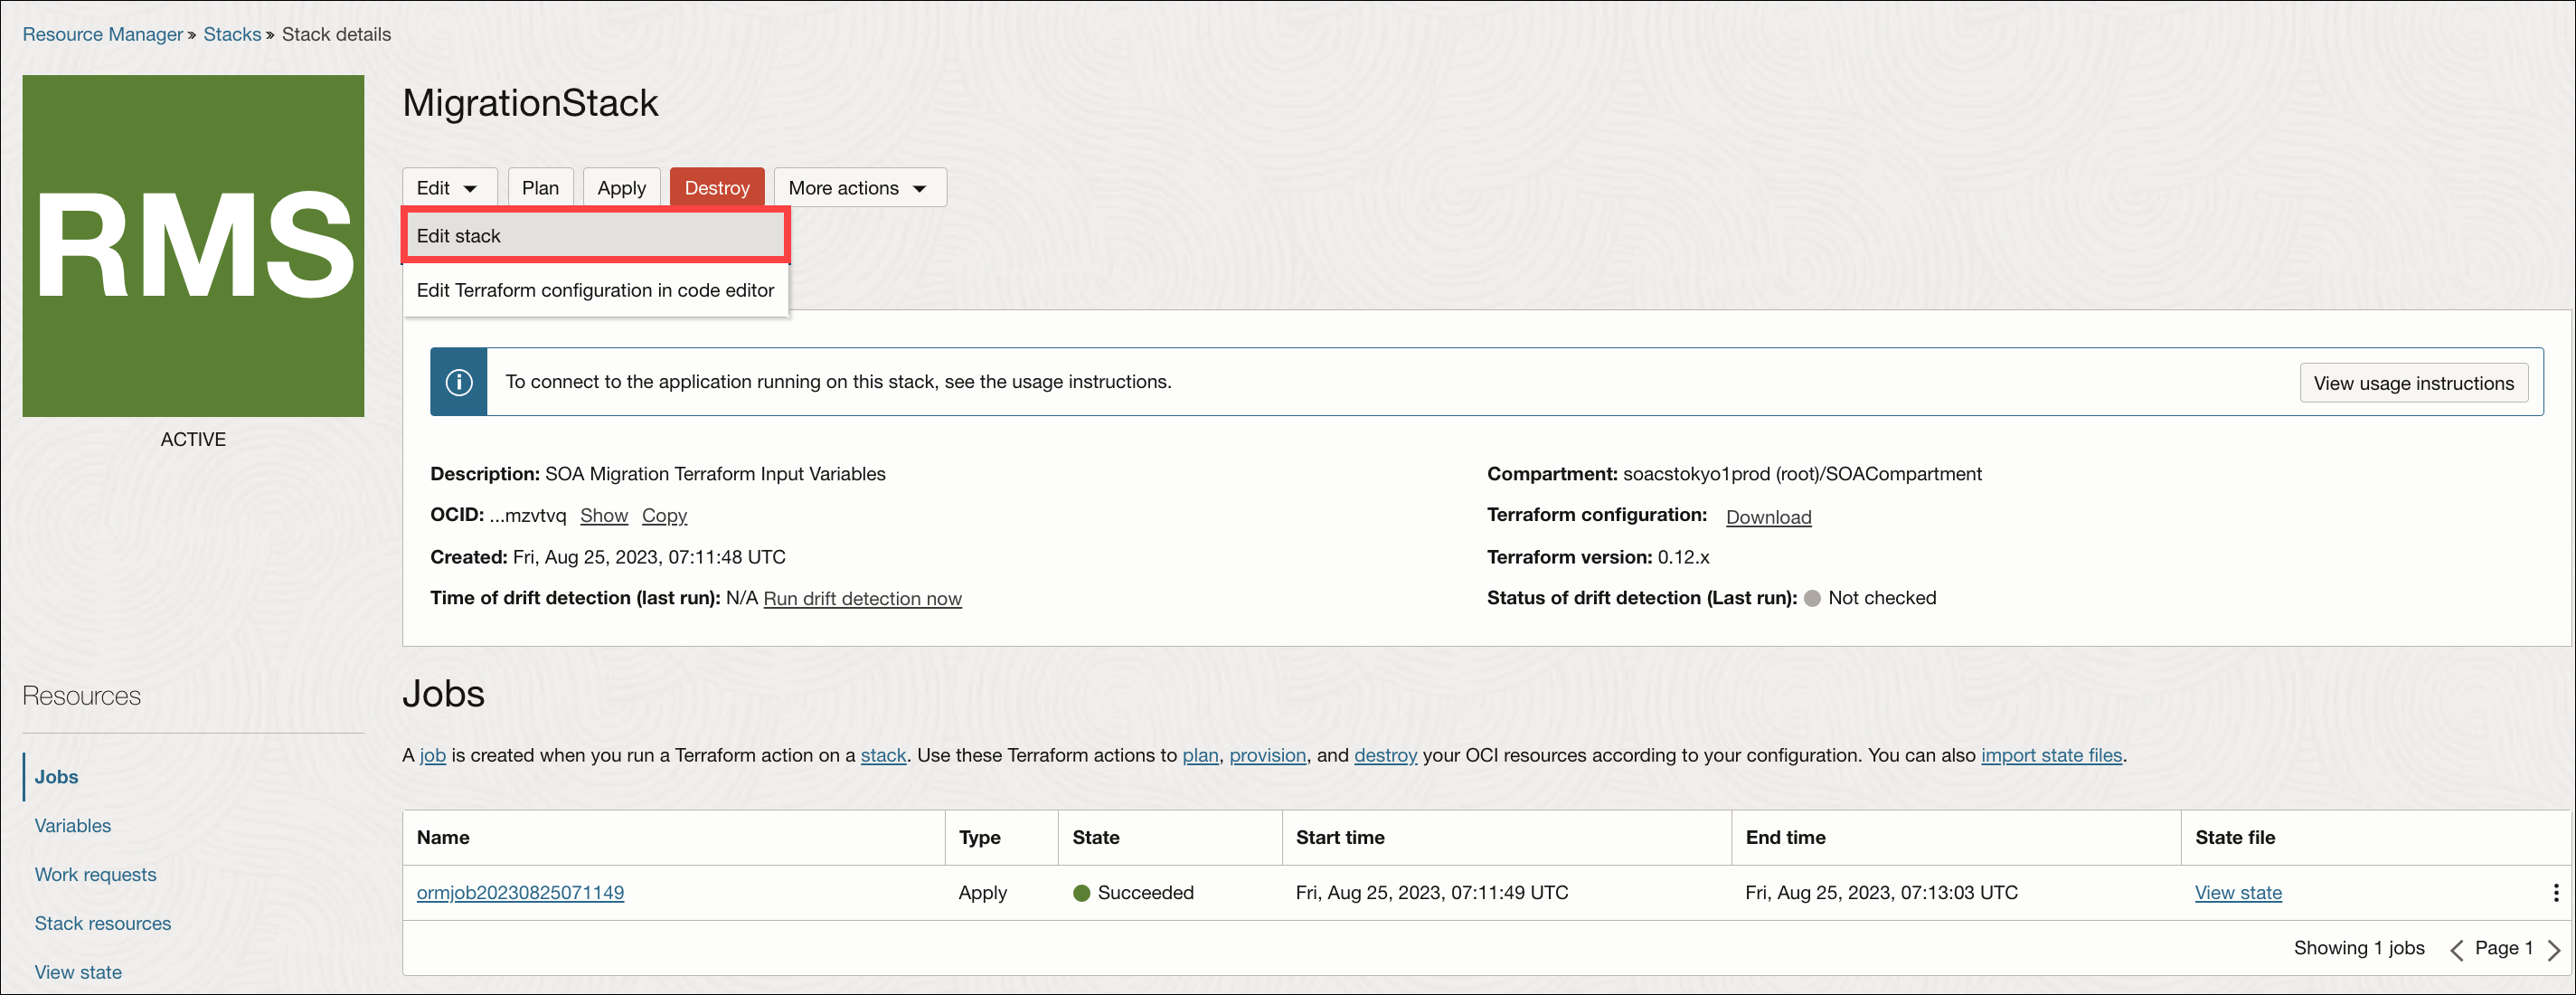
  1. On the Migration Stack page, click Edit and select Edit stack.
  2. In the Stack information section, click Next.
  3. In the Configure variables section, select Migrate SOACS instance to SOA on Marketplace and click Next.
  4. In the Review section, select Run apply and click Save changes.
    The apply job operation is automatically triggered.