 Build a Docker Image of a Node.js Microservice and Push it to OCI Registry using Visual Builder Studio
 Before You Begin
This 15-minute tutorial shows you how to configure a build job in a Visual Builder Studio (VB Studio) project to create a Docker image of a Node.js microservice and then push it to Oracle Cloud Infrastructure Registry (OCIR) Docker registry.
Background
OCIR is an Oracle-managed registry that enables you to store, share, and manage development artifacts like Docker images. You can use OCIR as a private Docker registry for internal and public use, pushing and pulling Docker images to and from the Registry using the Docker V2 API and the standard Docker command-line interface (CLI).
In this tutorial, you'll complete these steps to build and push a Docker image to OCIR:
- Create a Docker file in a VB Studio Git repository
- Configure a job in VB Studio to:
- Log in to OCIR
- Build a Docker image of a Node.js application
- Push the Docker image to OCIR
- Run the Docker image on your computer
What Do You Need?
This section lists the input values you need to complete this tutorial and explains how to get them. When you have them, replace the default values in this section's input fields with your actual values. The values you substitute automatically replace the default values used in the commands and snippets further down in the tutorial, allowing them to be used as-is with no further editing. In the commands and snippets, these input values are highlighted in bold. To copy the snippet or the command, click its Copy  icon.
icon.
For example, one of the input values you need is the OCI region key, which in this tutorial is set to iad, by default. To provide your region key, in the OCI Region Key's input box below, replace iad with your region key. After changing the region key, verify it in the Configure a Build Job section's Step 8 registry host value.
This substitution functionality is provided by JavaScript. To ensure you see the values and use them, you might have to enable JavaScript within your browser.
Note that the values you enter in this tutorial are not saved or uploaded. When you refresh the page, all input values revert to their default values. If you don't want to enter your values in this section's input fields, then don't copy or use the bold text values in the commands and snippets. Instead, replace them with your own values before using the commands and snippets. If you're not sure what the bold text value is, hover mouse over it.
You'll need these items to complete this tutorial:
- A web browser
- Your Oracle Cloud account credentials
- VB Studio Organization Administrator role assigned to you
- Access to the VB Studio project where the Node.js application is available
If you haven't created the project, see this tutorial.
- OCI region key. Your home region is displayed on the tenancy's details page. See Viewing the Tenancy Details Page to find out how to open the page and then see About Regions and Availability Domains to know your region's key.
OCI Region Key .ocir.io
Here's an example of the Tenancy Details page:
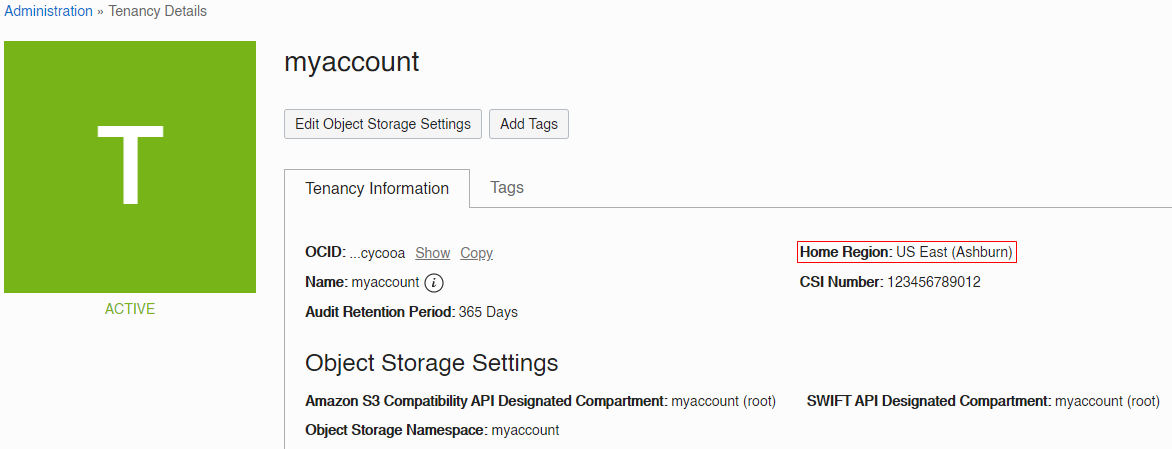
Description of the illustration oci_tenancy_region.png - OCI tenancy's name. Your tenancy's name is displayed on the tenancy's details page. See Viewing the Tenancy Details Page to find out how to open the page.
Tenancy Name
Here's an example of the Tenancy Details page:
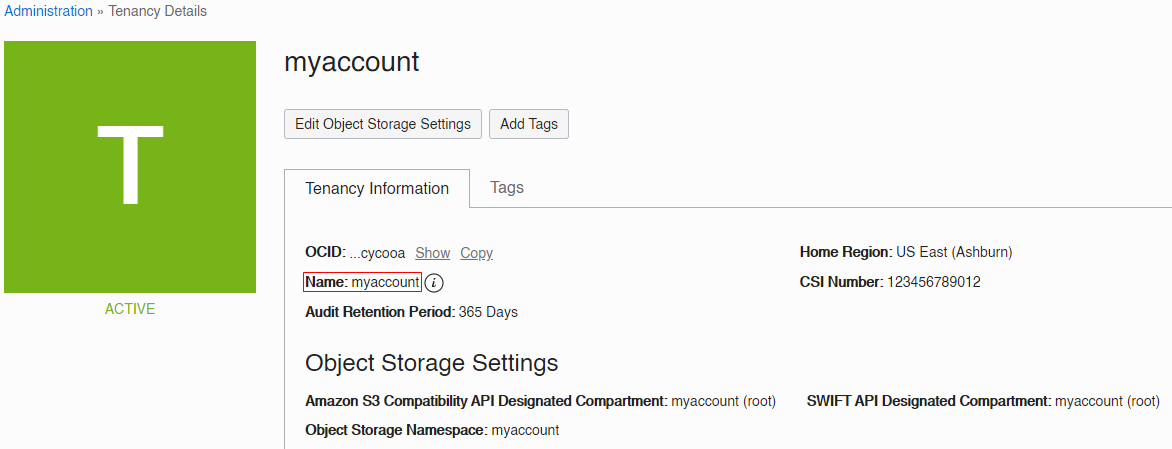
Description of the illustration oci_tenancy_name.png - An OCI user's name and authentication token who belongs to either the tenancy's Administrators group or a group to which a policy grants the REPOSITORY_CREATE permission. For details, see Policies to Control Repository Access.
To find out how to generate the auth token, see Getting an Auth Token.
OCI User Name
User's Auth Token
- Docker terminal to run the Docker image on your computer
To install Docker on your computer, see https://docs.docker.com/install/#supported-platforms.
 Create Build VM Template and Add Build VM
- Open VB Studio.
- In the navigation menu, click Organization.
- On the Organization page, click the Virtual Machines Templates tab.

Description of the illustration org_vmtemplates.png - Click + Create Template.
- In the New VM Template dialog box, enter these details and click Create.
- Name:
Node.js and Docker - Description:
Build VM template with Node.js and Docker

Description of the illustration org_vmtemplate_dialog.png VB Studio creates a Build VM template with the required Build VM components.
- Name:
- From the left list, select the Node.js and Docker template you just created. On the right, click Configure Software.
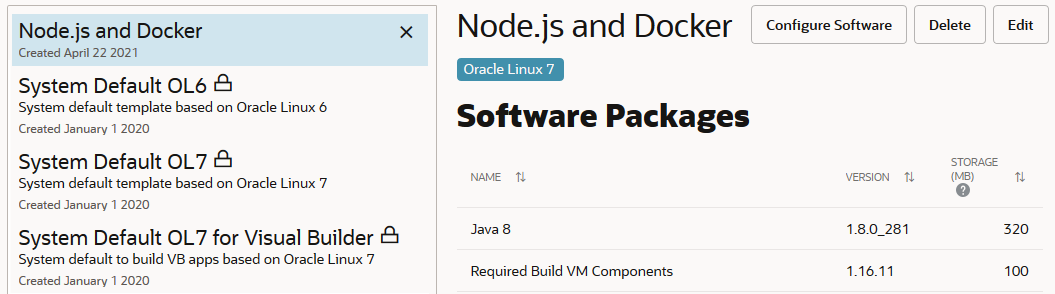
Description of the illustration org_vmtemplate_config.png The software versions you see in this tutorial's images might be different what you see in your VB Studio organization.
- In the search box, enter
Dockerand press Enter.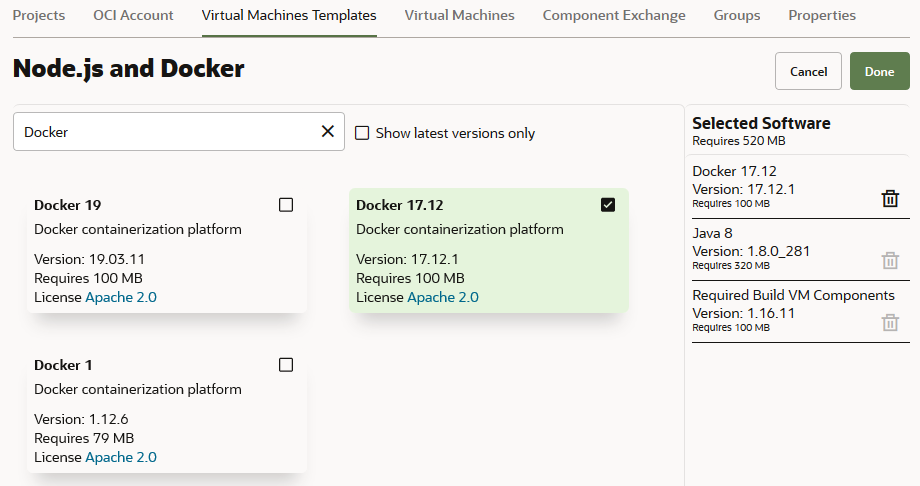
Description of the illustration vmtemplate_docker.png - In the Docker 17.12 tile, select the check box
The Docker software adds to the Selected Software list.
- In the search box, enter
Node.jsand select the Show latest versions only check box.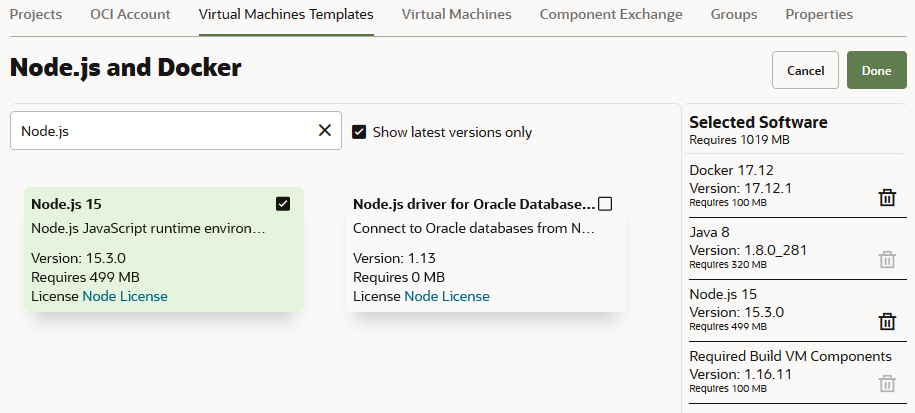
Description of the illustration vmtemplate_nodejs.png - In the Node.js 15 tile, select the check box.
The Node.js 15 software adds to the Selected Software list.
- Click Done.
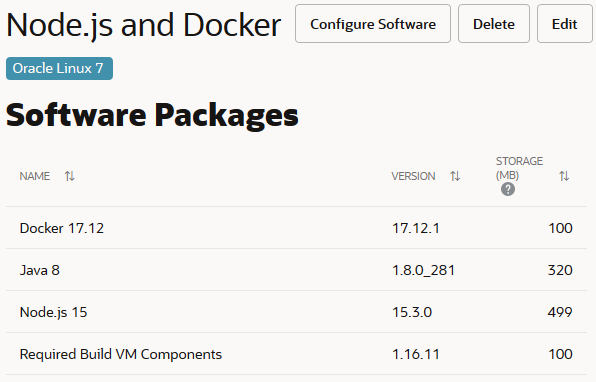
After you've added the required software, your template should look like this:
Description of the illustration org_vmtemplate_software.png - Click the Virtual Machines tab.
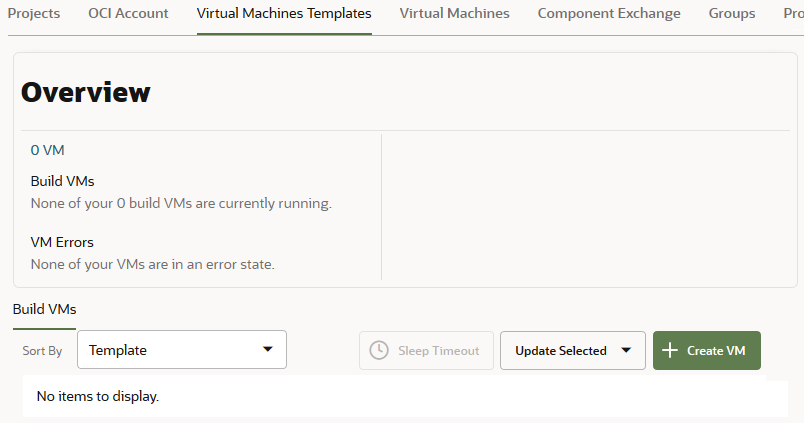
Description of the illustration org_vm.png - Click + Create VM.
- In the Add Build VM dialog box, enter these details and click Add.
- Quantity:
1 - VM Template: Node.js and Docker
- Region: Select the OCI region where your VB Studio account is located, or the one that's closest to you geographically
- Shape: Select the VM's shape that determines the number of CPUs, amount of memory, and other resources allocated to the created instance
- VCN Selection: Select the Virtual Cloud Network (VCN) to use.
To use the VB Studio compartment's default VCN, select Default.
To use another compartment's VCN, select Custom. In VCN Compartment and VCN, select the OCI compartment and the VCN to use.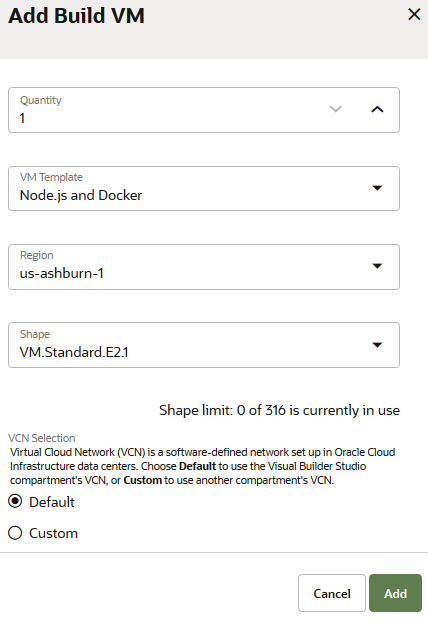
Description of the illustration org_newvm_dialog.png
After you've added the VM, your Virtual Machines tab should look like this:

Description of the illustration org_vm_pending.png - Quantity:
- From Actions
 , select Start.
The VM's status changes to Starting.
 Add the Docker File to the Git Repository
- On the Organization page, click the Projects tab.
- Click the My Nodejs App project.
- In the left navigation menu, click Git.
- From the Repositories list, select my-nodejs-app.git.
- Click + File.

Description of the illustration git_populated_repo.png - In File Name, enter
Dockerfile. - In the content area, copy and paste this code.
Click to copy the code.
FROM node:15
ADD main.js ./
ADD package.json ./
RUN npm install
EXPOSE 80
CMD [ "npm", "start" ]
The Docker script performs these actions:
- Downloads the Node.js version 15 Docker image to the build workspace
- Adds the
main.jsandpackage.jsonfiles to the build workspace - Using the
npm installcommand, downloads the dependencies defined in thepackage.jsonfile - Exposes Docker container's port 80
- Starts the application to listen on port 80
If you want to use your own corporate NPM registry, then configure it before the
RUN npm installcommand. - Click Commit.
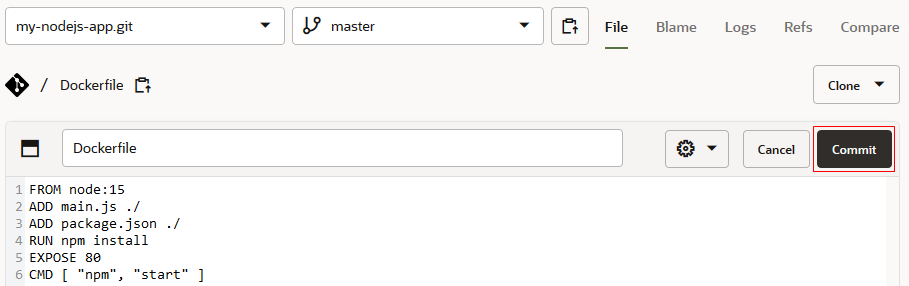
Description of the illustration git_addfile.png - In the Commit Changes dialog box, click Commit.
 Configure a Build Job
- In the left navigation menu, click Builds.
- In the Jobs tab, click + Create Job.
- In the New Job dialog box, enter these values and click Create.
- Job Name:
build-nodejs-docker - Description:
Job to create a Docker image of a Node.js app and push it to OCIR - Template: Node.js and Docker
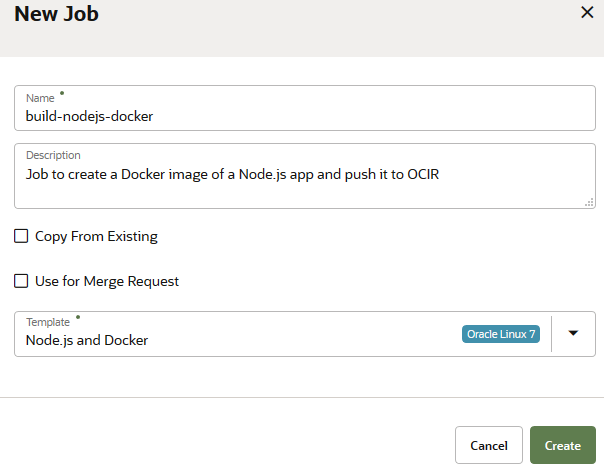
Description of the illustration new_job_dialog.png - Job Name:
- In the Configure
 tab, click the Git tab.
 - From Add Git, select Git.
- In Repository, select my-nodejs-app.git.
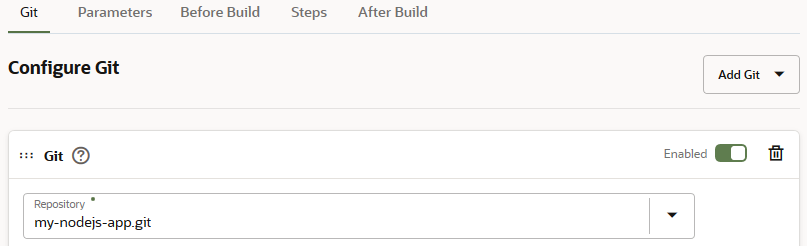
Description of the illustration configure_job_sourcecontrol.png - Click the Steps tab. From Add Step, select Docker, and then select Docker login.
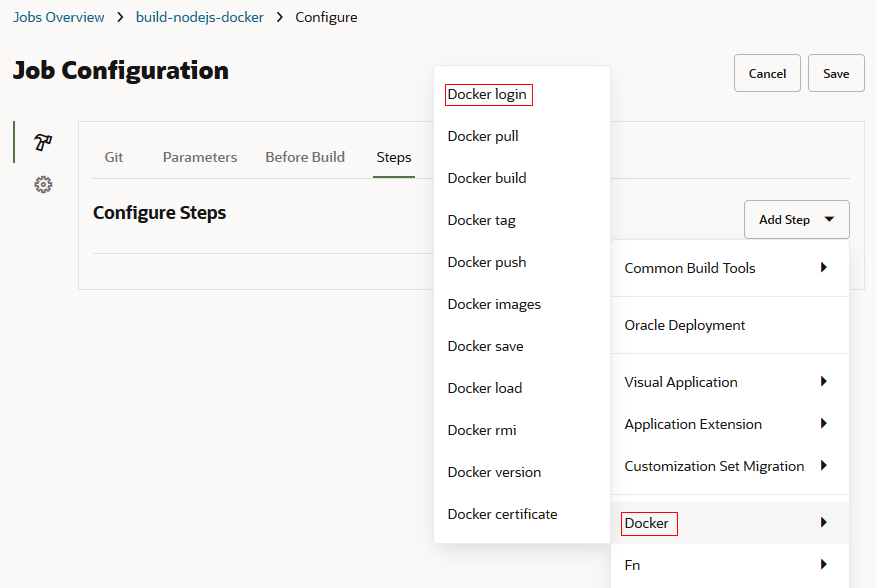
Description of the illustration configure_job_addstep.png - In Registry Host, enter this value:
.ocir.io - In Registry Username, enter this value:
/ - In Password, enter this value:
Here's an example:
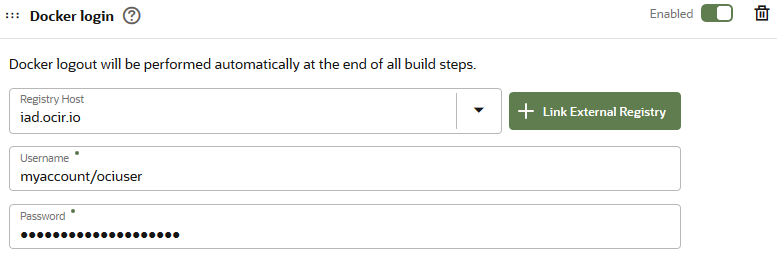
Description of the illustration configure_job_dockerlogin.png - From Add Step, select Docker, and then select Docker build.
- In Image Name, enter this value:
/ /my_nodejs_image In the above value,
my_nodejs_imageis the Docker image's name that you'll create. - (Optional) If you want to configure proxy, use the HTTP_PROXY and HTTPS_PROXY variables in the Options field and pass them as build arguments.
Here's an example:
--build-arg HTTP_PROXY=http://my-proxy-server:80
--build-arg HTTPS_PROXY=https://my-proxy-server:80
If you copy the above example code, remember to replace
my-proxy-server:80with your proxy server's address and port number.After Docker build configuration, it should look like this example:
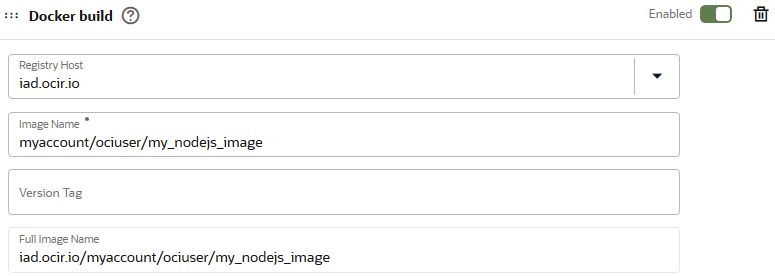
Description of the illustration configure_job_dockerbuild.png - From Add Step, select Docker, and then select Docker push.
No configuration is required in the Docker push section. It picks the required values from the Docker login and the Docker build sections.
Here's an example:
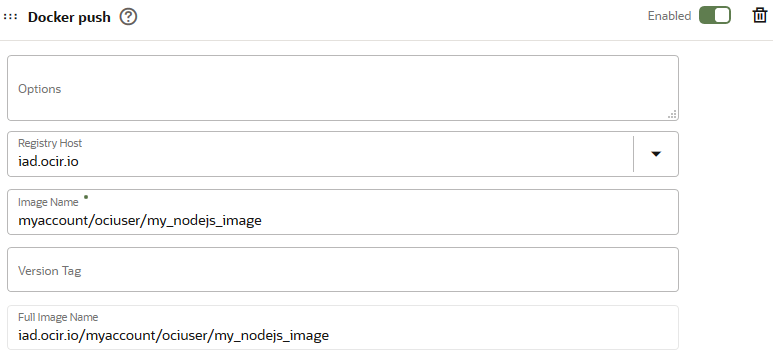
Description of the illustration configure_job_dockerpush.png - Scroll up and click Save.
- On the job's details page, click Build Now.
- Wait for the build to complete. If it's VM's first build, it'll take some time.
After the build is complete, click Build Log
 . You'll see a SUCCESSFUL message at the end of the build log.
[2020-01-01 07:35:57] Build completed.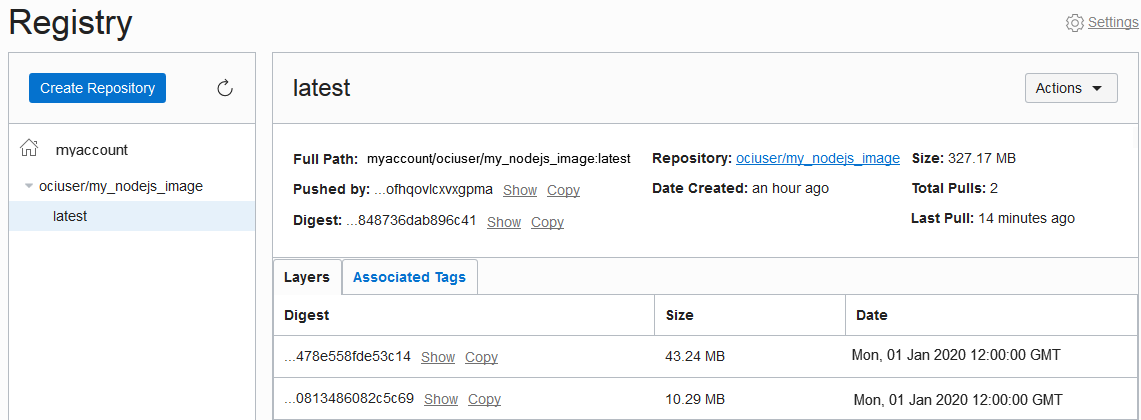
[2020-01-01 07:35:57] Status: DONE Result: SUCCESSFUL Duration: 9 min 24 sec - Open the Oracle Cloud Console.
- In the navigation menu, select Solutions and Platforms. Under Developer Services, select Container Registry (OCIR).
- Verify the registry image pushed to OCIR.
 Run the Node.js App
To test and run the Node.js app on your computer, use the Docker terminal.
- On your computer, open the Docker terminal.
- Run this command to log into OCIR:
$ docker login.ocir.io - When prompted, enter the user name and the auth token as the password. The password isn't visible when you type it. Press Enter when you're done.
Your username:
/ Your password:
- Run this command to pull the Docker image you pushed to OCIR from the build job:
$ docker pull.ocir.io/ / /my_nodejs_image Wait for the image to download.
Status: Downloaded newer image for
.ocir.io/ / /my_nodejs_image:latest .ocir.io/ / /my_nodejs_image:latest - Run this command to publish the image to a local container:
$ docker run -p 4000:80.ocir.io/ / /my_nodejs_image The above command runs the container and opens its port 80.
> NodeJSMicro@0.0.1 start /
> node main.js

Wed, 01 Jan 2020 12:00:00 GMT body-parser deprecated undefined extended: provide extended option at main.js:4:20
Listening at PORT 80
- In a web browser, enter
http://localhost:4000to open the application.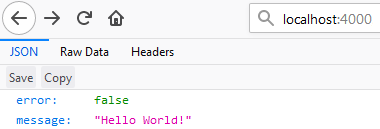
Description of the illustration browser_app_output.png - To test the
/addfunction ofmain.js, use curl.For example, open the curl command-line or the Git Bash command-line and run this command to get the sum of two numbers: 11 and 22.
$ curl -s -d "num1=11&num2=22" -X POST http://localhost:4000/addYou should see a similar output:
{"error":false,"message":"success","data":33}