 Create a Page with Nested Pages Using a Flow Container
 Before You Begin
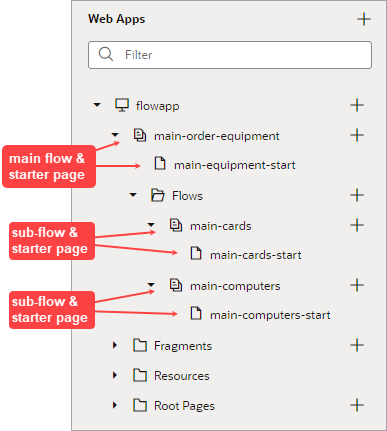
This 20-minute tutorial shows you how to embed pages from sub-flows in a main page, so that as you navigate between the pages of a sub-flow, the main page's contents are always shown at the top. In this example, we'll have a main flow for employees to order equipment. The main page will display the employee's name and title, and it'll have a Flow Container to display the pages of the sub-flows for ordering business cards and computers.
Background
Each page of an application is part of a flow. A flow groups pages that are used to perform a particular function. A flow named main is created by default when you
create an application. The main flow and its sub-flows can
each contain multiple pages, and each flow can have its own variables, types, action chains, and functions.
If you want the contents of a main flow's page to be at the top of each sub-flow's pages, you would:
- Use a Flow Container to embed the sub-pages in the main flow's page.
- Specify the default sub-flow to first be shown in the Flow Container.
- Specify the default page for each sub-flow.
When using a Flow Container, you edit the main flow's page and the sub-flow pages individually. On the main flow's page, you can't edit a sub-flow page, and on a sub-flow page, you can't edit the main flow's page. Also, you can only see a sub-flow page in the Flow Container when you run the application. You can specify navigation both between pages in a flow and from one flow to a sub-flow.
What Do You Need?
- Access to Oracle Visual Builder
- A supported browser
- Completion of the Create a Web Application in Oracle Visual Builder workshop, or equivalent.
 Import
an Application
Import
an Application
In this step, you'll import a simple one-page application to use as a basis for creating flows. The application simulates some tasks that a new company employee might perform as part of the onboarding process.
- Click this link
and download the
FlowApplication.zipfile. - In the web browser, log in to Oracle Visual Builder.
- On the Visual Applications page, click Import.

Description of the illustration vbcsfa_sec1_s3.png - In the Import dialog box, select Application from file.
- In the next Import dialog box, click the Drag and Drop area to select the downloaded
zipfile, or drop the file into the area.The application name is loaded to the Application Name and Application ID fields.
- Click Import.
A success message appears briefly, and FlowApplication appears on the Visual Applications page.
- Click FlowApplication to open it.
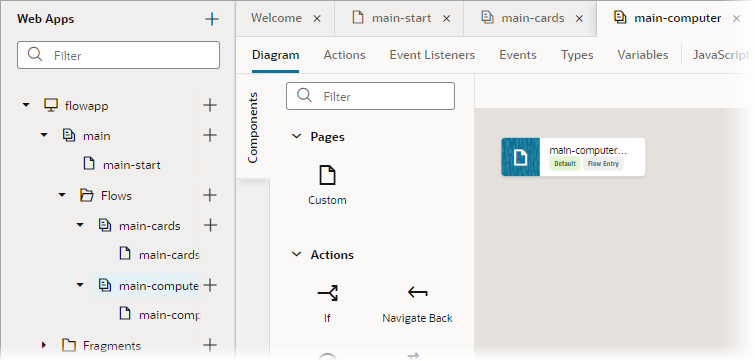
- In the Navigator, select the Web Apps tab. Expand the flowapp and main nodes, then click main-start to open the page in the Page Designer.
- The web application, flowapp, contains
just one page, main-start. The page has a
heading and a few additional components: two horizontal rules,
an avatar, and a paragraph.

Description of the illustration vbcsfa_sec1_s10.png Optional: To edit the initials, select the Avatar component, click the Data tab, and enter other initials. To modify the text of the paragraph component to display another name and title, select the Paragraph component and click Code to modify the paragraph's HTML code. When you are done, click Design to return to Design view.
 Create
Sub-Flows and a Flow Container
Create
Sub-Flows and a Flow Container
In this step, you'll create two sub-flows for new employee to order business cards and a computer.
- In the Web Apps pane, click the + sign next to main, and select Create Flow.

Description of the illustration vbcsfa_sec2_s1.png - In the Create Flow dialog box, enter
cardsaftermain-to create the main-cards flow, then click Create.A Flows folder gets created to contain the sub-flows for the main flow.
- In the Web Apps pane, click the + sign next to the new Flows folder. In the dialog
box, enter
computeraftermain-to create the main-computer flow, then click Create. - Expand the Flows node and the two sub-flow
nodes, if necessary.
When you create a flow, a start page for the flow is automatically created.
Description of the illustration vbcsfa_sec2_s4.png - Return to the main-start page. In the Components palette,
type "flow"
in the Filter box, then drag the Flow
Container component under the bottom horizontal rule.

Description of the illustration vbcsfa_sec2_s5.png - Click the Settings tab for the main-start
page. From the Default Flow drop-down list,
select main-cards.

Description of the illustration vbcsfa_sec2_s6.png When you run the application, the main-cards-start page will appear in the Flow Container by default.
 Add
Components to the Main Page of the Cards Flow
Add
Components to the Main Page of the Cards Flow
- In the Web Apps pane, click the main-cards-start page.
The sub-page looks much like the main-start page, with the components from the main-start page shown at the top. You can't select and edit these components here, as they can only be modified on the main-start page. To add components to the sub-page, add them under the upper section that displays the main flow's page.

Description of the illustration vbcsfa_sec3_s1.png A
divand Bind Text (showing "main cards") component have been automatically added to the sub-page, which we don't need. - Right-click the outermost
divelement on the canvas and select Delete:
Description of the illustration vbcsfa_sec3_s1.png - In the Components pane,
type "head"
in the Filter box, then drag and drop the Heading
component under the upper section. In the Properties pane, move the
slider to set the Level to H2.
In the Text field, enter
Order
                    Business Cards
.
Description of the illustration vbcsfa_sec3_s2.png - In the Components pane, type "layout" in the Filter box, then drag the Form Layout component below the Heading.
- In the Components pane,
type "text"
in the Filter box, then drag the Input
Text component into the Form Layout
component on the canvas.

Description of the illustration vbcsfa_sec3_s4.png - In the Properties pane, for the Input Text component, enter
Name
                on Card
in the Label Hint field. - Drag another Input
Text component into the Form Layout
component, under the first Input Text field:

Description of the illustration vbcsfa_sec3_s6.png - In the Properties pane, enter
Title
                on Card
in the Label Hint field. - In the Components pane, type "but" in the Filter box, then drag the Button component below the Form Layout component.
- In the Properties pane, enter
Continuefor the button's Label field. - Click the Structure tab.
The pane should have three Grid Row
components that contain the Heading, the Form
Layout, and the Button
components:

Description of the illustration vbcsfa_sec3_s9.png - Click the Structure and Components tabs to close them to make more room for the canvas. The page looks like
this:

Description of the illustration vbcsfa_sec3_s10.png
 Specify
Navigation within the Cards Flow
Specify
Navigation within the Cards Flow
In this step, you'll create another page in the cards flow and specify navigation from the first page to the second.
- In the Web Apps pane, click the + sign next to the main-cards flow and select Create Page.
- In the Create Page dialog box, enter
orderaftermain-cards-and click Create. The main-cards-order page opens.A
divand Bind Text (showing "main cards order") component have been automatically added to the sub-page, which we don't need. - Like you did before, right-click the outermost
divelement on the canvas and select Delete. - In the Components pane, type "head"
in the Filter box, then drag the Heading
component under the upper section. In the Properties pane, move the
slider to set the Level to H2.
In the Text field, enter
Place Card
                    Order
. - In the Components pane, type "but"
in the Filter box, then drag the Button
component under the Heading component.

Description of the illustration vbcsfa_sec4_s4.png - In the Properties pane, enter
Place
                    Order
in the Label field. - In the Web Apps pane, click the main-cards-start page, then click the Continue button.
- In the Properties pane, click the Events tab, then click + Event Listener and select On 'ojAction'.
- In the Actions palette, type "nav" in the Filter box, then drag the Navigate to Page action onto the canvas.
- In the Properties pane, for the Page drop-down list, select main-cards-order
from the Peer Pages list.
Now, when the Continue button is clicked on the main-cards-start page, the user is taken to the main-cards-order page.
 Add
Data and Components to the Main Page of the Computer Flow
Add
Data and Components to the Main Page of the Computer Flow
- Click this link to download the
ComputerTypes.csvfile. - In the Navigator, select the Business Objects
 tab.
tab. - Click the menu and select Data Manager.

Description of the illustration vbcsfa_sec5_s3.png - Click Import Business Objects.
- Click the Drag and Drop area to select the
ComputerTypes.csvfile, or drop the file into the area. Click Upload. - When the upload is successful, click Next on the upper right side of page.
- On the Business Objects step of the import wizard, click Next.
- On the Fields step of the wizard, click Finish. Click Close.
- In the Web Apps pane, click the main-computer-start page.
A
divand Bind Text (showing "main computer") component have been automatically added to the sub-page, which we don't need. - Like you did before, right-click the outermost
divelement on the canvas and select Delete. - In the Components pane, type "head"
in the Filter box, then drag the Heading
component under the upper section. In the Properties pane, move the
slider to set the Level to H2.
In the Text field, enter
Order a
                    Computer
. - In the Components pane, type "form lay" in the Filter box, then drag the Form Layout component under the Heading.
- In the Components pane, type "sing"
in the Filter box, then drag the Select
(Single) component into the Form Layout
component.

Description of the illustration vbcsfa_sec5_s13.png - In the Properties pane, click Add Options, on the Quick Start tab.
- In the Add Options wizard, select ComputerTypes, under Business Objects. Click Next.
- For the wizard's Bind Data step, select the label and value checkboxes to populate the Label and Value dropdown options. Click Next.

Description of the illustration vbcsfa_sec5_s15.png - For the Define Query step, click Finish.
- With the Select (Single) component selected, click the General tab. In the Label Hint field, enter
Select Computer. - From the Components pane, drag a Button component under the Select Computer field,
outside of the Form Layout component. In the Properties pane, enter
Place Orderin the Label field.
 Add
Buttons to Navigate to Each Sub-Flow
Add
Buttons to Navigate to Each Sub-Flow
Here, you'll add buttons to the main flow's page, for you to navigate from the main flow to the sub-flows.
- In the Web Apps pane, click the main-start page, then click the Page Designer tab.
- From the Components pane, drag the Button
component between the horizontal rule and the Flow
Container.

Description of the illustration vbcsfa_sec6_s2.png - In the Properties pane, enter
Order
                Business Cards
in the Label field. - Drag another Button component to the right
of the Order Business Cards button.
Tip: If you have trouble positioning the button component, try making your canvas wider.
- In the Properties pane, enter
Order
                Computer
in the Label field. - Click the Order Business Cards button, and in the Properties pane, click the Events tab.
- Click + Event Listener and select On 'ojAction'.
You are taken to the Action Chains editor. - Type "nav" in the Action palette's Filter box, then drag the Navigate to Flow action onto the canvas.
- In the Properties pane, select the Flow in Current Page radio button, and for the Flow drop-down list, select main-cards.

Description of the illustration vbcsfa_sec6_s9.png Now, when the Order Business Cards button is clicked on the main-start page, the user is taken to the main-cards flow.
- Click the Page Designer tab, for the main-start page.
- Click the Order Computer button, and in the Properties pane, click the Events tab.
- Click + Event Listener and select On 'ojAction'.
You are taken to the Action Chains editor. - Type "nav" in the Action palette's Filter box, then drag the Navigate to Flow action onto the canvas.
- In the Properties pane, select the Flow in Current Page radio button, and for the Flow drop-down list, select main-computer.
Now, when the Order Computer button is clicked on the main-start page, the user is taken to the main-computer flow.
- Click the Page Designer tab to see the
configured buttons on the main-start page.

Description of the illustration vbcsfa_sec6_s15.png
 Test
the Flow Application
Test
the Flow Application
- Click the Preview
 icon to open the
application in a new browser tab.
icon to open the
application in a new browser tab.
The main page displays the cards flow, which you specified as the default.

Description of the illustration vbcsfa_sec7_s1.png - Enter a name in the Name on Card field,
enter a title in the Title on Card field,
and then click Continue.
In the Place Card Order sub-flow, you could click the Place Order button, but nothing would happen, since you haven't configured it. You could configure the button to fire a notification or perform some other action.
- Click the Order Computer button. The main page now displays the computer flow.
- Select a value from the Select Computer drop-down list.
- Click the Order Business Cards button to confirm that you can navigate to that flow again.
- Close the browser tab.
 Want
to Learn More?
Want
to Learn More?
- Work with Flow Artifacts in Developing Applications with Oracle Visual Builder