 Save
a Web Application's Changes to a Remote Branch in Visual Builder Studio
Save
a Web Application's Changes to a Remote Branch in Visual Builder Studio Before You Begin
This 10-minute tutorial shows you how to save a web application's changes from your local branch to a remote branch using Visual Builder Studio.
Background
While developing the HR web application, you might have
noticed a dot in the header next to the Git repository:
![]()
This dot indicates you've made changes in your local branch that haven't been saved to the remote branch. It's important to save your changes as often as you can, but first, let's review a few concepts.
When you created a workspace early on in this series, you created a new branch called hrbranch, which was a copy of the master branch in the project’s Git repository. All the work you've done so far on the HR web application has been automatically saved to hrbranch, but these changes are not visible to others because hrbranch is a local branch in your workspace. To let others view your changes, you'll need to save your changes from the local branch in your workspace to a branch in a remote repository.
Saving changes to a remote branch is a two-step process: commit and push. The first step you'll do is "commit". A commit groups the files in your local branch that you want to save to the remote branch and provides a description of the group. Next, you'll "push" your changes. A push saves all the files in the groups that you've "committed" to the remote branch.
Once you commit and push your changes, all the changes from your local hrbranch become available to others in your project through the remote hrbranch.
What Do You Need?
- Access to VB Studio
- A supported browser
- Completion of the previous tutorials
 Commit
Changes in a Local Branch
Commit
Changes in a Local Branch
Let's group the changes you've made so far in your local branch for a commit. Ideally, you'll commit your changes as often as you can, so you have a string of commits with messages that clearly describe your updates.
- Click the Git repository menu in the header and
select Commit.

Description of the illustration commit_menu.png - In the Commit dialog box, enter a message that describes
your changes and click Commit.

Description of the illustration commit.png A successful message appears on the page. Click
 to close the message.
 Push
Changes to a Remote Branch
Push
Changes to a Remote Branch
Push your commits from the local branch in your workspace to the remote branch.
- Click the Git repository menu and select Push.
- In the Push dialog box, you'll see 1 commit ready to be pushed from your local branch to the remote branch. Click Push Changes.

When the successful message appears, click
.
 View
Changes in the Remote Branch
View
Changes in the Remote Branch
Now that your changes have been pushed, let's check them in the remote hrbranch.
- In the header, click Go to project page
 to return to the project's home page.
 - Click Git
 in the left navigation.
 - For the tutorial-hr-project.git repository, select hrbranch.
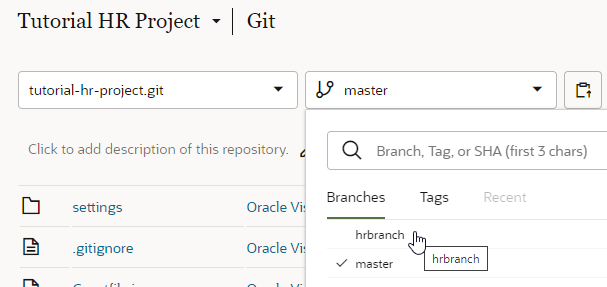
Description of the illustration git_view_hrbranch.png You can see your changes added to the remote hrbranch, indicated by your last commit message. Click the Logs tab to see all commits to the remote branch.
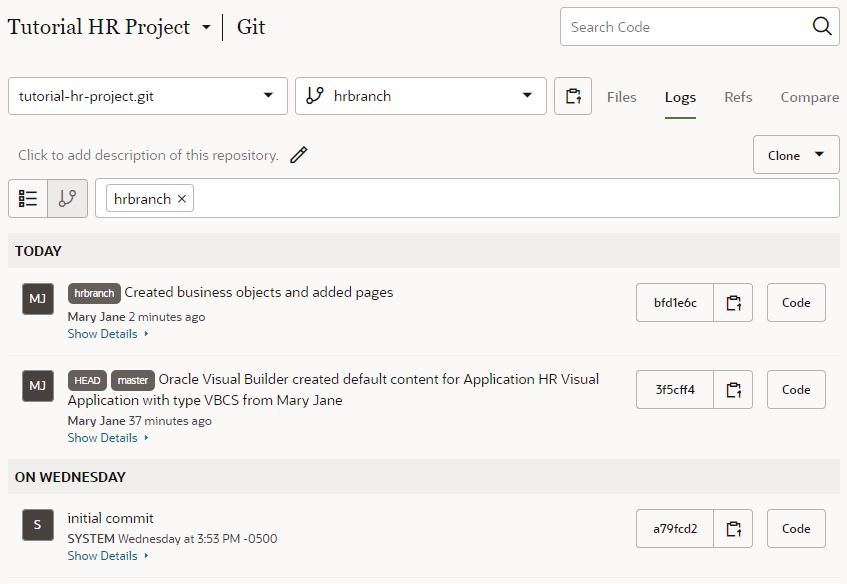
Description of the illustration git_view_hrbranch_logs.png Now if a teammate (for example, Clara Coder) wanted to work on this web application, she could use the Clone From Git option on the Workspaces page to clone hrbranch in her workspace, then use it as a base for her updates.