 Create
Pages for a Web Application in Visual Builder Studio
Create
Pages for a Web Application in Visual Builder Studio Before You Begin
This 15-minute tutorial shows you how to create web pages to display the business objects you created in the previous tutorial, Create a Web Application in Visual Builder Studio, and how to create new instances of the business objects.
Background
In the previous tutorial, you created the Location, Department, and Employee business objects.

In this tutorial, you'll create web pages to display the data from these business objects within your application. You'll also add a Create button to each web page to let your users add new information (in other words, to let them create new instances of the business object in the database).
What Do You Need?
- Access to VB Studio
- A supported browser
- Completion of the previous tutorial
 Use
the main-start Page to Display Departments
Use
the main-start Page to Display Departments
In this step, you'll create a table using a Table component to display your departments on the main-start page. The Table component is useful when you want to show lots of data in columns.
- Click Web Applications
 in the navigator.
 - If necessary, expand the Flows and main
nodes, then click main-start, the page that
was automatically created as the default home page for your
web application. (You can also open the page by clicking the main-start tab just below the header.) You're viewing the Page Designer.
You may want to click the Web Applications tab to close the navigator pane and expand your work area. You can also widen your browser window.
- Let's give this main-start page a title. From the Components palette, locate the Heading component under
Common and drag it onto the page.

Description of the illustration department_heading.png - Click Properties to open the Heading's properties pane, then enter
Departmentsin the Text field.
Description of the illustration departments.png - In the Components palette, scroll down to Collection and drag a Table component onto the page below the heading. A table with some sample data is added to the page. We'll use this table to display three columns that map to the department business object's id, name, and location fields.
- Select the table if necessary, then click Add Data in
the Properties pane to open the Add Data Quick Start.

Description of the illustration department_add_data_quick_start.png Quick Starts walk you through complex processes and help build the basics of your application quickly; in this step, we'll use the Add Data Quick Start to connect your table to the Department business object's data. The Quick Start wizard will prompt you to select your data source, select the fields from the business object that you want to show in your table, and filter data (which we won't do in this tutorial).
- On the Quick Start's Locate Data page, select the Department
business object, then click Next.

Description of the illustration department_add_data_1.png - On the Bind Data page, under item[i],
select id and name (in
that order). These two fields will show as
columns in your Departments table.

Description of the illustration department_add_data_2.png - Expand the locationObject and items
nodes (expand item[i] if it isn't already expanded) and
select name to enable the location name to
appear as another column in the table. Because we
created a reference from the Department business object to the
Location business object in the previous tutorial, the location's name field is now
available to us through the locationObject accessor, which lets us traverse relationships between the two
objects. Click Next.

Description of the illustration department_add_data_2a.png - On the Define Query page, click Finish.
A Departments table with three empty columns is displayed on the main-start page. Notice that the second Name column (which maps to the location name field) shows simply as Name because that's what we set for the Display Field when we created the Location reference.

Description of the illustration departments_table.png - To make the location name column descriptive, click the Data
tab in the Properties pane. Under Table Columns,
click
 Column Detail next to Name (locationObject). You won't see the icon until you hover the mouse next to the field.
- In the Columns, Header Text field, change
NametoLocation, then click Table
to return to the main Data tab.
Table
to return to the main Data tab.

Description of the illustration department_table_location_name_1.png

The main-start page now has a table with three columns: Id, Name, and Location. You won't see any information in your table because we are yet to import data for the Department business object.
 Add a
Create Page for the Department Business Object
Add a
Create Page for the Department Business Object
Now that we have a way to show departments, we'll add a Create page that lets users create new departments. With the help of the Add Create Page Quick Start, we'll connect to our data source, the Department business object, and select the fields that we want the user to provide values for.
- With the Departments table on the main-start page selected, click Quick Start, then click Add Create Page.
- On the Select Endpoint page, select the Department business object (if necessary) and click Next.
- On the Page Detail page, select location (name is already selected because it's a required field). Name and Location are the only fields the user needs to specify to create a department.
- Leave the Button label and other fields set to their default values. Click Finish.

Description of the illustration department_add_create.png A Create Department button appears in a Toolbar component above the table on the main-start page. (Click next to the button to see the Toolbar component.) Click the Web Applications tab to see the main-create-department page created in the pages list under Flows and main.

Description of the illustration department_add_create_result.png - Let's quickly test whether we can create departments. In the
Web App's tree, click the main-create-department
page to open it in the Page Designer.
The page has a form for you to enter the fields you specified. It also has two buttons: Cancel and Save.
- In the Page Designer toolbar, click Live to make the form active. (Click
Properties if you need to make room
for the form.)
To indicate that you are in Live view, the Live button now has a green background, and a green line appears around the page.
- Enter
Administrationin the Name field, and select Floor 1 from the Location list.
Description of the illustration department_add_create_live.png Click Save. A message appears briefly, and you are taken to the application's main page flow, where you see that the main-start page points to the main-create-department page. The arrow means that you can navigate from one page to the other.

Description of the illustration department_add_create_mainflow.png By convention, a page name has its flow name as a prefix. This simple application uses only the main flow. More complex applications can have more than one flow.
Tip: A page that's marked with a warning triangle usually indicates that the page's code has issues that you might want to review. For example, the warning for the main-start page here relates to a translation issue, which you can safely ignore. If you want, click Audits at the bottom of the screen to review and resolve issues in the Audits pane. You can also select messages that you don't want to be flagged and disable reporting for those messages in Code view. Pages without any issues appear with a green check mark in Page Flow.
- Open the main-start page (you can either click the main-start tab just below the header or click the page in the Web Apps pane), then
click Reload page
 to see the table row you created.

Description of the illustration department_add_create_reload.png - Click Design to return to Design view.
 Add a
Page to Display Employees
Add a
Page to Display Employees
In this step, you'll create a page to display employees, similar to the one you created for departments.
- In the Web Apps tree, under hrwebapp and Flows, click + (Create Page) next to the main node.
- In the Create Page dialog box, enter
employeesin the Page ID field after themain-prefix and click Create. The main-employees page opens in the Page Designer.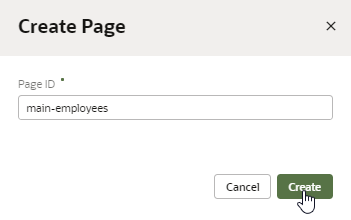
Description of the illustration employees_create_page.png - In the Components palette, locate the Heading component under Common and drag it onto the page.
- Click Properties, then in the heading's property pane, enter
Employeesin the Text field. - In the Components palette, scroll down to Collection and drag a Table component onto the page.
- Click Add Data.
- On the Locate Data page, select the Employee business object and click Next.
- On the Bind Data page, select id, name,
hireDate, and email under item[i]. The columns appear in the order selected; if you want to change the order, drag a Handle
 icon to reorder the columns as desired.

Description of the illustration employees_add_data_1.png - Expand the departmentObject and items
nodes (expand item[i] if it isn't already expanded) and
select name, then click Next.

Description of the illustration employees_add_data_2.png - On the Define Query page, click Finish.
An empty Employees table is displayed.
- To make the second Name column (which refers to the Department name field) descriptive, click Data in the Table's properties pane.
Under Table Columns, click Column
Detail next to Name (departmentObject).

Description of the illustration employees_table_department_name.png - In the Columns, Header Text field, change
NametoDepartment, then click Table
to return to the main Data tab.
The main-employees page now has a table with five columns: Id, Name, Hire Date, Email, and Department. You won't see any information in the table until we import data for the Employee business object in a later tutorial.

Description of the illustration employees_table.png

 Add a
Create Page for the Employee Business Object
Add a
Create Page for the Employee Business Object
In this step, add a Create page that lets your users create new employees.
- Click Quick Start, then click Add Create Page.
- On the Select Endpoint page, select the Employee business object (if necessary) and click Next.
- On the Page Detail page, select hireDate, email, and department, in that order (name is already selected because it's a required field).
- Leave the Button label field and other fields set to their default values. Click Finish.

Description of the illustration employees_add_create.png A Create Employee button appears above the table, and the main-create-employee page appears in the pages list.
- In the pages list, click the main-create-employee page to open it in the Page Designer.
- Click within the form on the page but outside of a component
(that is, in the Form Layout component on
the page). In the General tab of the
Form Layout's properties, set the Max Columns
value to 2.

Description of the illustration employees_add_create_max_columns.png The fields now appear in two columns.
- Click Live to make the form active. (To
make more room, click Properties.)
Enter
Leslie Smithin the Name field. Select today's date from the Hire Date calendar, and enterlsmith@example.comin the Email field. SelectAdministration(the only choice) from the Department list. (You can use other data if you wish, except for Department, because you have only one department.) Click Save.
VB Studio briefly displays a message and then places you in the main page flow of your application. As with the departments pages, you can navigate from the main-employees page to the main-create-employee page. But there is no connection between the Employee page flow and the Department page flow.

Description of the illustration employees_add_create_mainflow.png - Return to the main-employees page. (You can double-click the
page in the page flow, in addition to using other
navigation mechanisms.) Click Reload page
to display the row you created.
- Click Code (next to Design in the Page Designer toolbar) to view the HTML code for the main-employees page. You
can see the code for the heading, the toolbar, and the table
within
divelements. You could edit this code to create a customized user interface. The components and classes all begin withoj-, indicating that they are Oracle JavaScript Extension Toolkit (JET) components.

Description of the illustration employees_add_create_code.png - Click Design to return to the
main-employees page, then click Structure
to view the component structure on the page.

Description of the illustration employees_add_create_structure.png - Click Structure again.
 Change
the Name of the main-start Page
Change
the Name of the main-start Page
It makes sense at this point to change the name of the main-start page to main-departments, to match the name of the main-employees page.
- In the Web Apps pane, right-click the main-start
page and select Rename.

Description of the illustration main_start_rename.png - In the Rename dialog box, replace
startwithdepartmentsin the ID field and click Rename. - Click main. The Page Flow shows the
renamed page along with the others.

Description of the illustration main_start_rename_mainflow.png - Double-click main-departments to go to that page again.
- Although you have changed its name, the main-departments
page will continue to be the page where your application
starts when you run it. To find out why, click Source
View
 in the navigator and expand the webApps, hrwebapp, flows,
and main nodes. Then click main-flow.json
to open it.
in the navigator and expand the webApps, hrwebapp, flows,
and main nodes. Then click main-flow.json
to open it.

Description of the illustration mainflow_json.png You can see that the
defaultPageproperty has been set to the valuemain-departments, making it the starting page for the web application flow. (If we'd looked before, it would have been set tomain-start.)