Create and Configure the CSM Pipeline

To ensure the configuration jobs runs automatically in the correct order, create a pipeline and set the dependency.

When you define the pipeline, make sure that the import configuration job triggers after the export configuration job is successful. If the import configuration job fails, run the cancel configuration migration job. Don't add the apply configuration job to the pipeline. You should run it manually after verifying your changes on the target Oracle Cloud Applications instance.
  1. In the left navigator, click Builds Builds.
  2. Click the Pipelines tab.
  3. Click + Create Pipeline.
  4. In the Create Pipeline dialog box, in Name and Description, enter a unique name and description.
  5. Click Create.

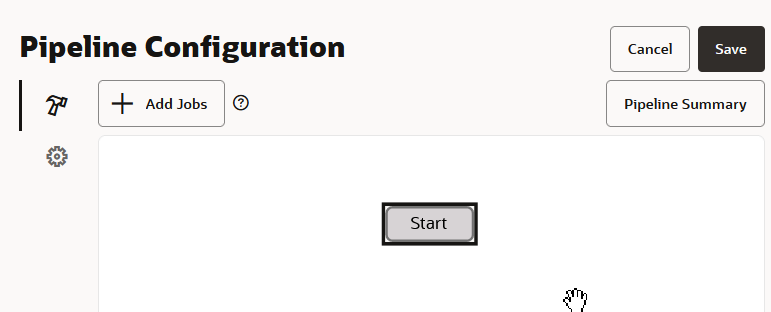
    The Pipeline Configuration window is displayed with the Start node in the center.


    Description of pipeline-initial-configuration-start-node.png follows
    Description of the illustration pipeline-initial-configuration-start-node.png

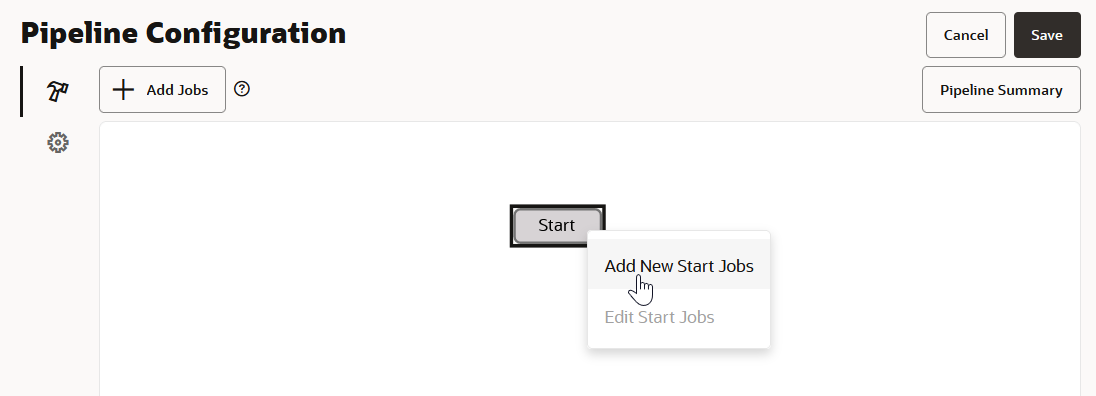
  6. Right-click the Start node and select Add New Start Jobs.


    Description of pipeline-add-new-start-jobs.png follows
    Description of the illustration pipeline-add-new-start-jobs.png

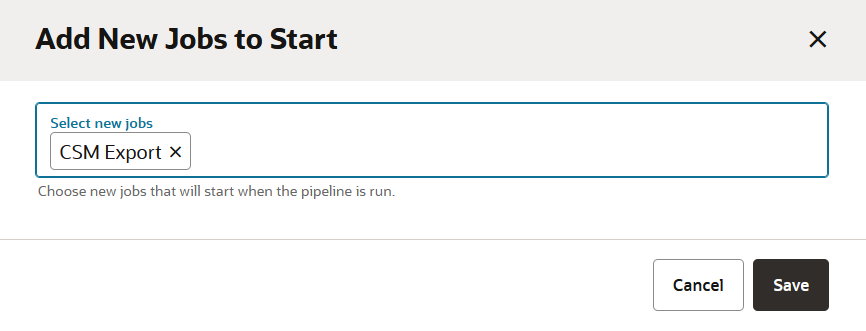
    The Add New Jobs to Start dialog box is displayed.

  7. Click in the Select new jobs area to choose new jobs that will start when the pipeline is run.

    Select one or more jobs from the list displayed.


    Description of pipeline-add-new-start-csm-jobs-dialog.png follows
    Description of the illustration pipeline-add-new-start-csm-jobs-dialog.png

  8. Click Save.

    The Pipeline Configuration window displays the Start node with a blue line that ends in an arrow connecting to the node that represents the job you just added.


    Description of pipeline-one-csm-node.png follows
    Description of the illustration pipeline-one-csm-node.png

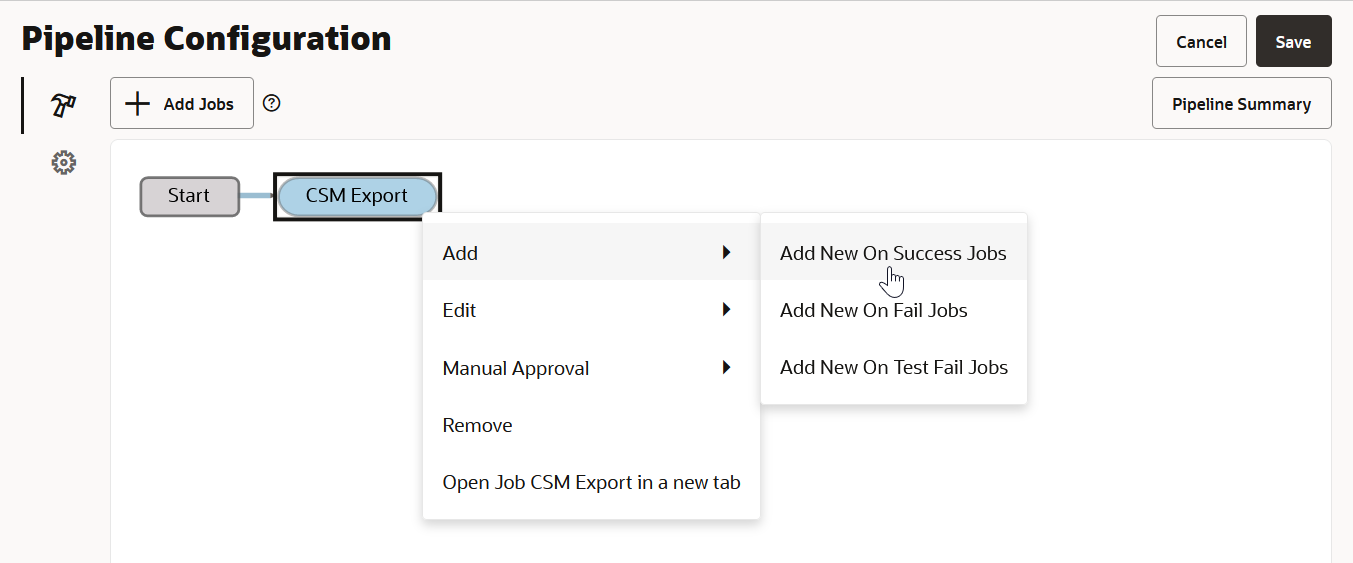
  9. Right click the node you just added and select Add then select Add New On Success Jobs.


    Description of pipeline-add-new-success-csm-jobs.png follows
    Description of the illustration pipeline-add-new-success-csm-jobs.png

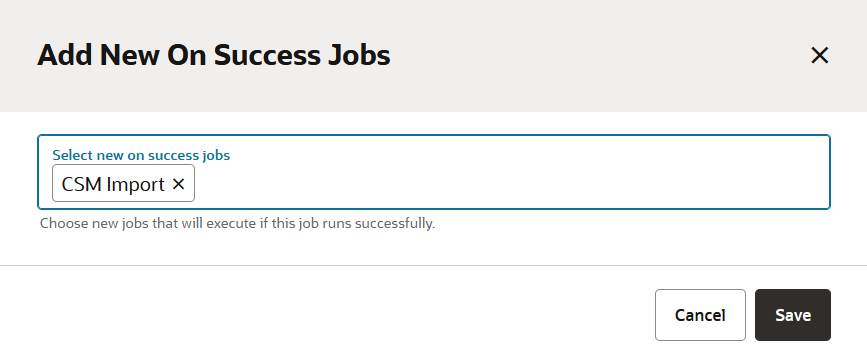
    The Add New On Success Jobs dialog box is displayed.

  10. Click in the Select new on success jobs area to choose new jobs that will execute if this job runs successfully.

    Select one or more jobs from the list displayed.


    Description of pipeline-add-new-success-csm-jobs-dialog.png follows
    Description of the illustration pipeline-add-new-success-csm-jobs-dialog.png

  11. Click Save.

    The Pipeline Configuration windows displays the Start node, the node with the build job you previously selected in step 7, and the node with the build job you just selected, all connected by lines that end in an arrow.


    Description of pipeline-two-csm-nodes.png follows
    Description of the illustration pipeline-two-csm-nodes.png

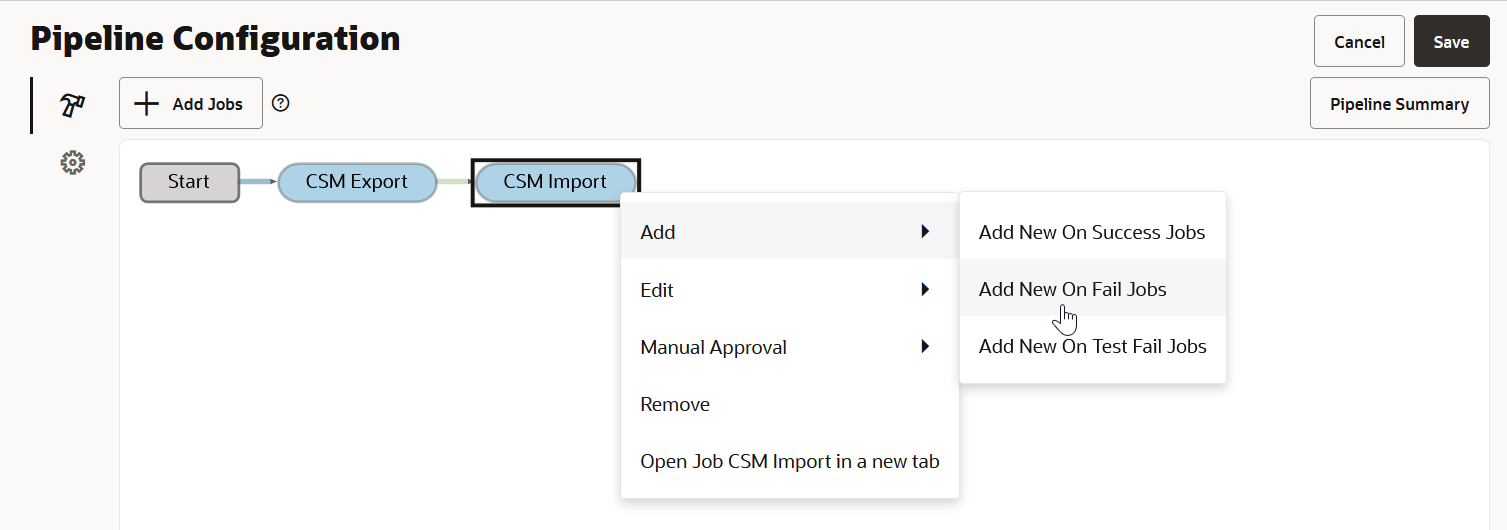
  12. Right click the node you just added and select Add then select Add New On Fail Jobs.


    Description of pipeline-add-new-fail-csm-jobs.png follows
    Description of the illustration pipeline-add-new-fail-csm-jobs.png

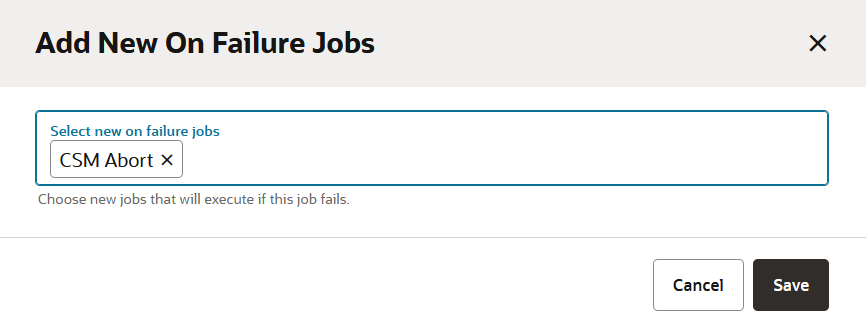
    The Add New On Failure Jobs dialog box is displayed.

  13. Click in the Select new on failure jobs area to choose new jobs that will execute if this job's run fails.

    Select one or more jobs from the list displayed.


    Description of pipeline-add-new-failure-csm-jobs-dialog.png follows
    Description of the illustration pipeline-add-new-failure-csm-jobs-dialog.png

  14. Click Save.

    The Pipeline Configuration windows displays the Start node, the node with the build job you previously selected in step 7, the node with the build job you previously selected in step 10, and the node with the build job you just selected, all connected by lines that end in an arrow.


    Description of pipeline-three-csm-nodes.png follows
    Description of the illustration pipeline-three-csm-nodes.png

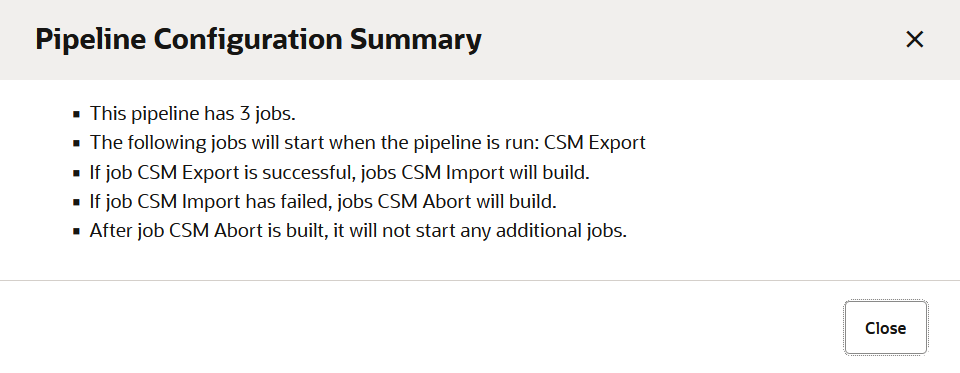
  15. Click the Pipeline Summary button to display a summary screen that provides many details about the pipeline configuration, similar to the example shown here.