Set Up the OCI Connection in VB Studio

To connect to OCI, you will need to first need to get the VB Studio compartment's details, user details, and the required OCID values. You will need to leave VB Studio and open the OCI console in order to get the details you need. If you're not the OCI administrator, get the details from the OCI administrator.

After you have the OCI input values, you can create an OCI connection from VB Studio.
  1. In the left navigator, click Organization Organization.
  2. Click the OCI Account tab.
  3. Click Connect.
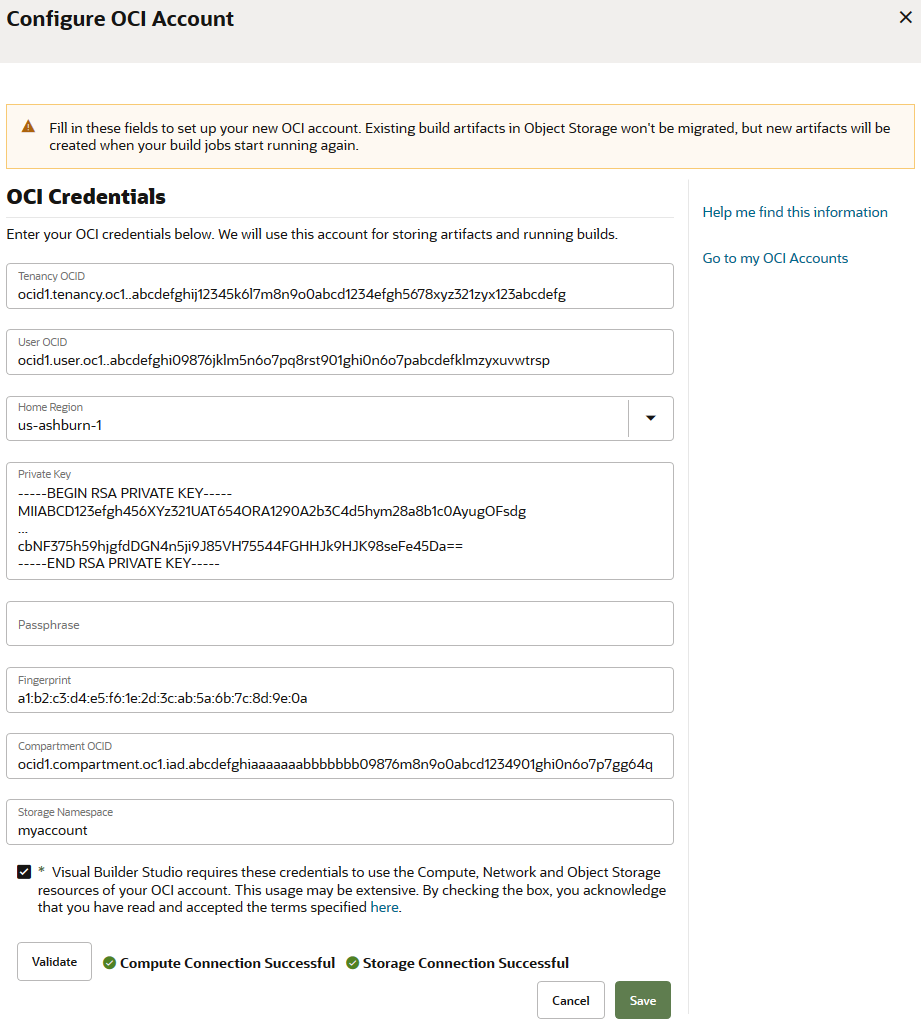
  4. In Tenancy OCID, enter the tenancy's OCID copied from the Tenancy Details page.
  5. In User OCID, enter the OCID of the user who can access the VB Studio compartment.
  6. In Home Region, select the home region of the OCI account.
  7. In Private Key, enter the user's private key who can access the VB Studio compartment.
    The private key file was generated and saved on your computer when you created the private-public key pair in the PEM format. See Step 5 in Set Up the OCI Account.

    Make sure that the private key you enter contains the -----BEGIN RSA PRIVATE KEY----- and -----END RSA PRIVATE KEY----- markers.

  8. In Passphrase, enter the passphrase used to encrypt the private key. If no passphrase was used, leave the field empty.
  9. When you enter a private key and a passphrase, the Fingerprint field is automatically populated. Ensure that the automatically populated fingerprint value matches the fingerprint value of your private-public key pair. If it doesn't, update it to enter the correct value.
  10. In Compartment OCID, enter the compartment's OCID copied from the Compartments page.
  11. In Storage Namespace, enter the Object Storage Namespace value copied from the Tenancy Details page.
  12. Select the terms and conditions check box.
  13. Click Validate.
  14. After validating the connection details, click Save.
Here's an example of an OCI Account tab filled with required OCI details.