Selectively Enable a Field

Within a form (simple or dynamic), you can disable a field by default, and enable it only after a certain action or event occurs within the page.

For example, suppose you have a form for entering data about new movie theaters, which contains three fields:
  • An input field for the name of the theater
  • A list of values (LOV) for the city where the theater is located
  • An LOV for the new theater's capacity.

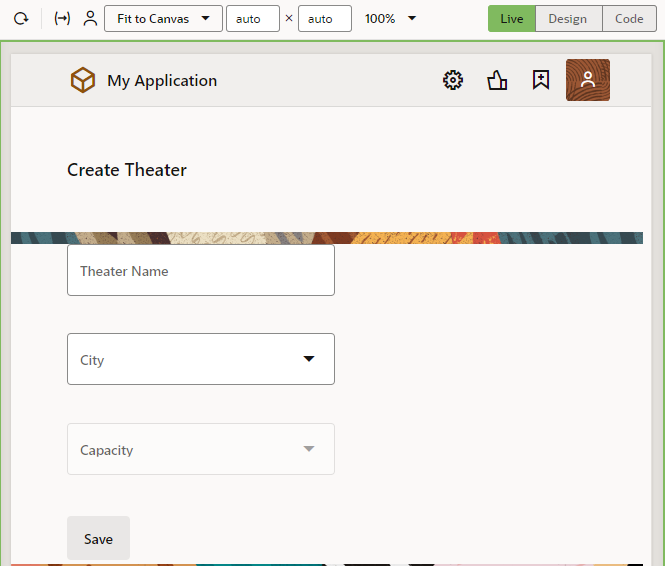
In this scenario, you want the Capacity field disabled by default (that is, grayed out), like this:


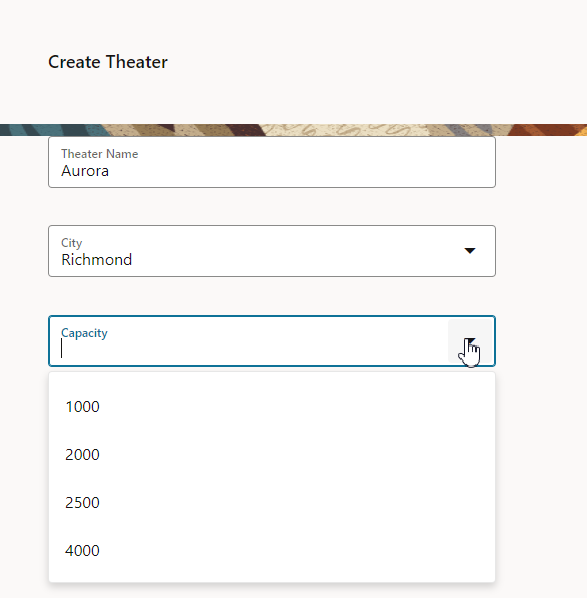
After the user selects a city, the Capacity field becomes active so the user can select a value:


When you want something to happen on a page based on the behavior of another component, either on that page or elsewhere, it almost always involves an action chain. Let's focus on how action chains work as we go through this scenario, so that you can apply your understanding to future use cases as well.

Note:

If you're working with a dynamic form, you'll need to work with its rule set to achieve the effect you want. See Selectively Display a Field to get an idea of how to do that.
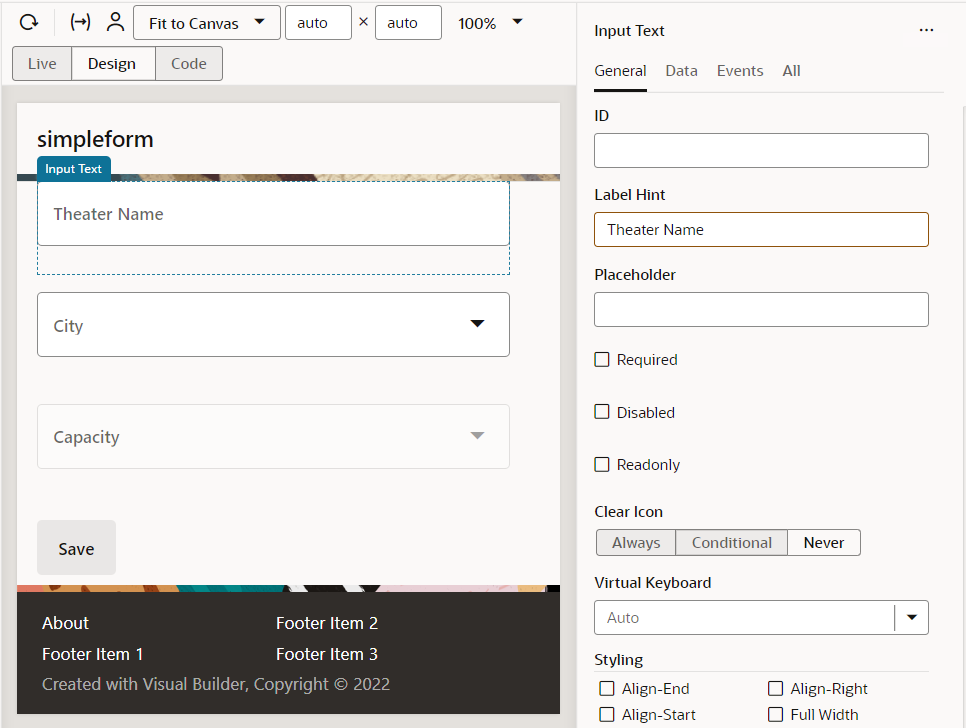
In the Page Designer, let's assume that the form looks something like this: Description of theatercompletedform.png follows
Description of the illustration theatercompletedform.png
  1. We'll start by disabling the component for the Capacity menu.
    1. Select the Capacity field on the canvas, which is provided by a Single Select component (commonly used for LOVs).
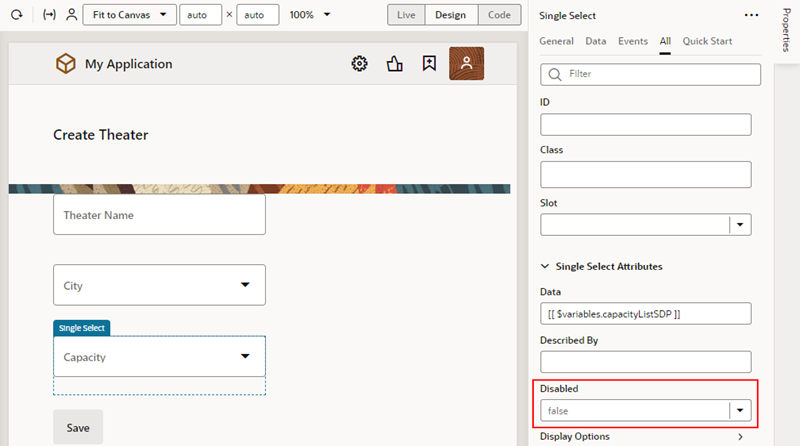
    2. In the Properties pane, click All, then locate the Disabled property:


      The Disabled property is a Boolean, so the value must be either true or false. The default value is false, which means the component is enabled on the page by default. But we want the field disabled by default, and enabled only when the user selects a city. The best way to implement this selective behavior is to change the Disabled field's value to a variable, rather than a static value. We can then use that variable in an action chain, which we'll get to later.

  2. To create a variable for the Disabled property:
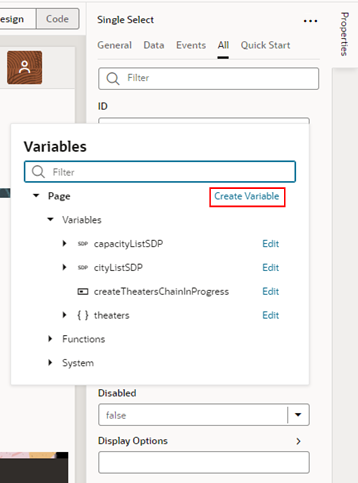
    1. Click Select Variableon the Disabled property to open the Variables picker, then click Create:
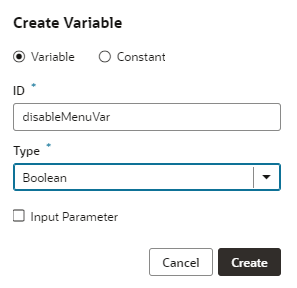
    2. Specify a name for the variable, perhaps disableMenuVar, and set the type to Boolean. Click Create:


      The new variable becomes the source of the Disabled property's value. Now let's set the value of this variable to true, meaning the field will be disabled by default.

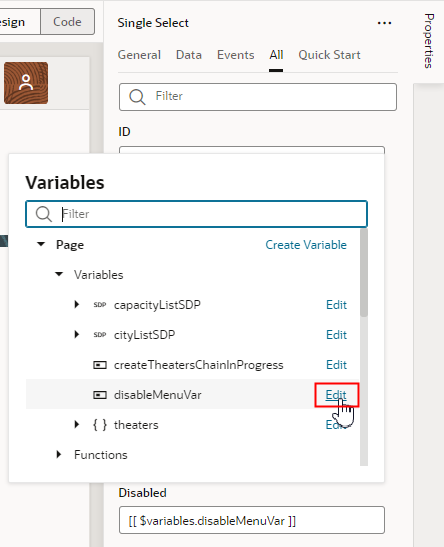
    3. Open the Variables picker for the Disabled property again, and click Edit next to the new variable:
    4. On the Variables tab, set the new variable's Default Value to true.
      The Capacity field is now disabled by default. The next step is to set things up so the value of this variable changes when the user selects a city from the City field. We'll use an action chain to do that.
  3. To set up the action chain:
    1. Click the Page Designer tab.
    2. Click the City field.
      Notice that we're setting up this action chain on the City field, because that's the field that impacts the behavior of another field; in our case, the Capacity field.

      An action chain always requires an event to serve as a triggering mechanism, so let's create one now.

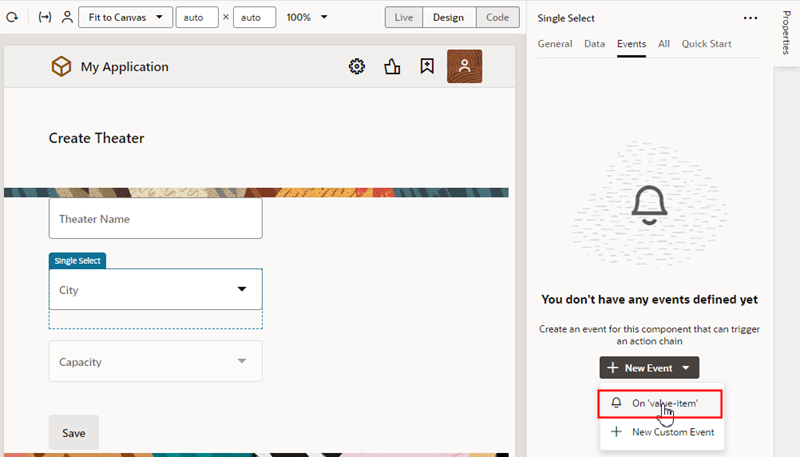
    3. In the Properties pane, click Events, then click New Event. Select On 'value-item' when prompted:

      An On 'value-item' type of event essentially says, "When the value of this field changes (in this case, the City field), kick off the associated action chain."


      The Action Chains editor opens automatically.

      When you create an On 'value-item' event, VB Studio automatically creates a new action chain for you called SelectValueItemChangeChain, as well as an event listener that listens for the On 'value-item' event. When the event listener "hears" the event, it starts the sequence of actions defined in the action chain.

    4. In the Action Chains editor, drag an Assign Variables action from the Actions palette and drop it onto the plus sign under Start.
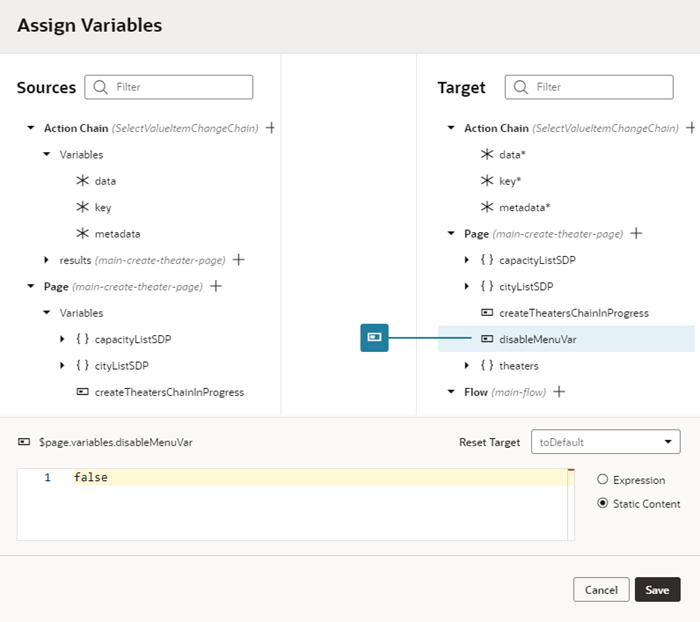
      As the name implies, the Assign Variables action assigns a value to a variable. The value could be an expression, but in this case we want to set the value of our disableMenuVar variable simply to false, a static value.
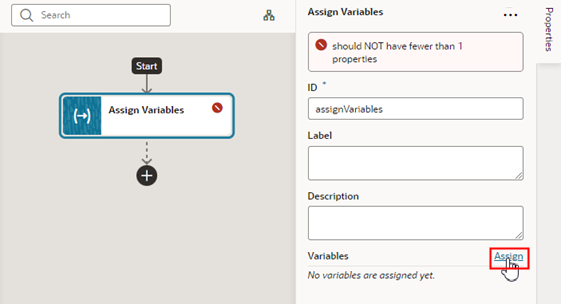
    5. In the Properties pane, click Assign to select the variable we want to modify and define its new value:
    6. In the Assign Variables window, select disableMenuVar in the Target pane, then type false at the bottom of the window. Make sure that Static Content is selected, then click Save:


      When the action chain is triggered, the Assign Variables action will change the value of the disableMenuVar variable to false. This will change the value of the Capacity menu component's Disabled property, so that the component will become enabled on the page.

You can now Preview the page to check your work. Notice that the Capacity field is disabled by default. Select a city, and see that the Capacity field is enabled. Success!
Let's do a quick re-cap of what's happening behind the scenes:

  • The user selects a value from the City field.
  • The event listener detects that an On 'value-item' event has occurred, and fires off the SelectValueItemChangeChain action chain.
  • The action chain has one action, which is to assign a value of false to the disableMenuVar variable.
  • Because the Disabled property for the Capacity field is controlled by the disableMenuVar variable, and that value is now false, the Capacity field is enabled.