Work with Polymorphic Objects in a Layout
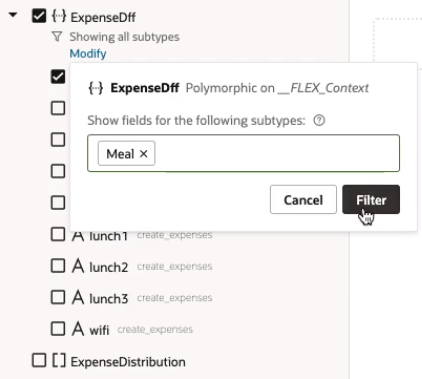
When you are adding fields to a layout, the Fields palette might include polymorphic objects containing fields you can select. Polymorphic objects are defined by the service that your extension uses, and define a set of fields rather than a single field. A polymorphic object can display different field subsets based on a pre-defined discriminator sub-type that is evaluated at runtime. The polymorphic object might have several sub-types for the discriminator field, each defining a different set of fields.
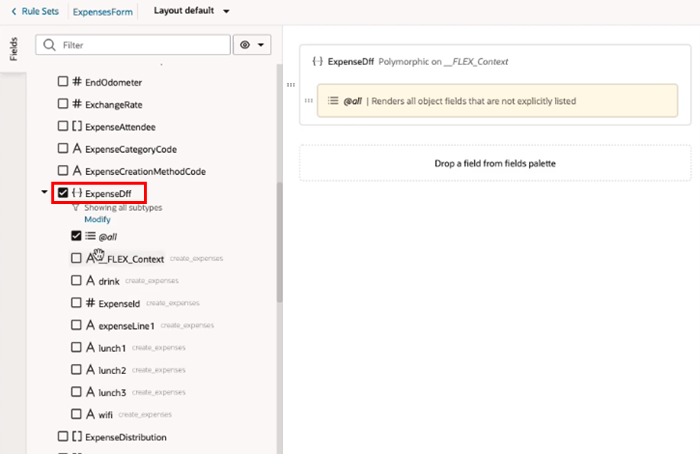
In the image below, ExpenseDff is a polymorphic object, and __FLEX_Context is the discriminator field.
An @all field is automatically added when you add a polymorphic object to a layout, but you can also explicitly add fields to the center pane. When the center pane contains the @all field, all the fields, as determined by the discriminator, will be displayed in the layout. You can control the order that fields are displayed in the polymorphic object by explicitly adding fields to the object in the center pane.
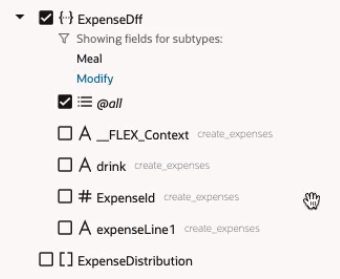
In the example above, the discriminator has a sub-type Lunch that determines the fields that will be displayed (ExpenseId, expenseLine1, lunch1, lunch2, lunch3). All of those fields will be displayed when the Lunch sub-type is applied at runtime because the polymorphic object in the center pane includes the @all field. If you remove the @all field from the center pane without explicitly adding any fields, no fields will be displayed in the layout.
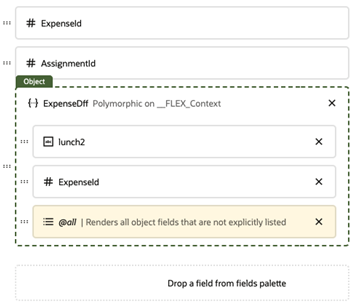
By explicitly positioning some of the fields (lunch2, ExpenseId), as in the image below, you can control the display order of the fields.
The fields will appear in the following order when the Lunch sub-type is applied to the discriminator:
- lunch2 (added and positioned explicitly)
- ExpenseId (added and positioned explicitly)
- expenseLine1 (added using
@all) - lunch1 (added using
@all) - lunch3 (added using
@all)
If the @all field is removed, only the fields added explicitly (lunch2, ExpenseId) will be displayed when the Lunch sub-type is applied.
If the wifi field was added explicitly to the object, it wouldn't be displayed when the Lunch sub-type is applied to the discriminator.
To add a polymorphic object to your layout:


