Update Your Email Address

By default, VB Studio displays your Oracle Cloud email address across all pages and sends email notifications, such as merge request notifications and issue notifications, to this email address.

If you want VB Studio email notifications sent to another email address, you can change it from your Oracle Cloud Infrastructure (OCI) Identity and Access Management identity domain, accessible from the Oracle Cloud Console. If you don't have access to the Oracle Cloud Console, ask your OCI or identity domain administrator for help.

Note:

Updates that you make in OCI Identity and Access Management will be reflected on the User Preferences page’s read-only Profile tab within 24 hours.

Some things to keep in mind when updating an email address:

  • If you’re using an email address as your Oracle Cloud login username, your original Oracle Cloud email address continues to be your login username even after you change your email address on your user account.

  • After you provide another email address, you’ll receive a verification email. It's important that you take the time to verify the new email address because, if you don't, you won't receive any VB Studio email notifications. You can, however, continue to use VB Studio.

Here's how to change the email address that email notifications will be sent to:
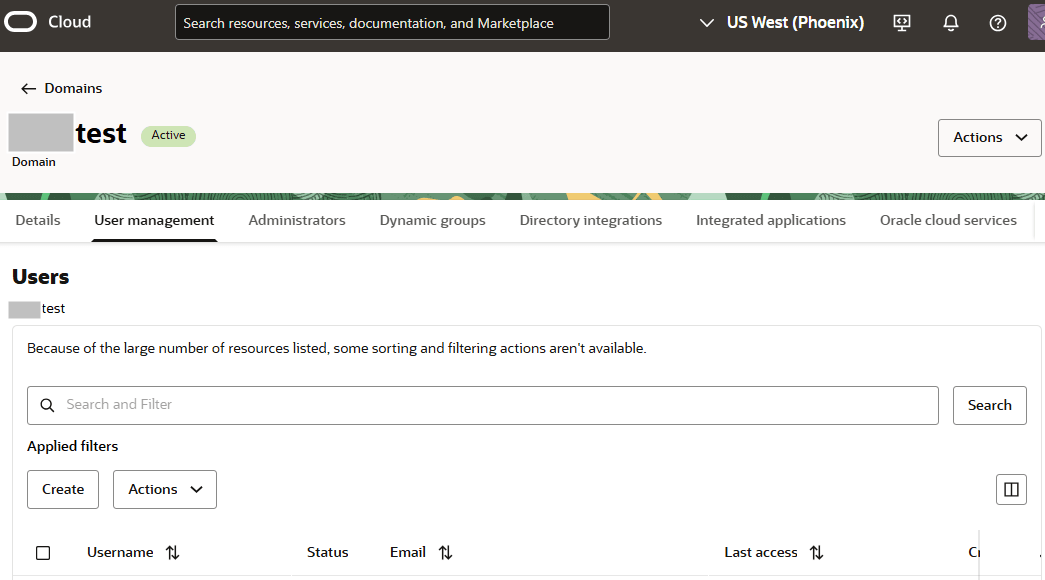
  1. In a web browser, go to https://cloud.oracle.com.
  2. On the Sign-In page, in Cloud Account Name, enter your Oracle Cloud account or tenancy name and click Next.
  3. On the Single Sign-On (SSO) panel, if required, select your identity domain and click Next.
  4. Enter your Oracle Cloud account credentials and click Sign In.
    The Oracle Cloud Console, also called the OCI console, opens.
  5. In the upper-left corner, click Navigation Menu the Menu icon.
  6. Select Identity & Security and then, under Identity, select Domains.
  7. On the Domains page, click the name of the identity domain that you want to work in. You might need to change the compartment, next to Applied filters, to find the domain that you want.
  8. After clicking the identity domain, click the User management tab.

  9. In the Users section, click your user record, then click Edit user.
  10. In Email, enter your new email address.
  11. Click Save changes.
  12. In the email that you receive, click the confirmation link to confirm the new email address.

    Note:

    If you don't confirm the new email address, when you go to the Profile tab under User Preferences, you'll see a Not Verified Error icon message next to your email address. Click the Re-send email button next to the error message and respond to that email when it reaches your inbox.