Introduction
In this tutorial, you learn how to import balances with data integration and load them into Account Reconciliation.
Background
In this tutorial, you perform the following tasks in Account Reconciliation:
- Review the Account Reconciliation target application
- Review Periods and Category Mapping
- Create an Integration
- Test the Integration
- Import balances into Account Reconciliation
- Review reconciliation balances
- Create reconciliations
Prerequisites
Before starting this tutorial, you should have:
- A working knowledge about Account Reconciliation.
- Access to Account Reconciliation, and a source data load file. You can save this sample file locally and then use it to create an integration.
Reviewing target application in Data Exchange
In Account Reconciliation, you can check the target application by performing the following steps:
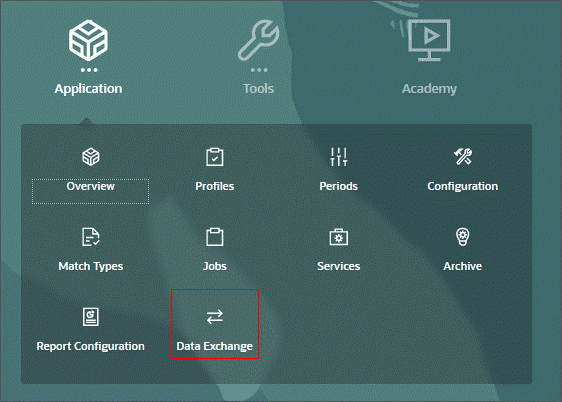
- From the Account Reconciliation home page, click the Application card and select Data Exchange.
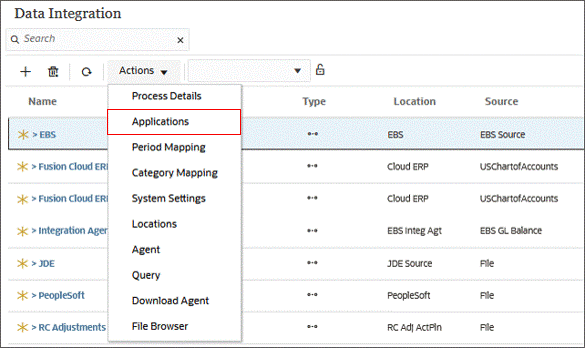
- From Data Integration, select Actions > Applications.
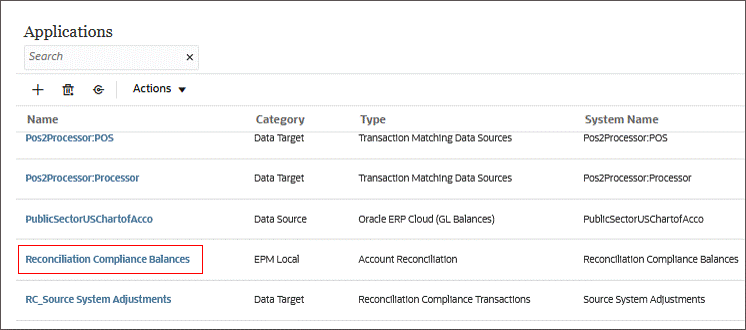
- Select Reconciliation Compliance Balances to view the application details.
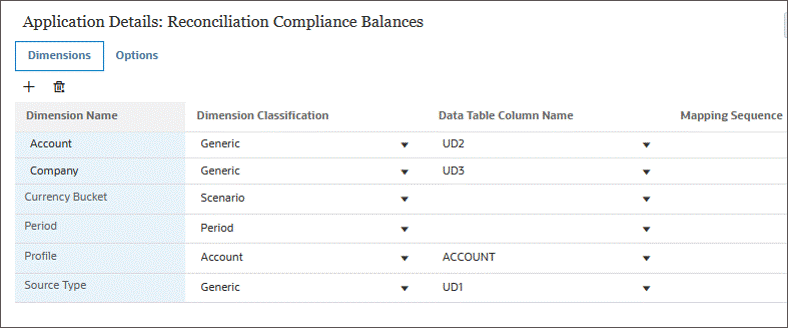
- In the Application Details, review the dimension details of the target application. In this example, the target application includes the Account, Company, Currency Bucket, Period, Profile, and Source Type dimensions.
Reviewing period and Category Mapping
To review Period Mapping and Category Mapping, perform the following steps:
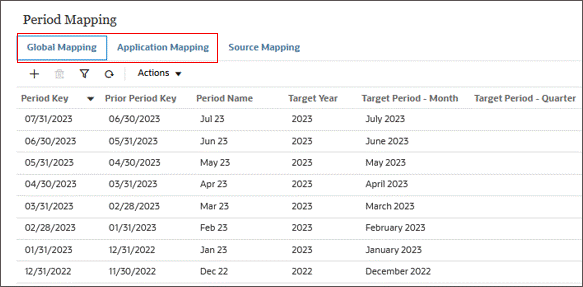
- In Data Integration, select Actions > Period Mapping.
- In Data Integration, select Actions > Category Mapping.
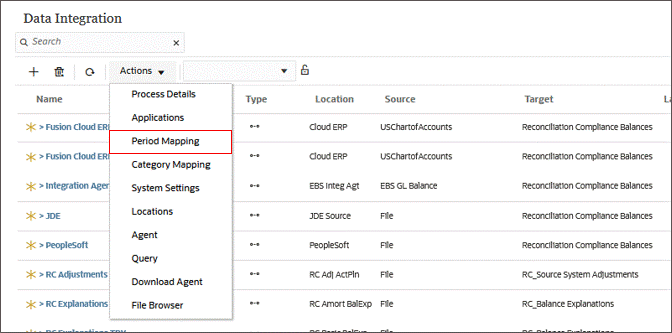
The Period Mapping page is displayed. Here, you can view the Global Mapping and Application Mapping tabs.
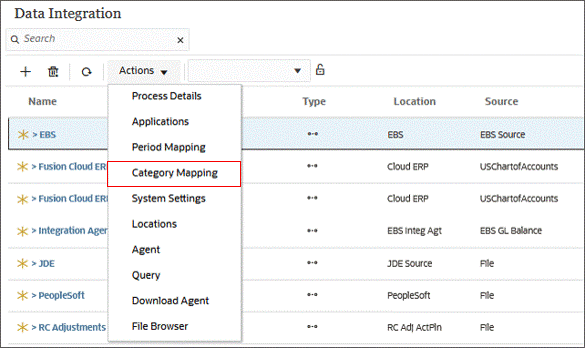
The Category Mapping page is displayed. Here, you can view the Global Mapping and Application Mapping tabs.

Creating integration
In Data Exchange, you can create a data integration by using the following steps:
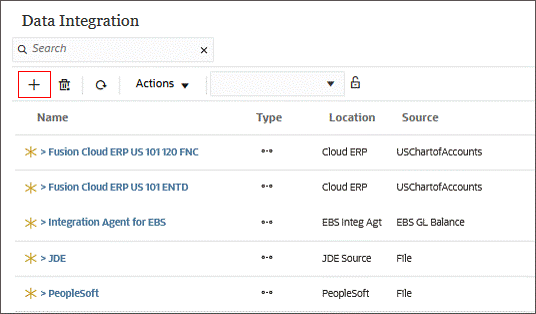
- In data integration, click the New icon.
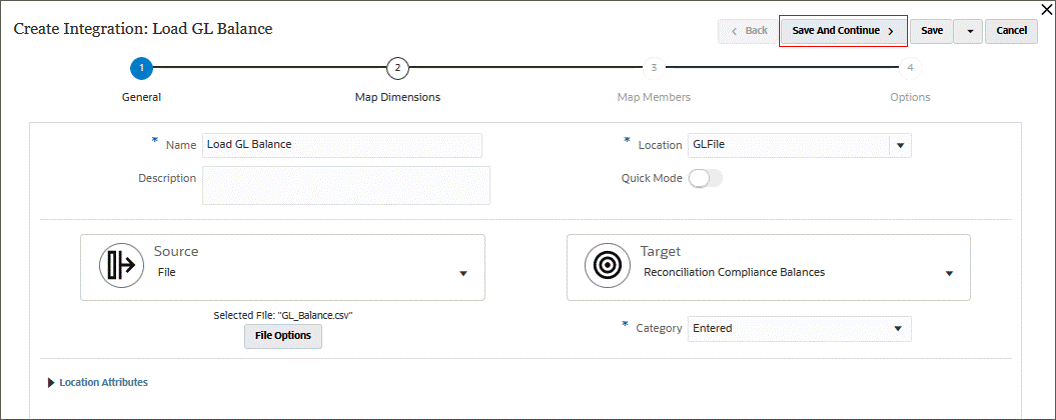
- In the General tab, provide the required Name, Location, Source and Target. Proceed by clicking the Save and Continue button.
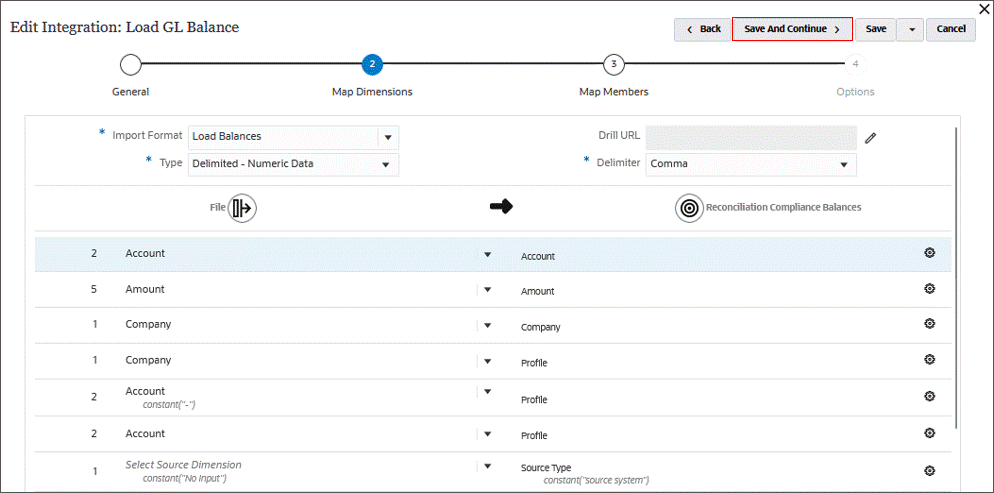
- In the Map Dimensions tab, you can specify how source columns map to the dimensions in the target application. Proceed by clicking the Save and Continue button.
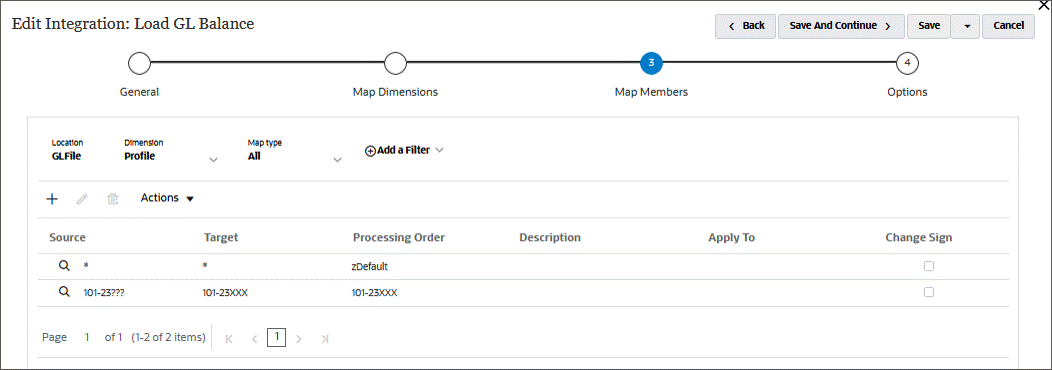
- In the Map Members tab, define the data load mappings for each target dimension.
- To save the integration, click the Save drop-down and select Save and Close.

Testing data integration
In Data Exchange, you can run a data integration by following these steps:
- To run a data integration, click the Run icon.
- The Run Integration pop-up window is displayed. Here, you can select the required Import Mode, Export Mode, Start Period, End Period and File. After providing the required information, click the Run button.

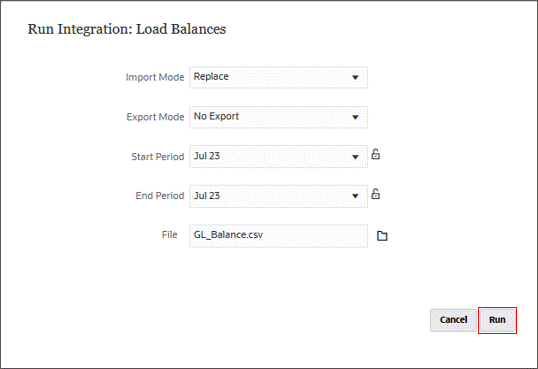
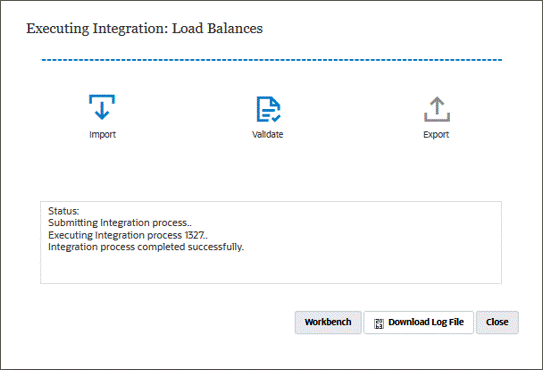
The integration is executed successfully.
Importing balances into Account Reconciliation
In Account Reconciliation, you can import balances by following these steps:
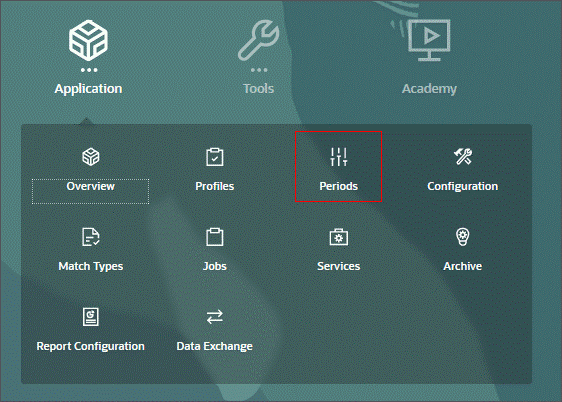
- From the Account Reconciliation home page, click the Applications card and select Periods card.
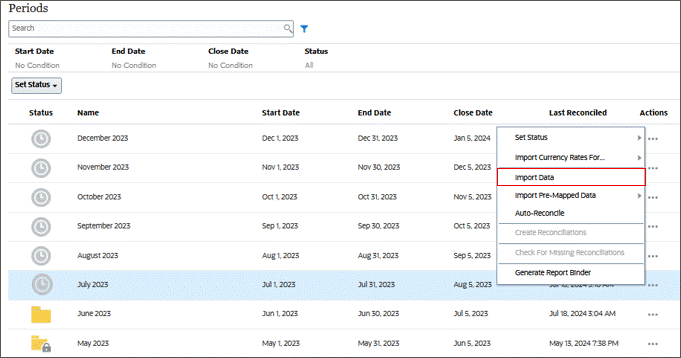
- The Periods page is displayed. Click the Actions icon for the required period and select Import Data.
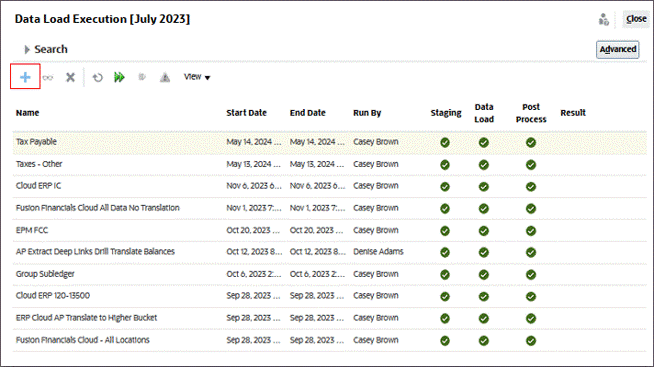
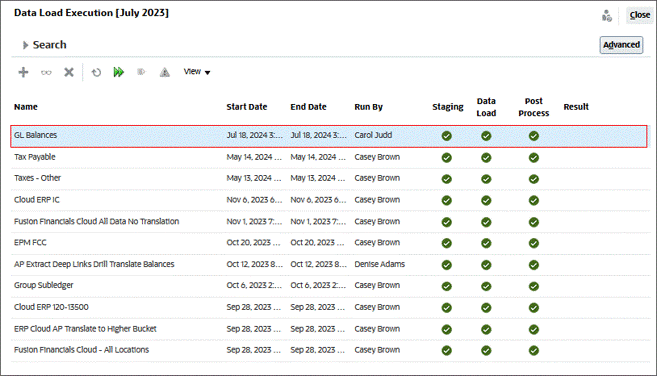
- The Data Load Execution window is displayed. You can click the New button to add new balances.
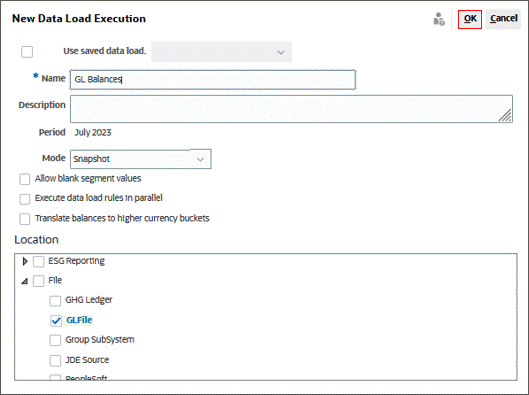
- The New Data Load Execution window is displayed. Enter the required details, select the correct location, and then click the OK button.
- The balances have been imported successfully.
Reviewing loaded balances
In Account Reconciliation, you can review loaded balances by following these steps:
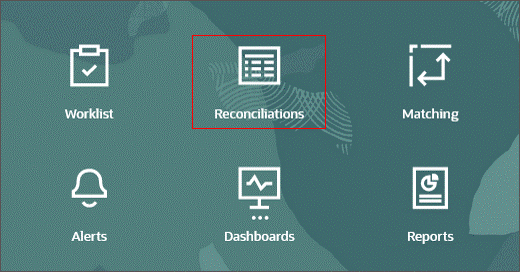
- From the Account Reconciliation home page, click the Reconciliations card.
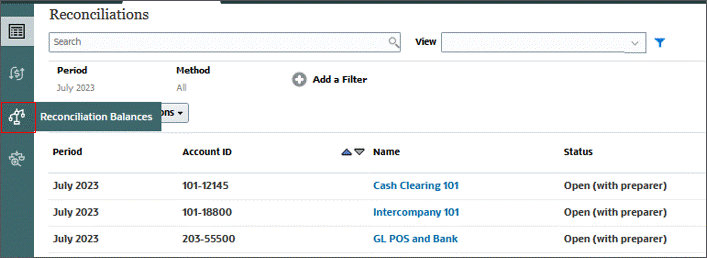
- The Reconciliations page is displayed. Click the Reconciliation Balances tab.
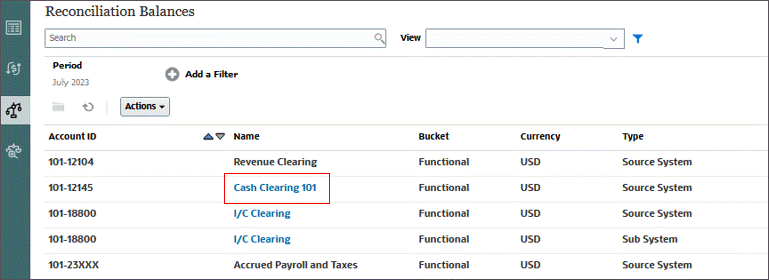
- The Reconciliation Balances tab displays the balances loaded for all reconciliations in a particular period. Click a reconciliation name to view the required details.
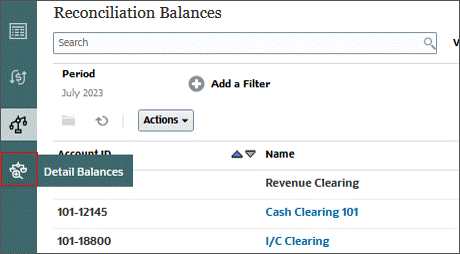
- Click the Detail Balances tab.
- The Detail Balances tab displays information such as Account ID, Name, Company, Account, Bucket, Currency, Type, and Amount. You can sort the information in ascending or descending order by using the arrow icons against each column. Note that balances are loaded for new company and account combinations as well. You will need to create Profiles for such cases. To create Profiles directly from this screen, you can use the Ellipsis against each balance either on the Detail Balances tab or on the Reconciliation Balances tab for Group Reconciliations.

Reviewing profiles and creating reconciliations
In Account Reconciliation, you can review profiles and create a reconciliation by following these steps:
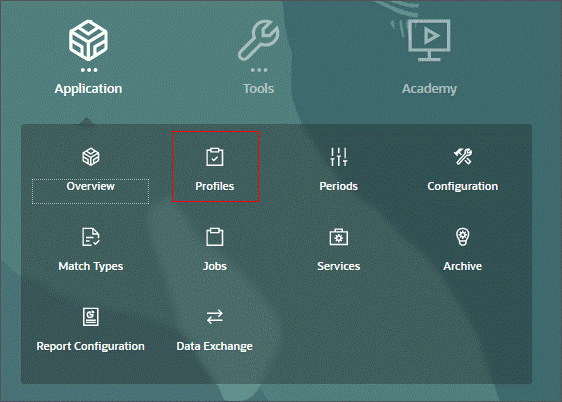
- From the Account Reconciliation home page, click the Applications card and select Profiles.
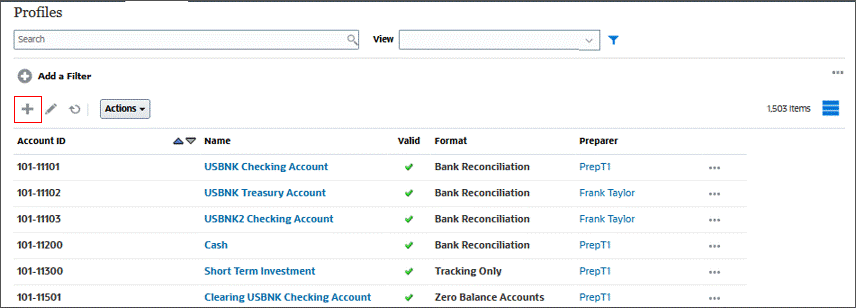
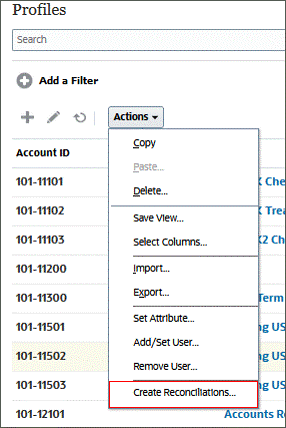
- The Profiles page is displayed. Here, you can view the required profiles by adding filters. Click the New icon to create new profiles for balances that have been loaded but do not have any profiles assigned to them.
- Click the Actions drop-down and select Create Reconciliation.
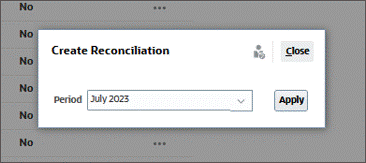
- Select the required period and click Apply.
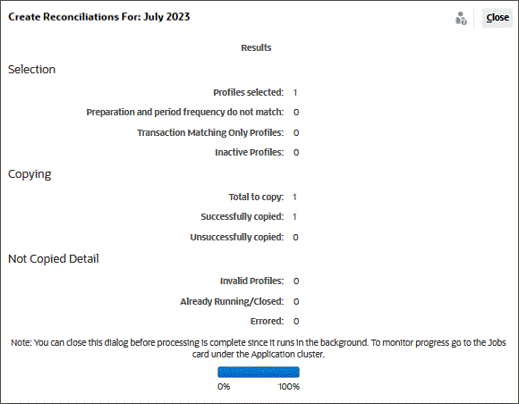
- You can create a reconciliation for the selected profile or for all available profiles. For this example, we will create a reconciliation for the selected profile. Click Apply.
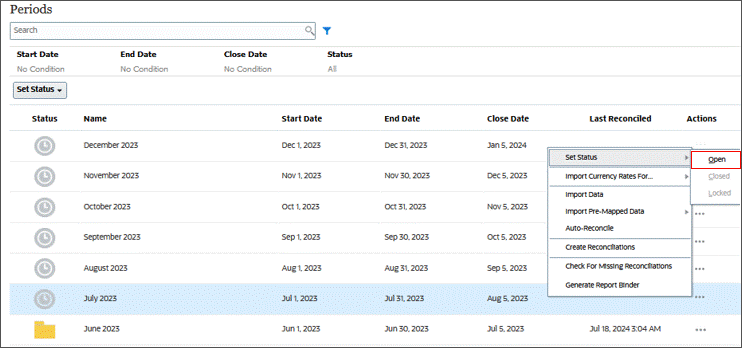
- From the Periods page, you can now change the status from Pending to Open.

The reconciliation has been created.
Related Links
Managing Account Reconciliation balance load
G10784-01
July, 2024