Introduction
In this tutorial, you learn how to create a custom attribute with a custom rule to stop carrying reconciliation compliance transactions into a period that the Close Date is in. This ends the carry-forward process for the transaction, so the user won't have to manually delete it in the period when it is no longer needed.
Background
In this tutorial, you perform the following tasks in Oracle Cloud EPM Account Reconciliation:
- Create a custom attribute with a calculation
- Apply the attribute to a format
- Create a custom rule in the format
Prerequisites
Before starting this tutorial, you should have:
- A working knowledge of Oracle Cloud EPM Account Reconciliation.
- Administrator access to an Oracle Cloud EPM Account Reconciliation application.
Creating an attribute
Create a custom attribute with a calculation definition.
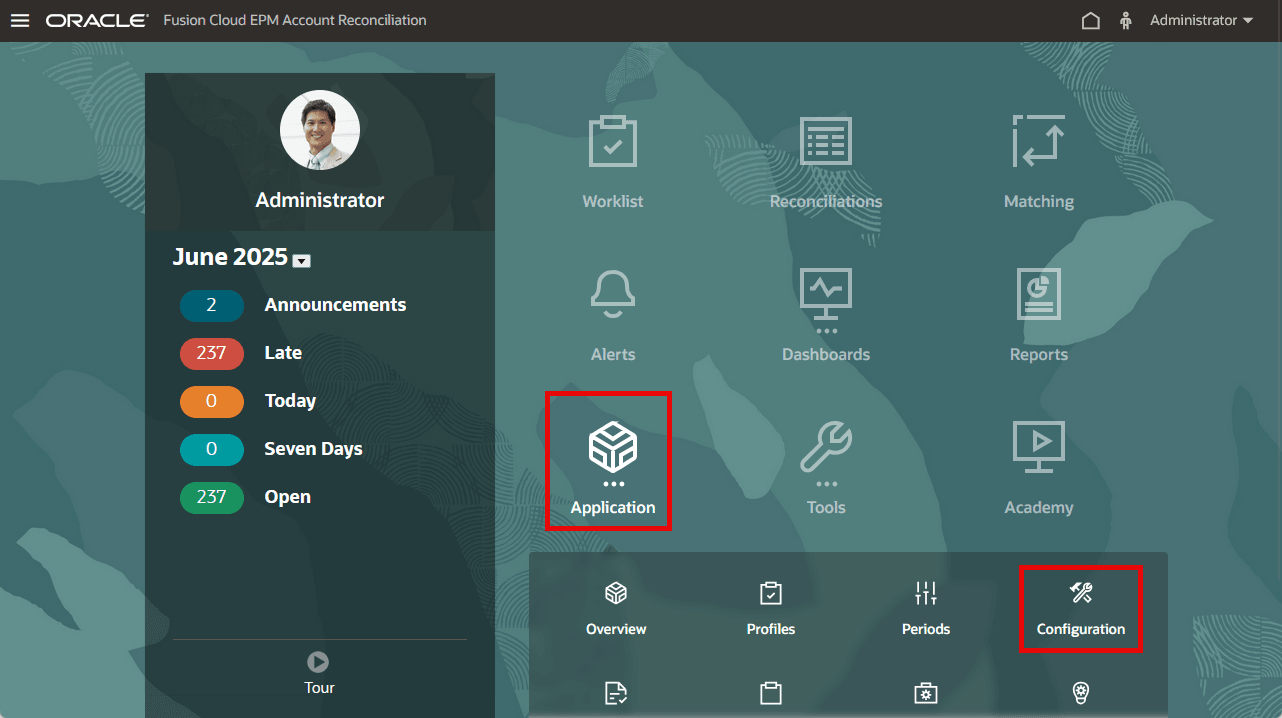
- From the Account Reconciliation home page, click the Application card and then select Configuration.
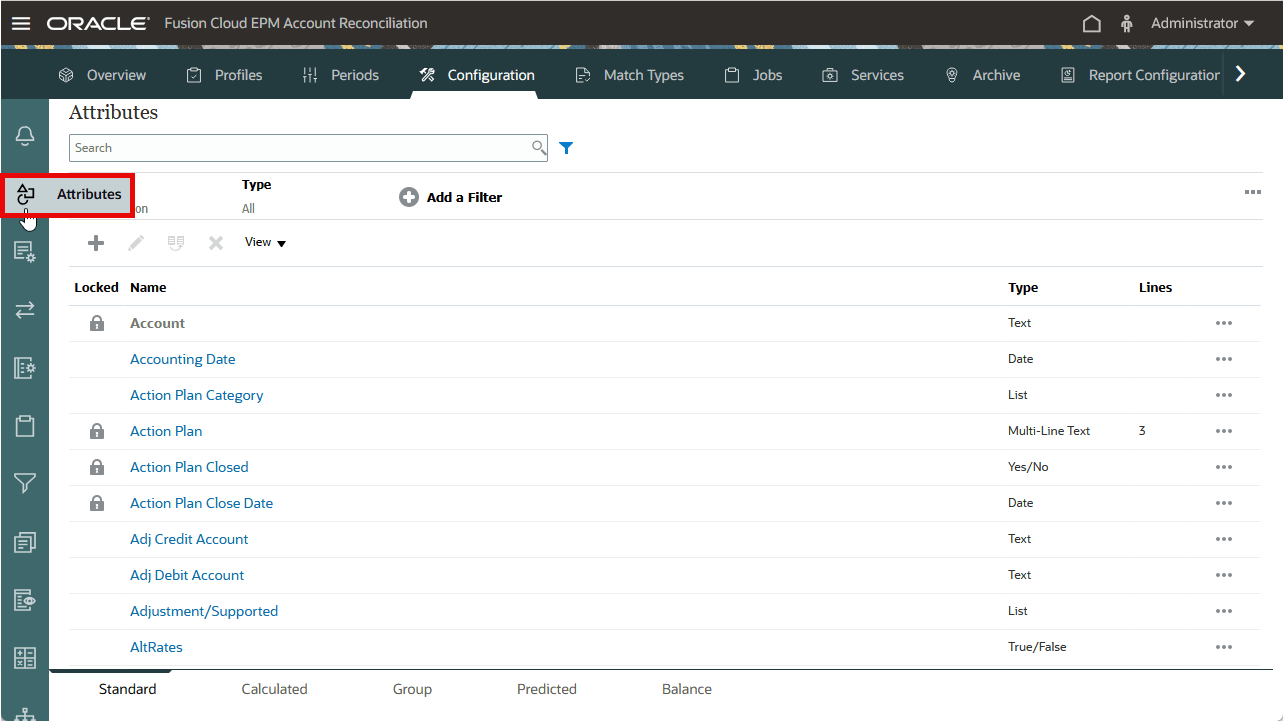
- Click the Attributes tab.
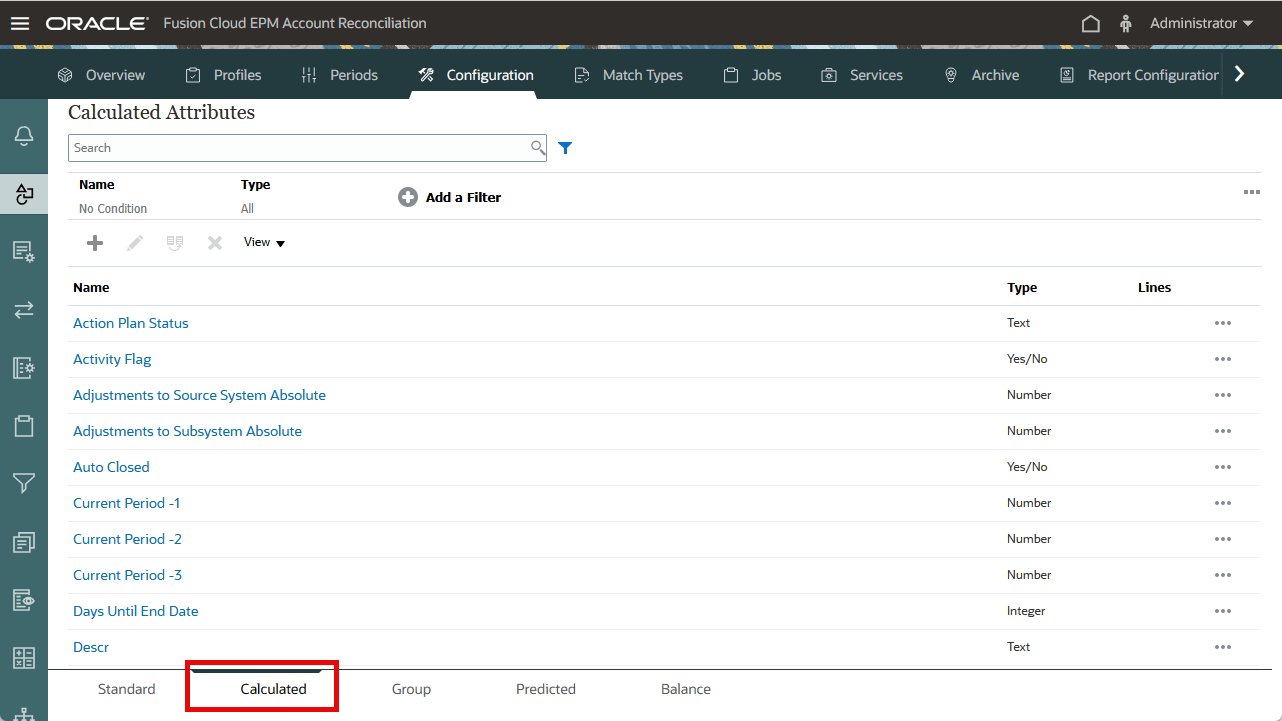
- Click the Calculated tab.
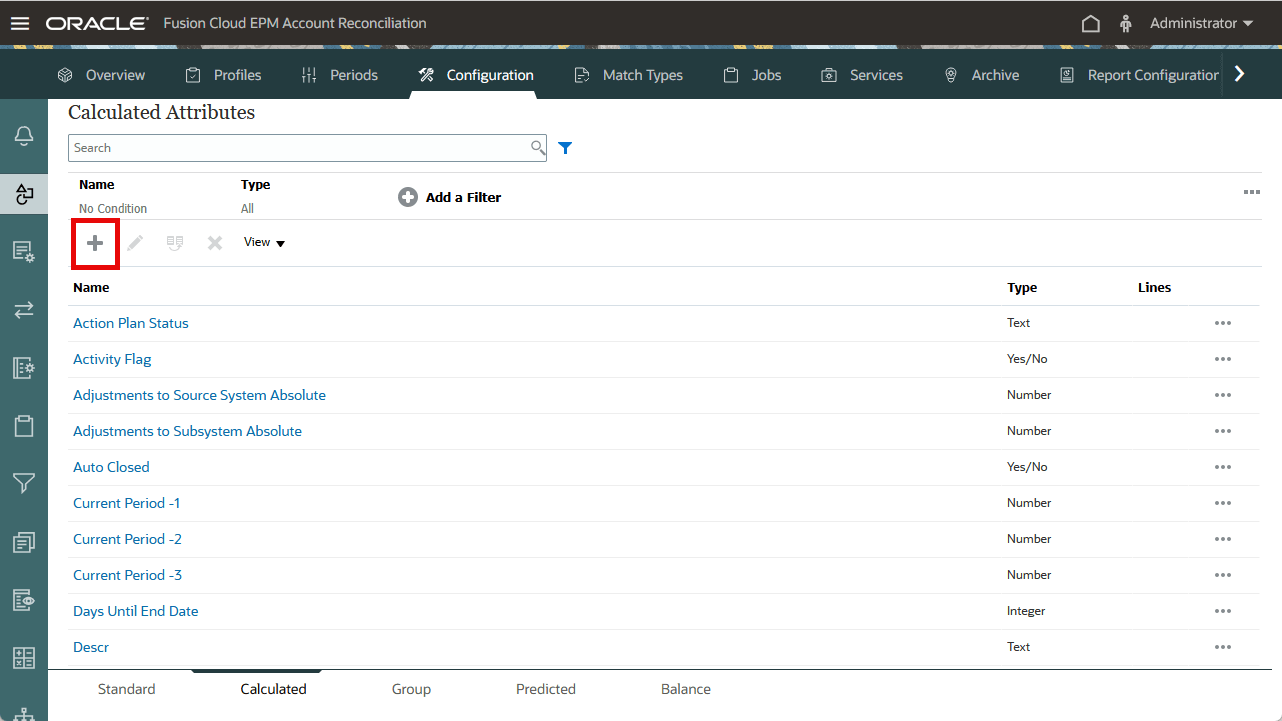
- Click the New icon to create an attribute.
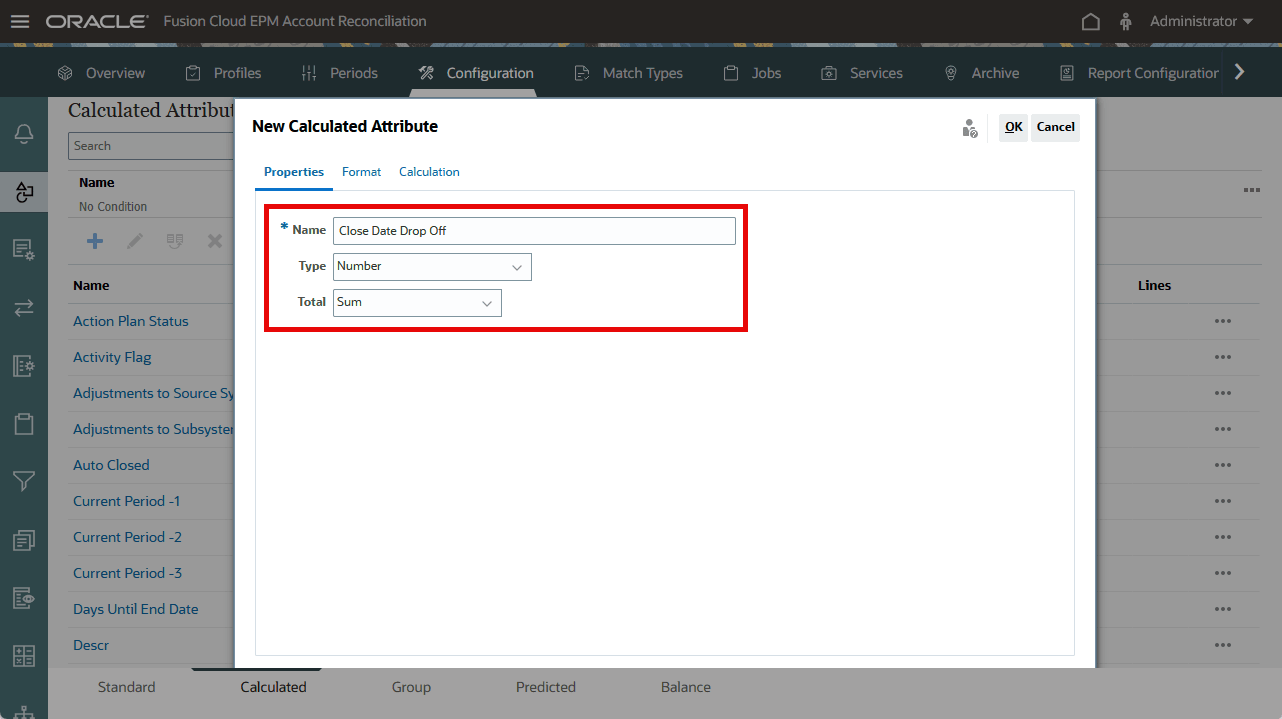
- On the Properties tab, name the attribute (Close Date Drop Off in this example), select Number for Type, and select Sum for Total.
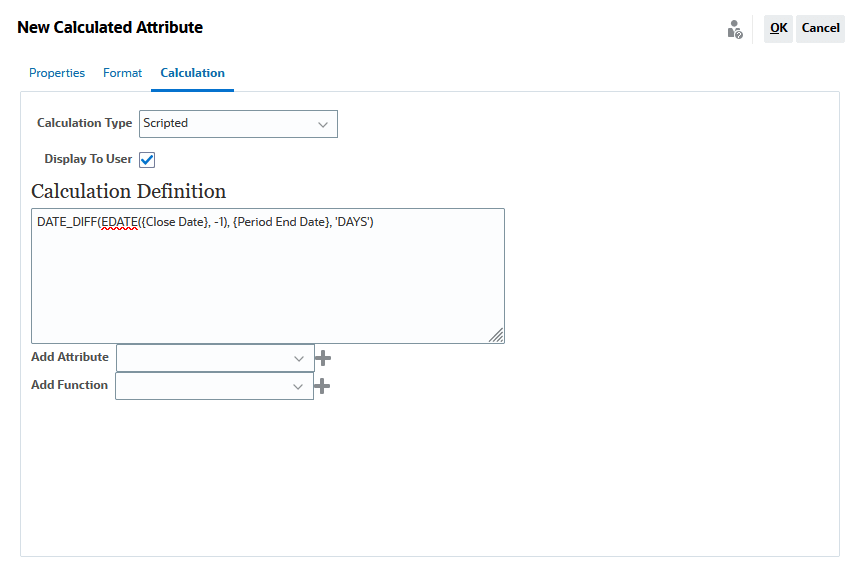
- In the Calculation tab, set Calculation Type to Scripted and Display To User checked. In the Calculation Definition field , enter DATE_DIFF(EDATE({Close Date}, -1), {Period End Date}, 'DAYS'), and then click OK.
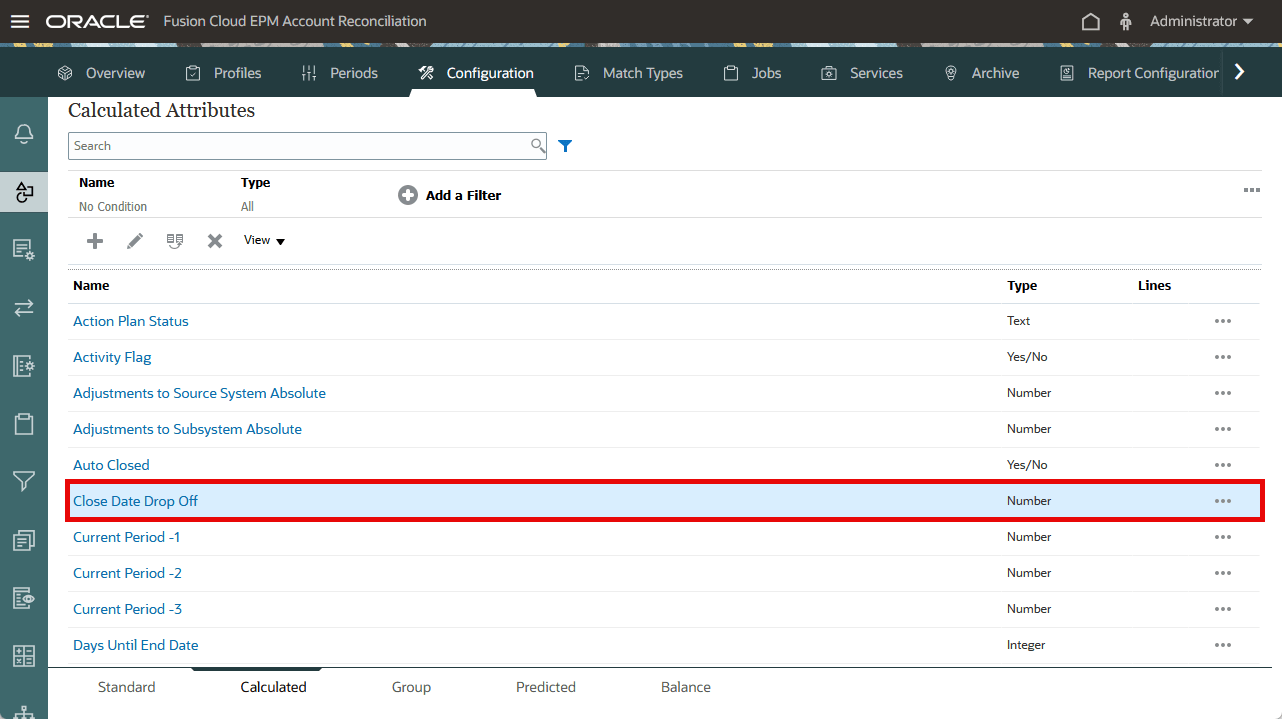
- The attribute is added.
Note:
There are two functions in this formula, DATE_DIFF and EDATE.The Date Difference or DATE_DIFF function calculates the difference between two dates in days. In this example, between the Close Date entered on the transactions and the Period End Date.
The Add Month or EDATE function adds or subtracts months from the starting date. Because the formula is used in the Copy Transactions from Prior Reconciliation rule that populates a current reconciliation with transactions from a previous reconciliation, the function uses a negative value for months “-1” that brings the Close Date back a month. This way, if a transaction has the Close Date in July, the calculation returns a June date instead so that the Copy Transactions from Prior Reconciliation rule won't copy the transaction into July.
The two functions are then combined to return the date difference of the Close Date (minus one month) and the Period End Date in days.
Creating a rule
Create a rule to stop carrying reconciliation compliance transactions into a period that the Close Date is in.
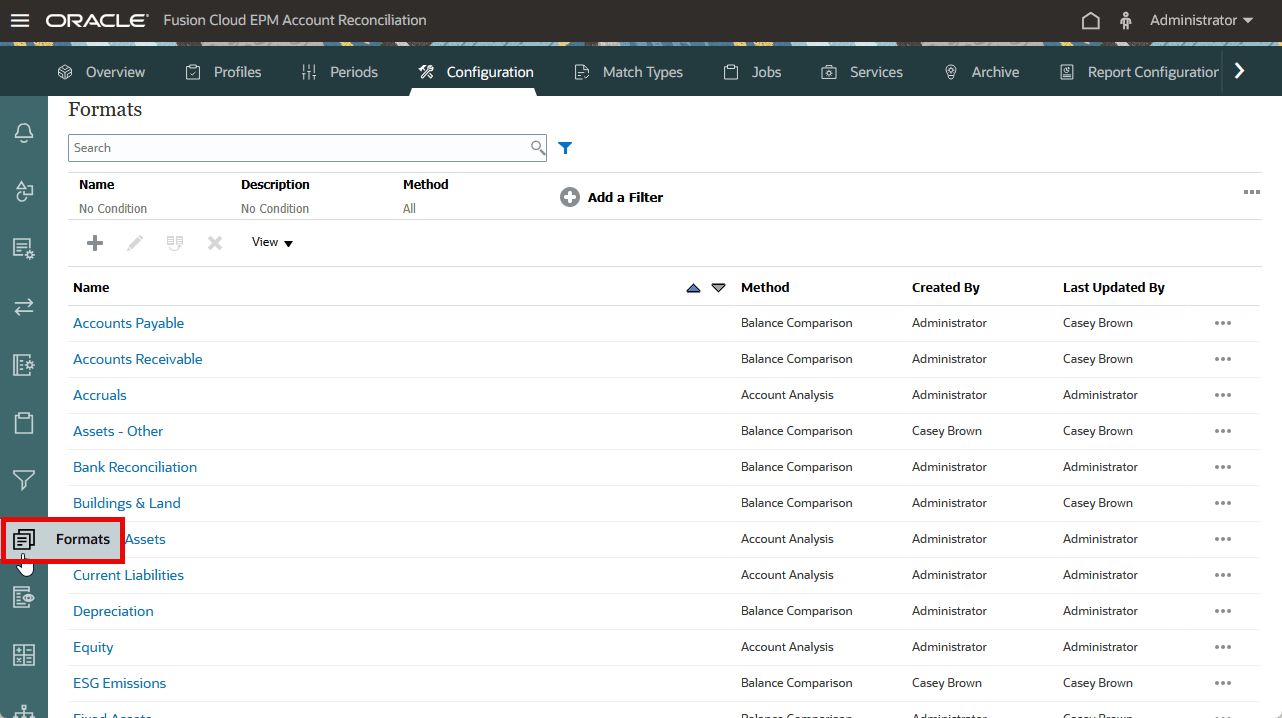
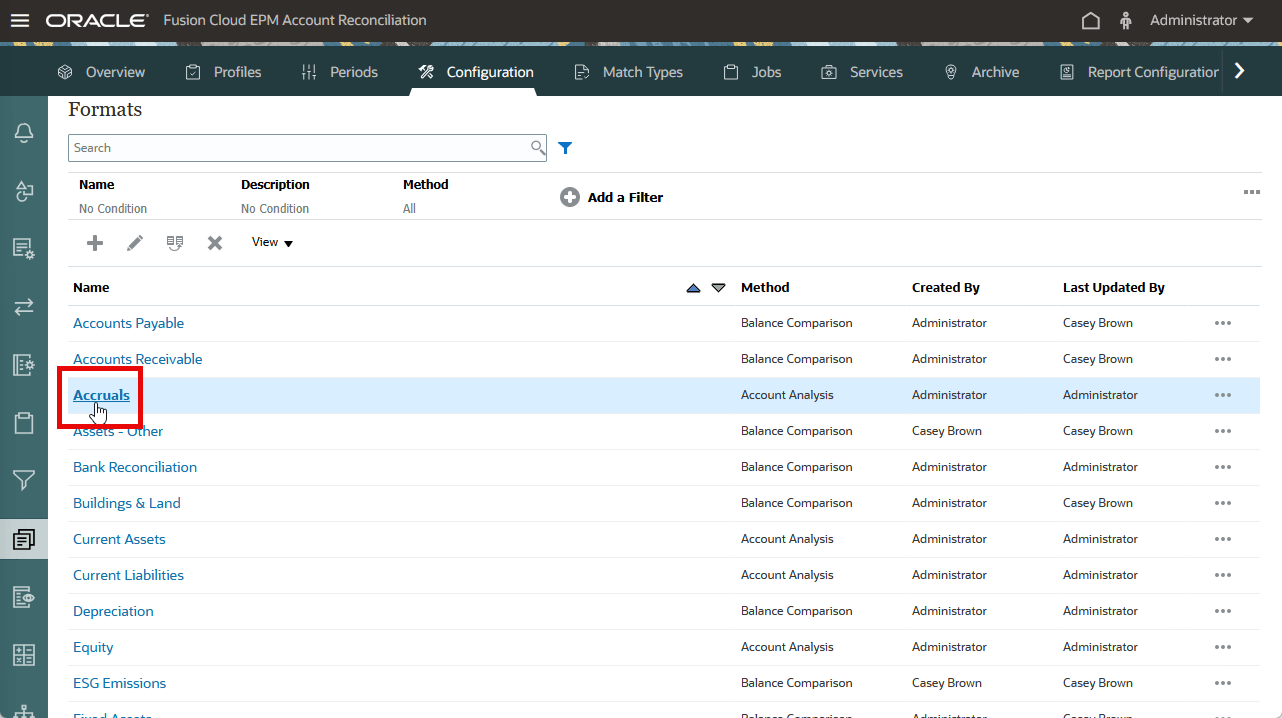
- From the Configuration page, click the Formats tab.
- You can create a format or select an existing format to apply the rule. In this example, select the Accruals format.
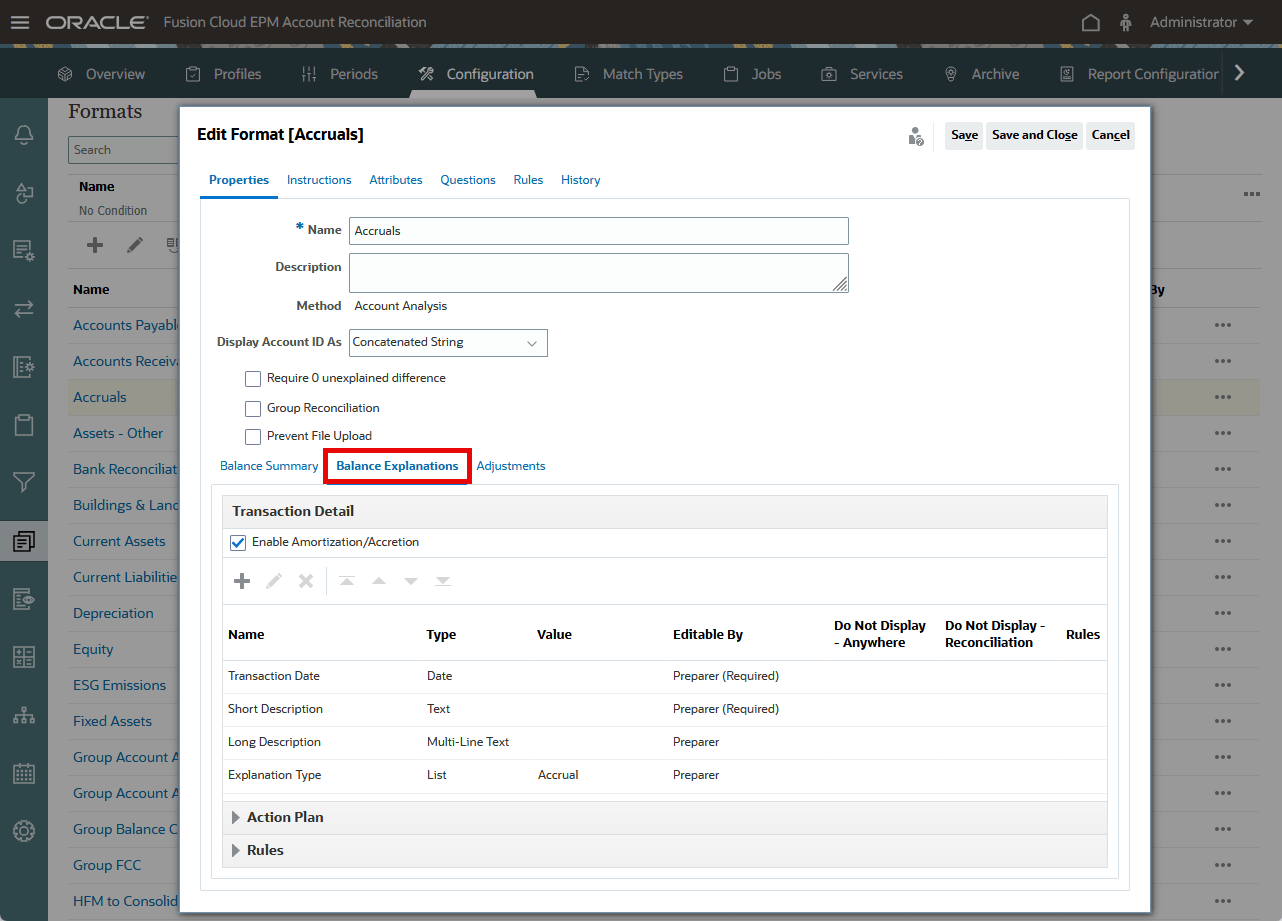
- Click the Balance Explanations or Adjustments transaction tab that will have the new rule applied (Balance Explanations in this example).
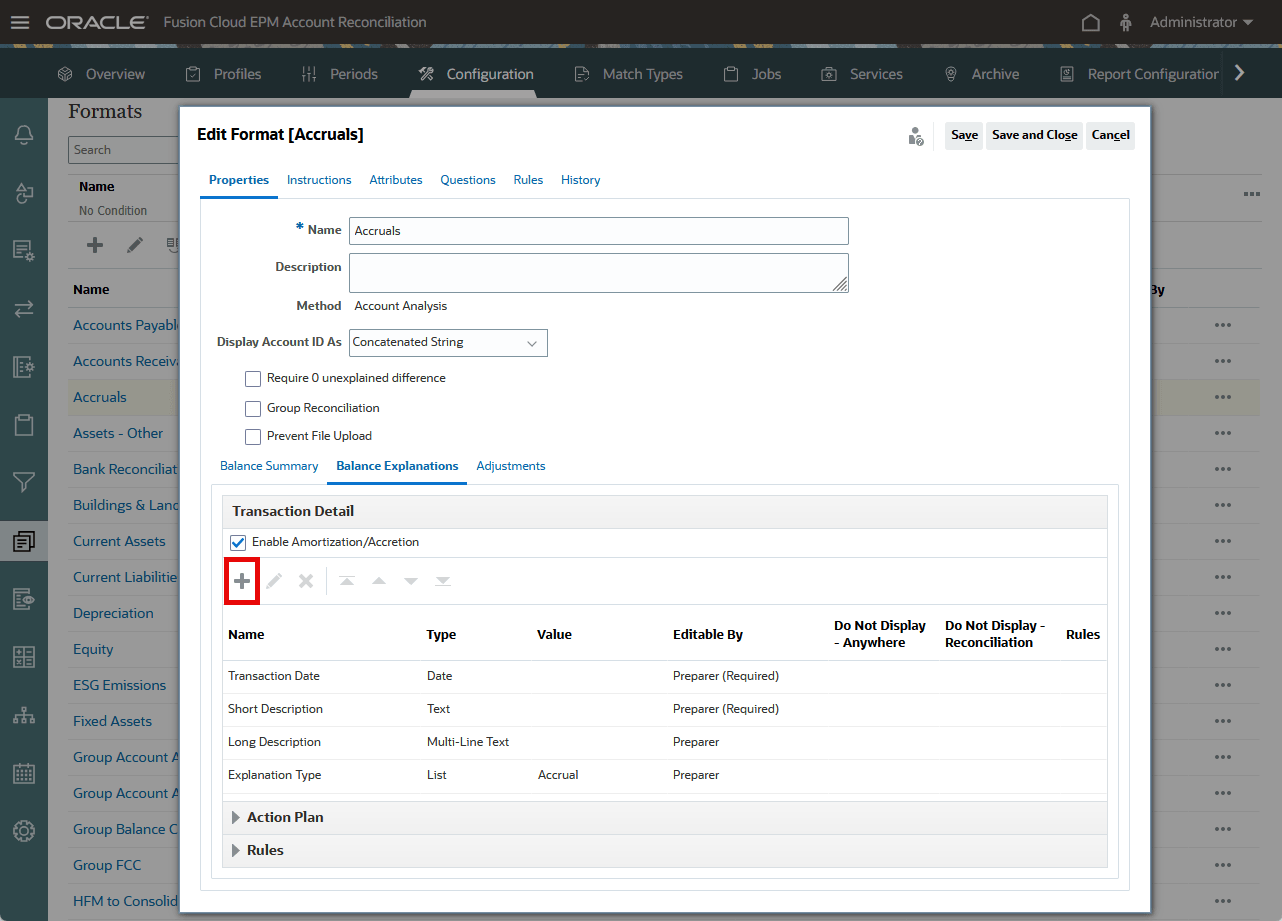
- Click Add to add the newly created attribute to the Transaction Detail.
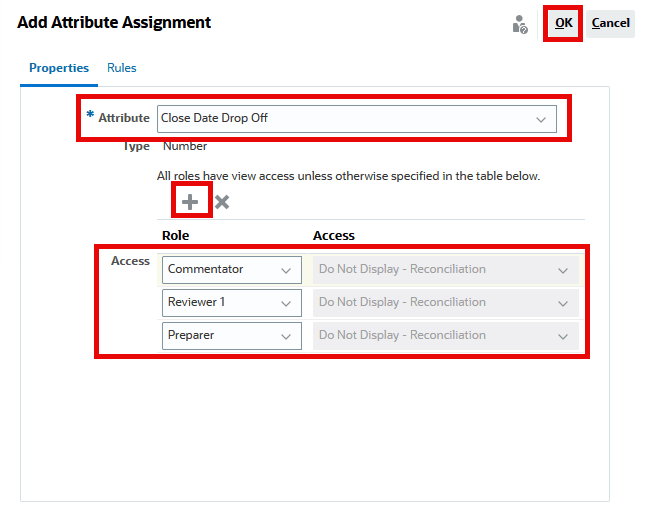
- Select the custom attribute that was created in the previous step (in this example, Close Date Drop Off), and then click the Add icon to assign roles that should not have view access to the attribute. Click OK.
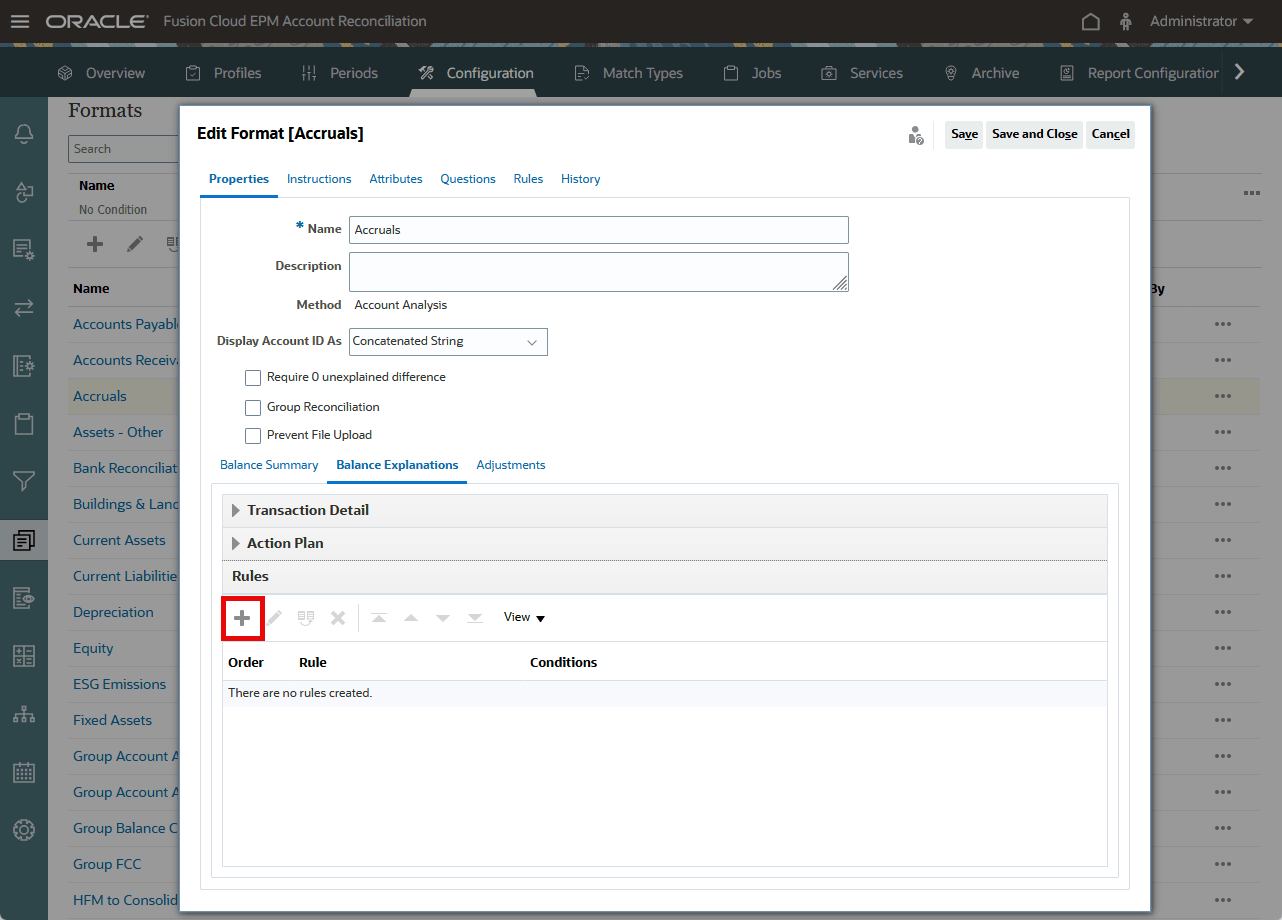
- Expand the Rules bar, and then click the Add icon to create a rule.
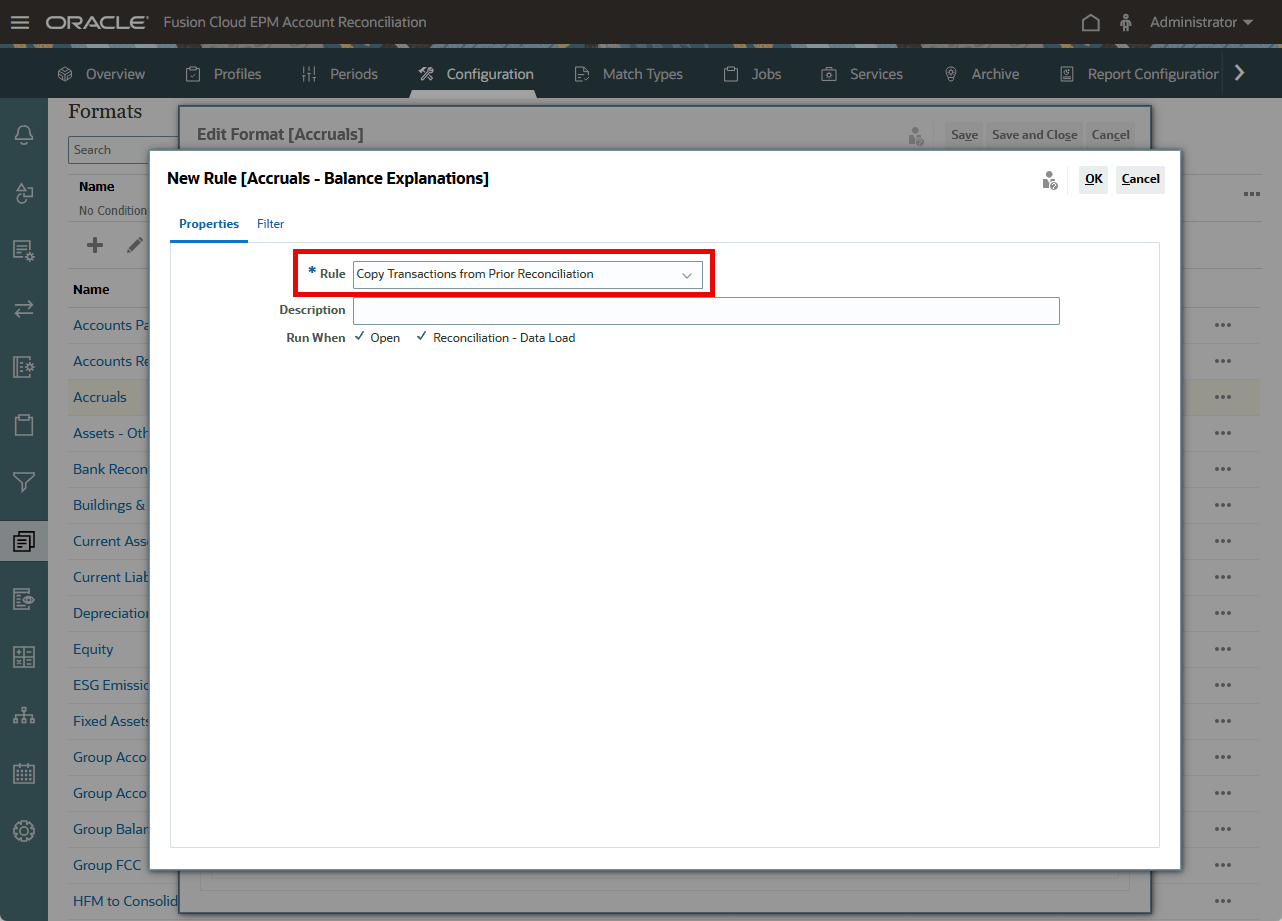
- Select the Copy Transactions from Prior Reconciliation rule.
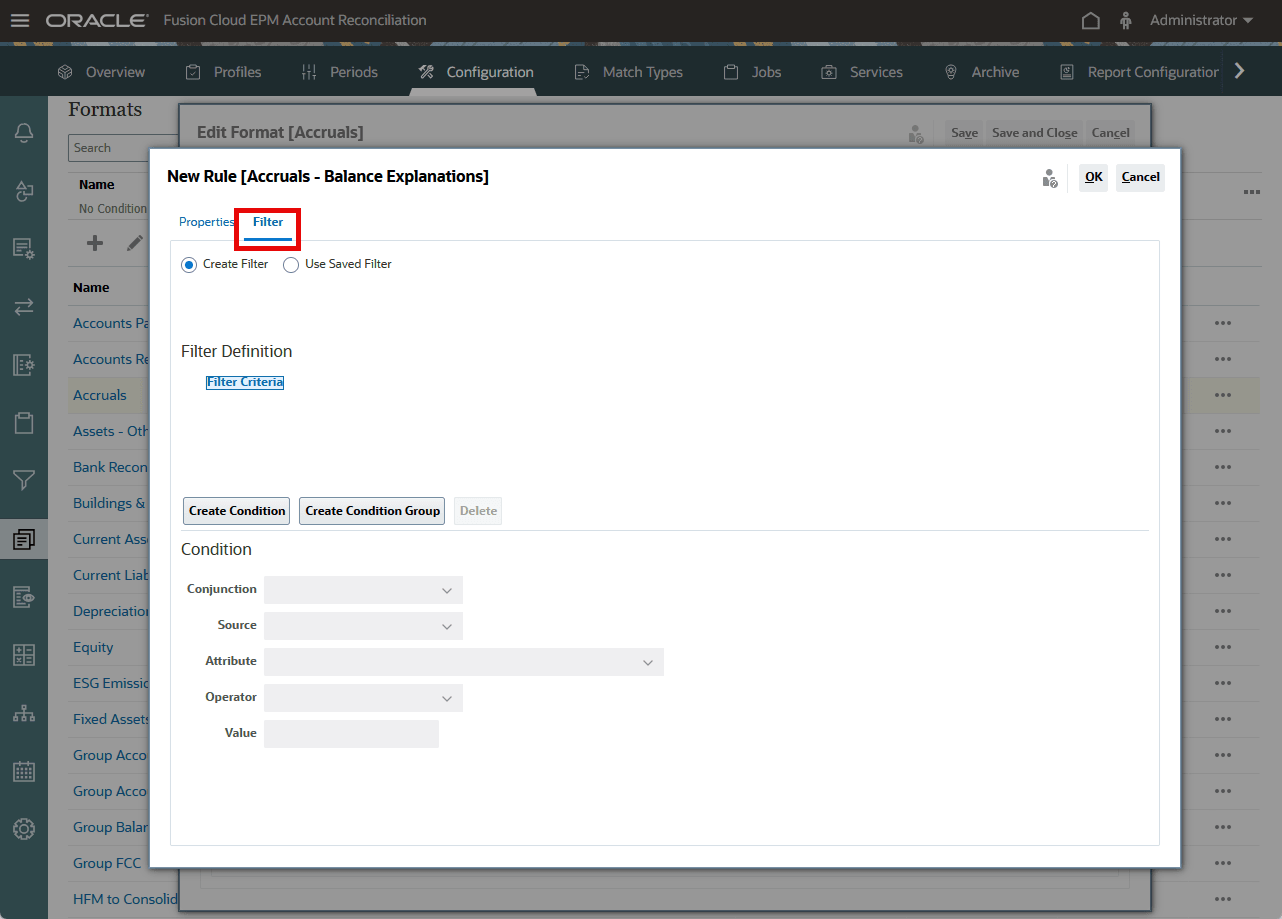
- Select the Filter tab.
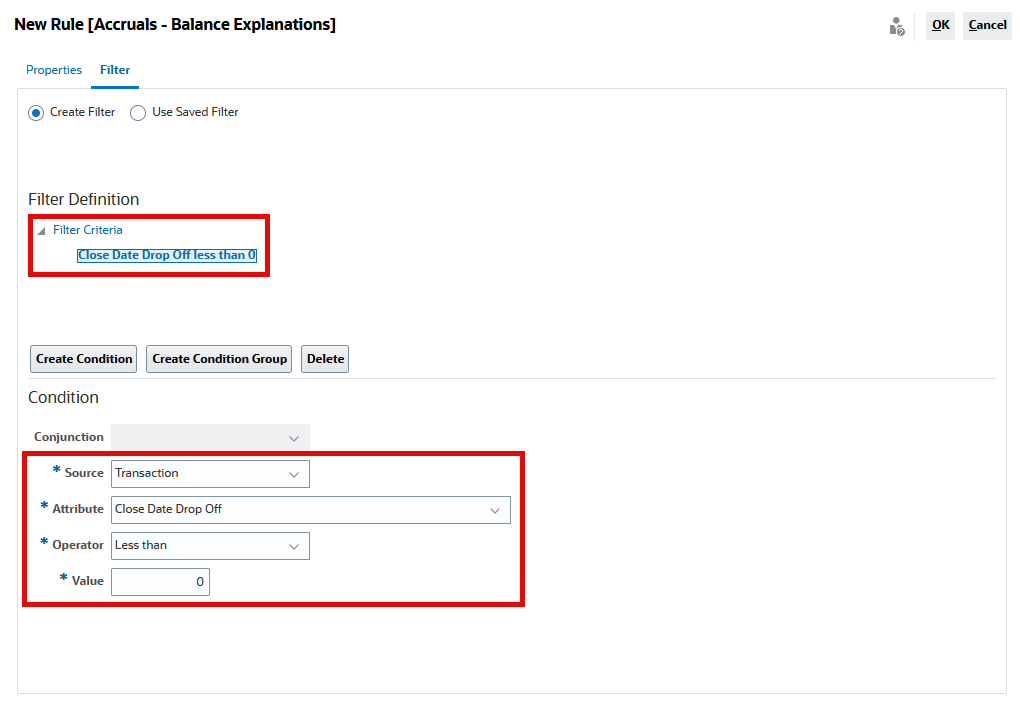
- Click Create Condition and create the following condition:
Source: Transaction
Attribute: Close Date Drop Off
Operator: Less Than
Value: 0
- Click OK to close the New Rule dialog.
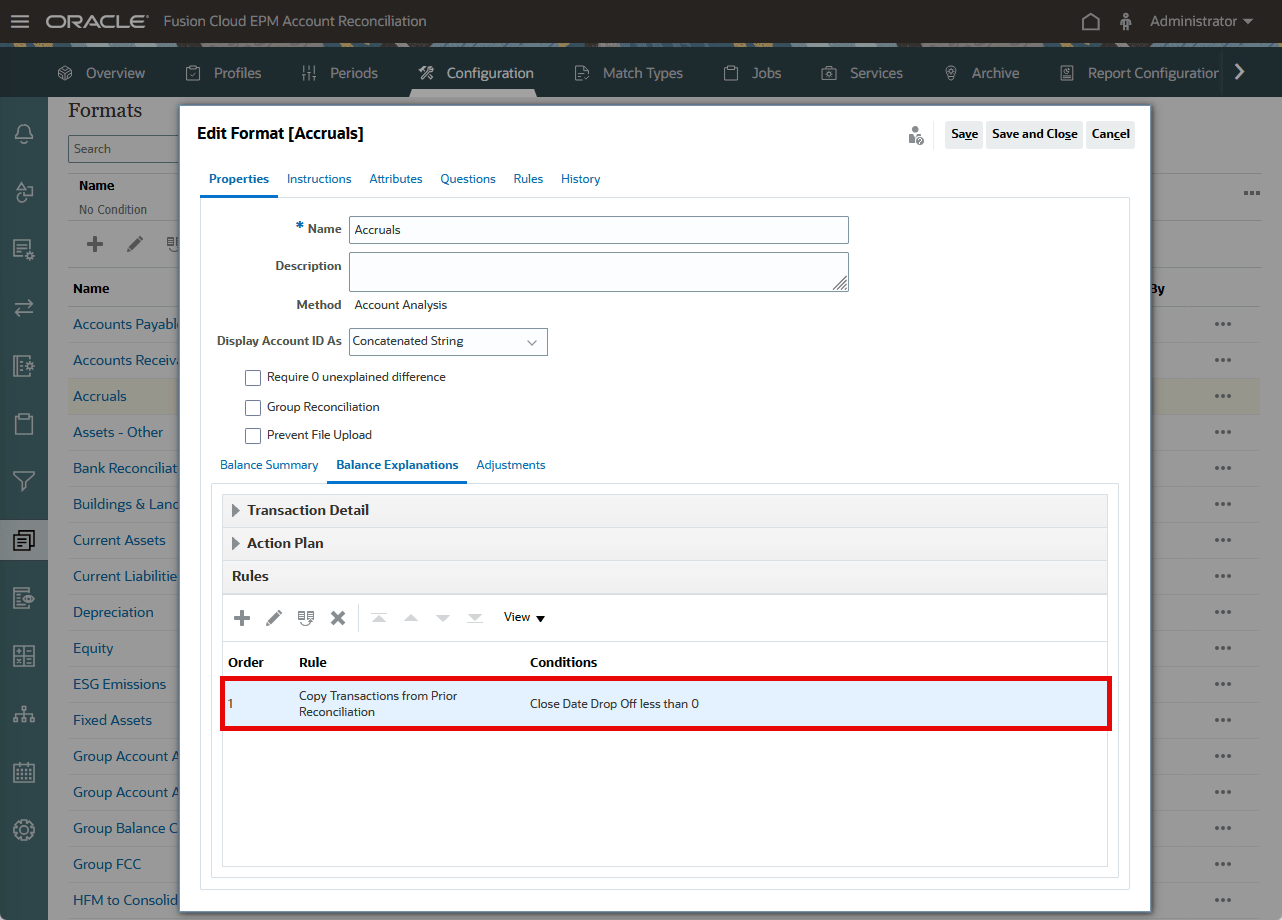
- The rule is added to the format.
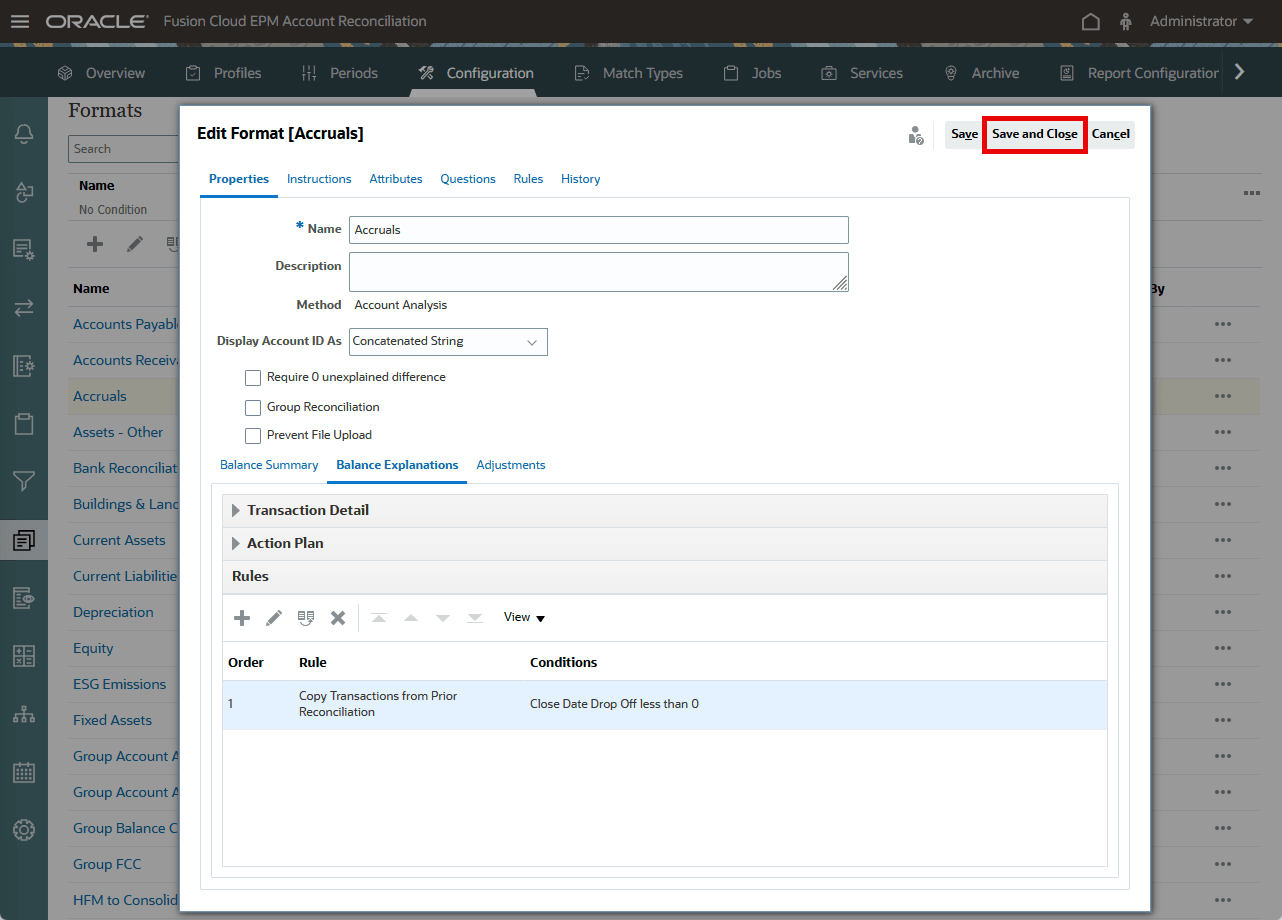
- Save and Close the format. The rule will now be applied to all future reconciliations you create.
Note:
Whenever the calculation for Close Date Drop Off is a negative number for the previous reconciliation, that means the Close Date is greater than the current period end date, so it should be copied forward from the prior reconciliation to the current reconciliation.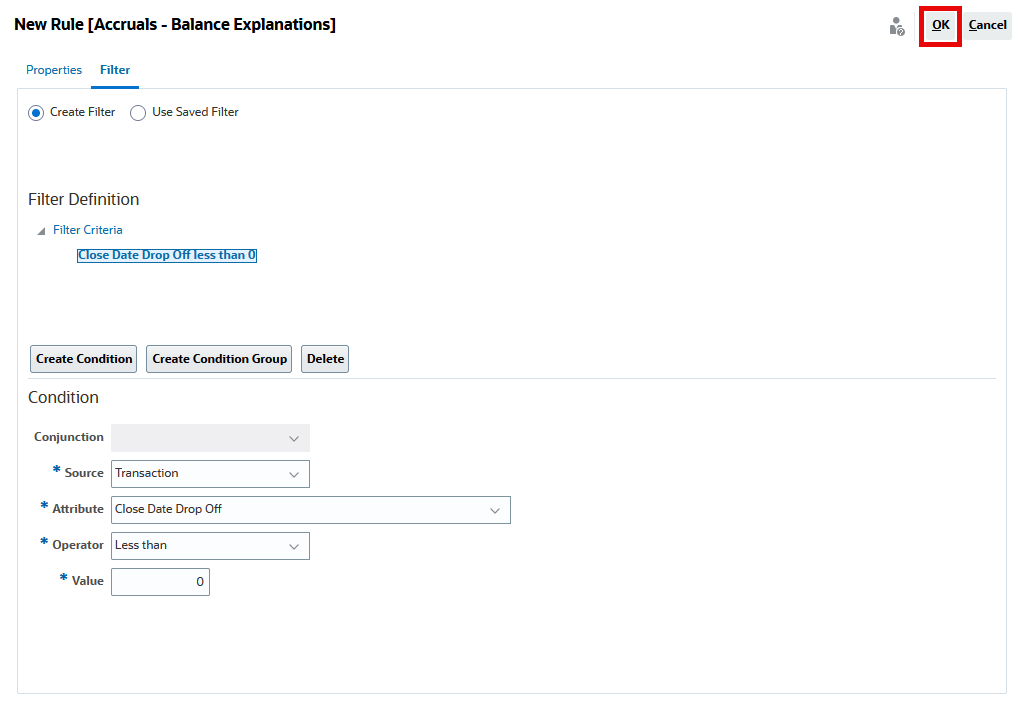
Related Links
Create an attribute and rule to drop off transactions based on Close Date
G27071-02
February, 2025