Introduction
This 30 minute tutorial shows you how to configure an account reconciliation format so that when transactions are carried forward from a prior reconciliation, the Transaction Date and Amount attributes are not editable. The tasks build on each other and should be completed sequentially.
Background
Carried-forward transactions often represent items that remain valid across periods. An example is a rent transaction carried over to later months to explain a balance.
For audit and control purposes, once a transaction is carried forward, preparers should not be able to change the original Transaction Date or Amount. The goal is to preserve the integrity of carried-forward transaction history while still allowing preparers to update other supporting details as appropriate.
Formats control what reconciliations look like, what information preparers and reviewers can enter, which attributes exist, and which rules apply to the reconciliation. Format design controls transaction attributes and the rules governing who can edit those attribute values.
In this tutorial, you configure format rules to ensure that Transaction Date and Amount are protected whenever a transaction’s Creation Method is Carried Forward.
Prerequisites
Before starting this tutorial, you should have:
- A working knowledge of Oracle Cloud EPM Account Reconciliation.
- Administrator access to an Oracle Cloud EPM Account Reconciliation application.
Task 1: View the issue before configuring format rules
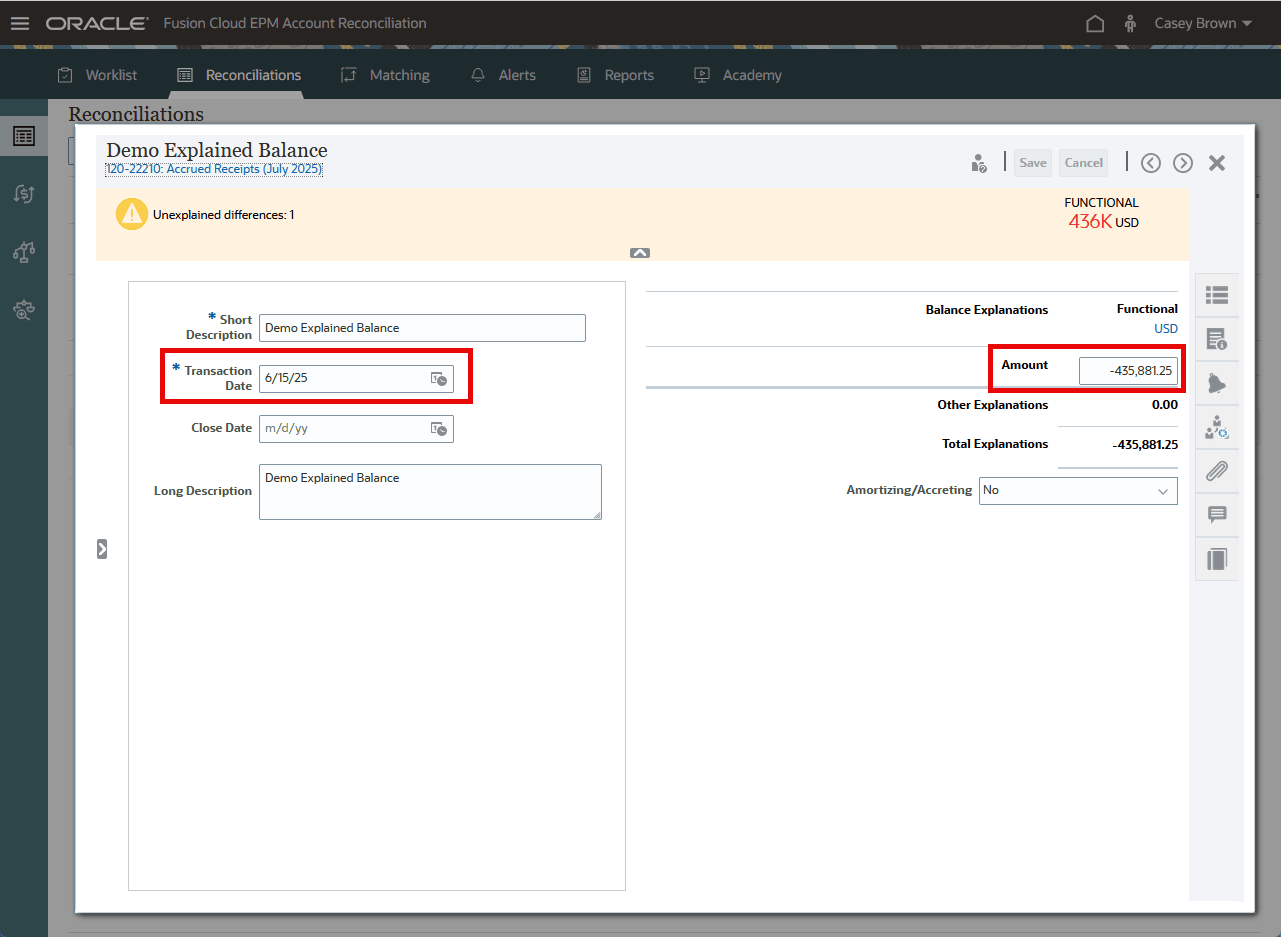
The screenshot shows a carried forward balance explanation before applying the format rule configurations in this tutorial. Transaction Date and Amount are editable.
Task 2: Identify the format associated with a reconciliation profile
Identify the format you want to modify to include rule configurations for Transaction Date and Amount.
- Sign in as an Administrator.
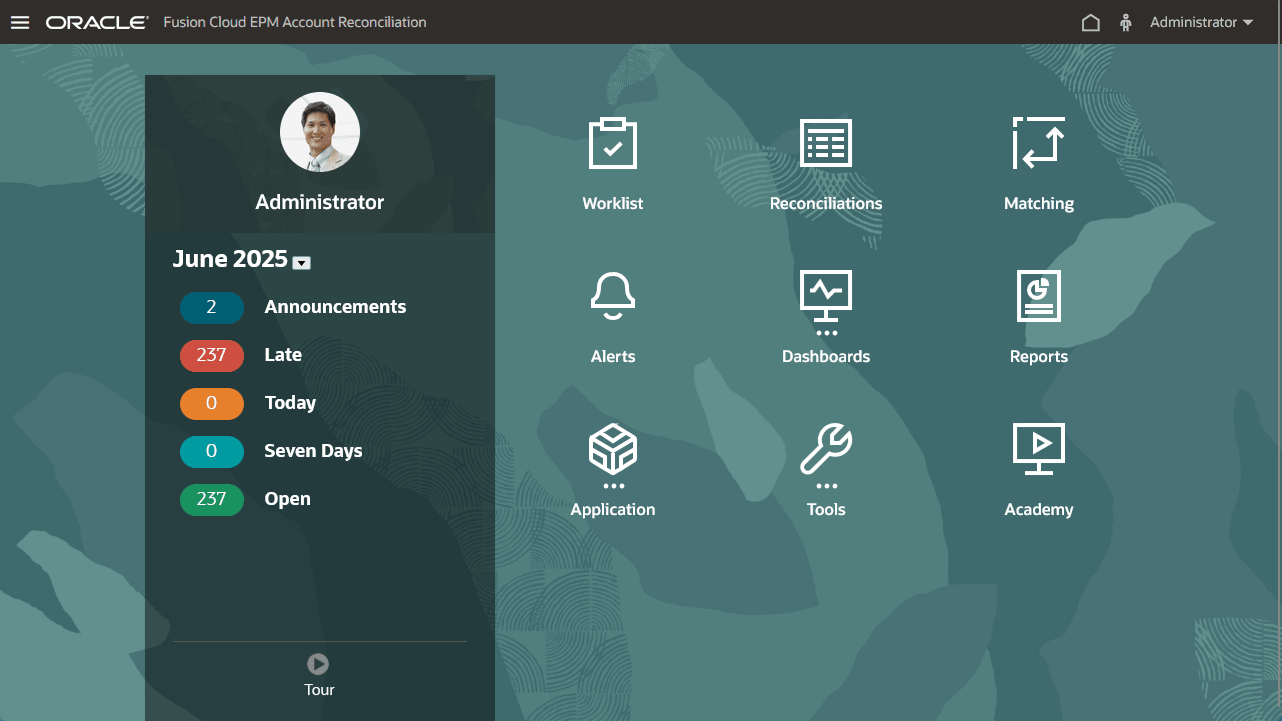
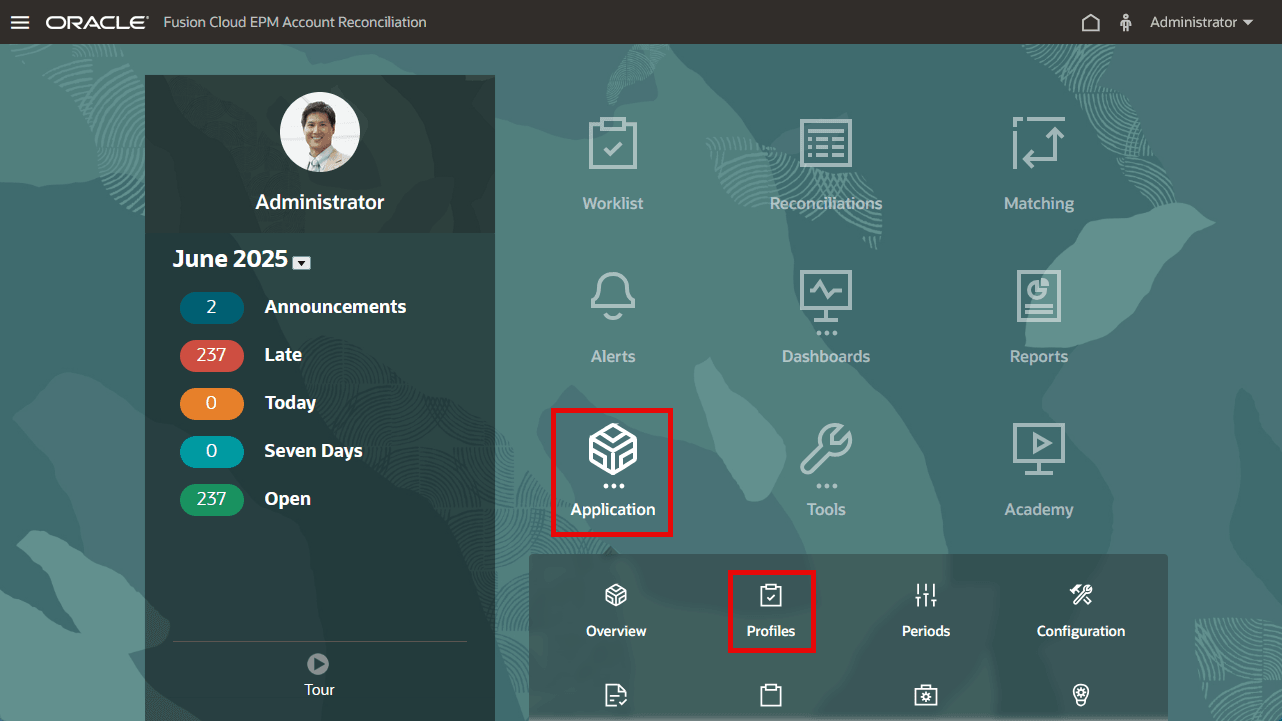
- From the Home page, select Application > Profiles.
- Search for the profile you want to modify (120-22210 Accrued Receipts in this example).
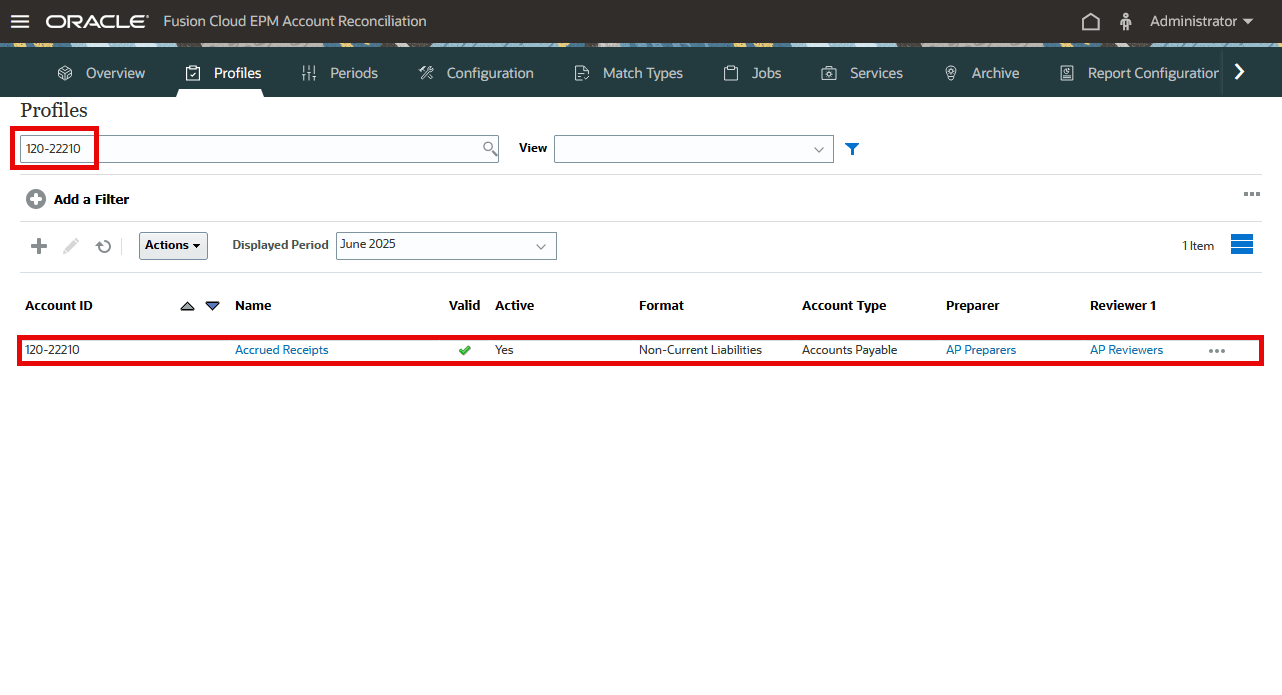
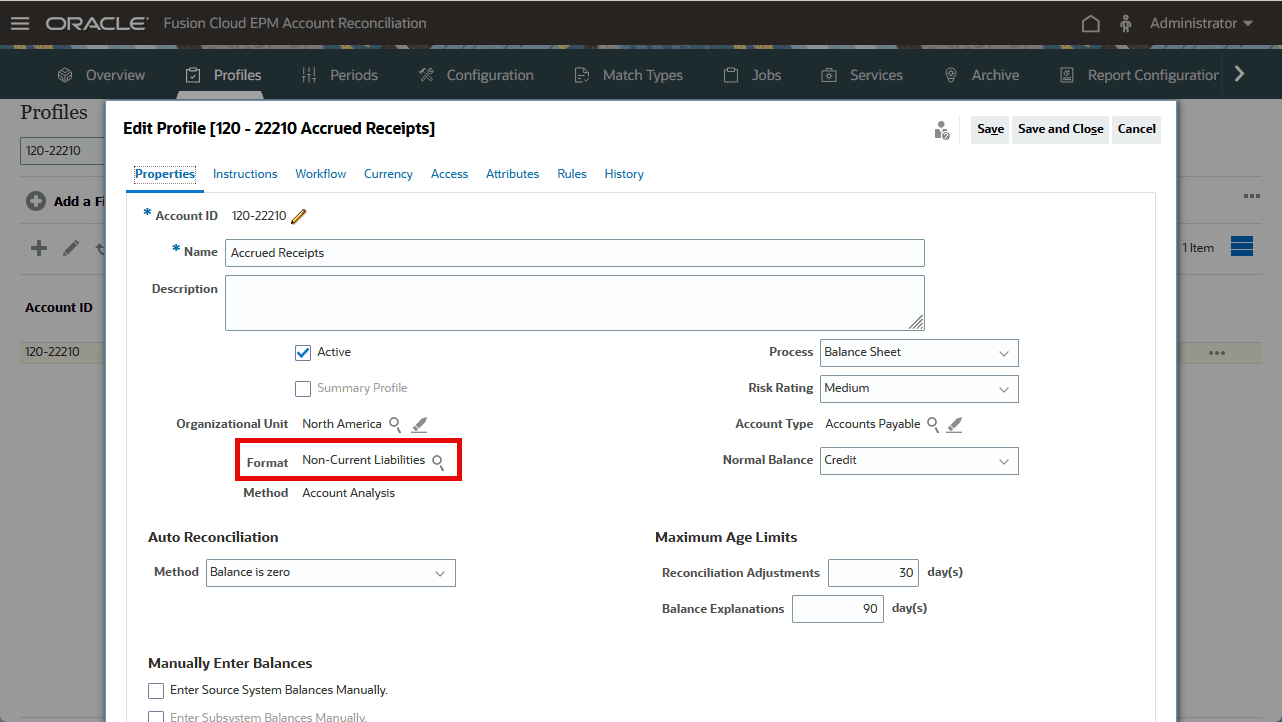
- Open the profile to identify the associated format (Non-Current Liabilities in this example).
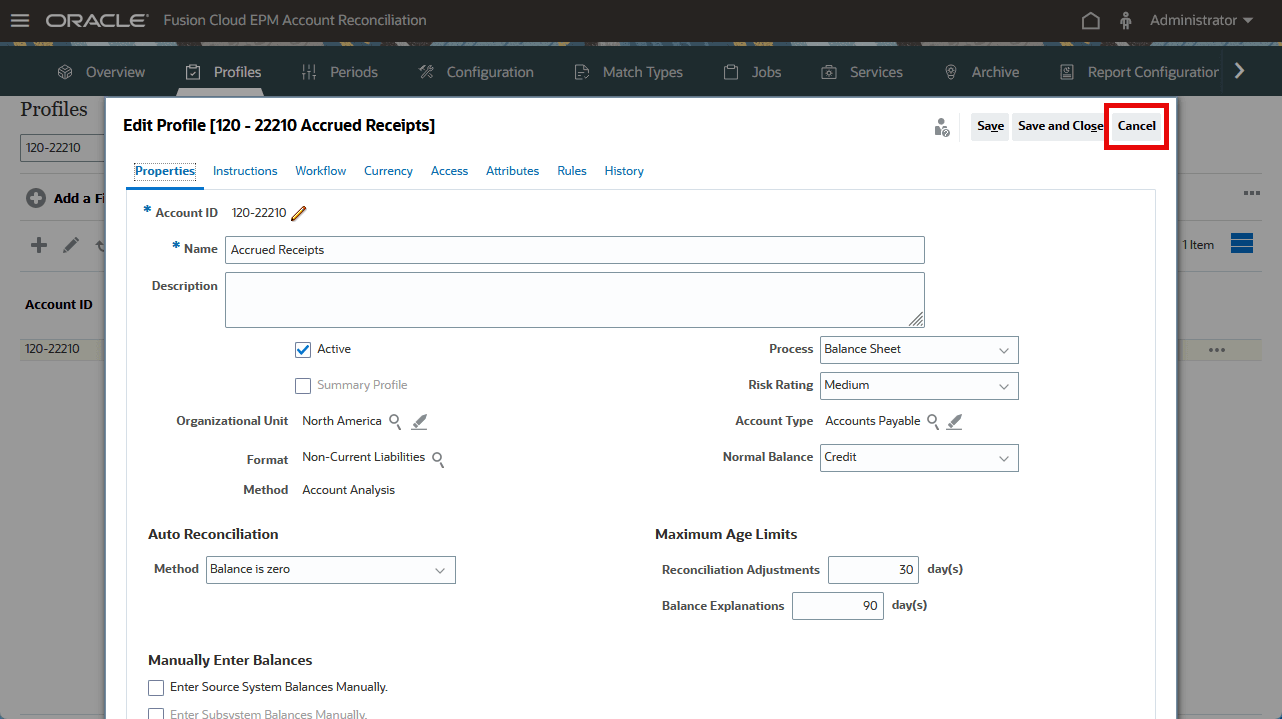
- Click Cancel to close the profile.
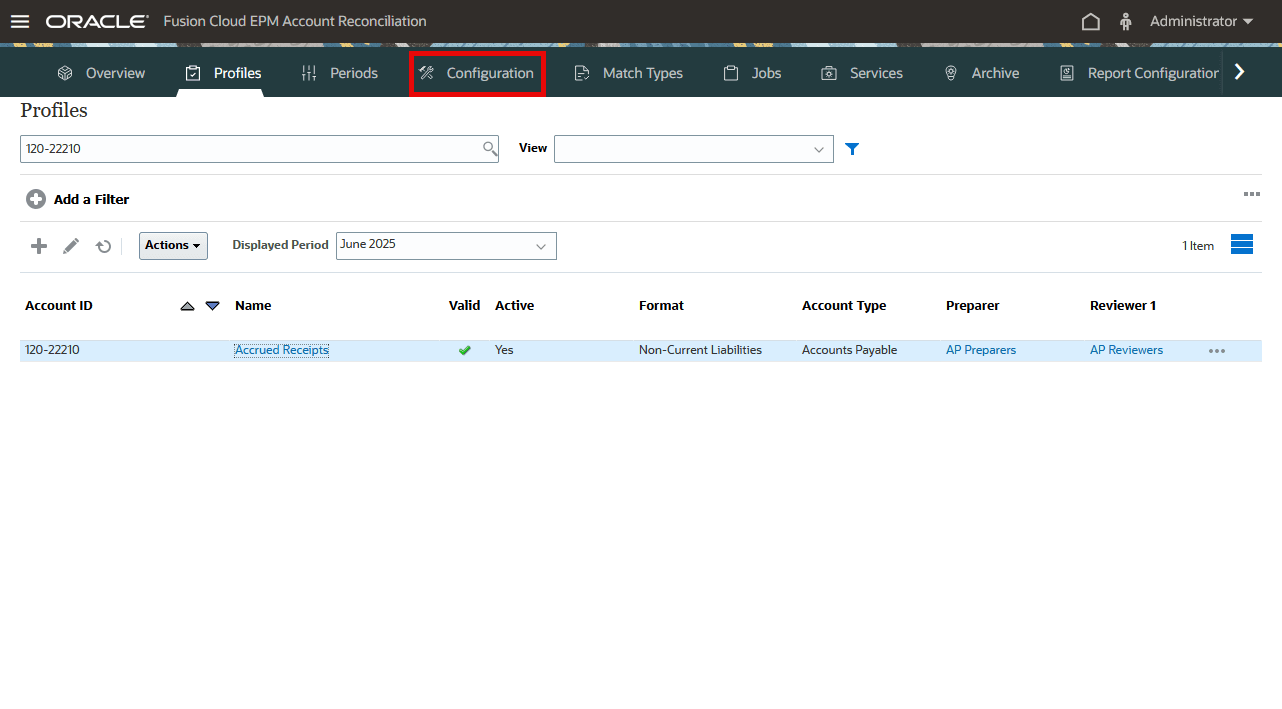
- Select Configuration from the navigation bar.
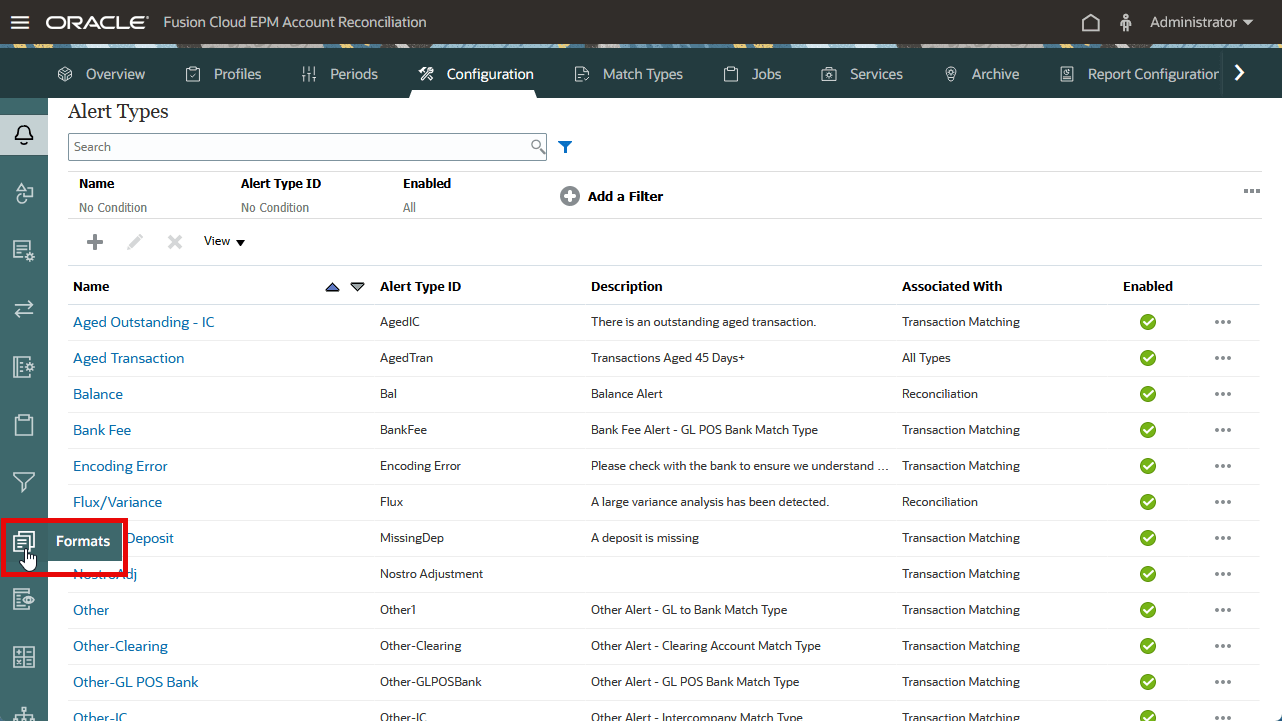
- Select Formats from the side bar.
- Search for the format (Non-Current Liabilities in this example).
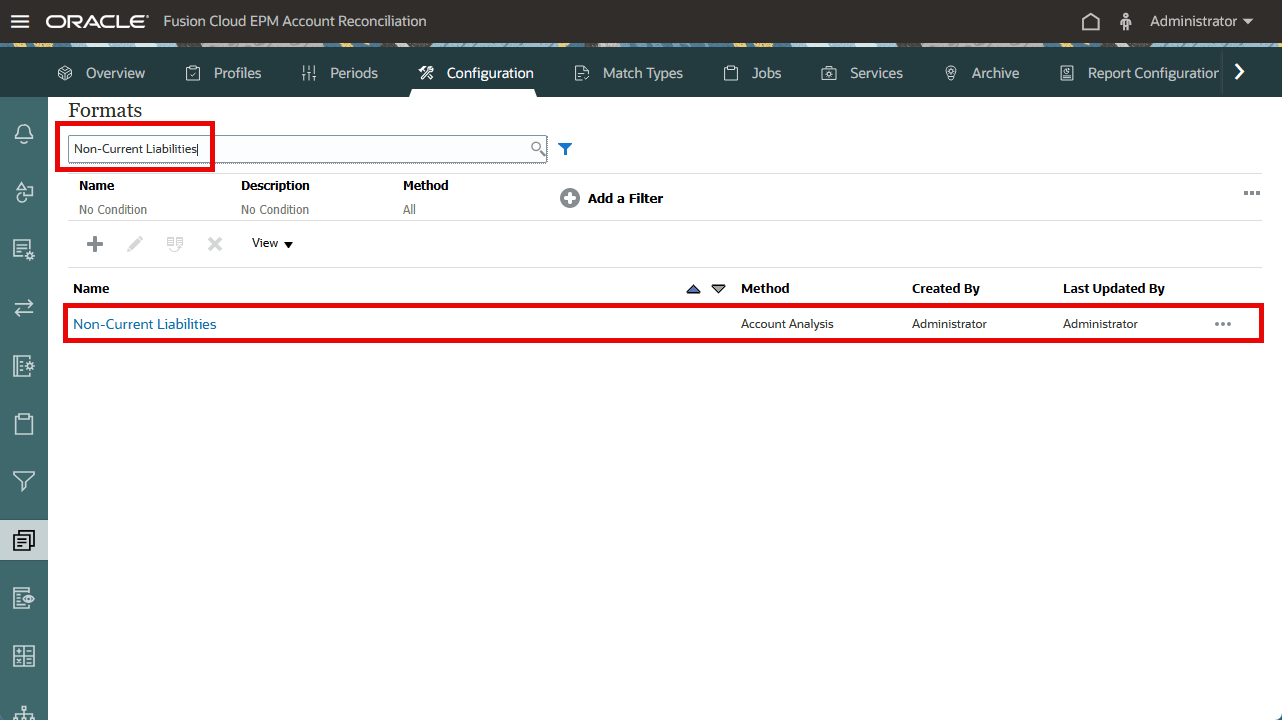
Task 3: Configure the rule for Transaction Date
- Open the format and select Balance Explanations.
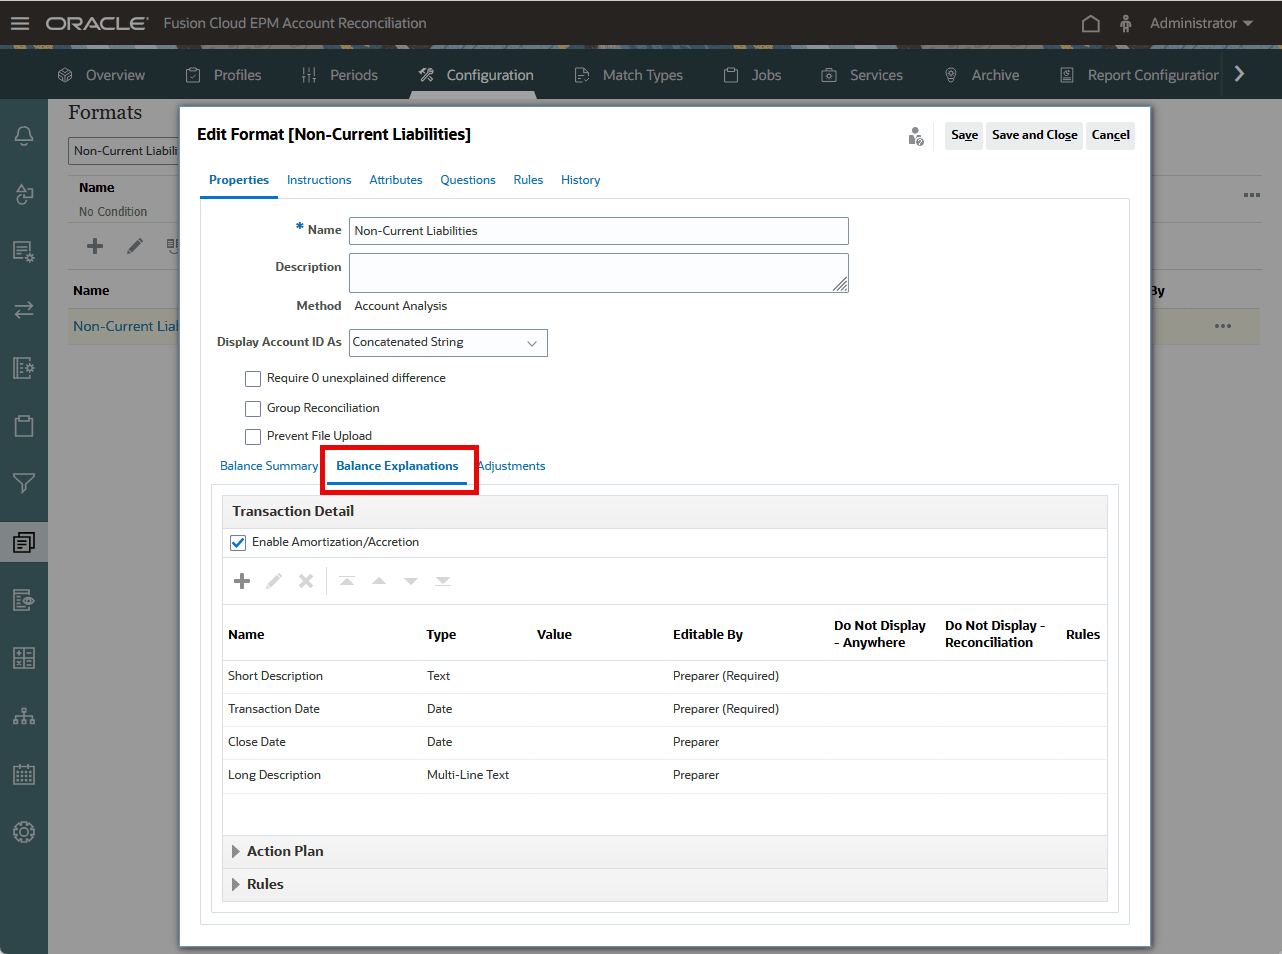
- In the Transaction Detail section, select Transaction Date.
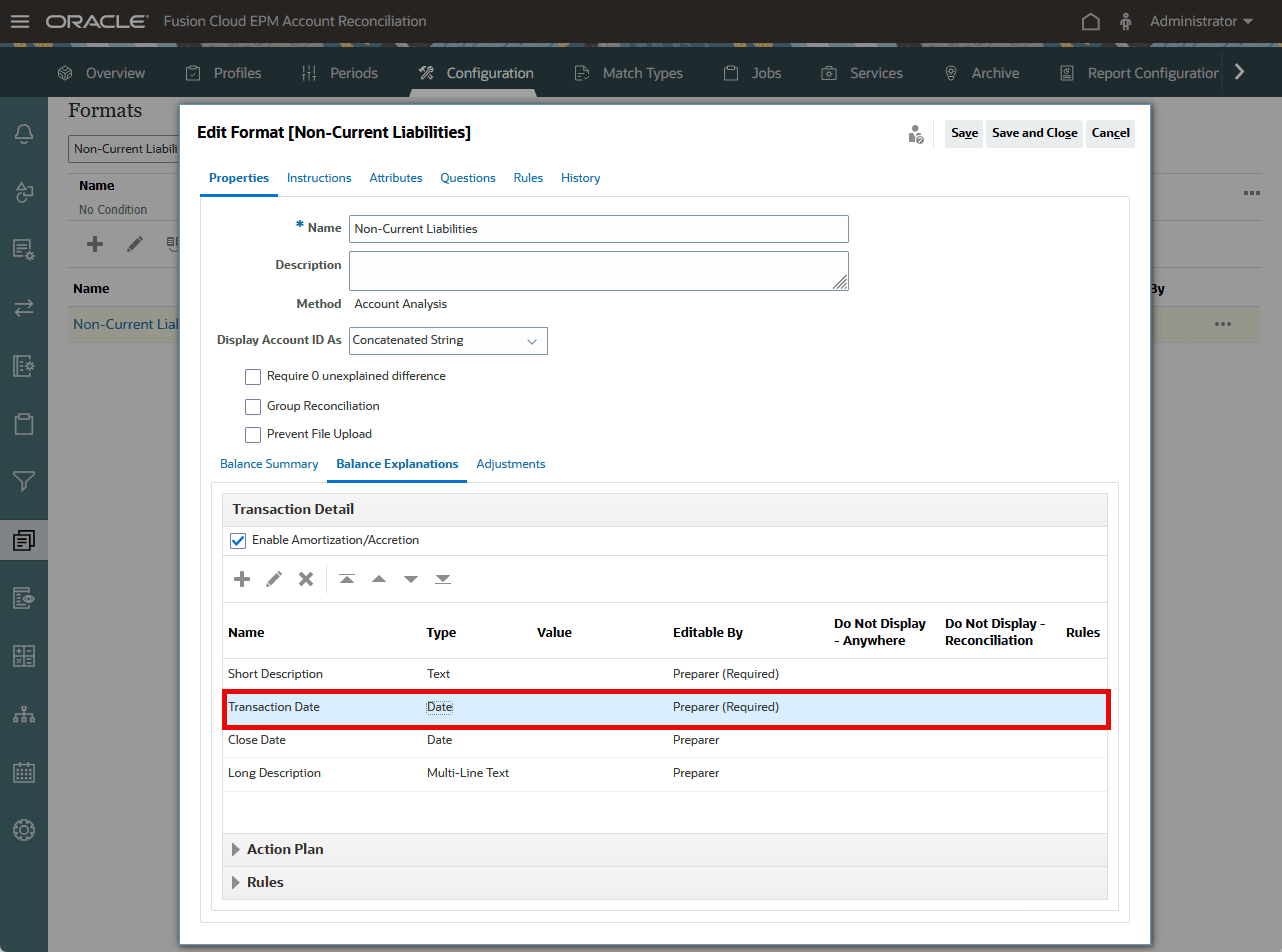
- Click Edit.
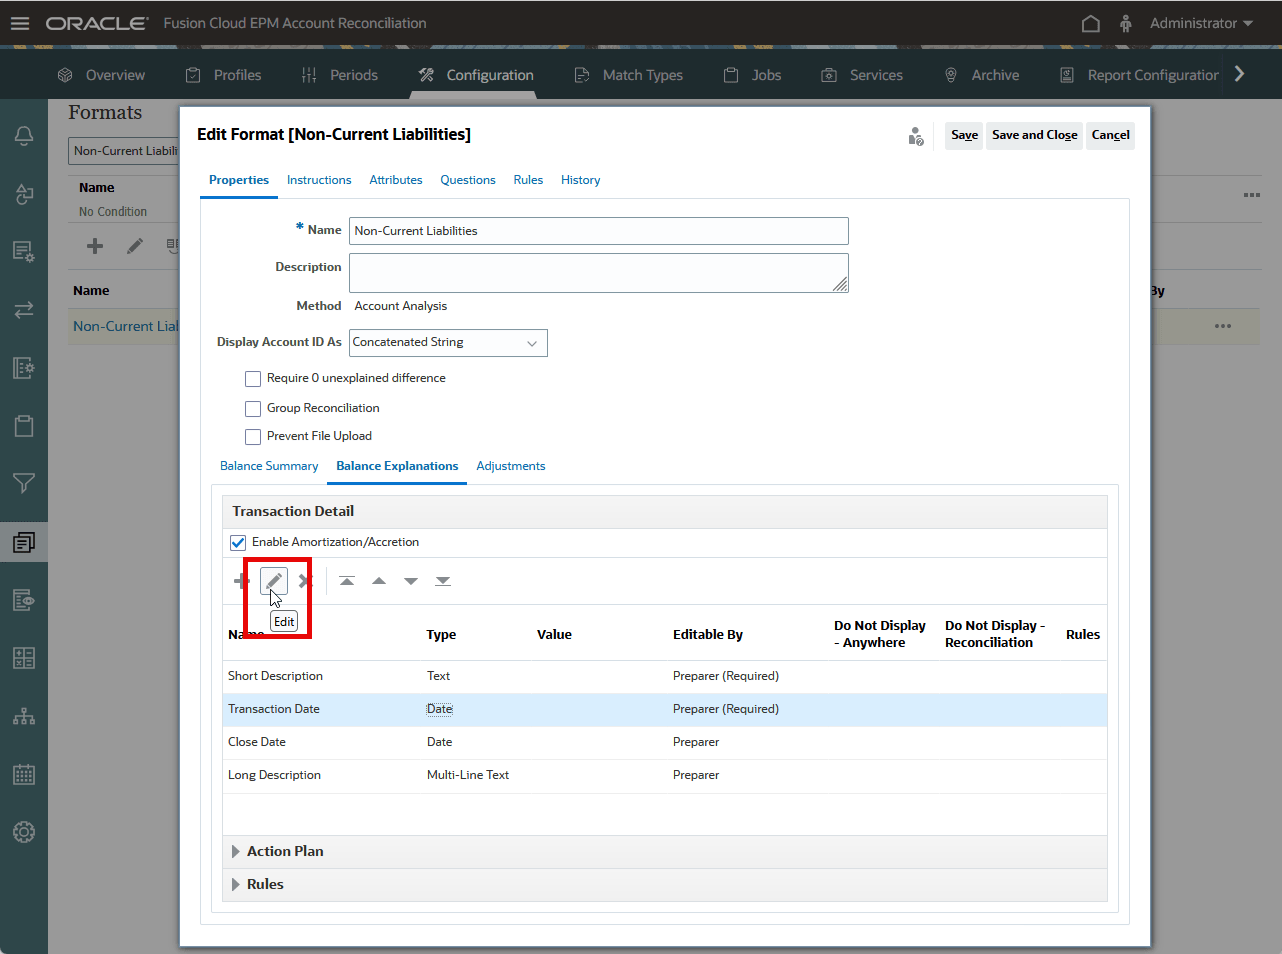
- The Edit Attribute Assignment dialog opens.
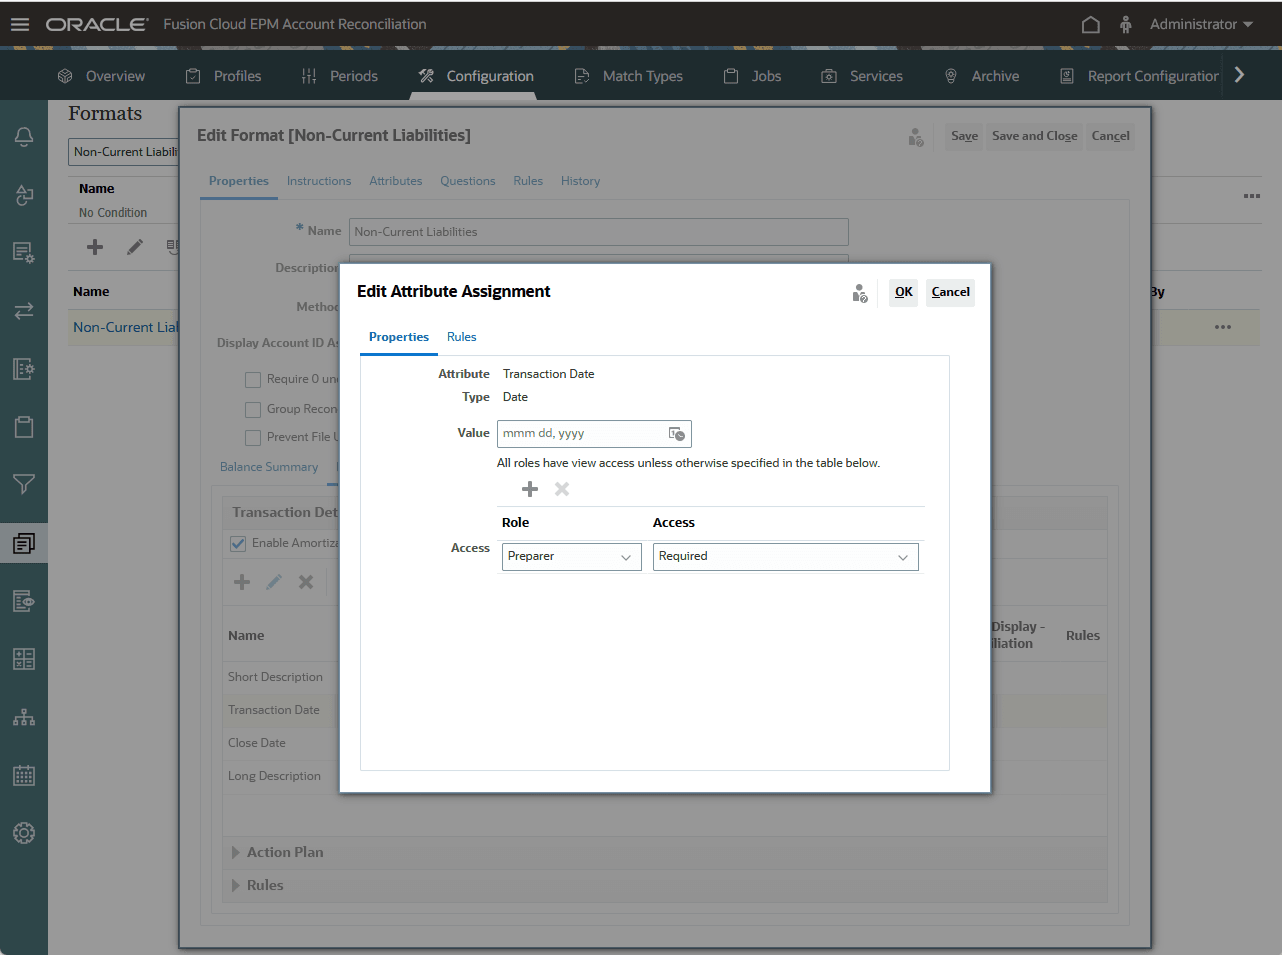
- Select one of the Access fields to enable Remove (X).
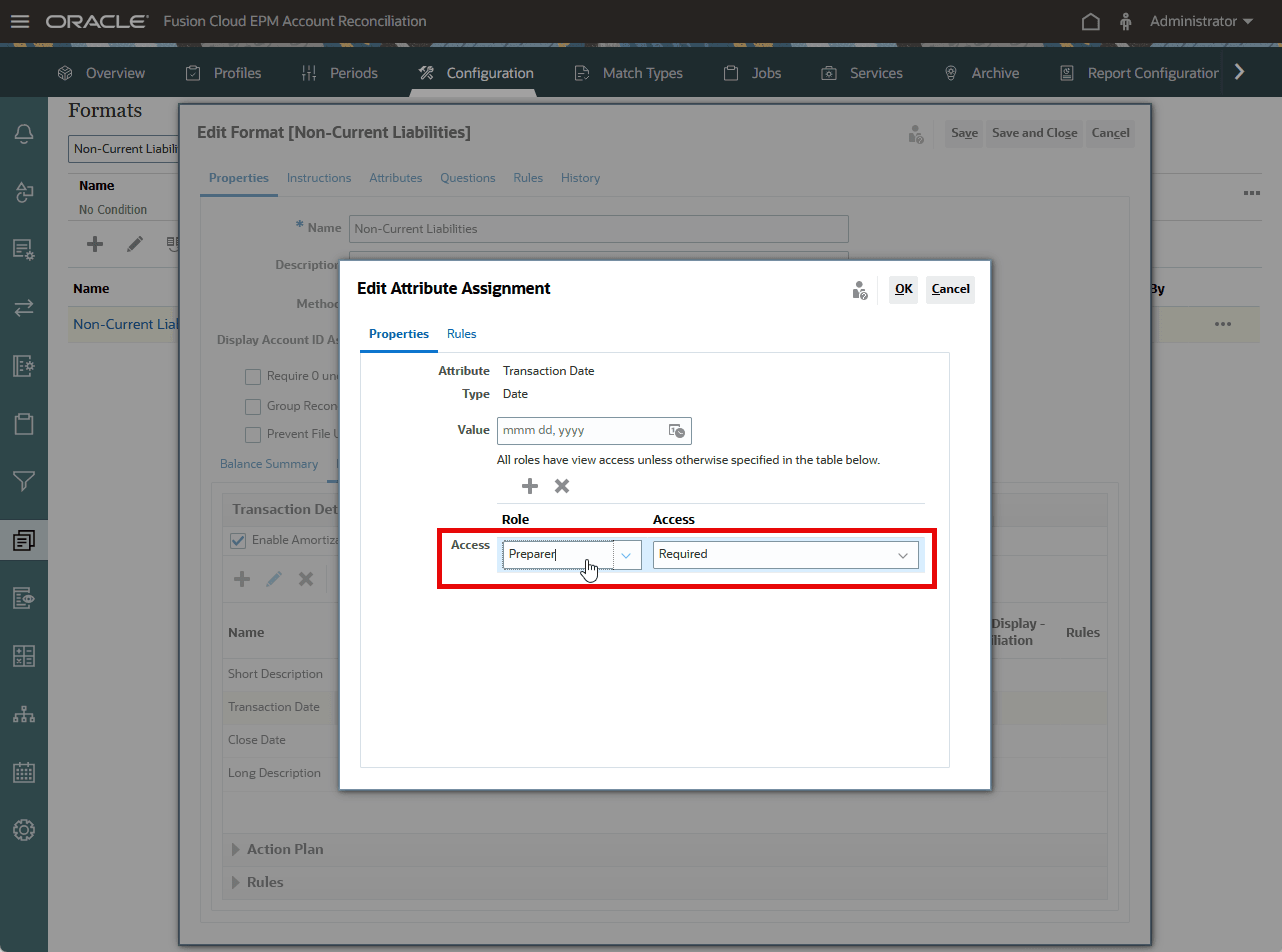
- Click X to remove the default “full edit” access.
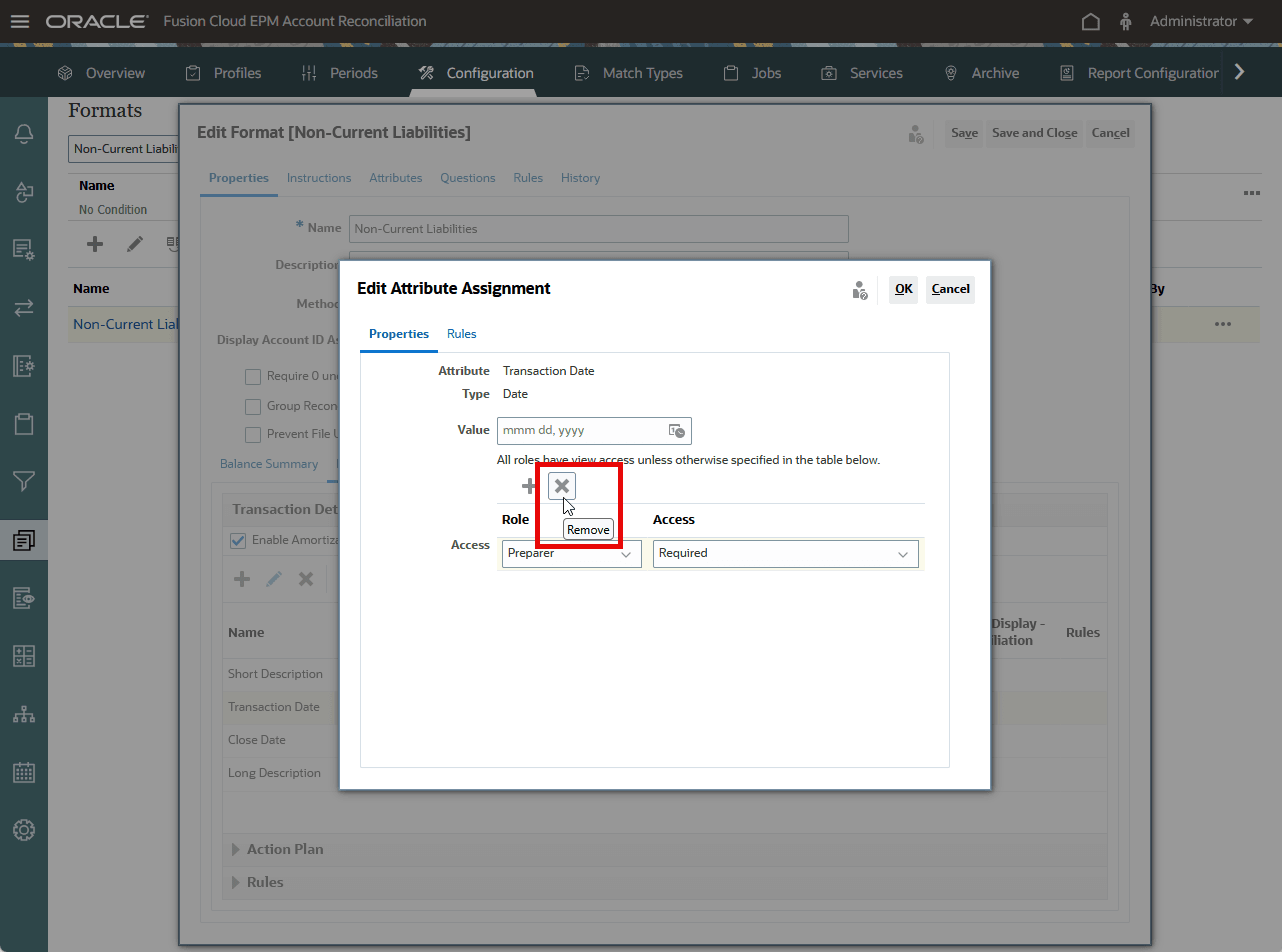
- Verify that there are no role access assignments. This is important because a default full edit setting may override the intended restriction.
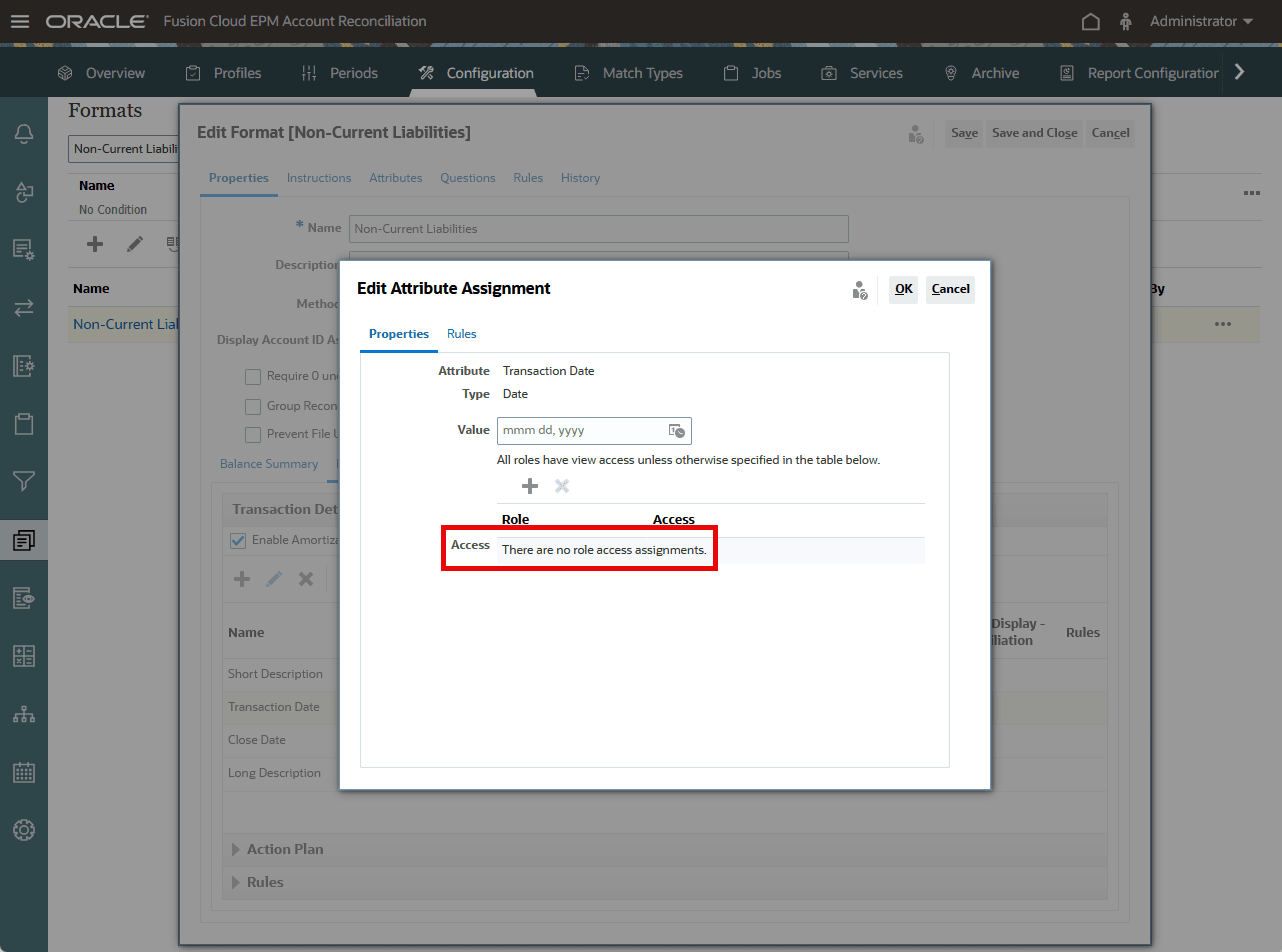
- Select the Rules tab.
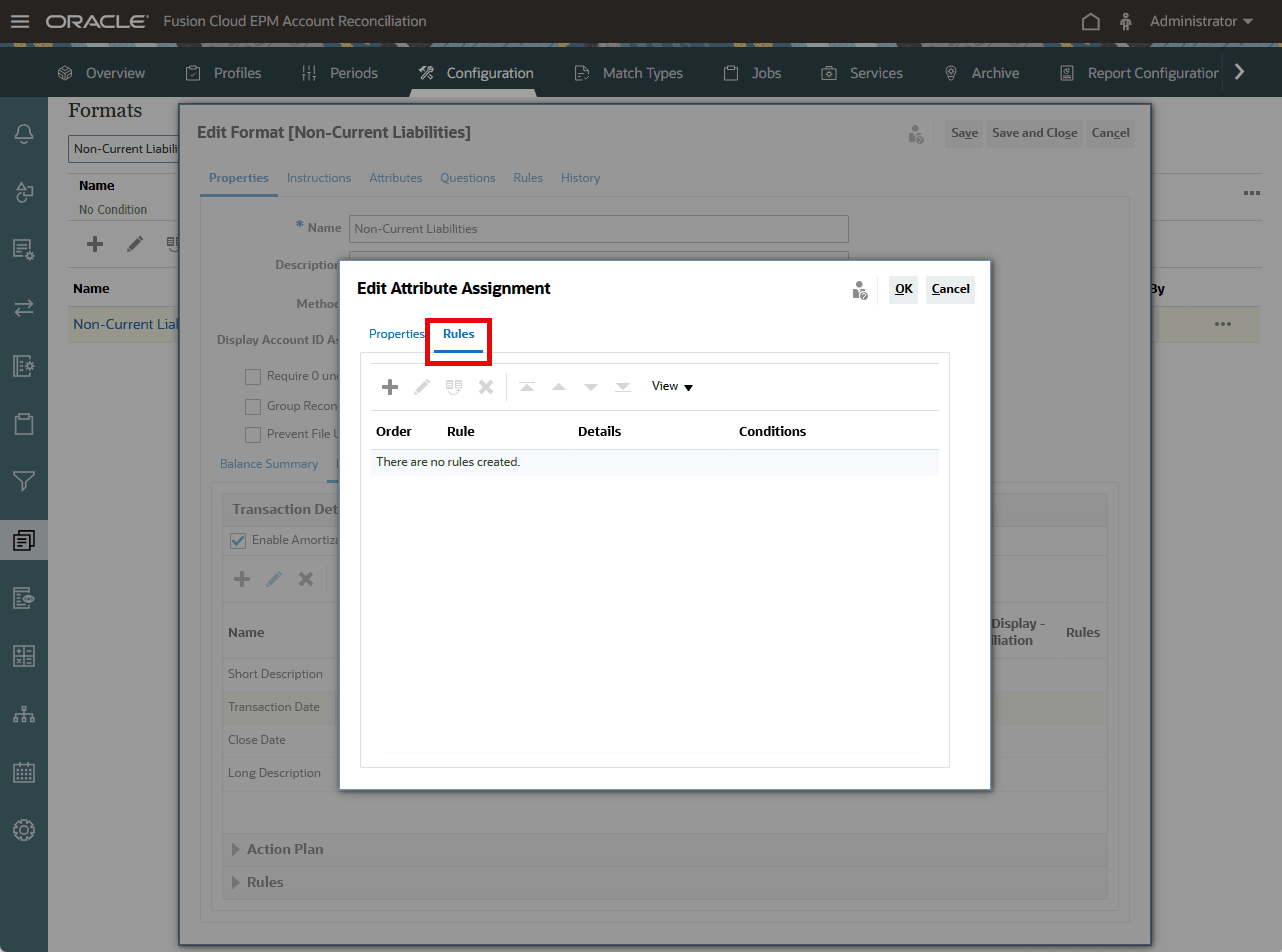
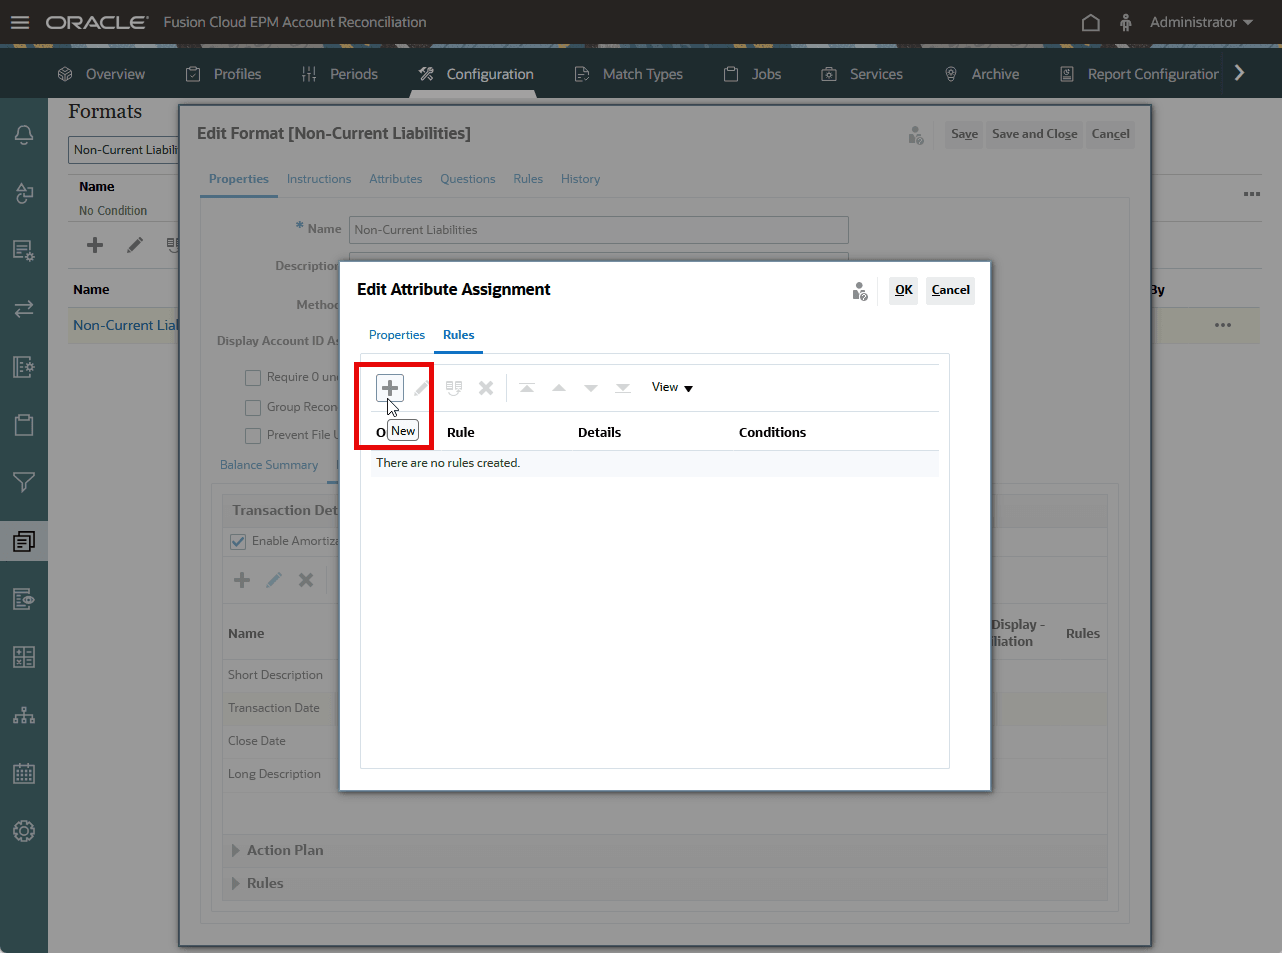
- Click New to add a rule.
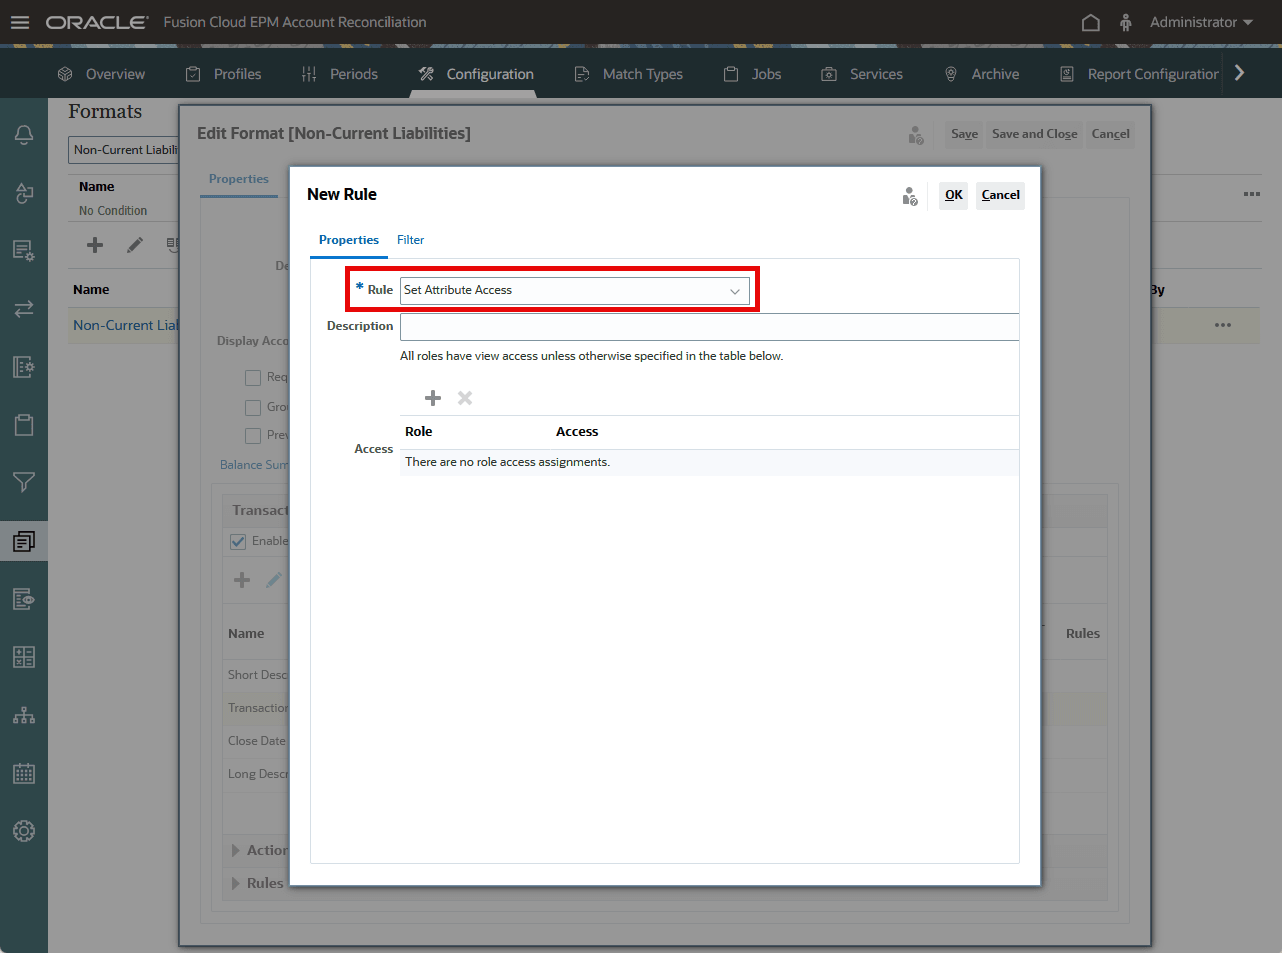
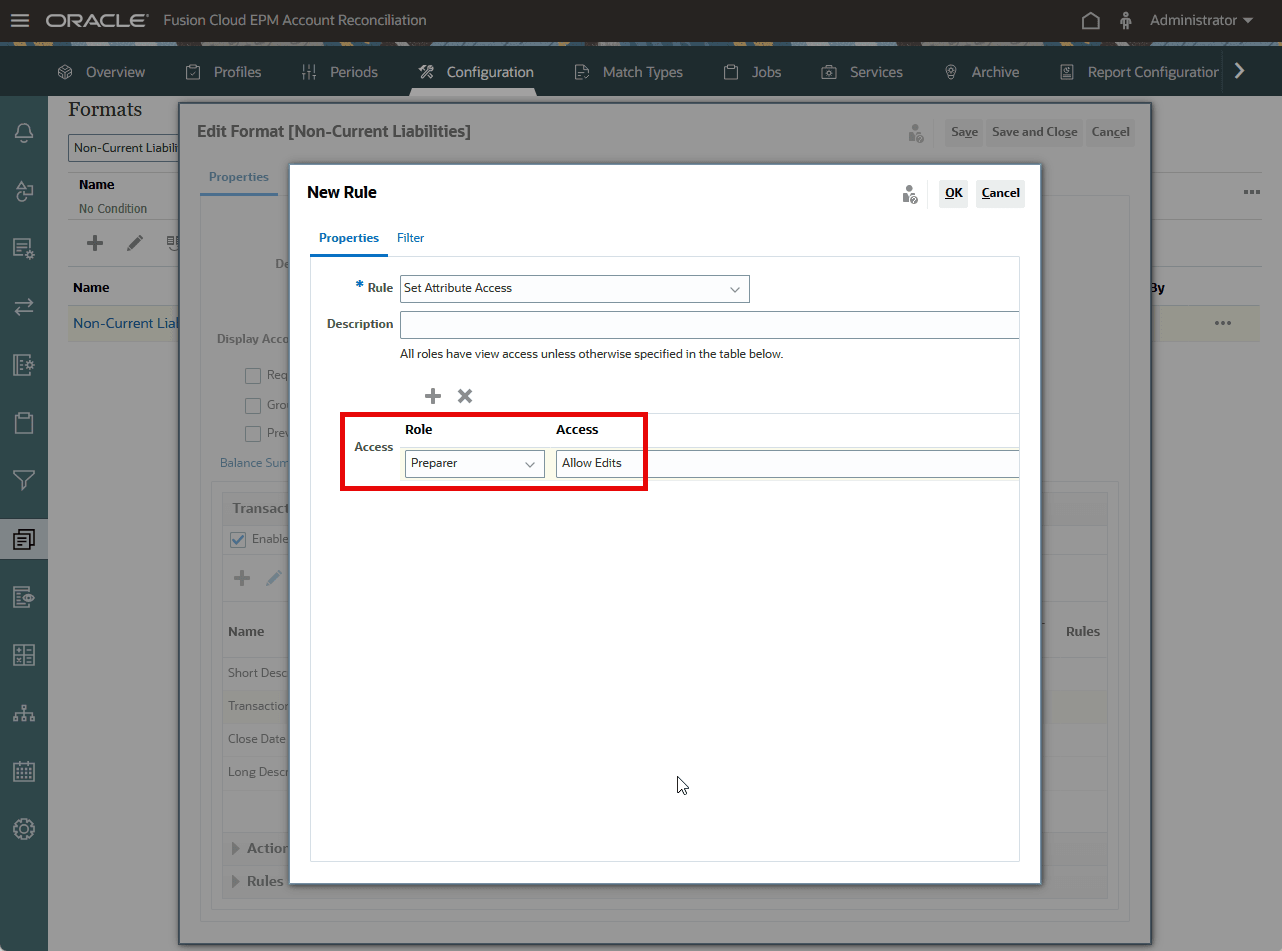
- In the New Rule dialog, verify that Set Attribute Access is selected for Rule.
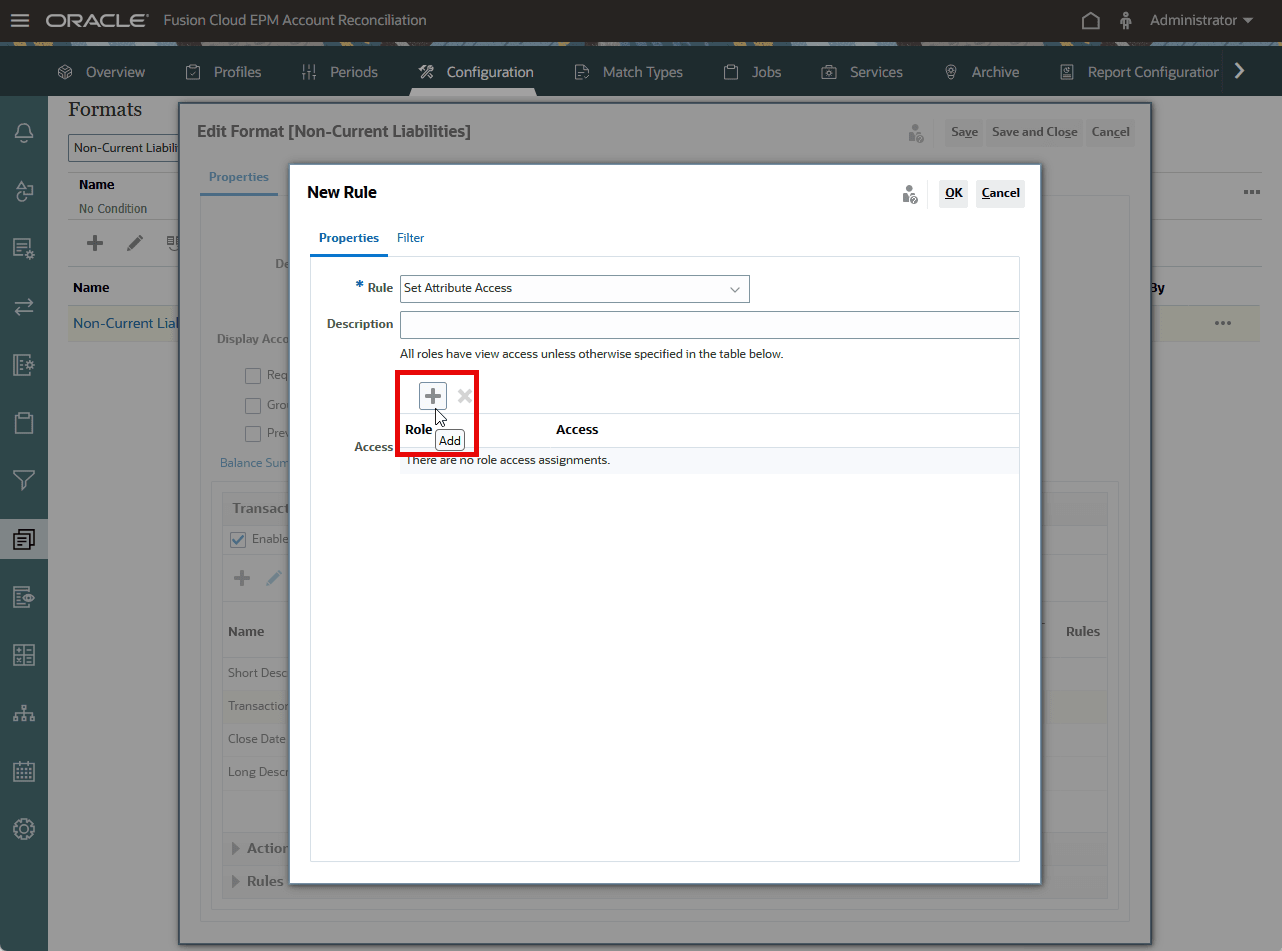
- Add a role.
- Select Preparer for Role and Allow Edits for Access.
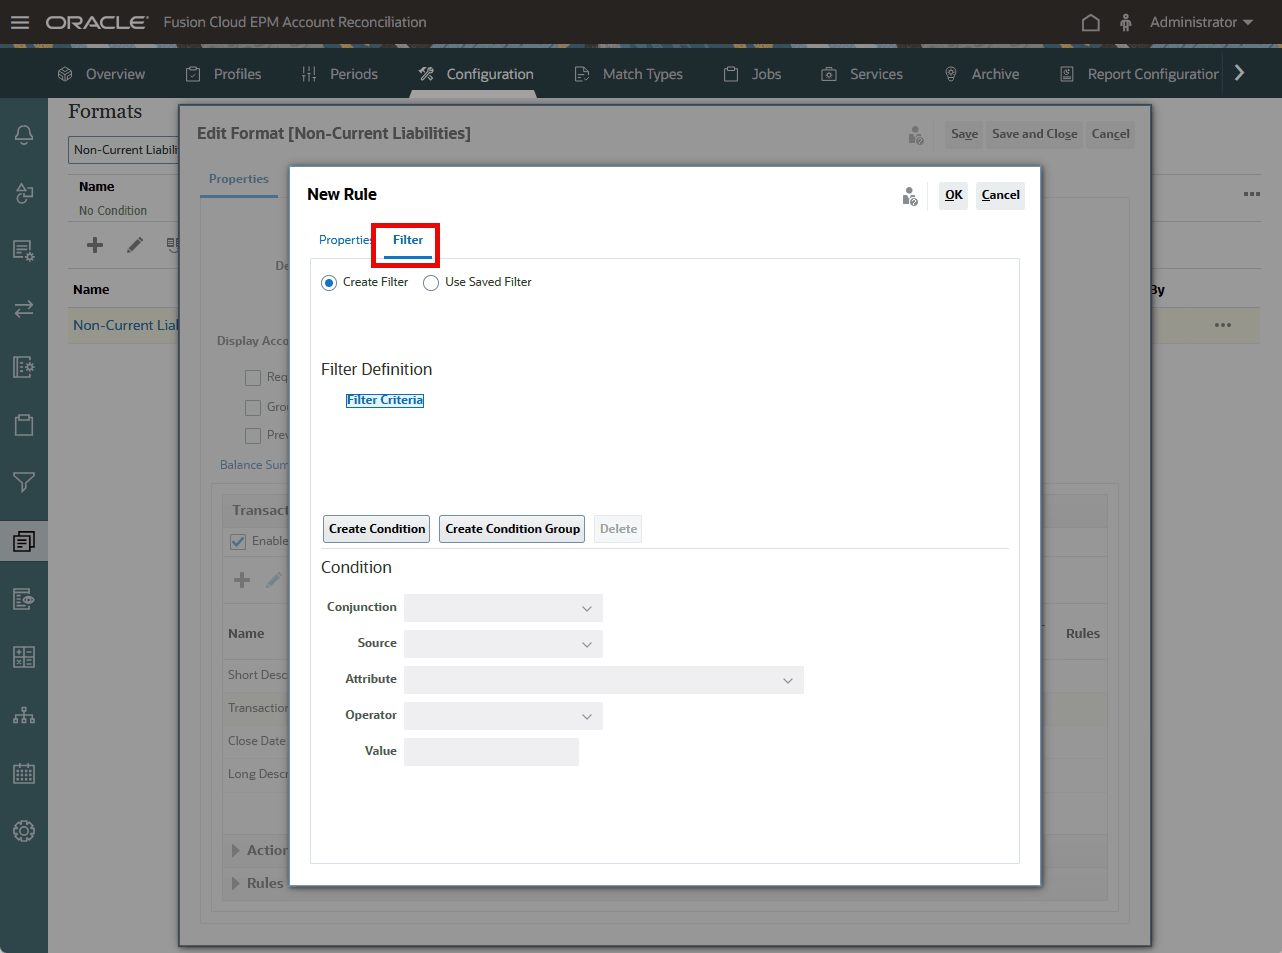
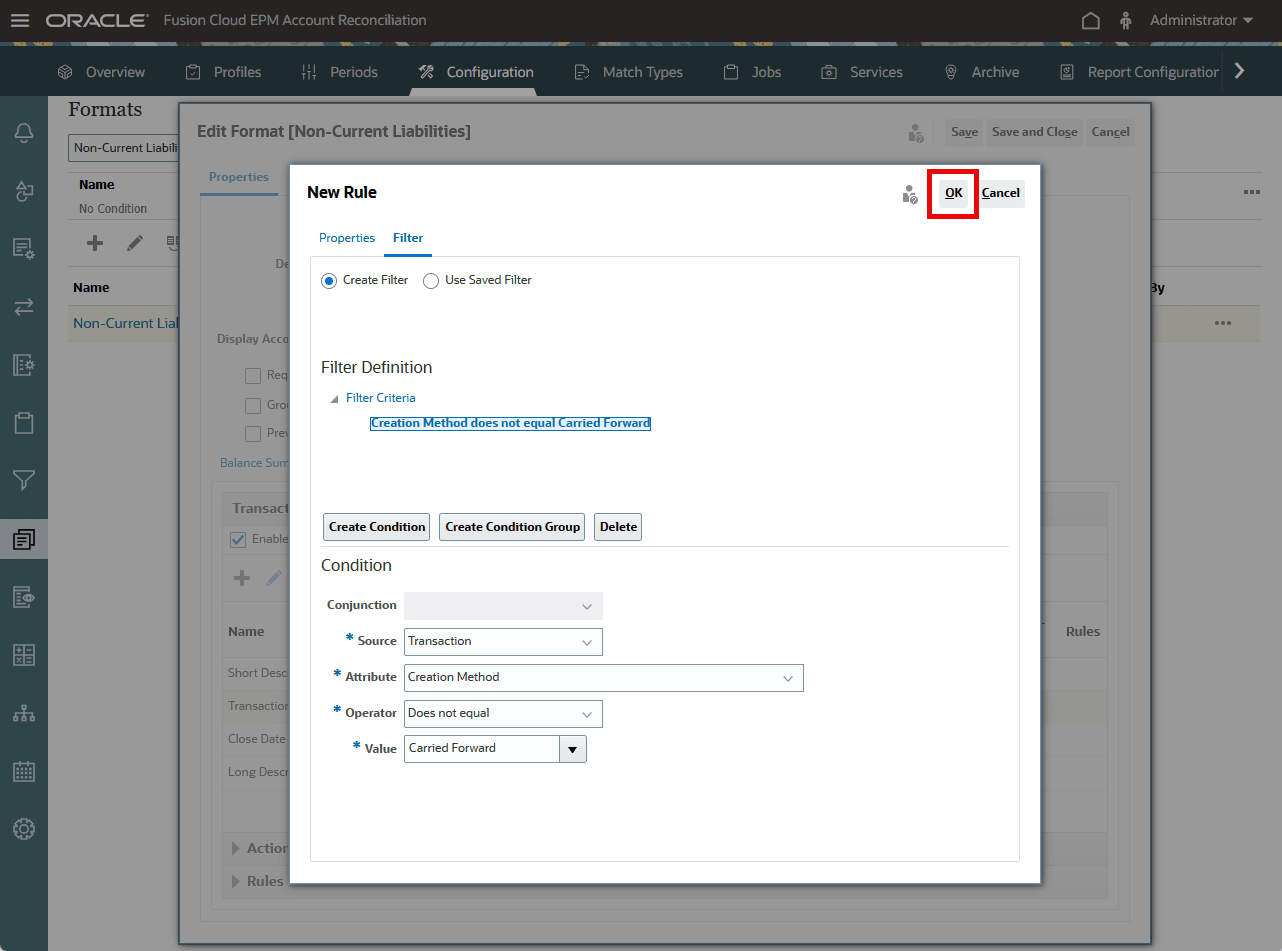
- Select Filter.
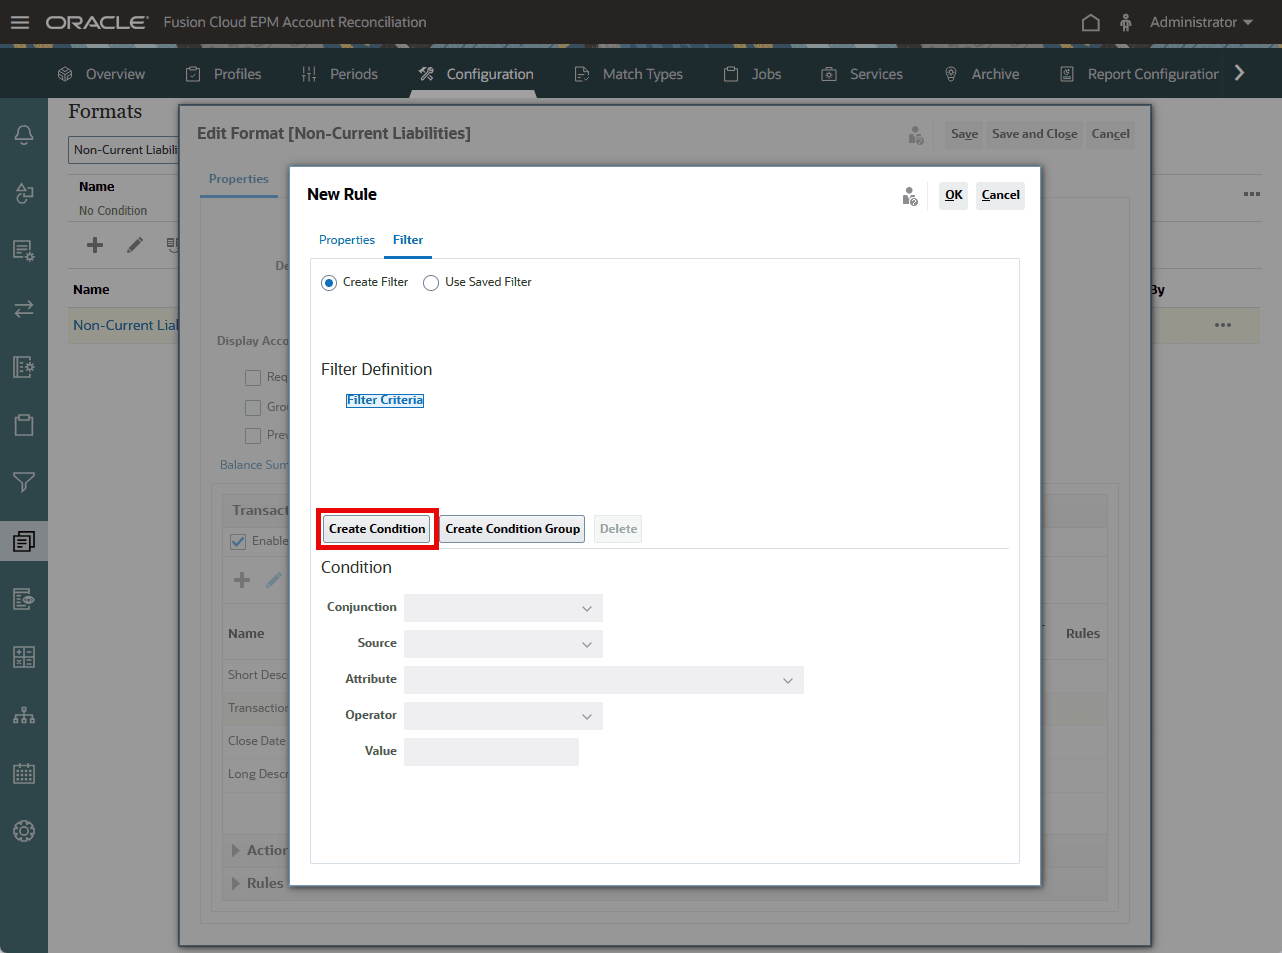
- Select Create Condition.
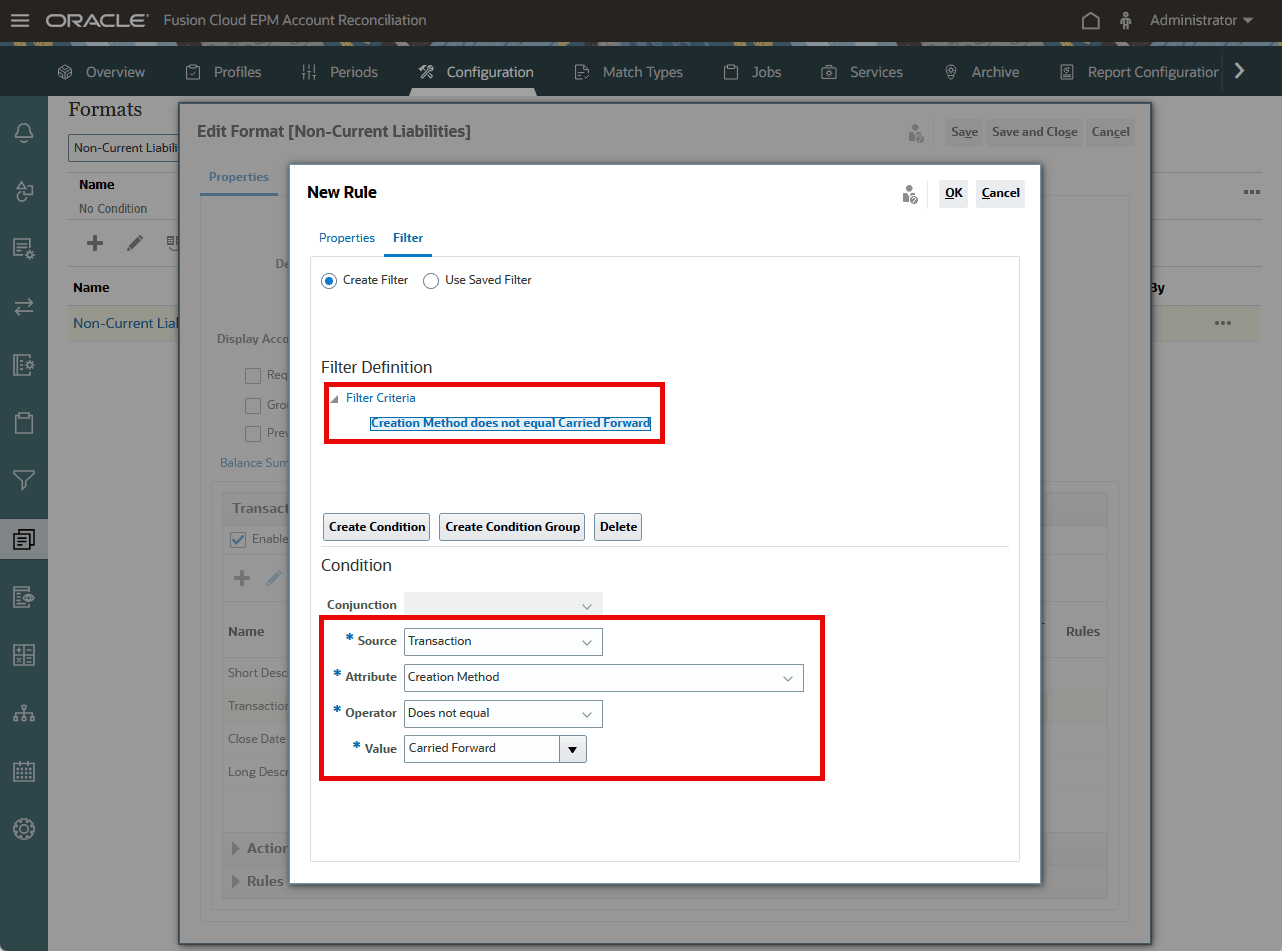
- Create the condition to create the filter criteria "Creation Method does not equal Carried Forward":
- Source: Transaction
- Attribute: Creation Method
- Operator: Does not Equal
- Value: Carried Forward
- Click OK.
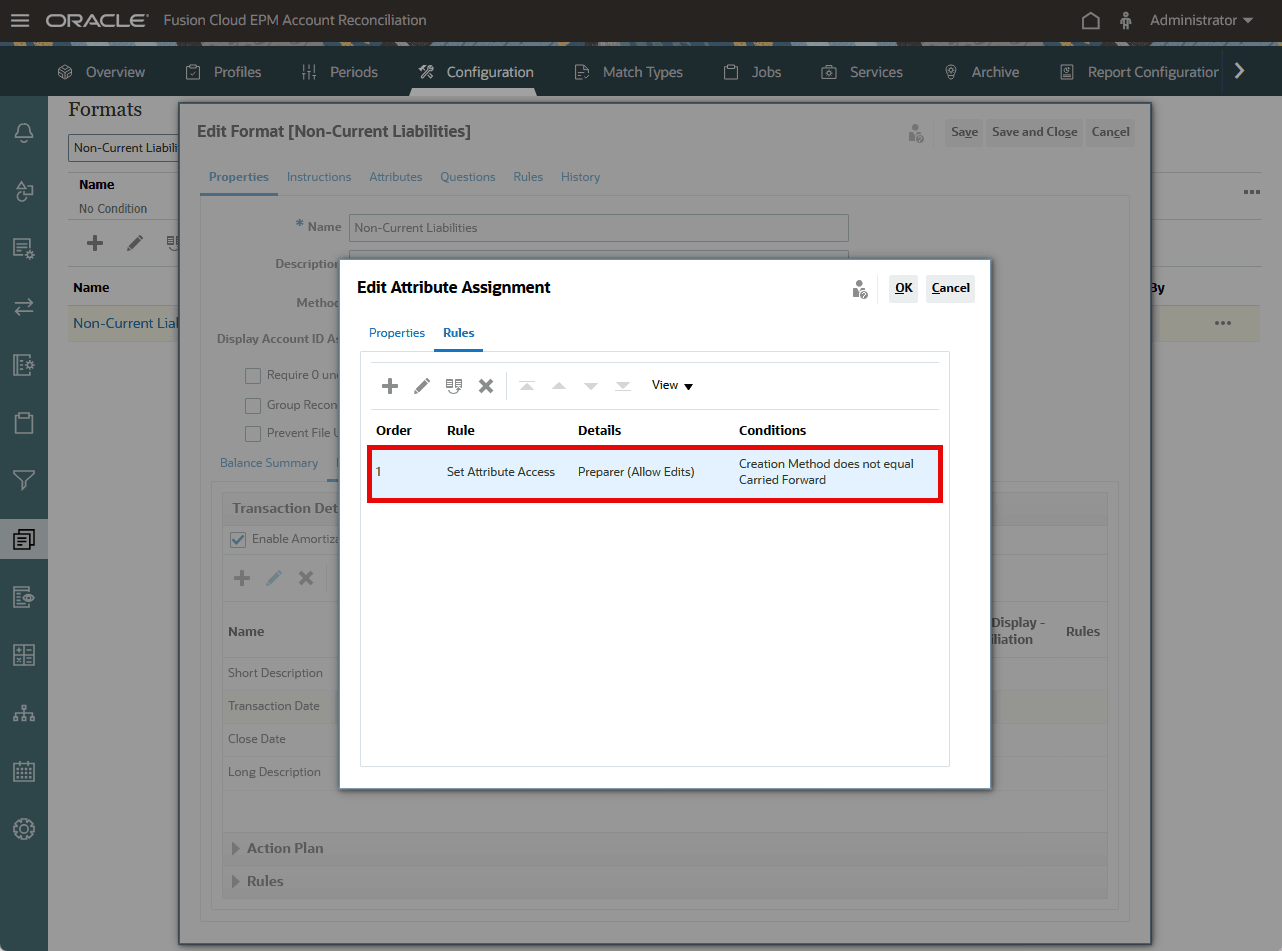
- Verify the rule is added. The rule is written as an “allow edits” rule for non-carried-forward transactions. This means preparers can still edit Transaction Date for manually entered or imported transactions, but not for transactions created by carry forward.
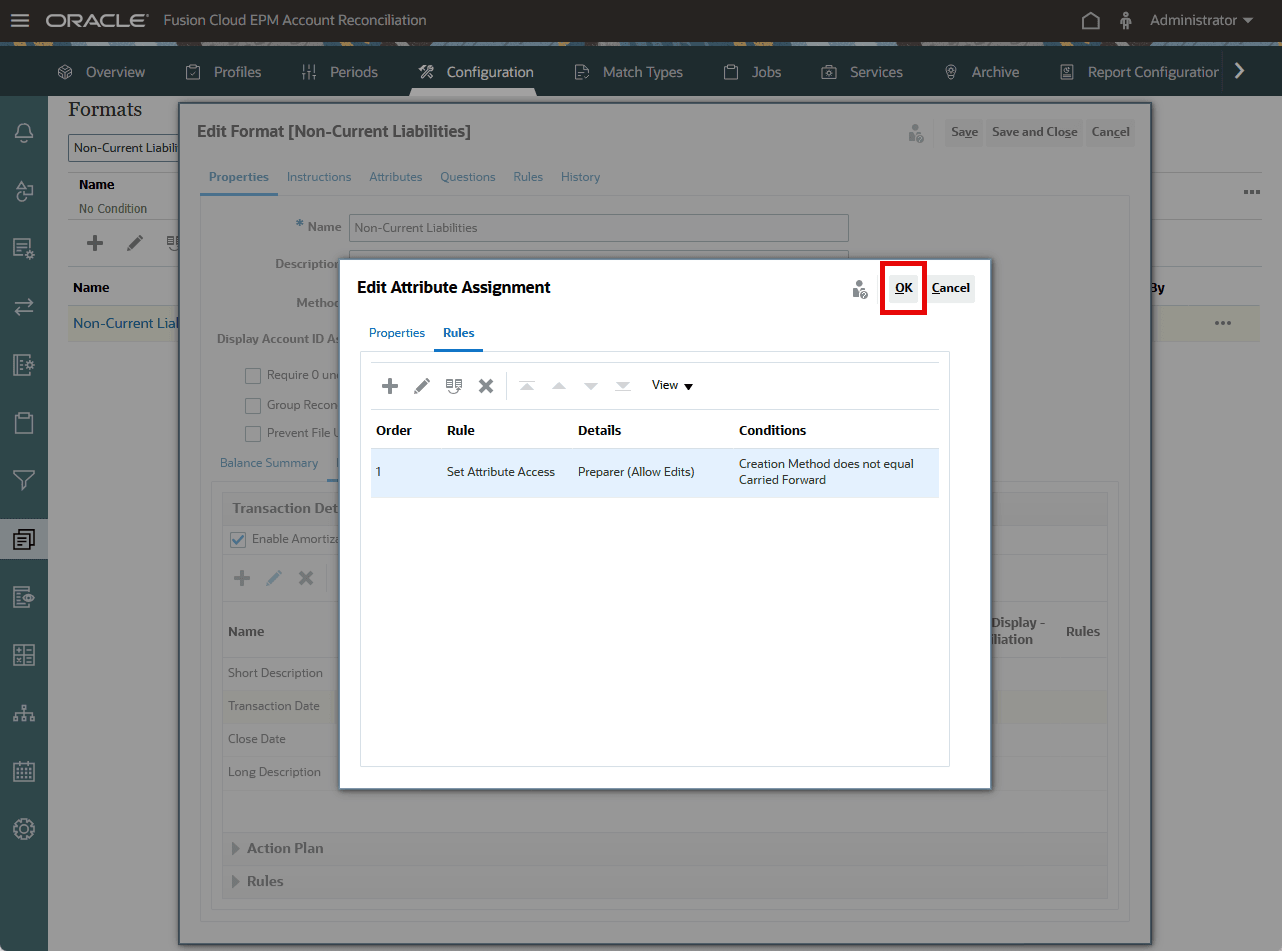
- Click OK to close the Edit Attribute Assignment dialog.
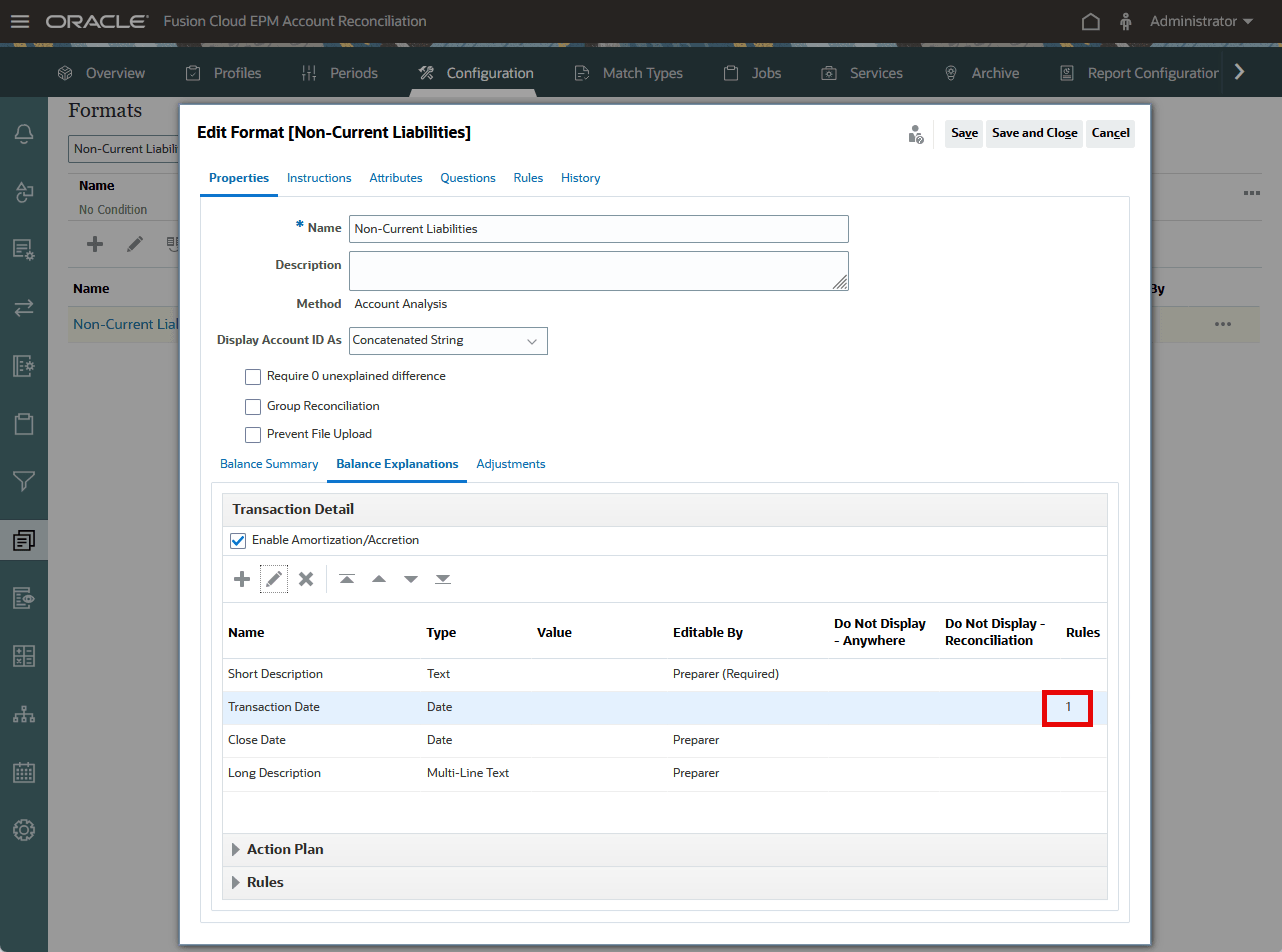
- Note that the rule has been applied to the Transaction Date attribute.
- Click Save. Leave the Edit Format dialog open.
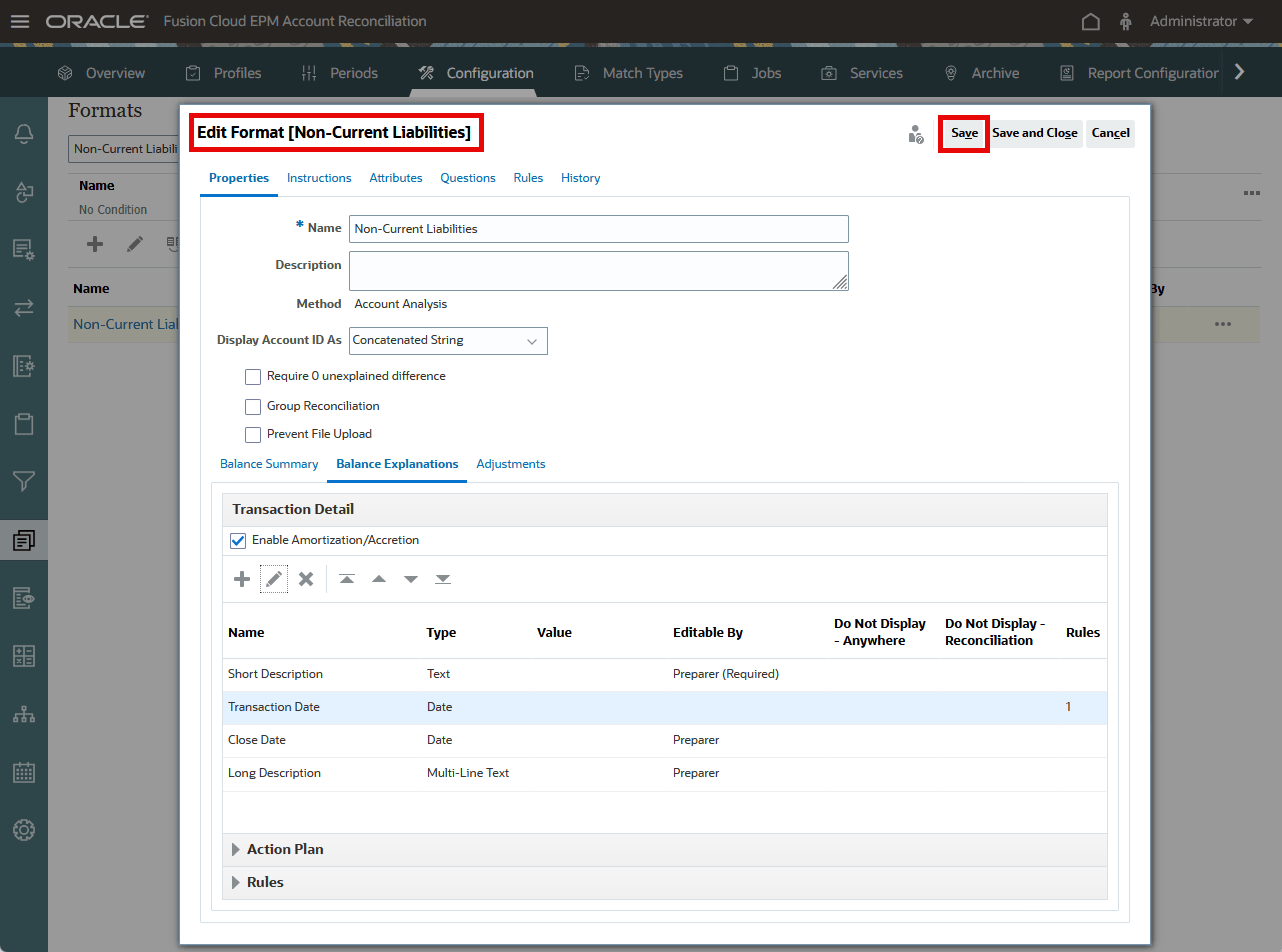
Task 4: Configure the rule for Amount
Amount is not handled the same way as Transaction Date. Amount is not an attribute that can be added or removed from the Format, so it must be controlled using a rule at the format transaction level. This approach is supported because the transaction rules available in format configuration include Prevent Amount Edit.
- You should still be in the same Edit Format dialog with Balance Explanations selected.
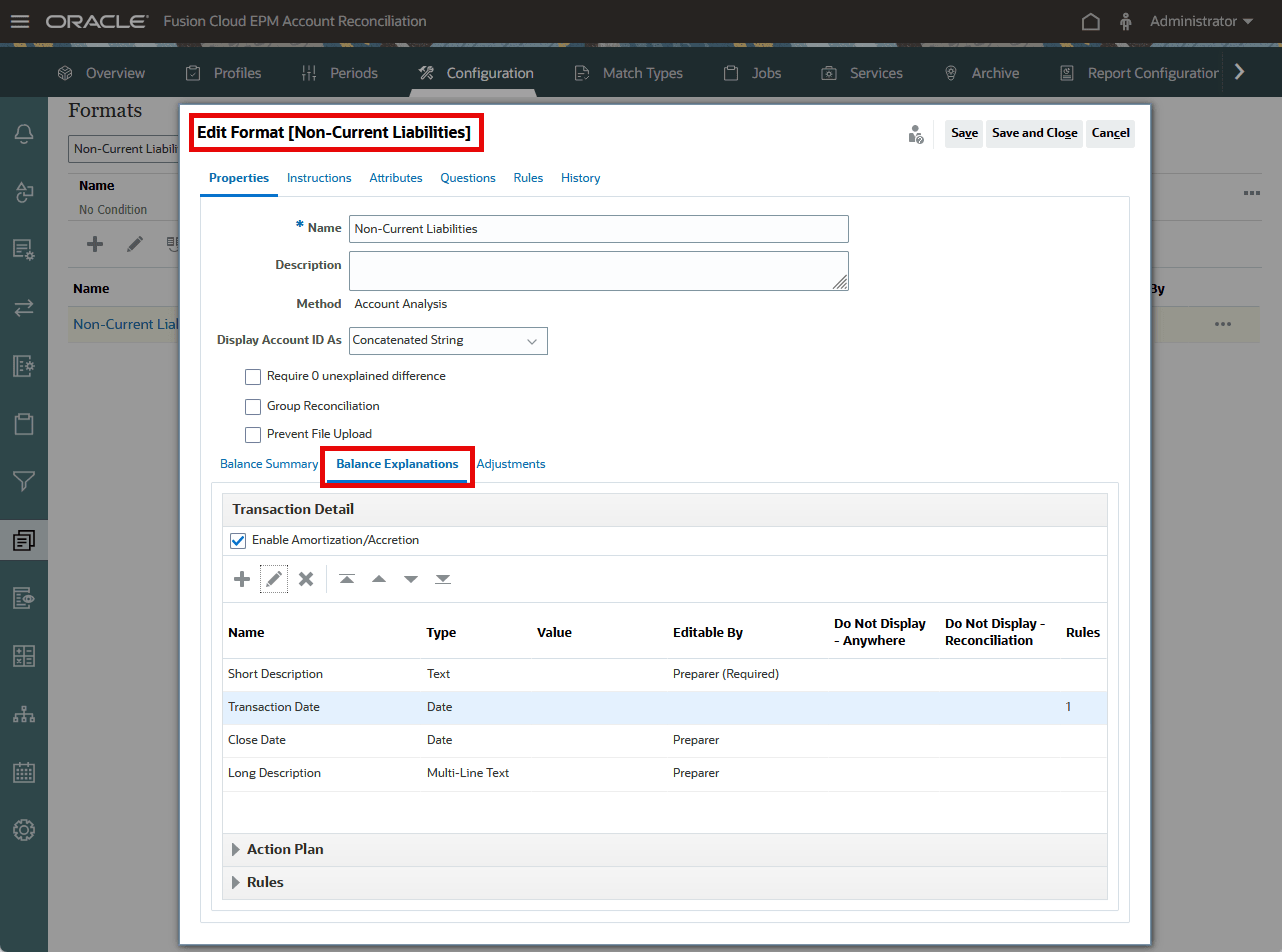
- Expand the Rules section at the bottom of the format configuration.
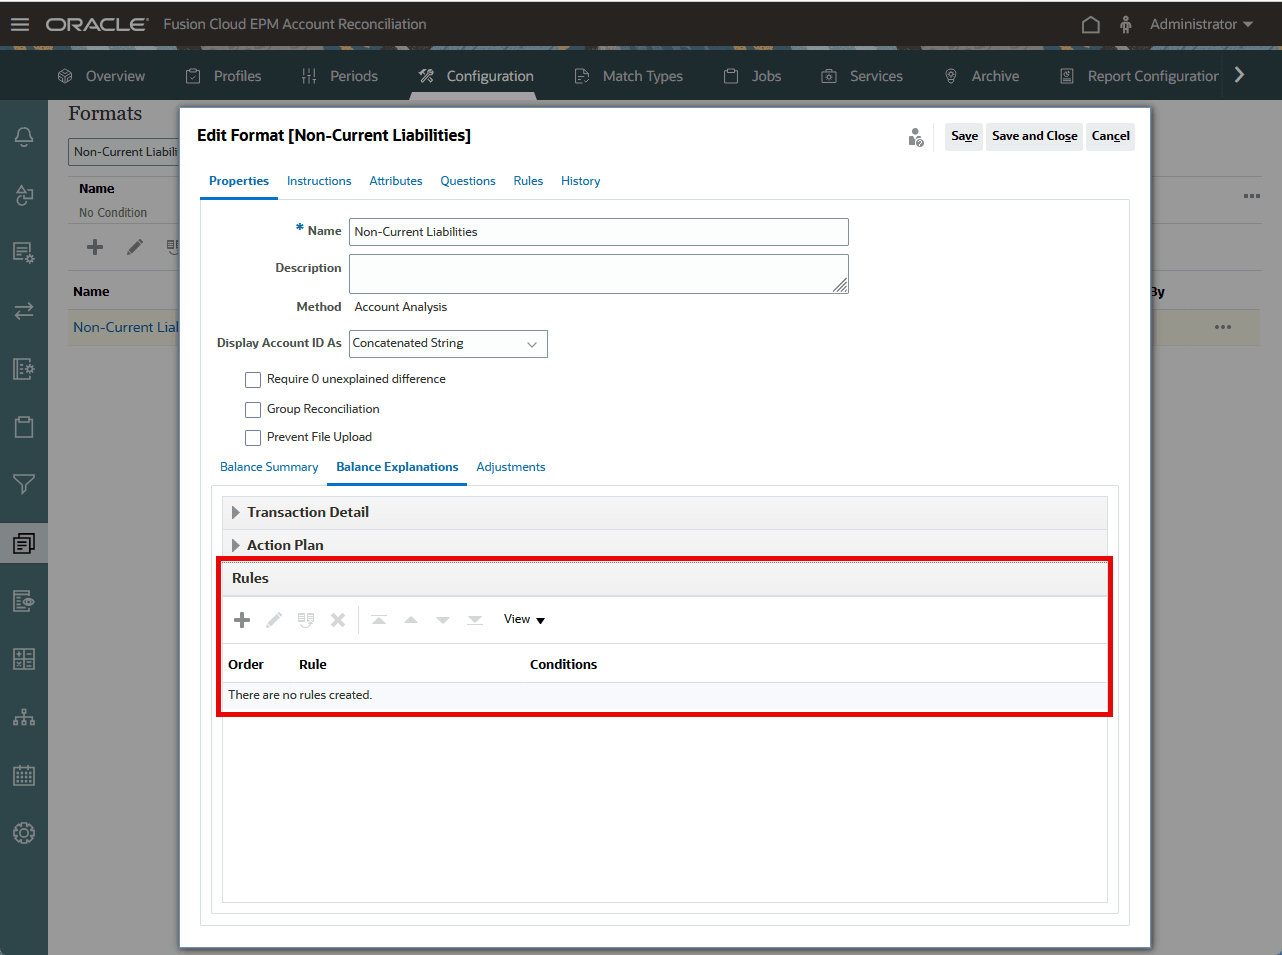
- Add a new rule.
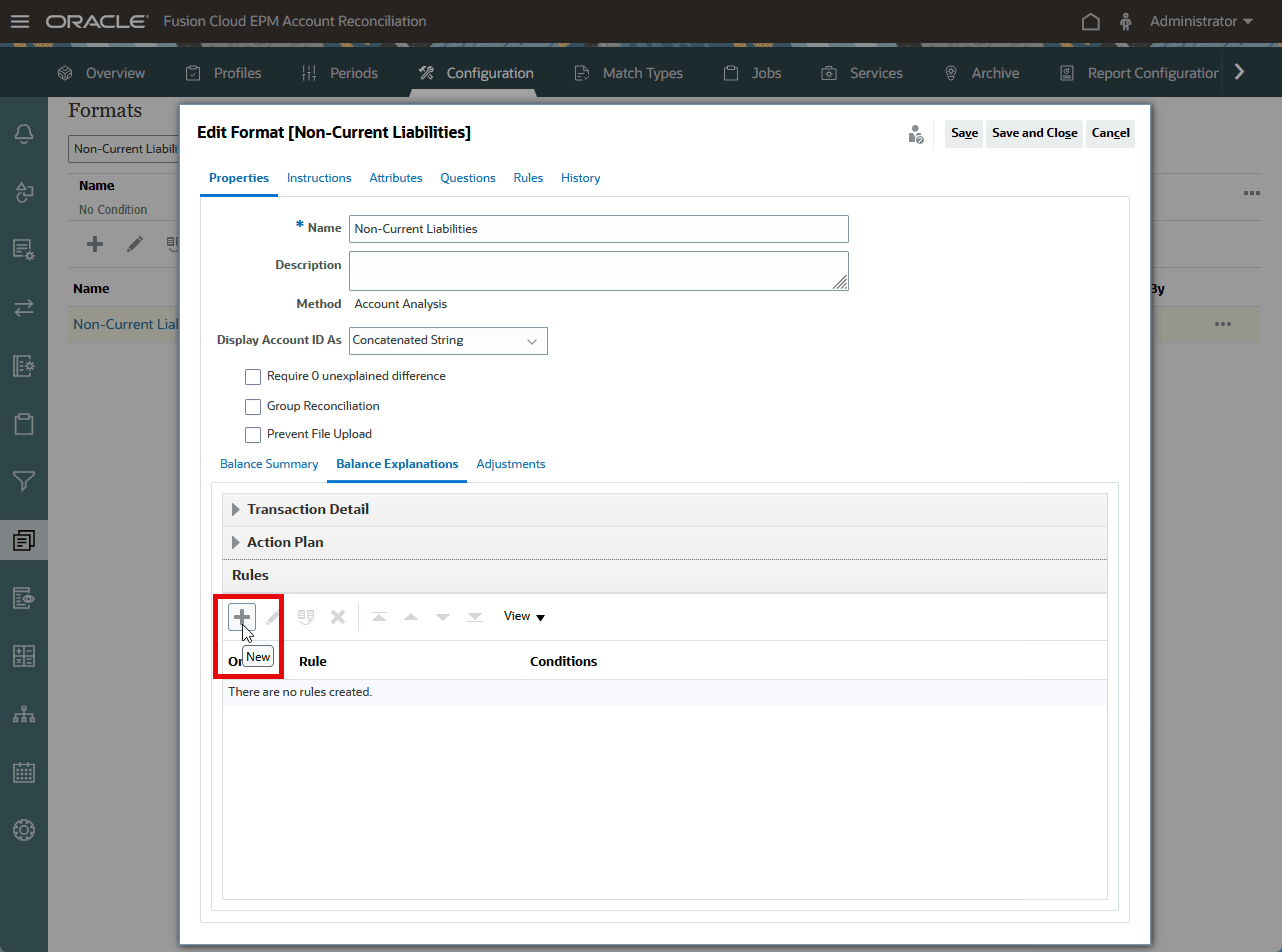
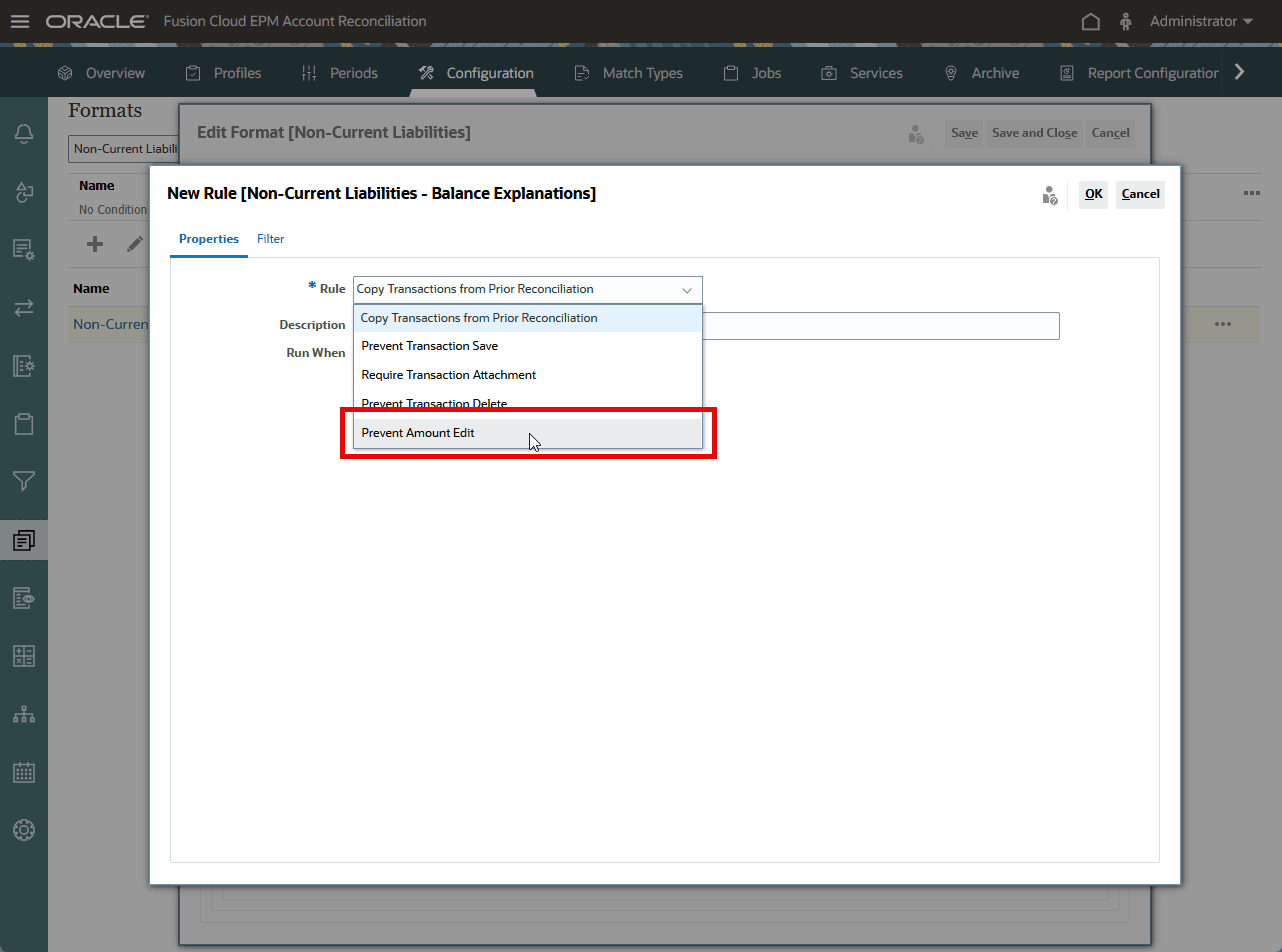
- Select Prevent Amount Edit in the Rule drop down list.
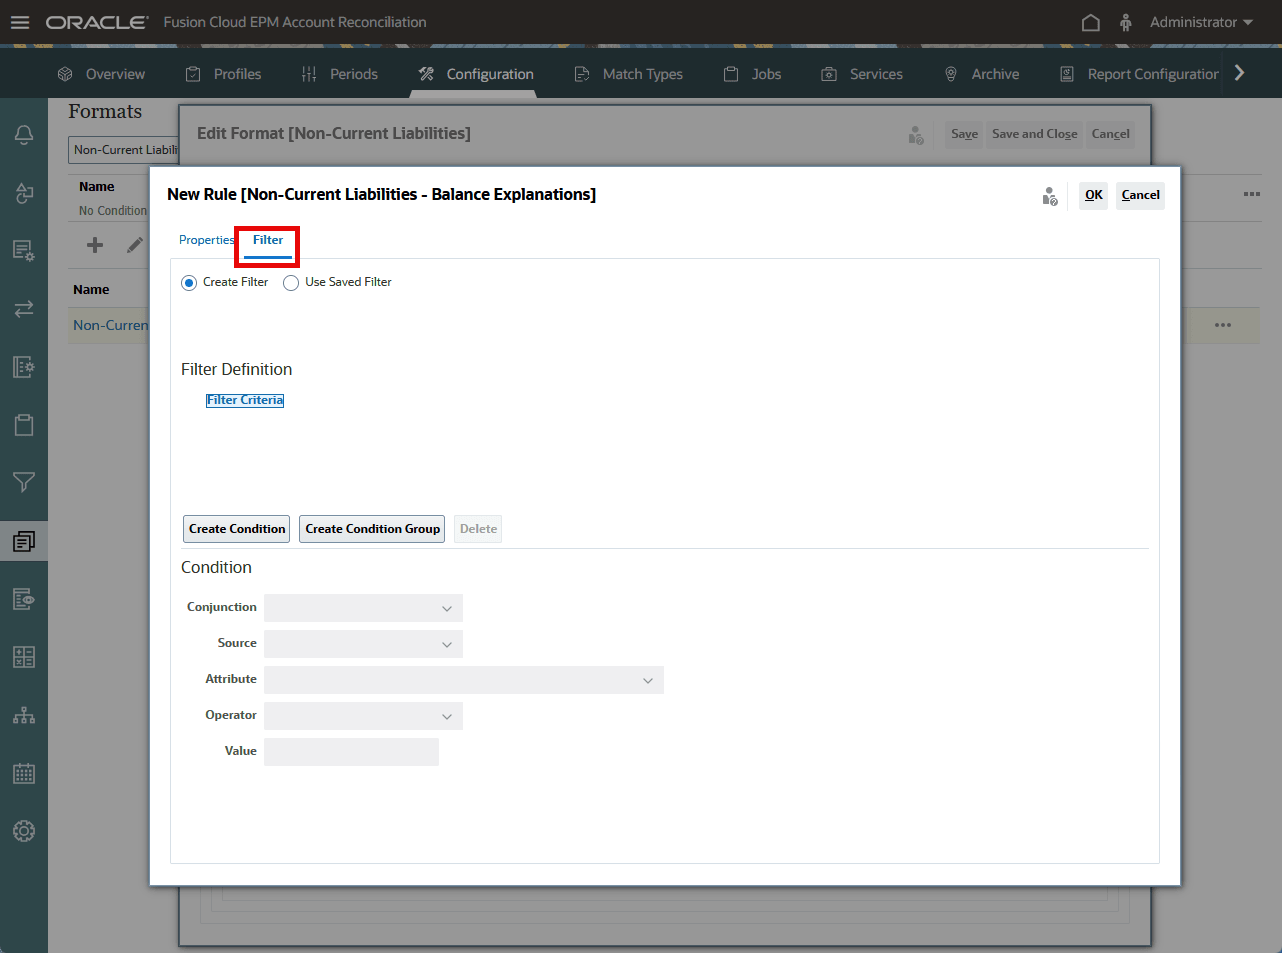
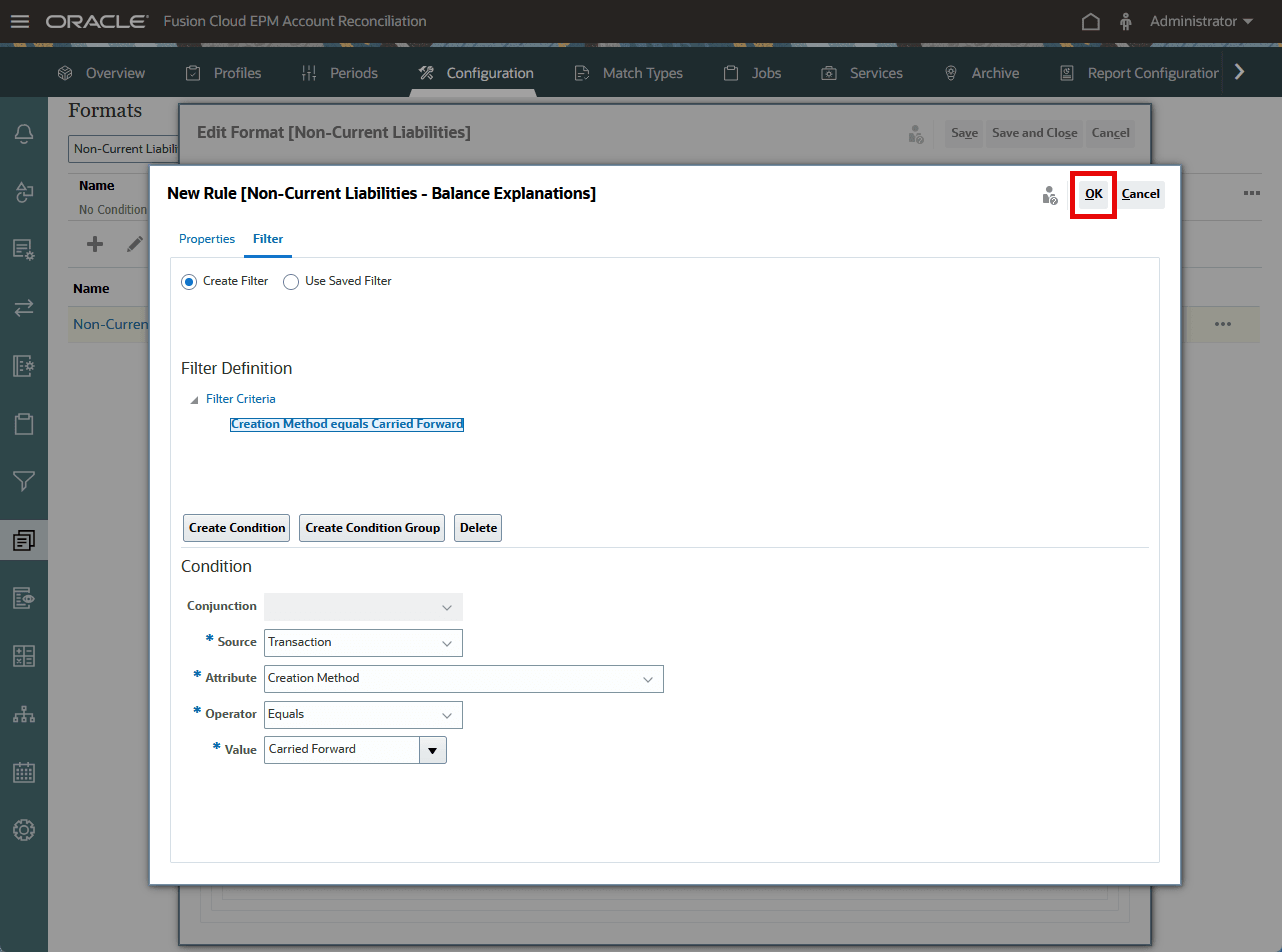
- Select Filter.
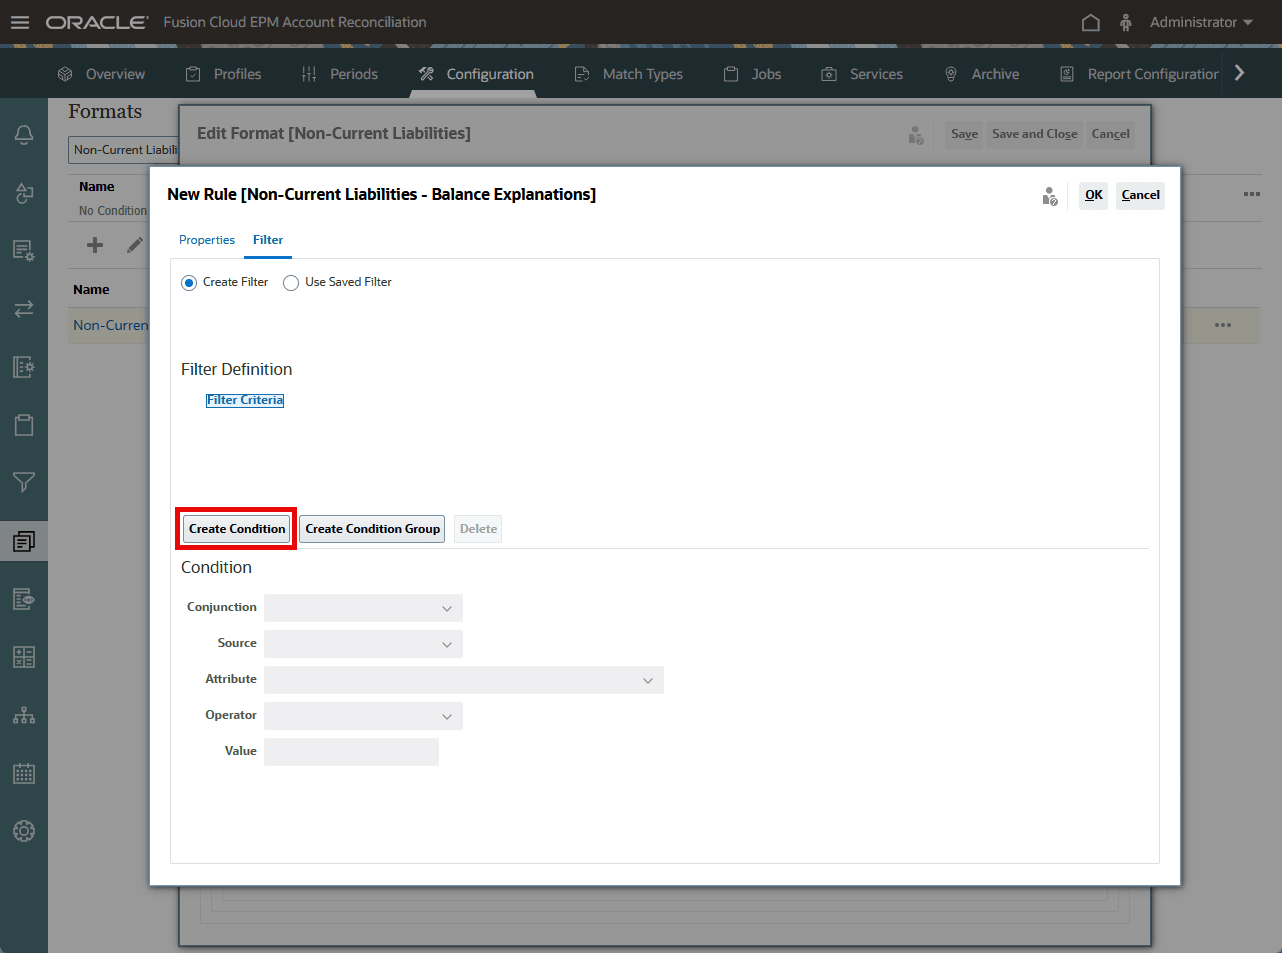
- Select Create Condition.
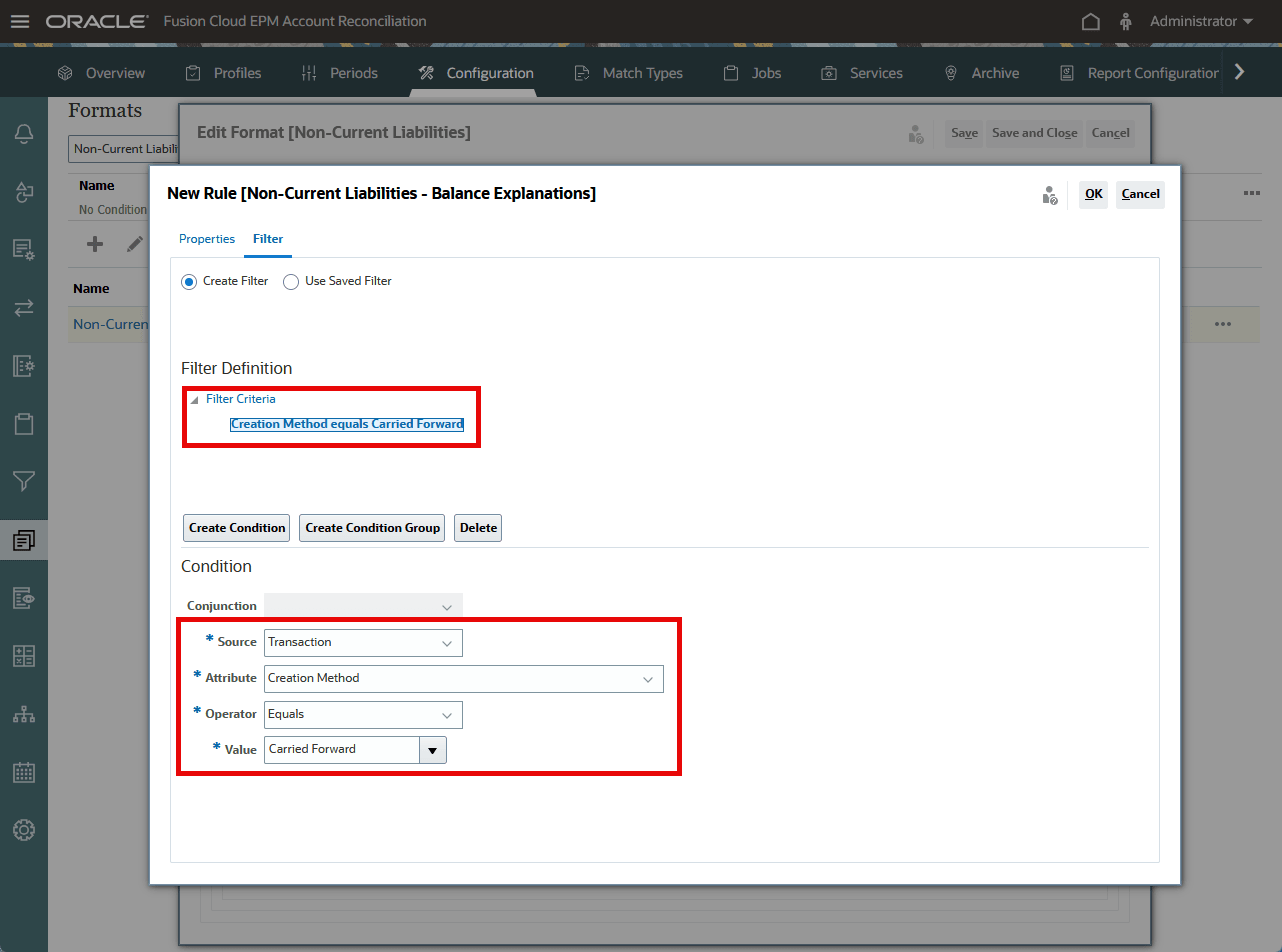
- Create the condition to create the filter criteria "Creation Method equals Carried Forward":
- Source: Transaction
- Attribute: Creation Method
- Operator: Equals
- Value: Carried Forward
- Click OK.
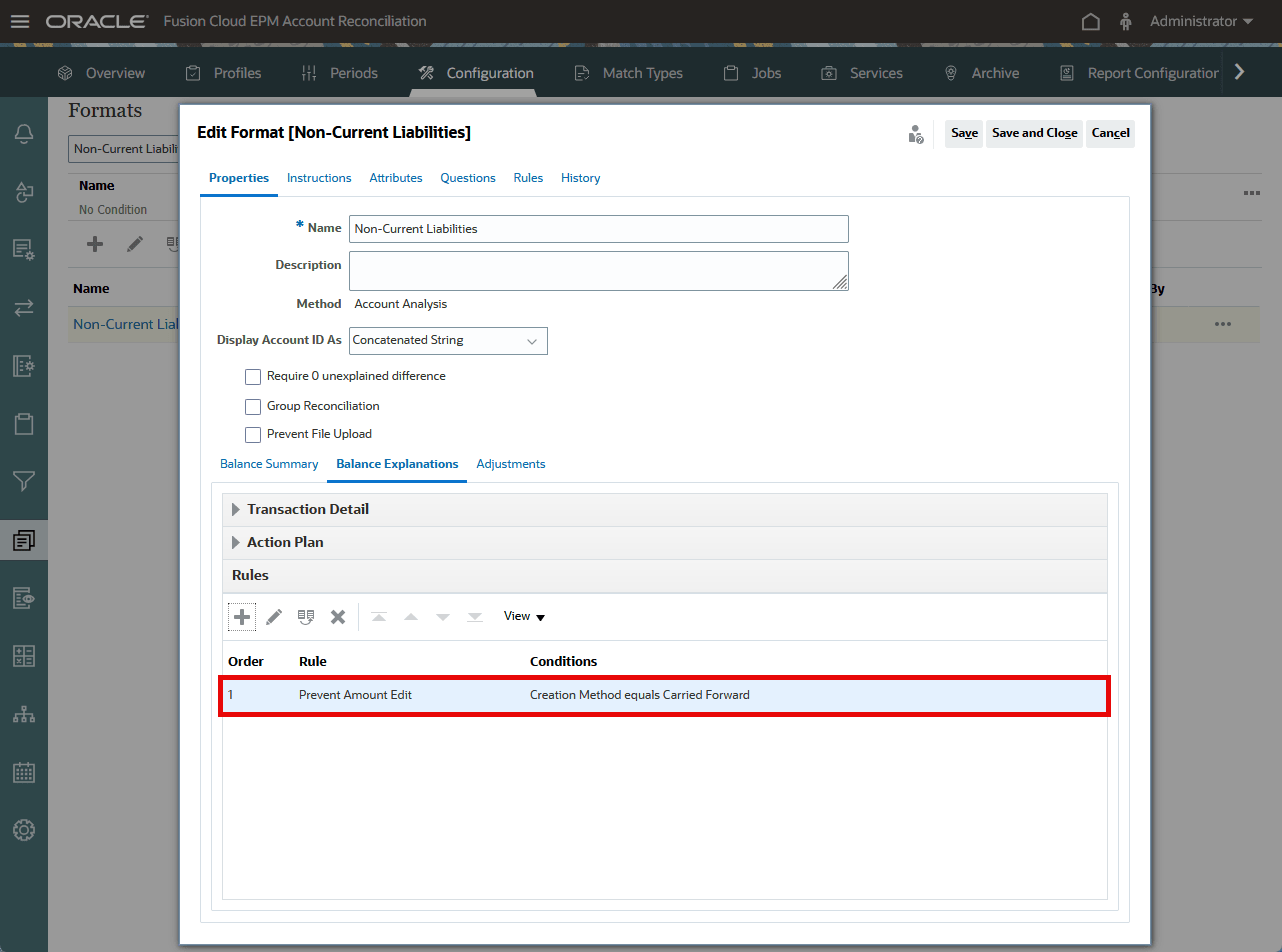
- Verify the rule is added. This rule prevents users from changing the Amount field only when the transaction originates from a carry-forward process. Amount remains editable for transactions that are manually added or imported, depending on the broader process design.
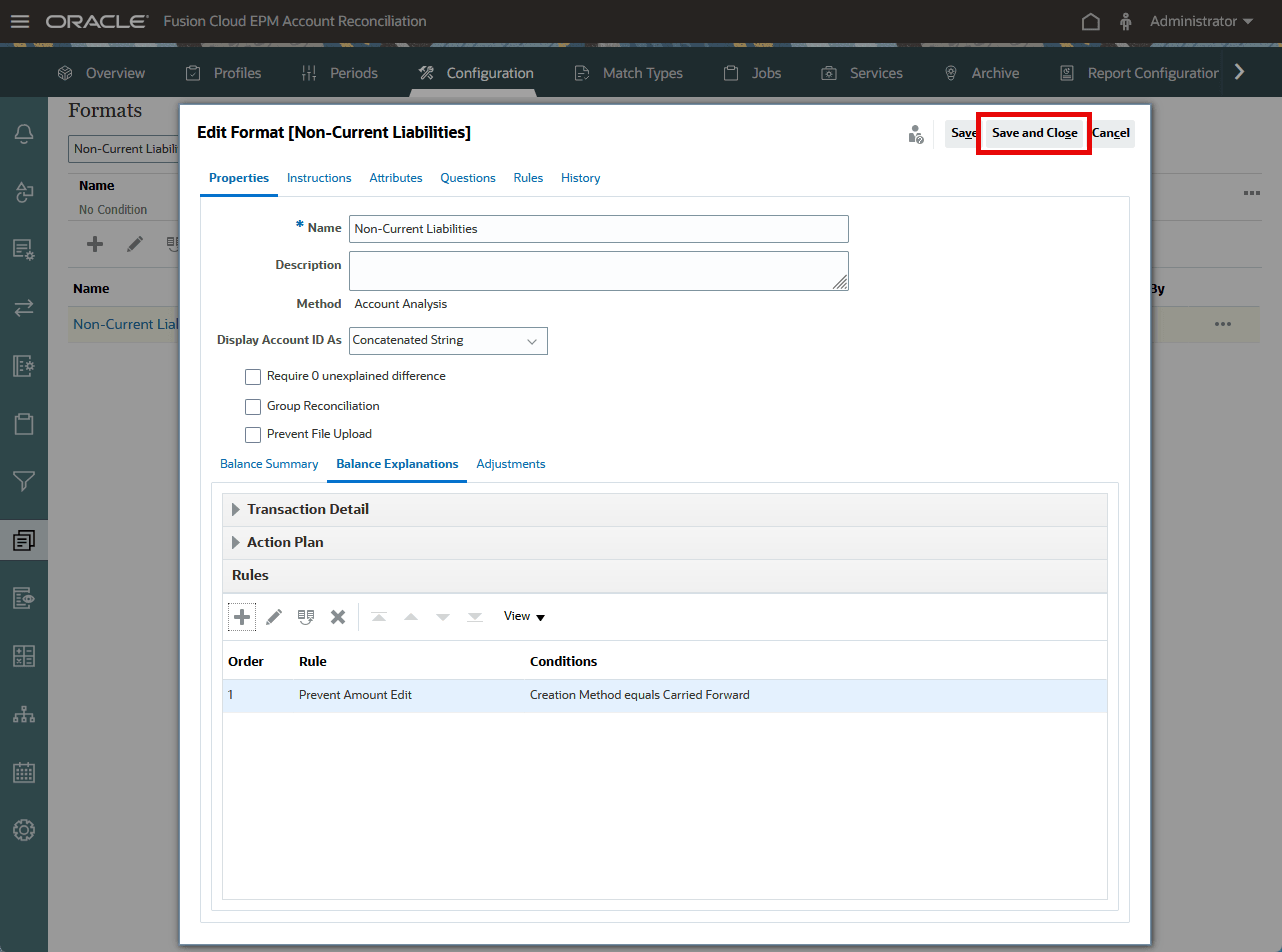
- Click Save and Close.
Task 5: Create a reconciliation using carried forward
Create a reconciliation for the next period using carry forward to test the rules. Because Account Reconciliation snapshots the format when reconciliations are created, the rules will be effective the next time reconciliations are created for a period using the format.
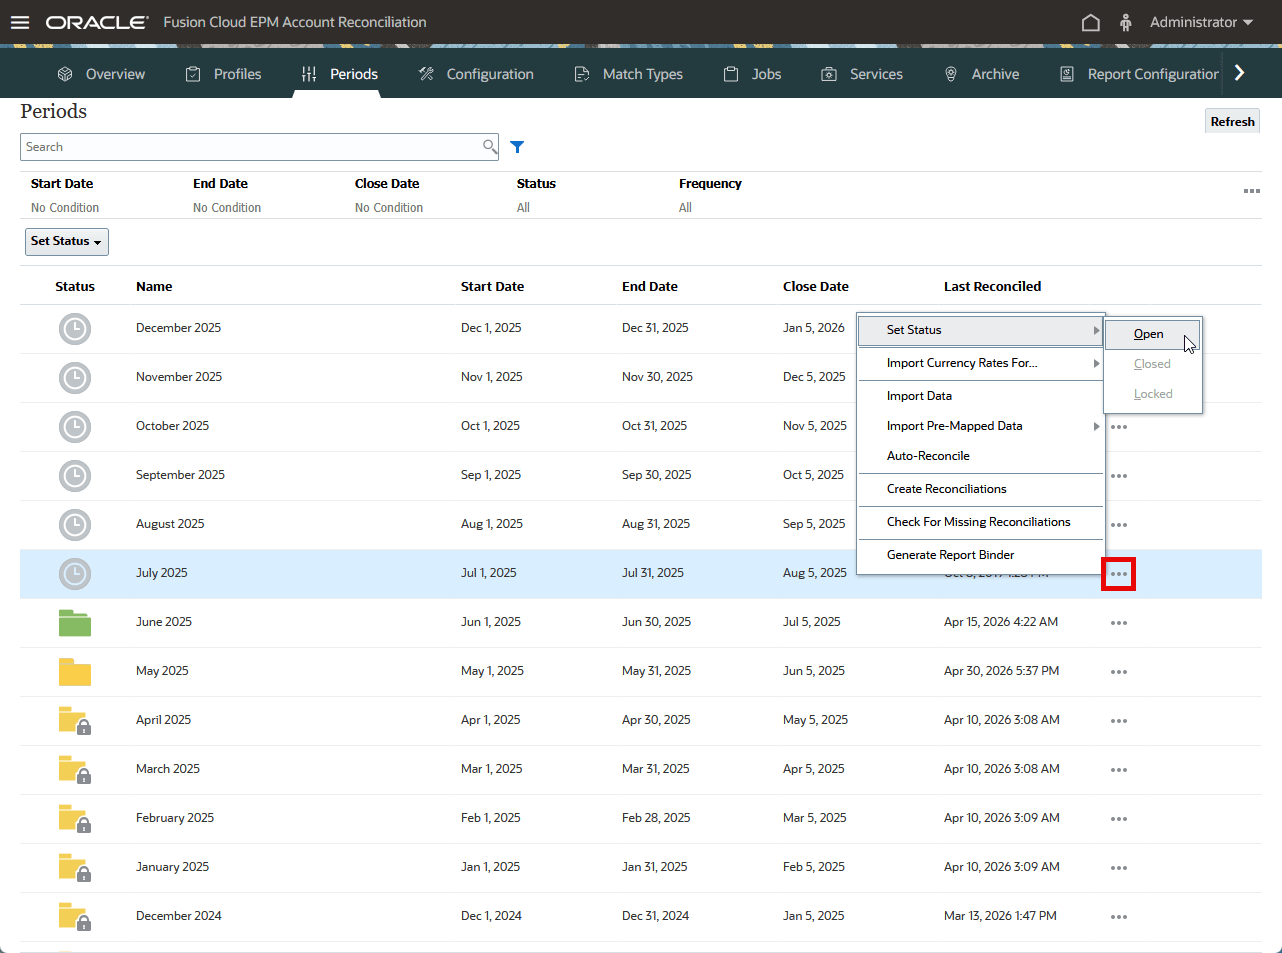
- Select Periods in the navigation bar.
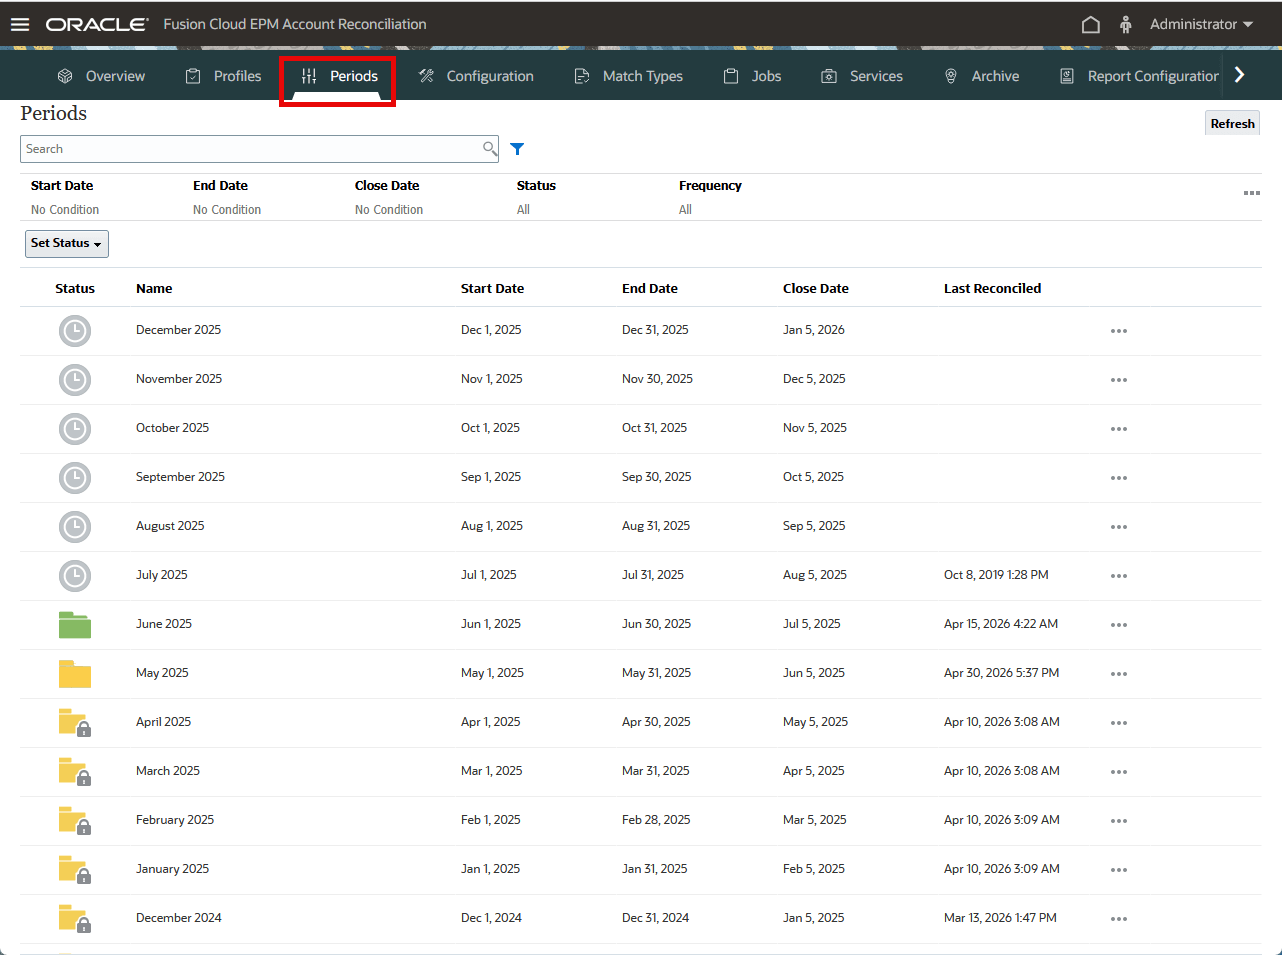
- Open the next period (July 2025 in this example).
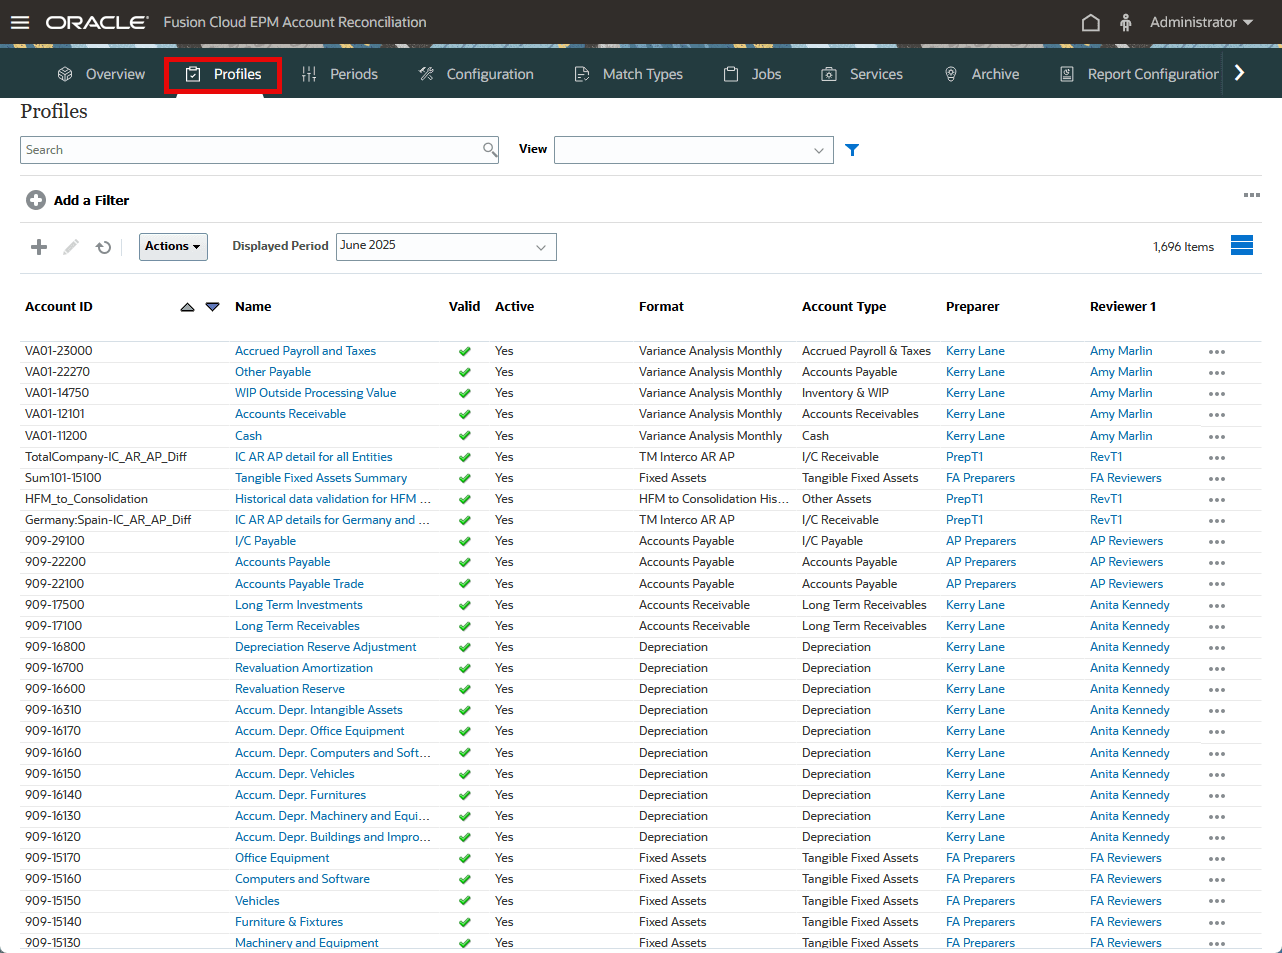
- Select Profiles from the Navigation Bar.
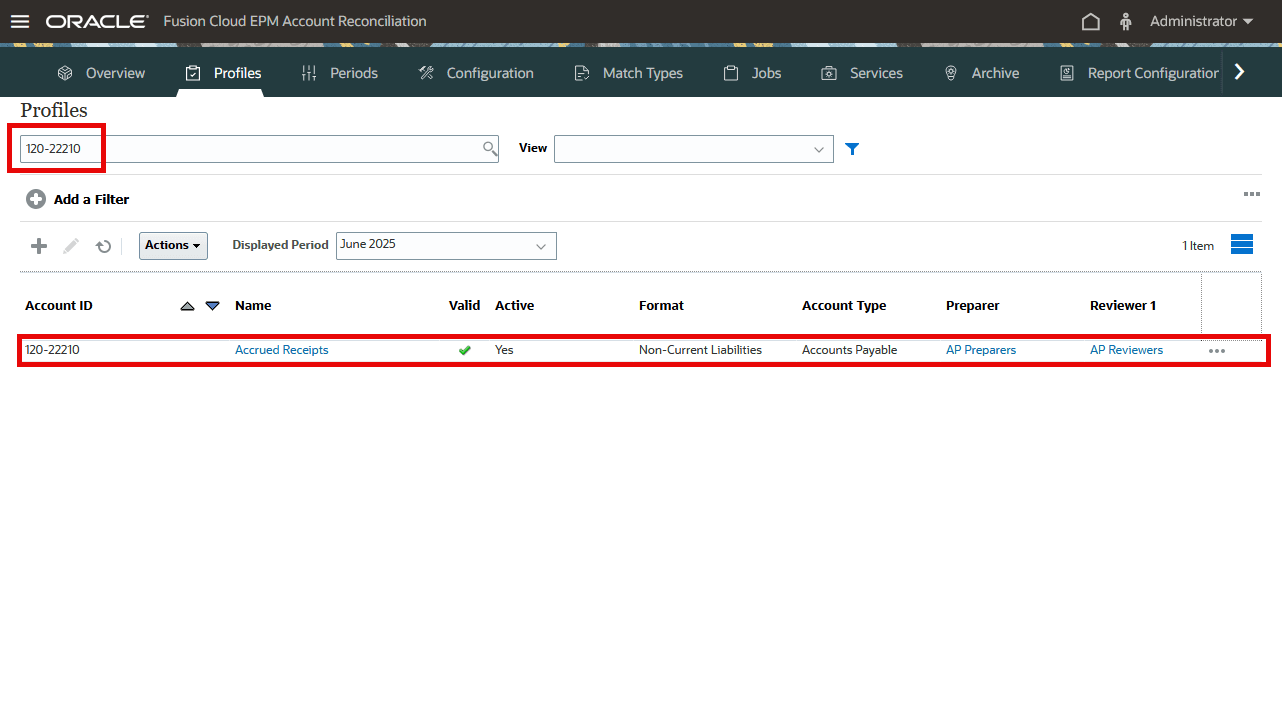
- Search for the profile with the modified format (120-22210 Accrued Receipts in this example).
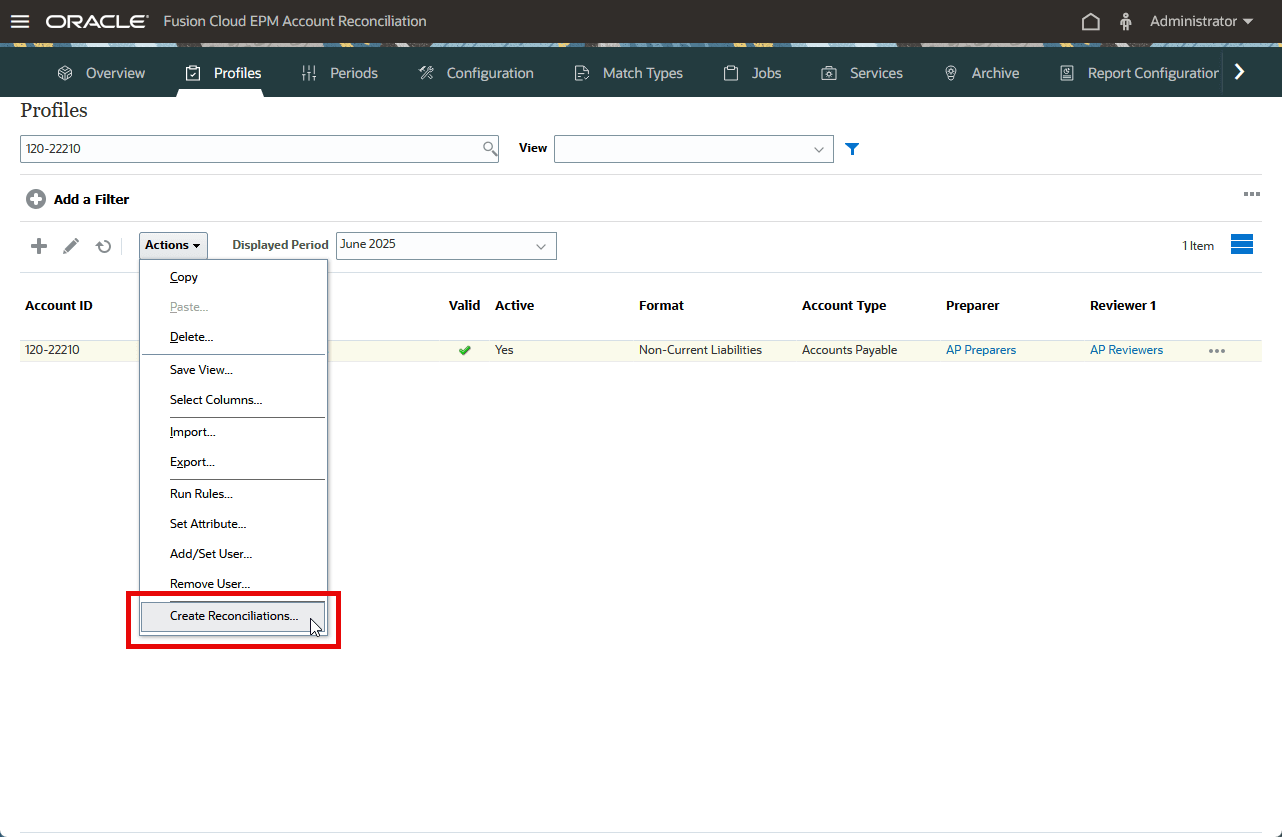
- Do not click the profile name. Select the profile in the list and then select Actions > Create Reconciliations.
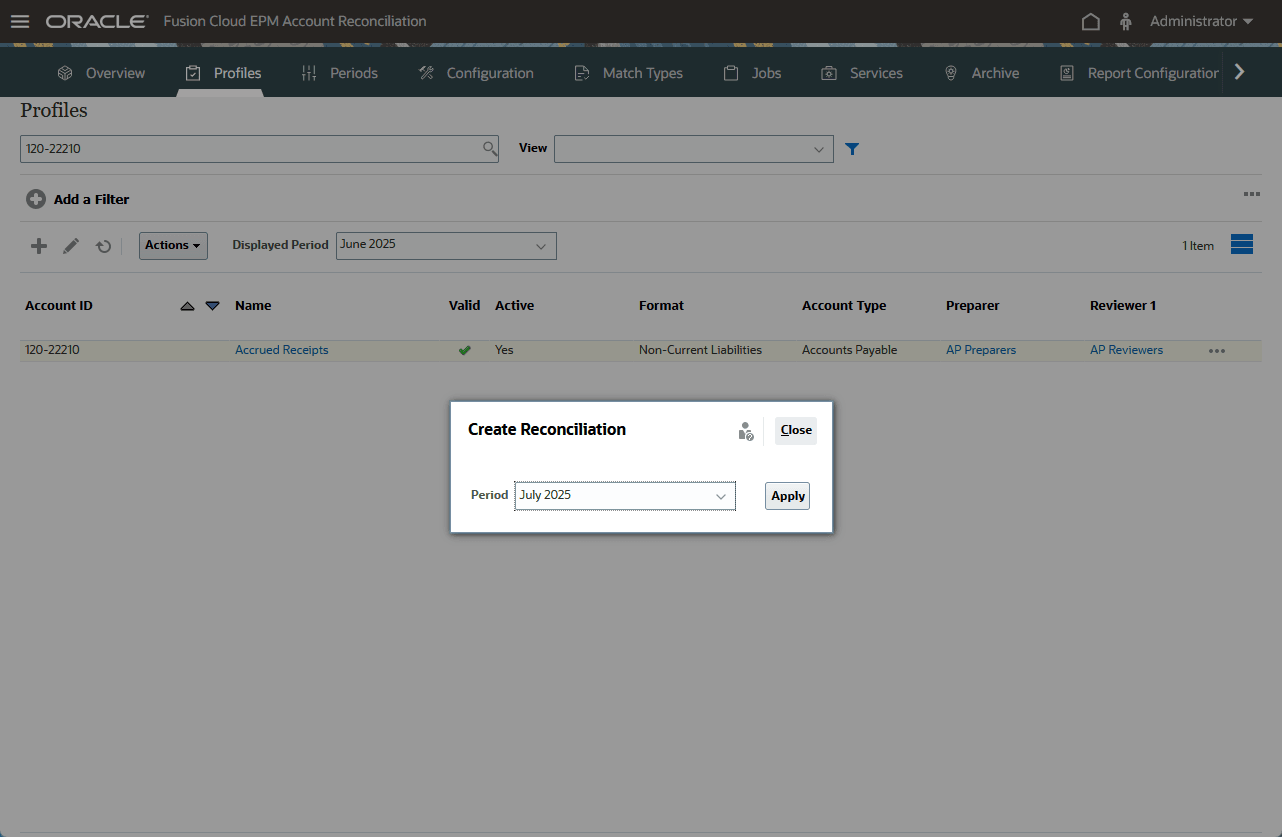
- Select the next period (July 2025) and click Apply.
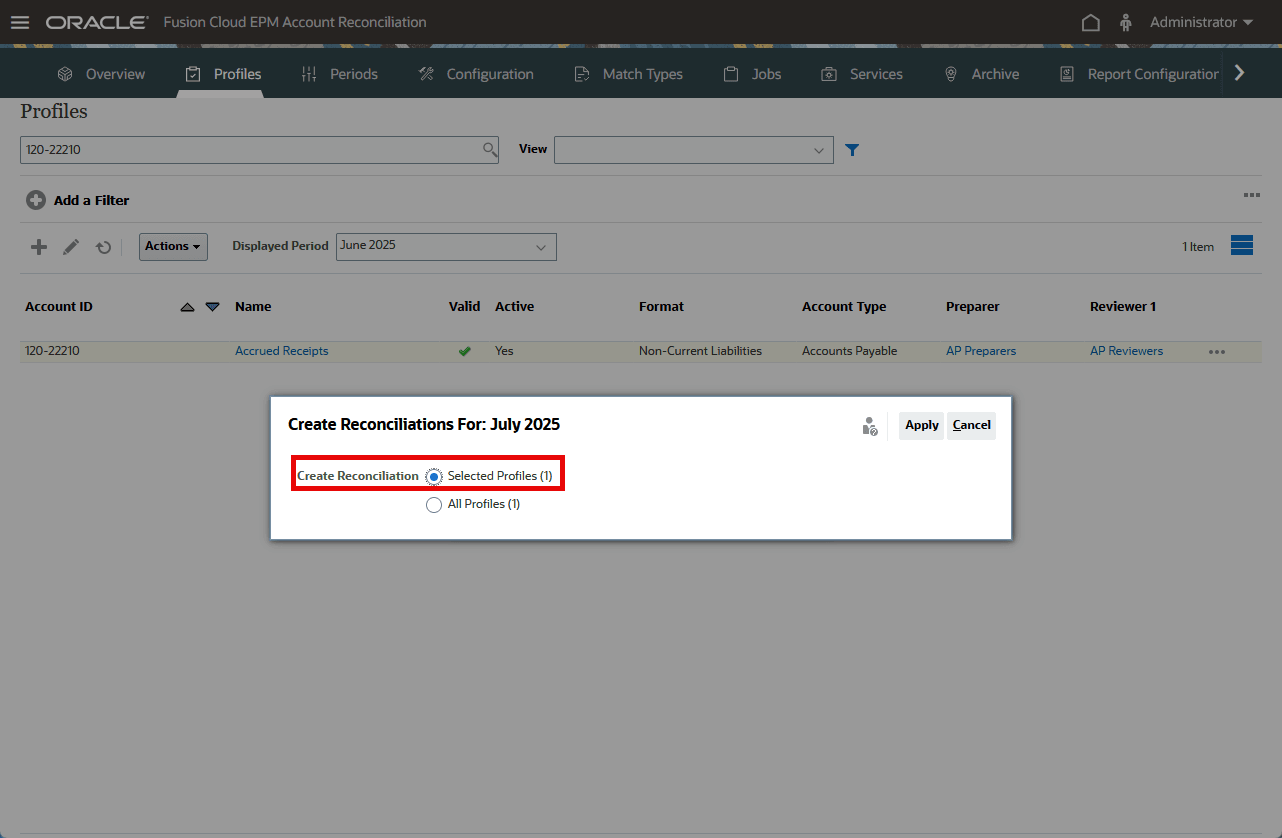
- Select "Create Reconciliation for Selected Profile" and click Apply.
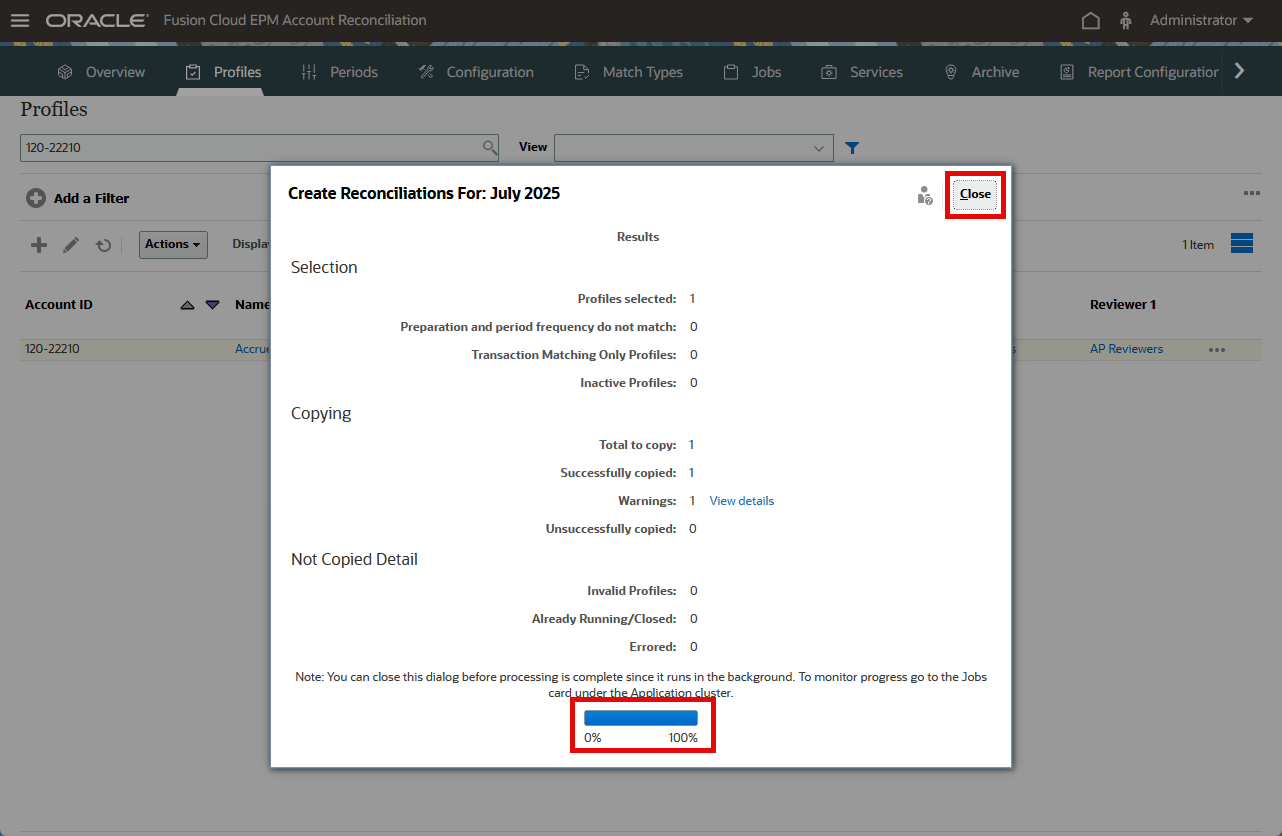
- Allow Processing to complete and click Close.
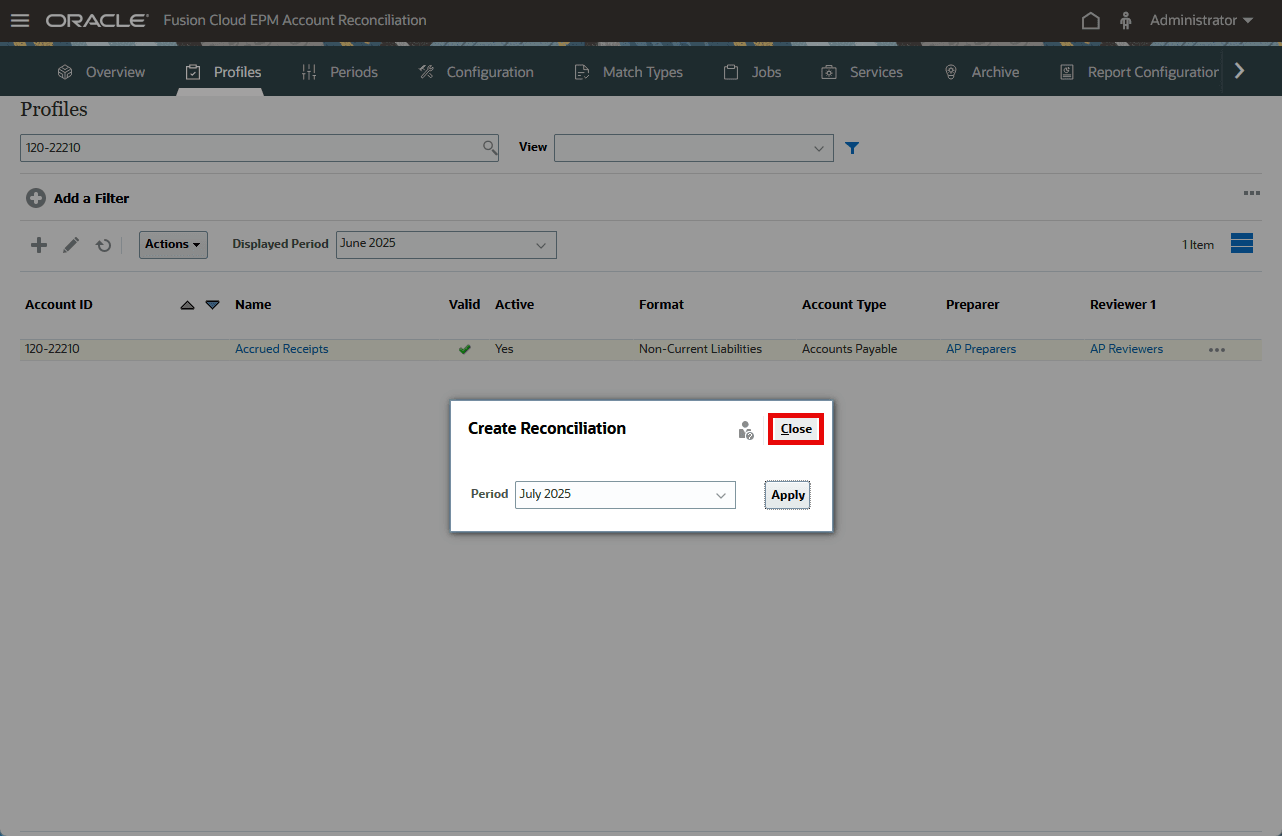
- Click Close.
- Sign out and sign back in as a preparer (Casey Brown in this example).
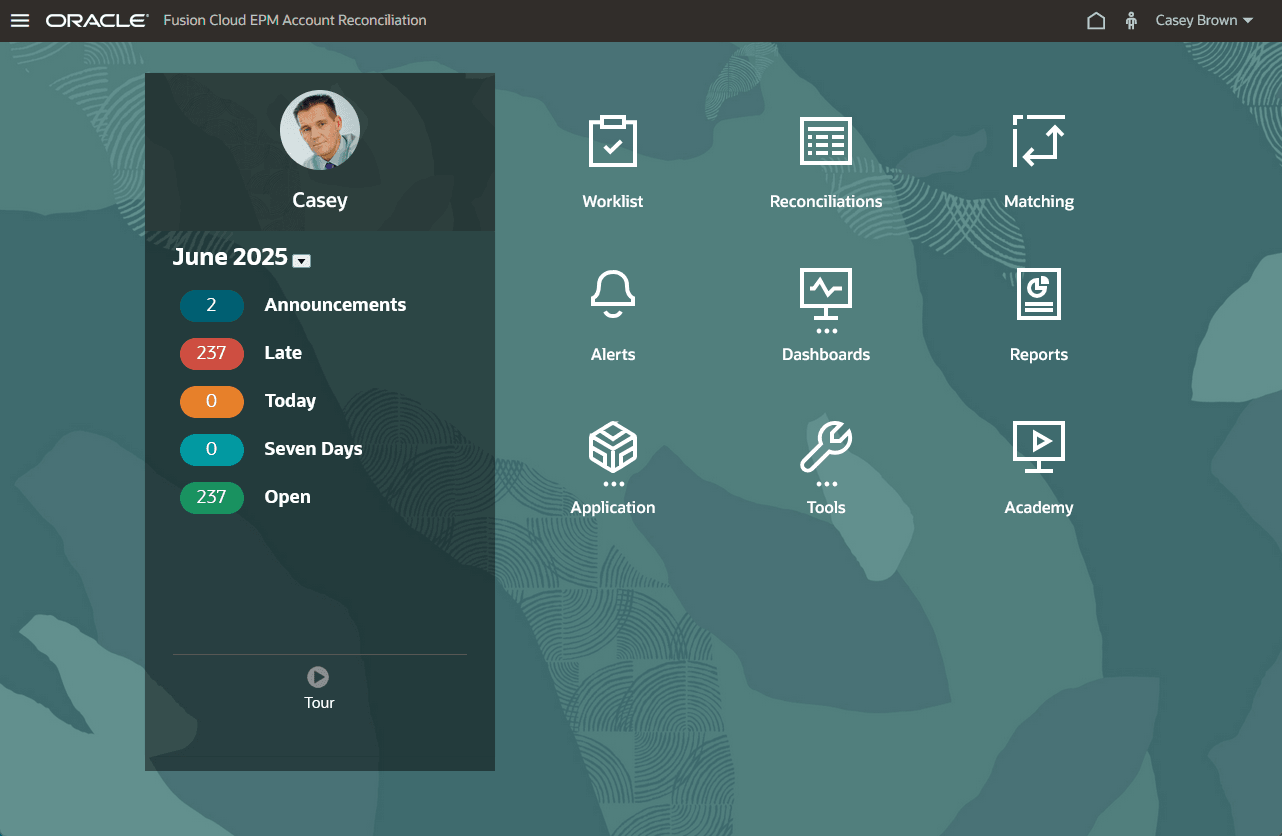
- Navigate to Reconciliations.
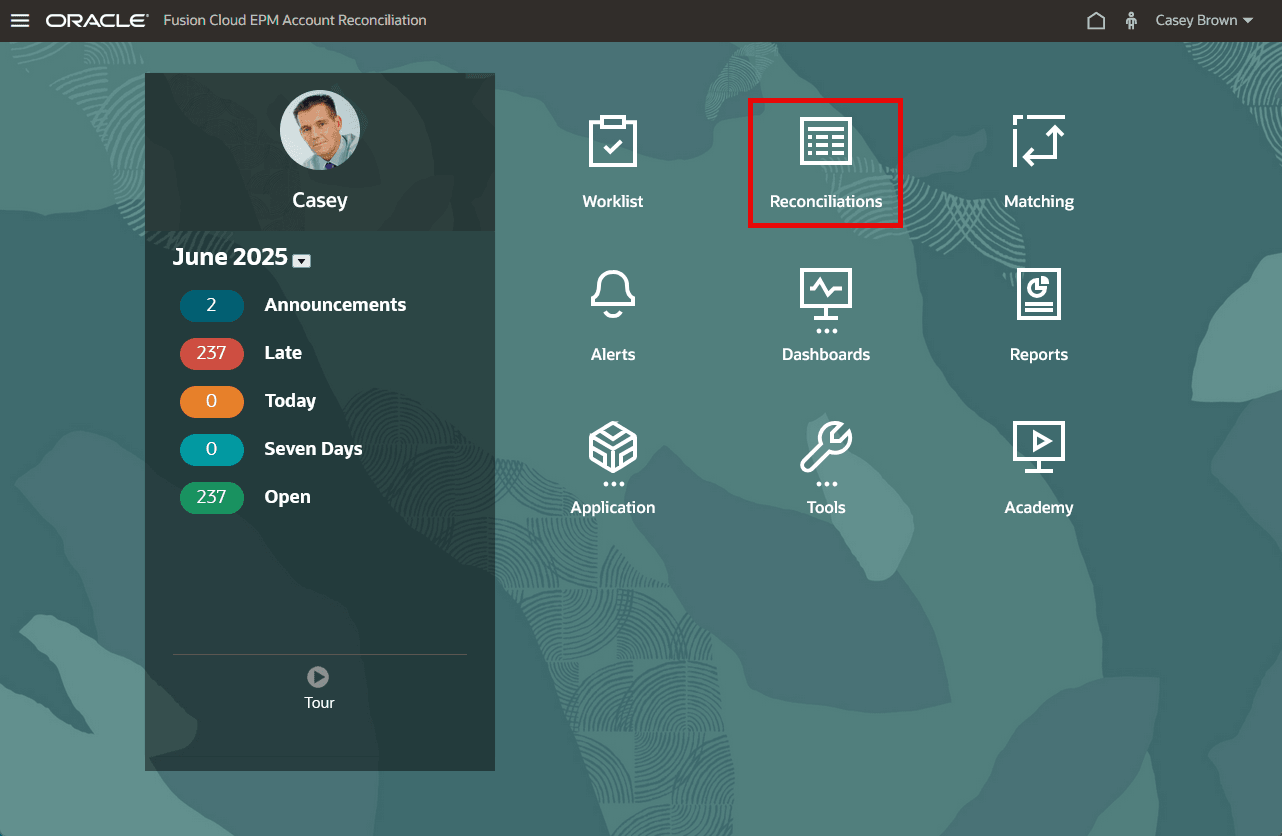
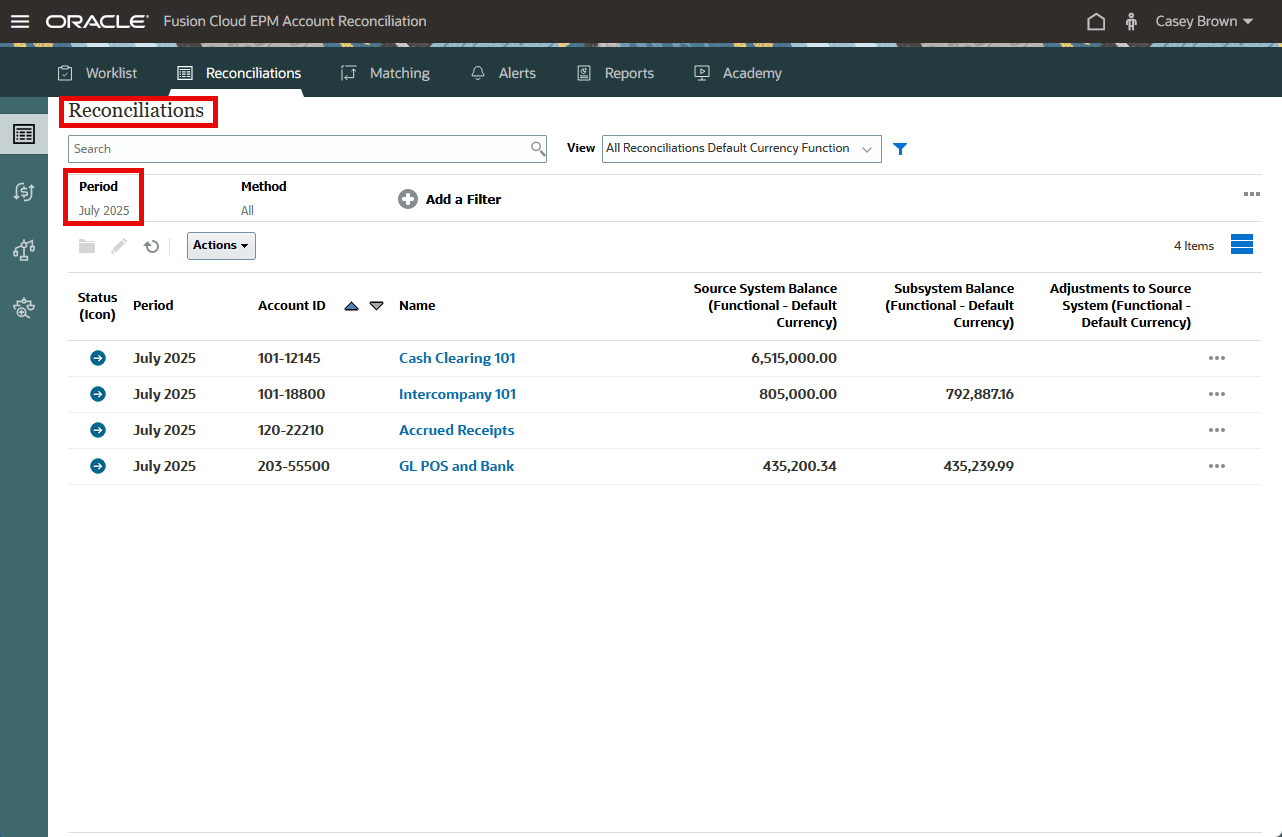
- Select the appropriate period (July 2025 in thhis example).
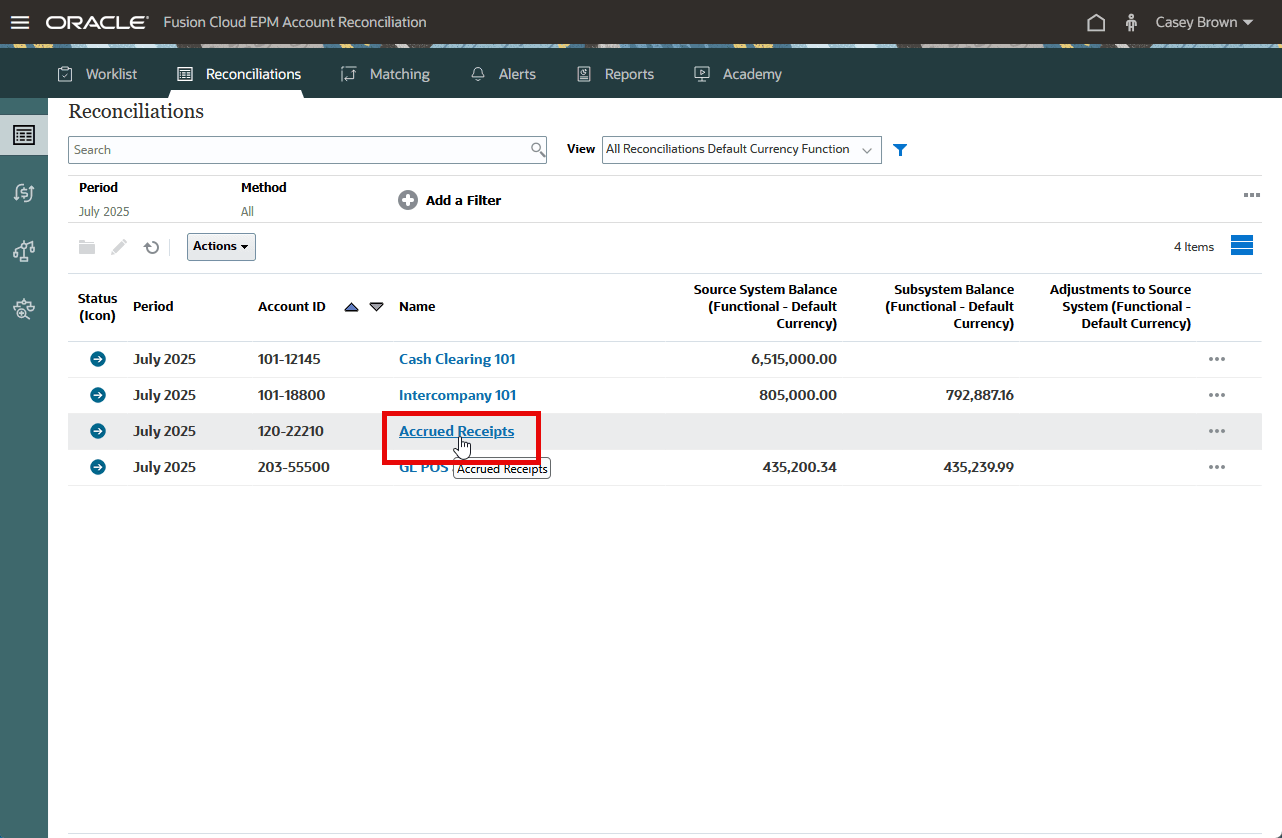
- Select the reconciliation to open it (Accrued Receipts in this example).
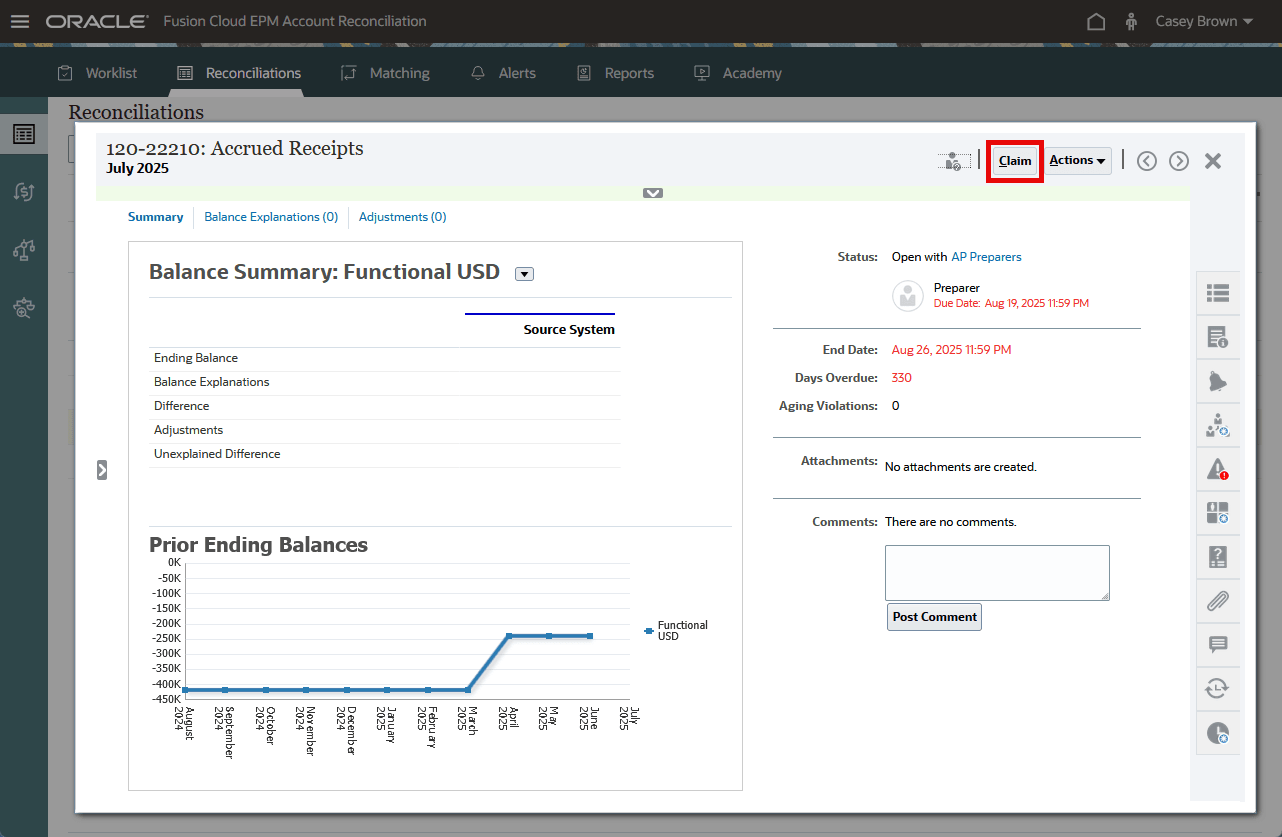
- If the preparer is a member of a preparer team, click Claim.
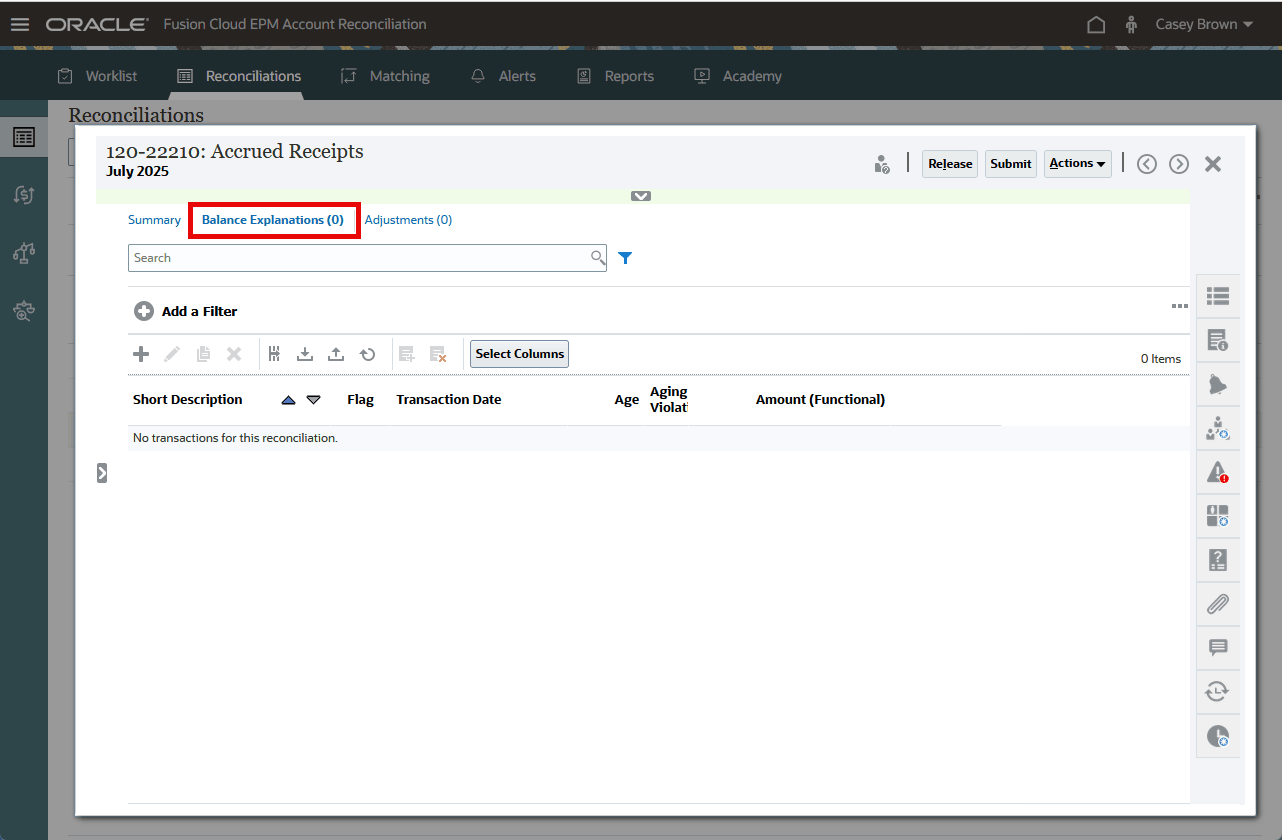
- Select the Balance Explanations tab.
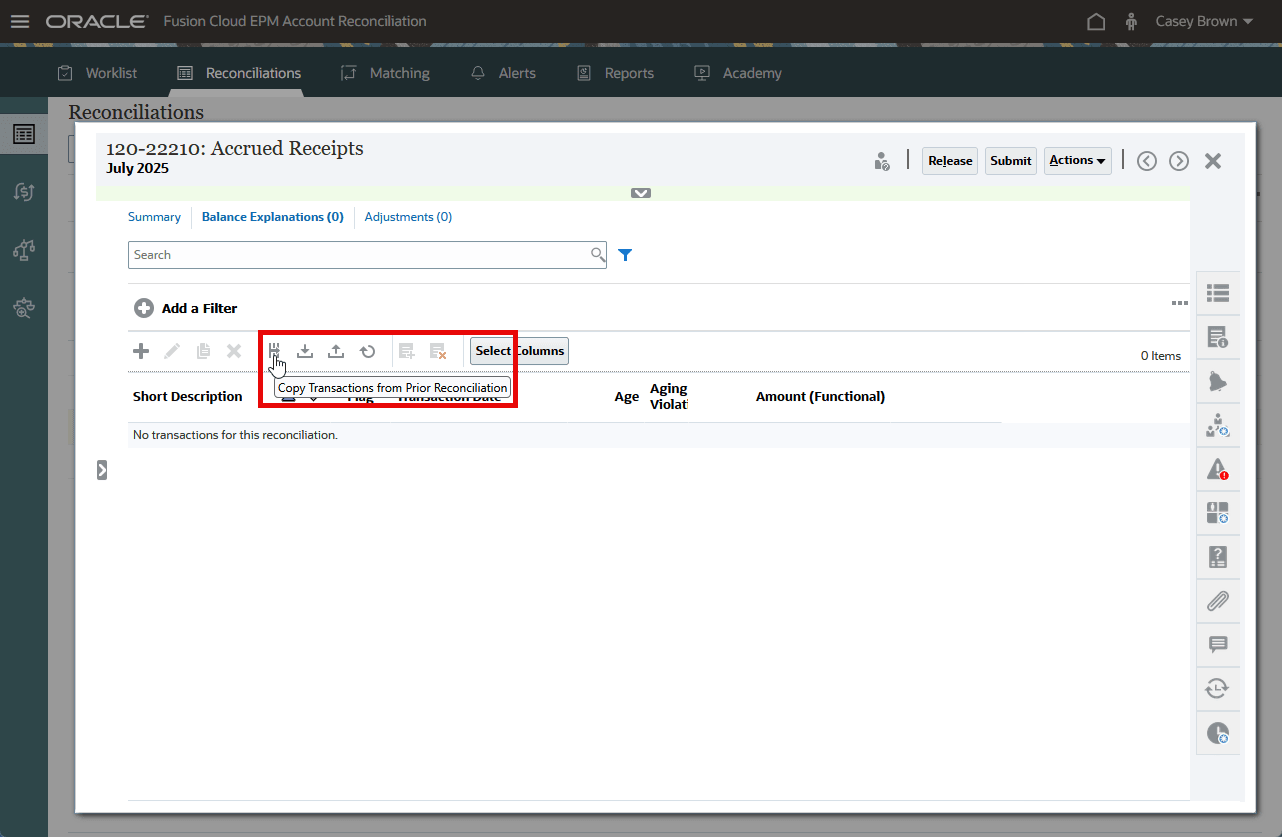
- Select “Copy Transactions from Prior Reconciliation”.
- Click Copy.
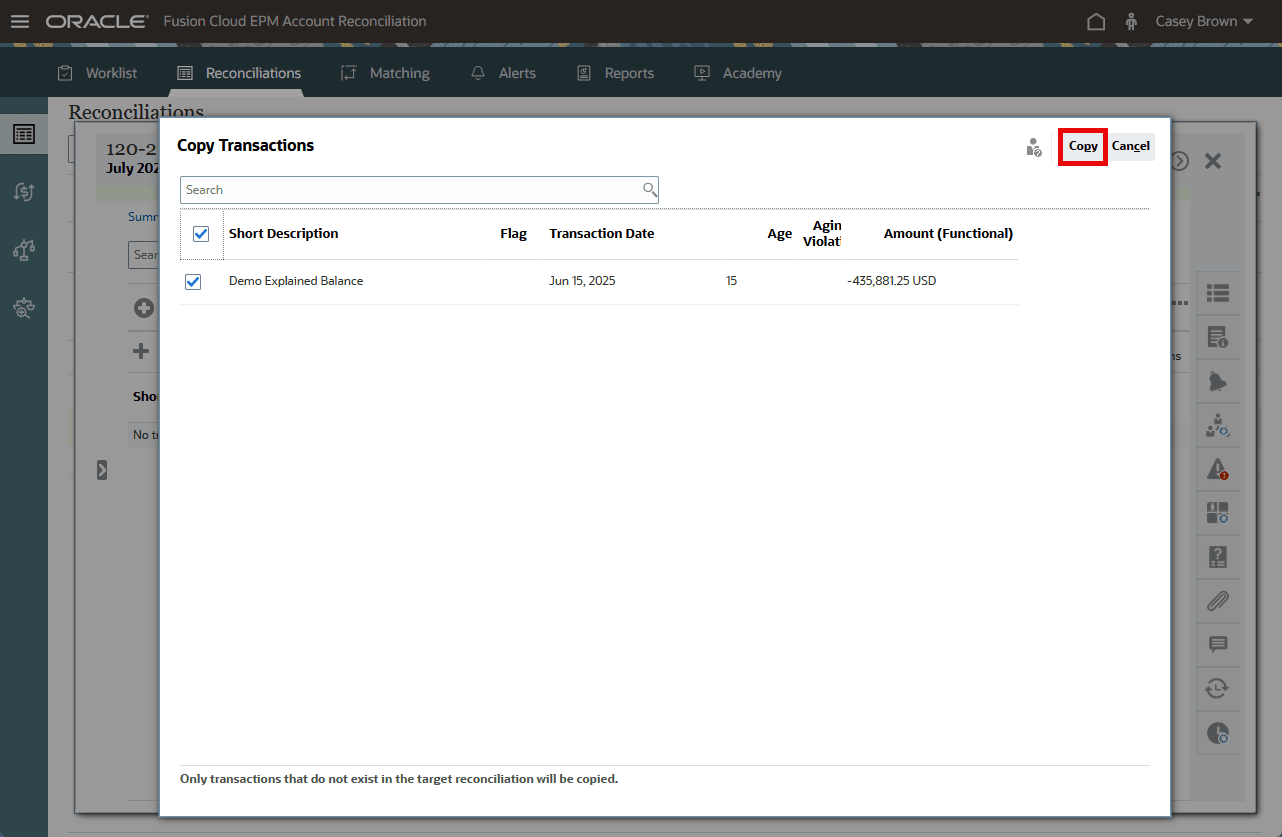
- The transaction is copied from the prior reconciliation.
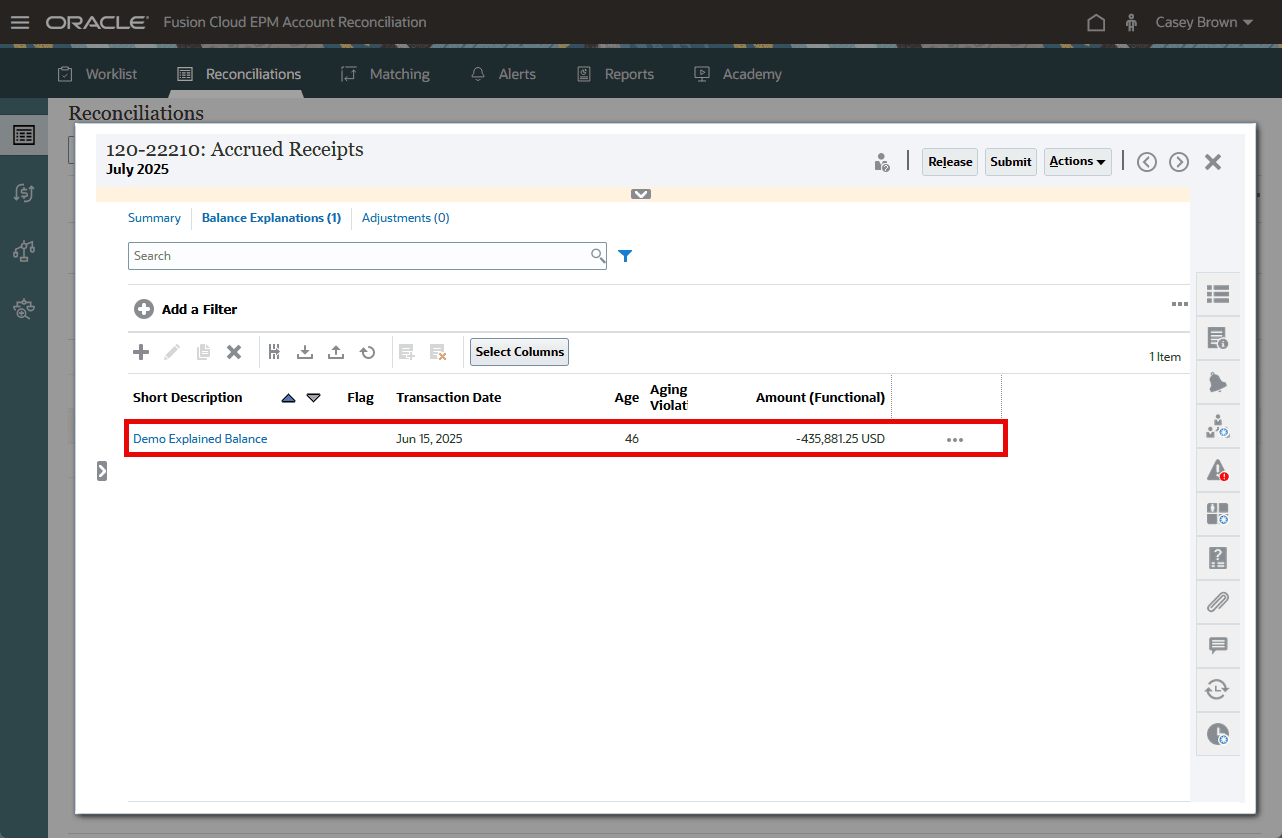
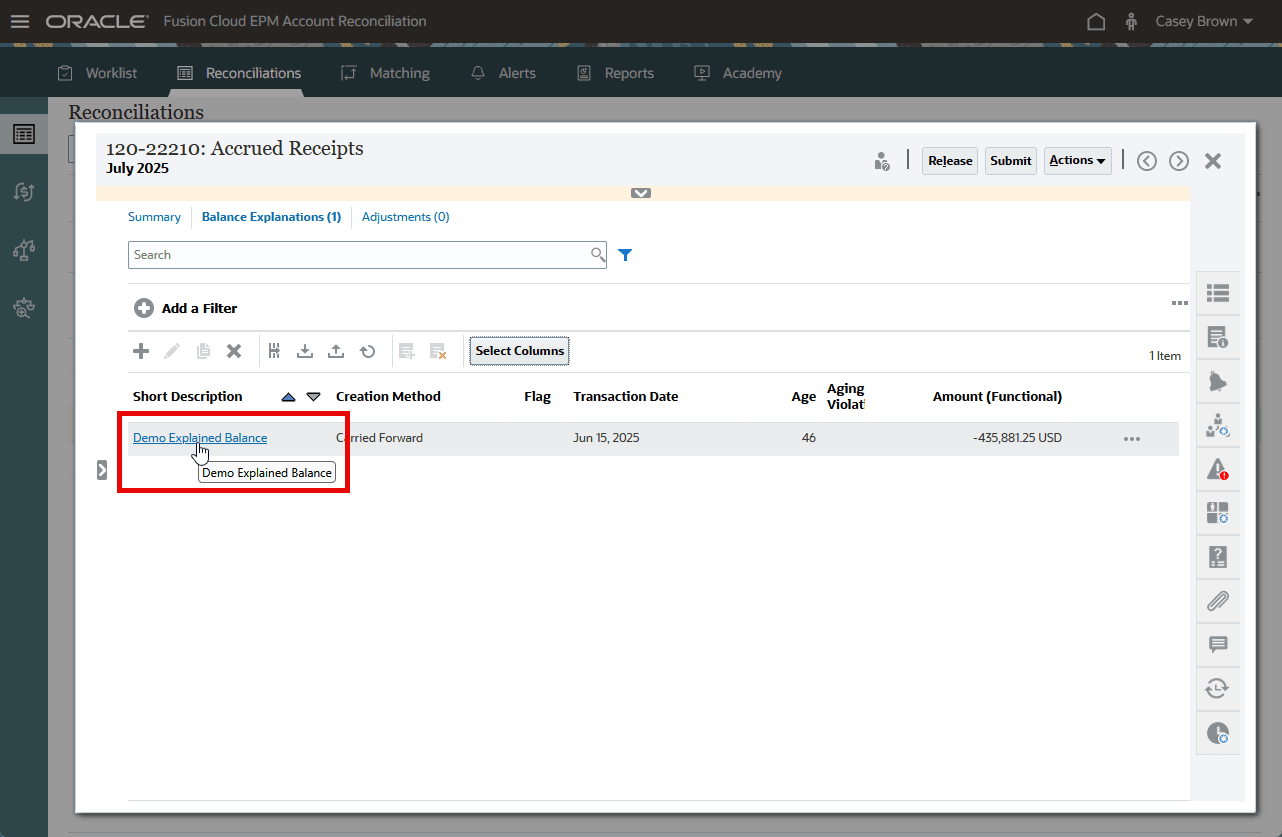
- Click Select Columns.
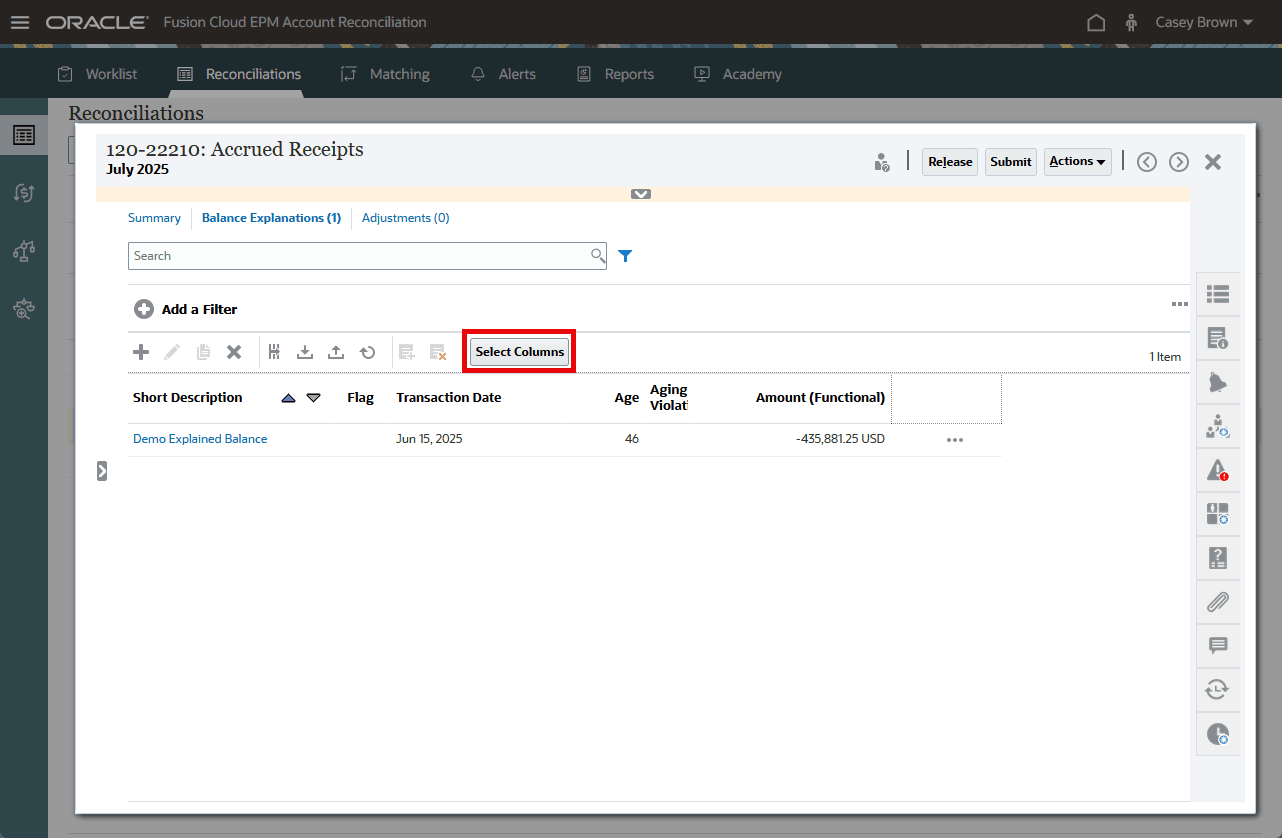
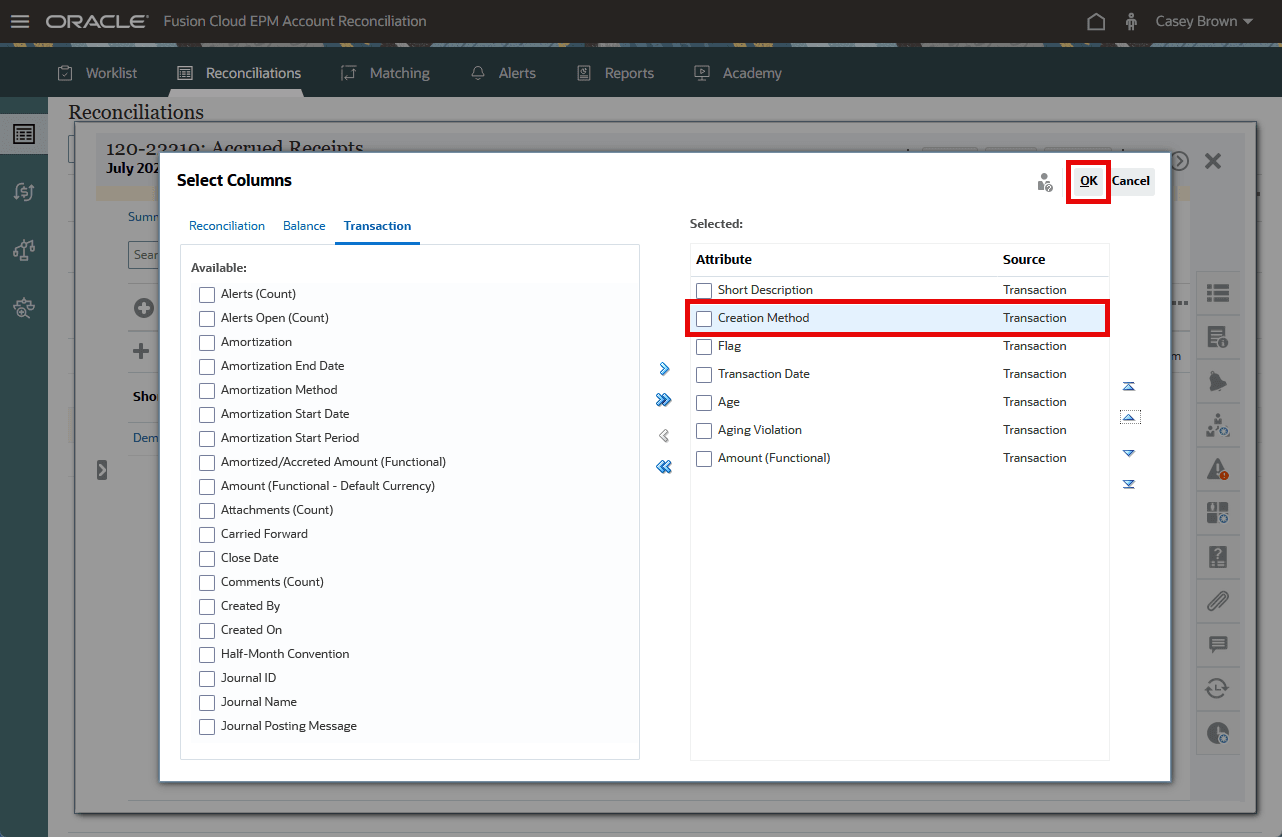
- Add the Creation Method column, move it below Short Description, and click OK.
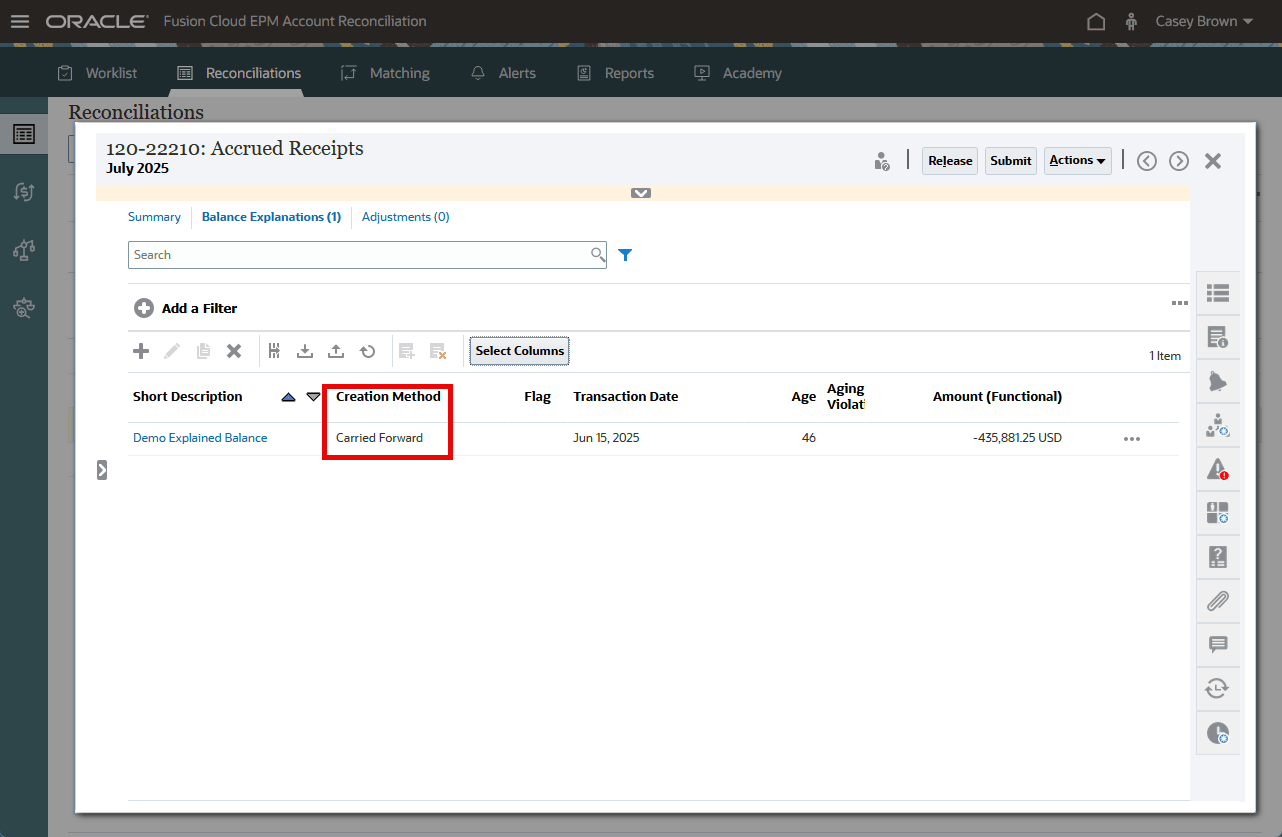
- Confirm that the Creation Method is “Carried Forward”.
- Open the balance explanation (Demo Explained Balance in this example).
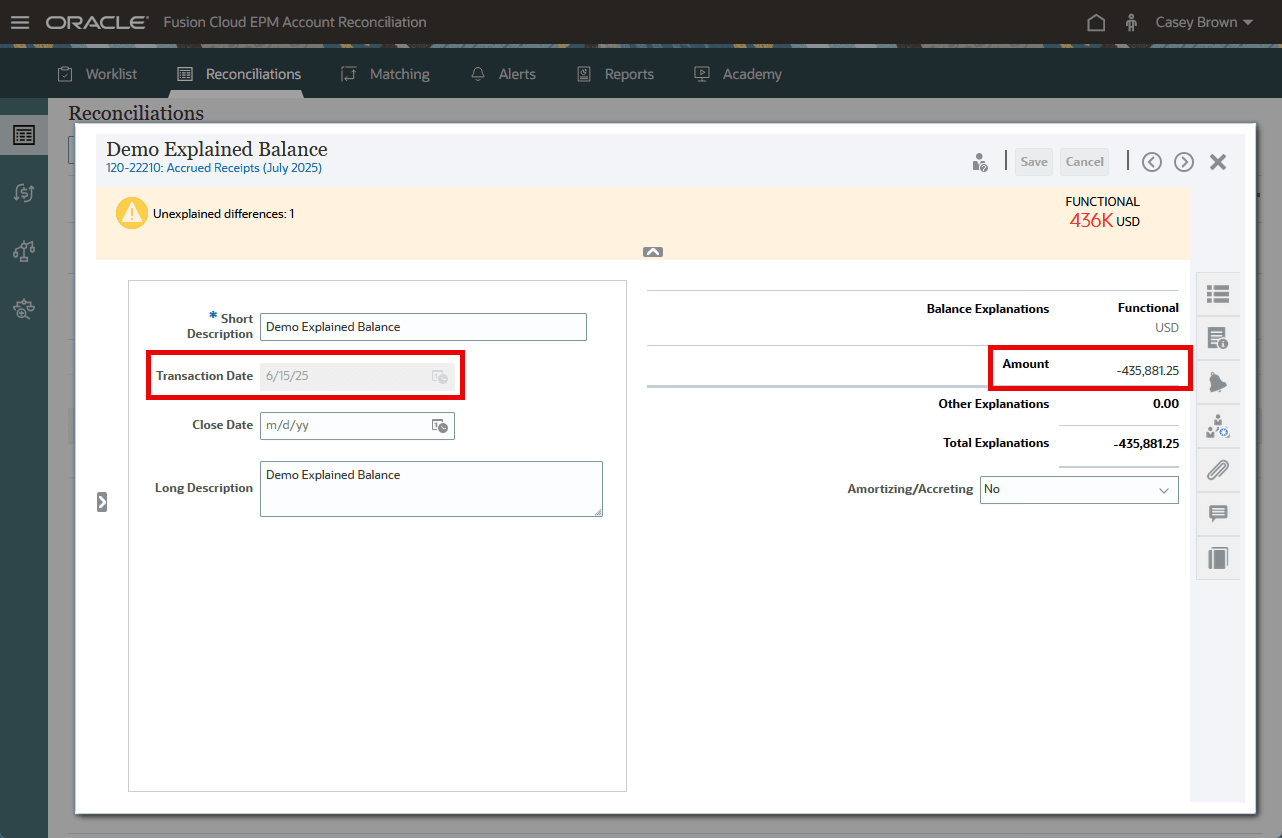
- Confirm that Transaction Date and Amount cannot be edited, but other permitted fields remain editable depending on the format design. Explanation: For carried-forward transactions, Transaction Date and Amount are protected. For non-carried-forward transactions, edit behavior follows the configured access rules.
Related Links
More Learning Resources
Explore other labs on docs.oracle.com/learn or access more free learning content on the Oracle Learning YouTube channel. Additionally, visit education.oracle.com/learning-explorer to become an Oracle Learning Explorer.
For product documentation, visit Oracle Help Center.
Lock down attributes on carry forward
G58733-01
July 2026