Filter Data in a Workbook
Use filters in a workbook to limit the data that you visualize. For example, you might filter by Month and visualize data only for January, February, and March.
- On the Home page, select a workbook, click the Actions menu, then select Open.
- Navigate to a canvas, and display the Visualize pane.
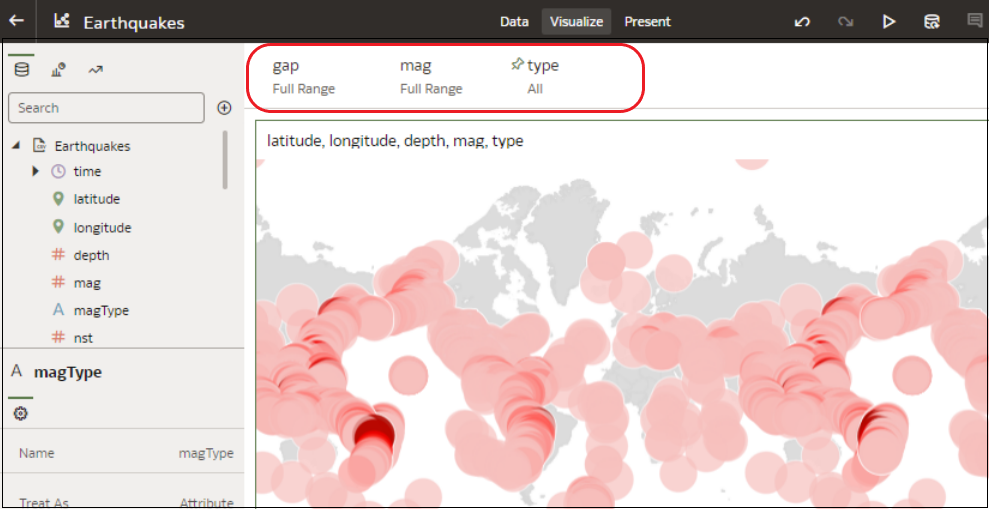
- Use the filter bar to update existing filters.
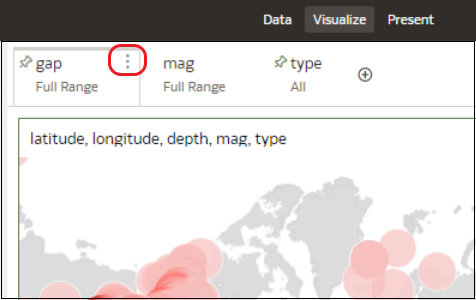
- To edit an existing filter, hover over the filter, then click Menu.
Use the options to configure that filter (for example, you might clear filter selections, pin it to all canvases in the workbook, disable it, or change the filter type).
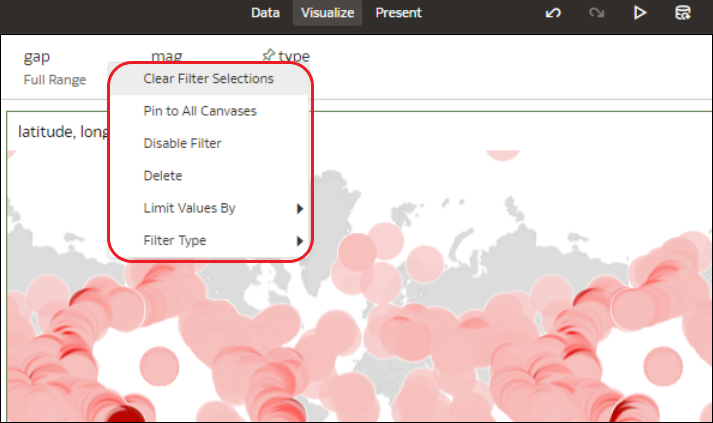
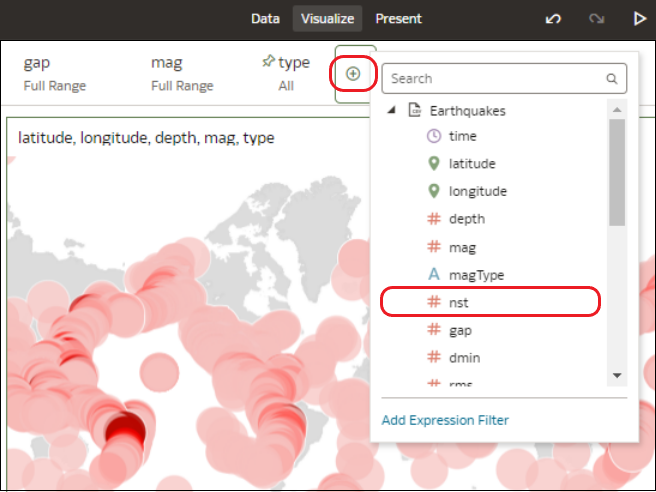
Description of the illustration filter-menu-options.png - To add a filter, click Add Filter (+), and select a data element.
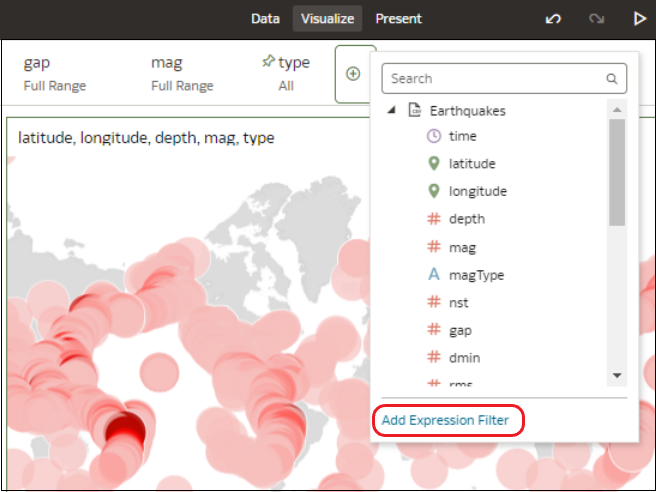
- To add a complex filter using an expression (for example, field1 + field 2 > 100), click Add Filter (+), then click Add Expression Filter.
- To apply a filter to all canvases in a workbook, hover over the filter, click Menu, then select Pin to All Canvases.
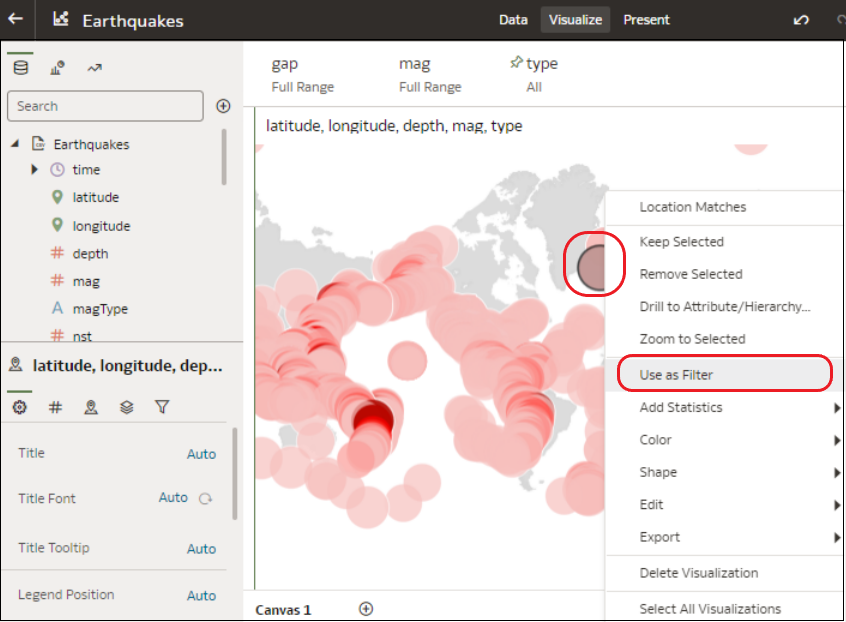
- To filter on a visualization element, right-click the element and select Use as Filter.
Notes:
- Filters are applied automatically unless you turn this option off the Auto-Apply Filters option (click the filter bar menu or right-click and select Auto-Apply Filters). When turned off, click Apply on individual filters apply them.
- If your workbook contains multiple datasets and some aren’t joined, then there are restrictions for how you can use filters. Any visualization that doesn't use the data element of the filter is grayed out.
- You can add filters to an individual visualization.
- You can't specify data elements of a dataset as a filter of other datasets, if the two datasets aren’t joined.
- To select an alternative compatible filter type, click the filter Menu and hover the mouse pointer over the Filter Type option.
- Click the filter Menu and hover the mouse pointer over the Limit Values By option to specify how the filter interacts with the other filters in the filter bar. Note the following:
- By default, the Auto option causes the filter to limit other related filters in the filter bar.
For example, if you’ve filters for Product Category and Product Name, and if you set the Product Category filter to Furniture and Office Supplies, then the options in the Product Name filter value pick list is limited to the product names of furniture and office supplies. You can select None to turn this limit functionality off.
- You can specify any individual filter in the filter bar that you don’t want to limit.
For example, if you have filters for Product Category, Product Sub Category, and Product Name, and in the Limit Value By option for the Product Category filter you click Product Sub Category, then the product subcategory filter shows all values and not a list of values limited by what you select for Product Category. However, the values shown for Product Name is limited to what you select for Product Category.
- By default, the Auto option causes the filter to limit other related filters in the filter bar.
