Extend an Entity

You can augment your reports with datasets created by extending an existing entity or group of facts.

While extending an entity or group of facts, ensure that you select Descriptive Flex Field (New) as the source dataset type to select the necessary columns for the augmentation. The existing approach of skipping the column selection is deprecated and won't be available from a future release.

You must ensure that any column with a primary key doesn’t have null values, otherwise the extract process rejects the entire dataset or table. If there are multiple columns with primary keys, then you must ensure that none of those columns have null values. If any of them have null values, then Oracle Fusion Data Intelligence rejects the entire extraction job. If Oracle Fusion Data Intelligence rejects the extraction job, then the corresponding augmentation is also rejected.

Ensure that SME Options for Data Augmentation is enabled in Pipeline Features section under the Generally Available Features tab on the Enable Features page. See Enable Generally Available Features.
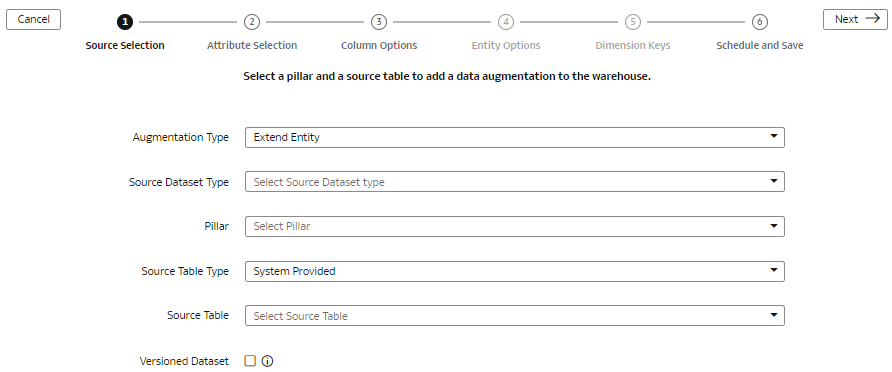
  1. In step 1 of the Data Augmentation wizard, select Extend Entity in Augmentation Type.
  2. Select Descriptive Flex Field (New) in Source Dataset Type.
  3. In Pillar, select a product pillar; for example, Enterprise Resource Planning.
  4. In Source Table Type, specify the source table type using either of the options:
    • Select System Provided and then in Source Table, select a table from the list of view objects that support descriptive flex fields.
    • Select Customer Provided and then in Source Table, enter the name of the table that supports descriptive flex fields.
  5. Optional: Select the Versioned Dataset check box to enable full load of the source table data everytime and then click Next.
  6. In step 2 of the wizard, select the check box for the attributes from the source table that you want in your target table, and then click Next.
  7. In step 3 of the wizard, click the Action icon for each of the selected attributes to specify the Type and Treat as settings, and then click Next.
  8. In step 4 of the wizard, select the entity or group of fact tables to extend and its primary keys, and then click Next. For example, if you select ARTransaction as the entity to extend, then this process joins the prebuilt InvoiceID descriptive flex field using the s_k_5000 primary join key with all the fact tables in the ARTransaction entity.
  9. In step 5 of the wizard, choose the primary keys for the attributes that you had specified to be treated as dimensions.
  10. In step 6 of the wizard, provide the following details and click Finish to save and schedule your data augmentation pipeline job:
    1. Name your augmentation pipeline job; for example, AP Invoice Header.
    2. Enter a suffix for the target table name using underscore in place of spaces between words and don’t use special characters; for example, AP_Invoice_Header_DFF. The augmentation process automatically creates the target table name.
    3. Provide a description.
    4. Select the functional area and one or multiple subject areas in which you want to include this augmentation pipeline job.
    5. Specify the options to save the data augmentation pipeline job without executing it, or schedule the execution date and time, or execute it immediately.