Manage Territory Geography Splits
You must group territory geographies into group zones to manage territory geography level splits. Grouping the territory geographies involves two steps, selecting the geography level based on which you need grouping and initiating the grouping.
Select the Geography Level for Grouping
You can perform these steps to select the geography level based on which you want to create the group zones:
-
Sign in as a set up user such as Application Implementation Consultant.
-
In the Setup and Maintenance work area, go to the following:
-
Offering: Customer Data Management
-
Functional Area: Enterprise Profile
-
Task: Manage Geographies
-
-
Search for the country for which you want to enable territory geography level grouping.
-
Click Structure Defined. Manage Geography Structure page appears.
-
Select the Subject to Grouping check box corresponding to the geography type level for which you want to enable grouping.
You must select the geography level that suits your business requirements. For example, if your product delivery is based on postal code, and your territory geographies don't have higher levels of master geographies such as counties and cities, then you may have postal code splits. In this case you must select postal code as the geography type level for grouping.
Note: You can enable grouping for only one level at a time. -
Click Save and Close.
Initiate Grouping
Here are the steps to initiate grouping:
-
In the Setup and Maintenance work area, go to the following:
-
Offering: Sales
-
Functional Area: Territories
-
Task: Manage Territory Geographies
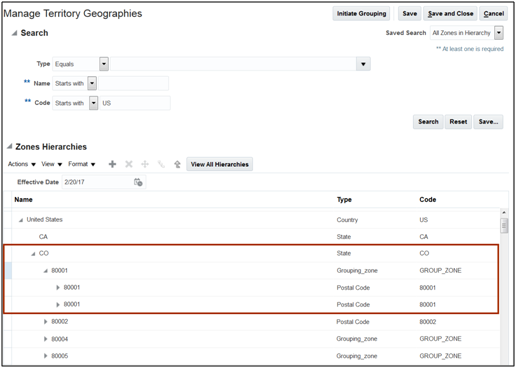
The Manage Territory Geographies page opens.
-
-
Click Initiate Grouping.
-
Click OK in response to the warning message and confirm the process.
Note: You can't automatically un-group the grouped territory geographies. You can manually undo the grouping process by recreating territory geography hierarchy either through the UI or import process.The geography level that you selected for grouping appears as an expandable Group Zone when the grouping is complete is shown in the following figure.
-
Click Save and Close.