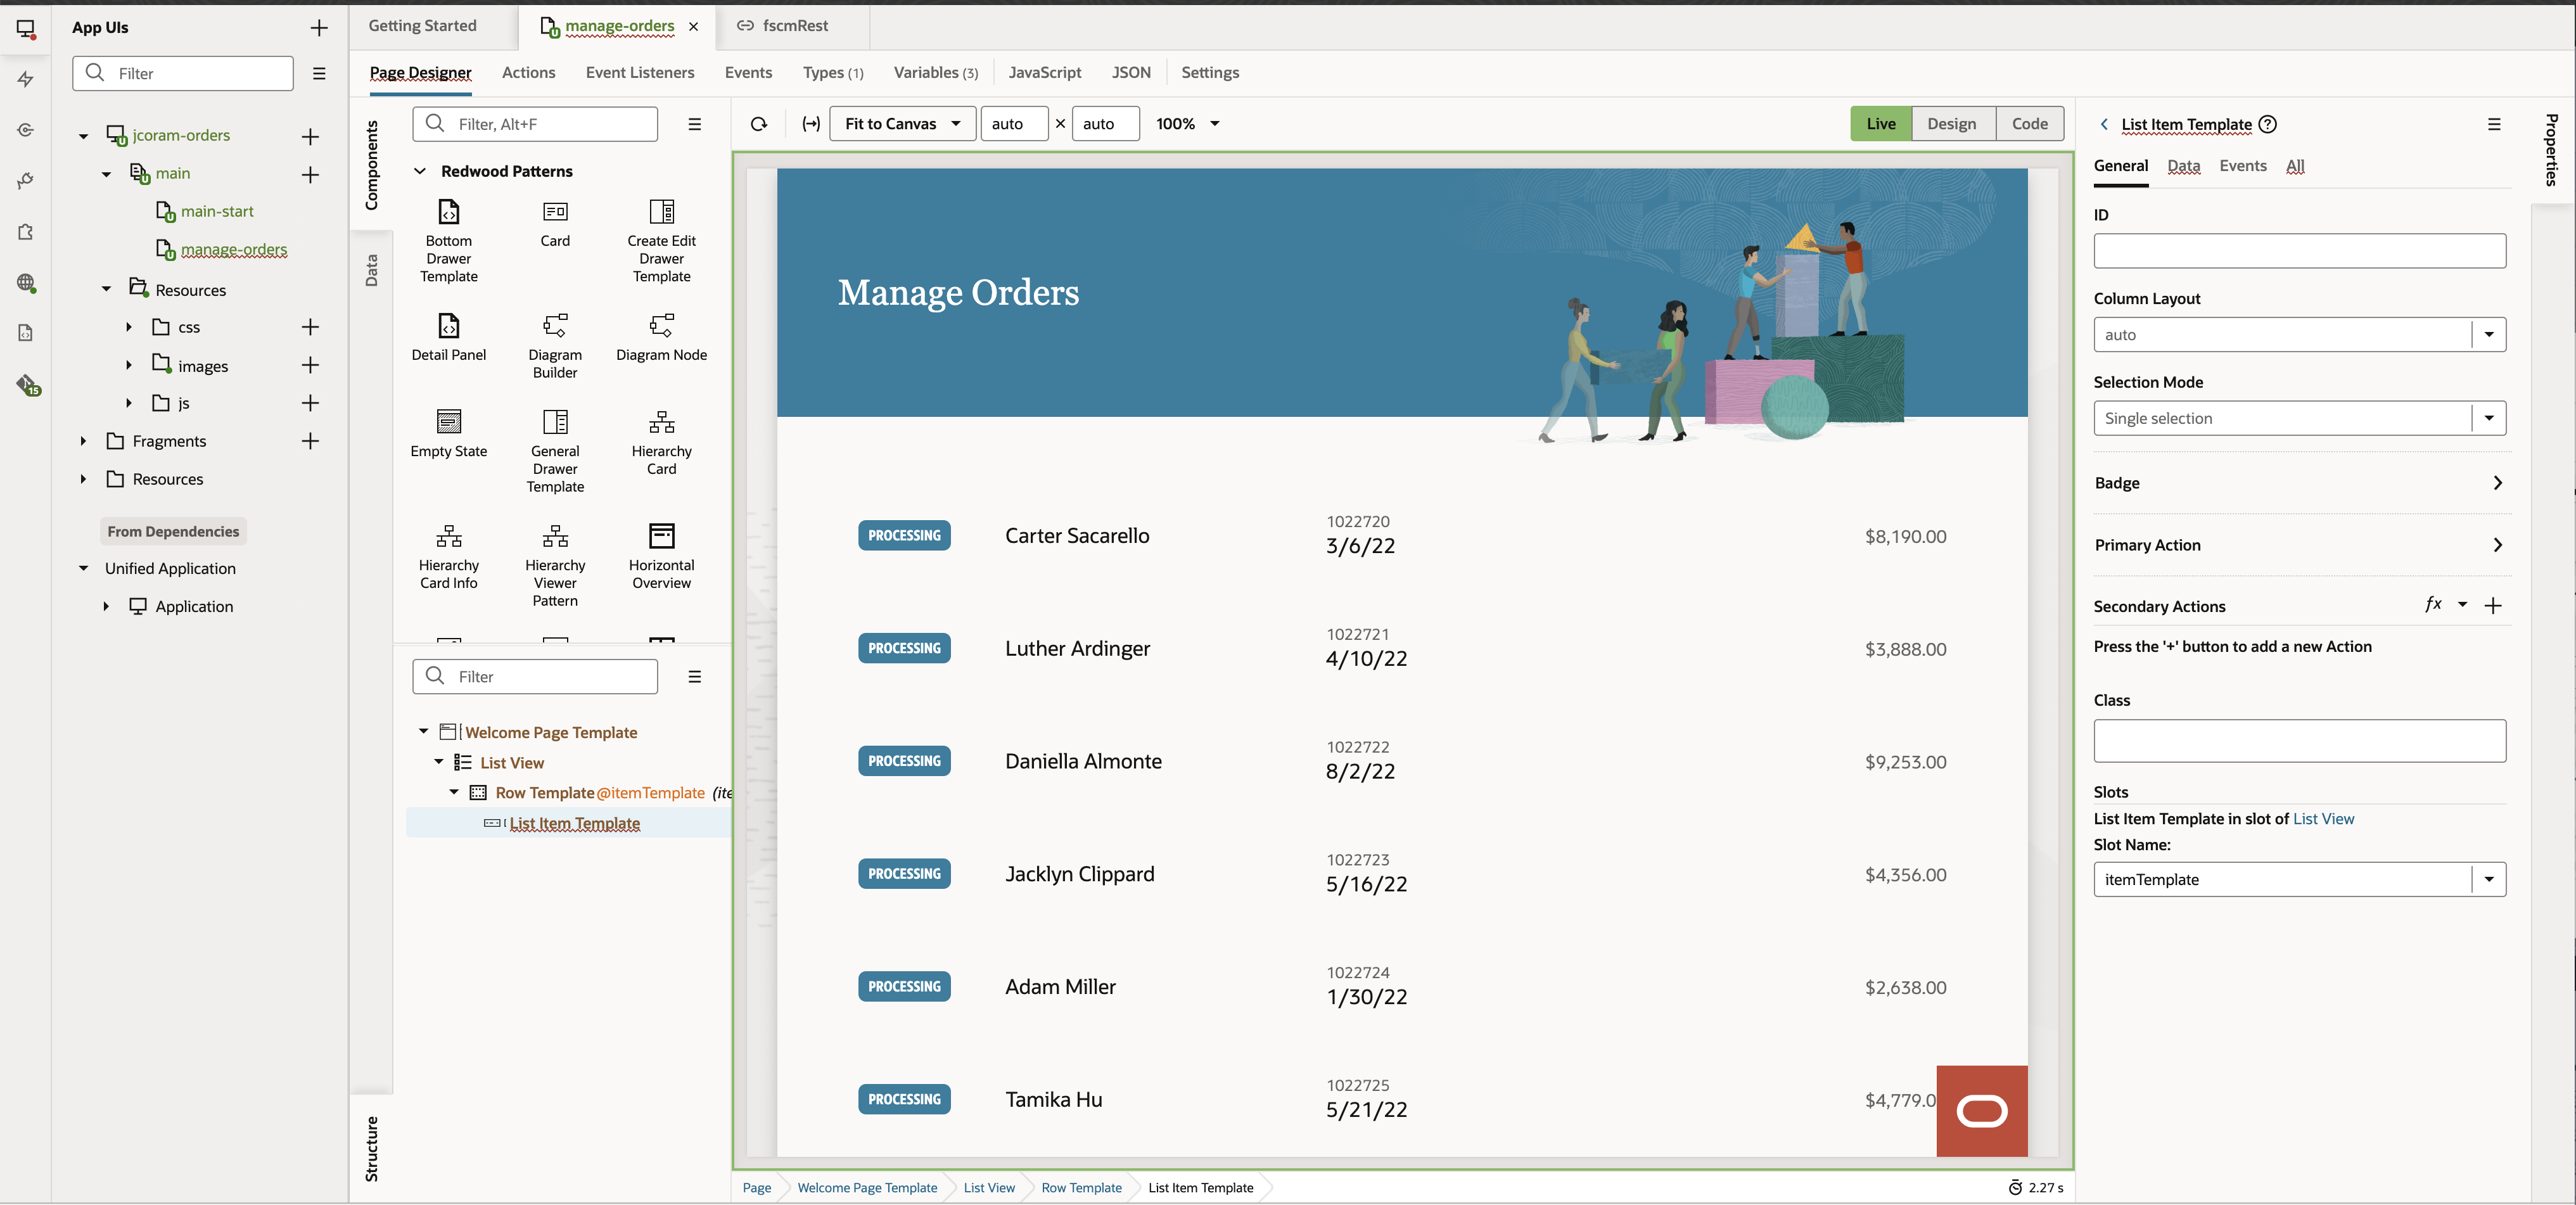
Add the Edit Action Icon to the Manage Orders Page
Create a secondary action icon on the manage-orders page.
- Go to the List Item Template properties.
- If you're not already there, open the manage-orders tab and click the Page Designer subtab.
- In the Structure view, make sure that the List Item Template component is selected.
- In the Properties pane, go to the General tab.
- Add an action to the list item template.
- In the Properties pane, General tab, Secondary Actions field, click the
Add Action (+) icon.
A new row is added.
-
Hover over the added row and click the More Properties (>) icon.

-
In the Actions pane, enter these values:
- In the Action Id field, enter edit-order.
- In the Label field, enter Edit Order.
- In the Icon field, enter
oj-ux-ico-edit. Note: You can find all Redwood icons at Oracle Images.
- In the Properties pane, General tab, Secondary Actions field, click the
Add Action (+) icon.
- Click Live to see what you've built so far. The Edit
Order (pencil) icons appear on the canvas.
