Configure the rraProducts Action Chain for KPI 2
- Navigate to Action Chains.
- On the orders-analysis tab, click the Actions tab.
- Click Action Chains.
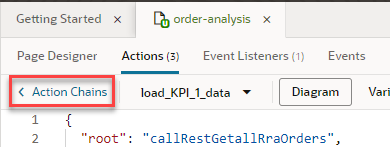
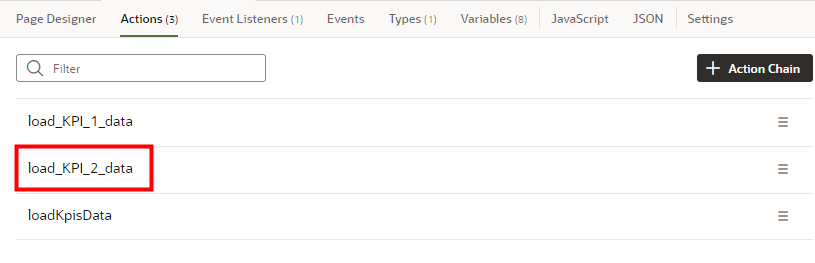
- Click load_KPI_2_data.
 The Diagram tab opens.
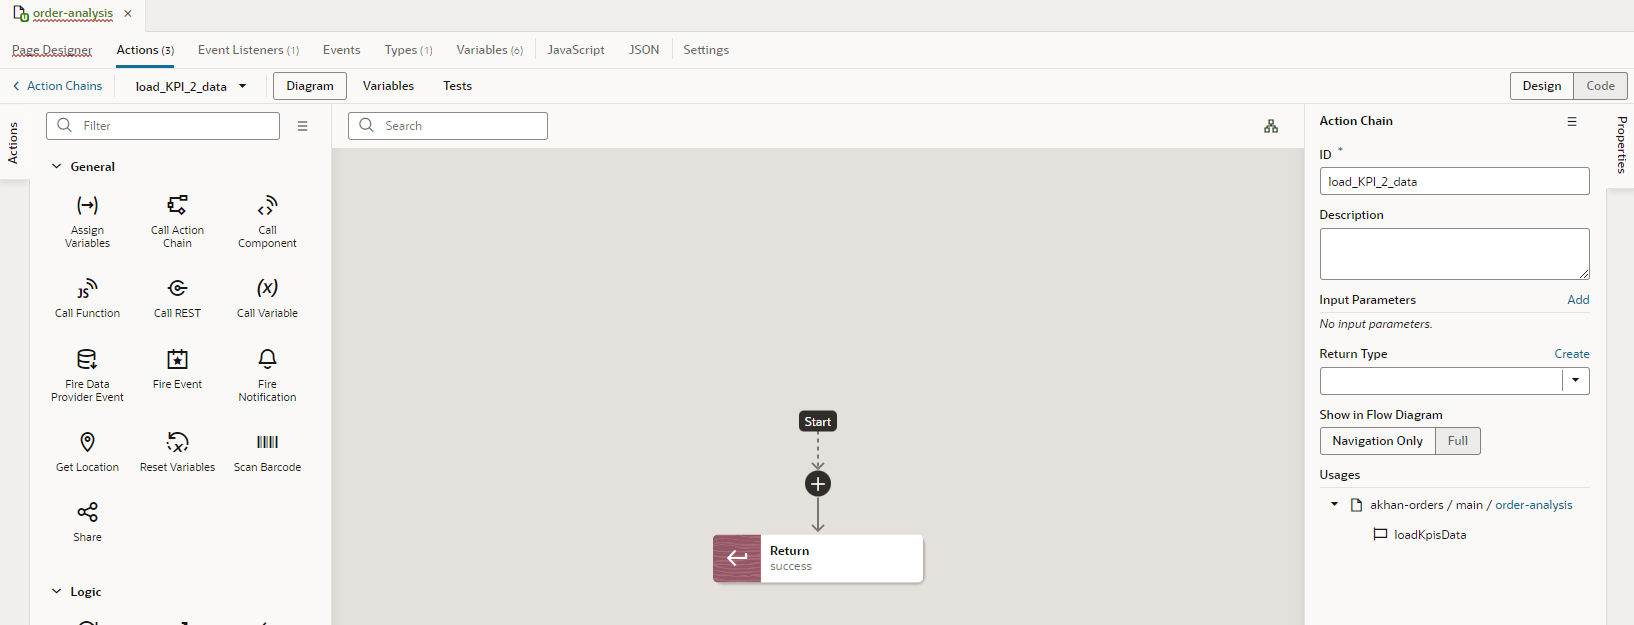
- In the Actions pane under General, click Call REST and
drag it under the Start point and over the + icon, then drop it.
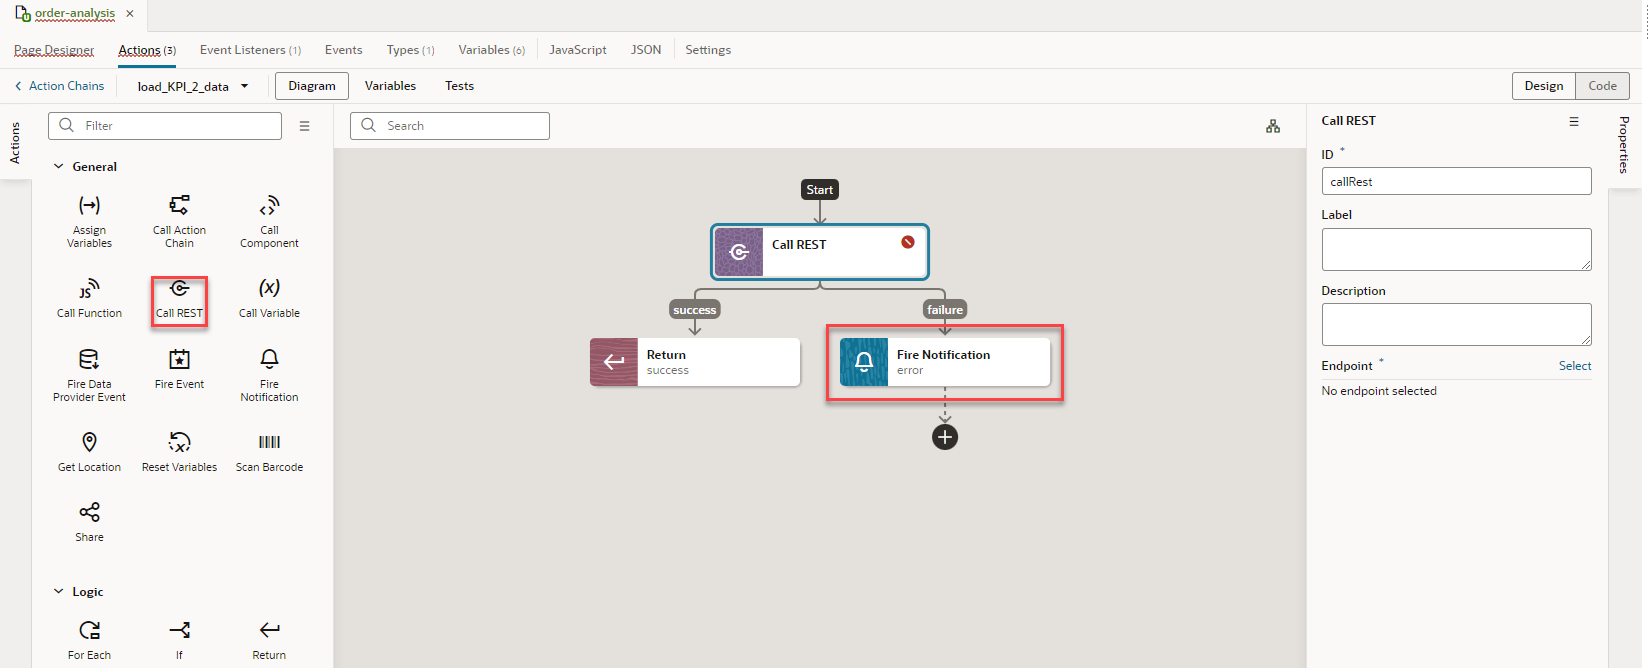
With this configuration method, the failure path for the REST call is automatically handled for you.
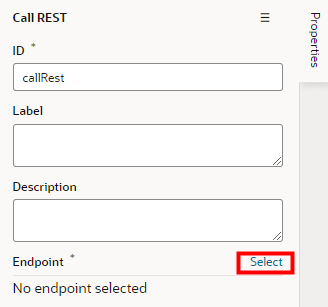
- Configure the call REST action.
- In the Properties pane, click Select.
- In the Select Endpoint dialog box, expand .
- Select GET /rraProducts.
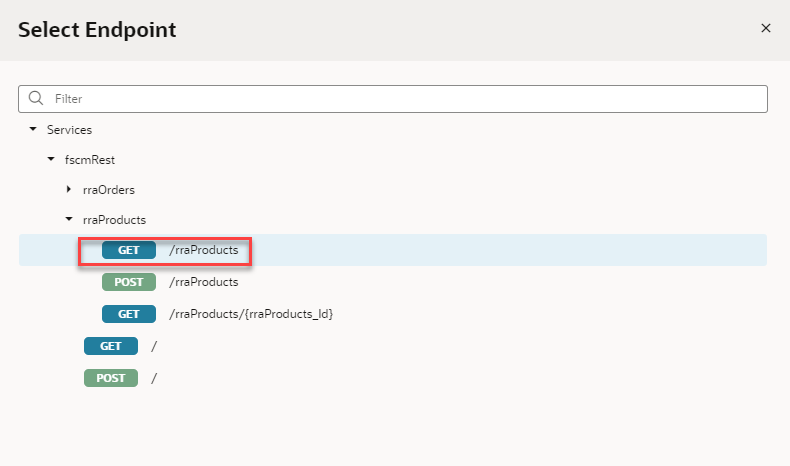
- Click Select.
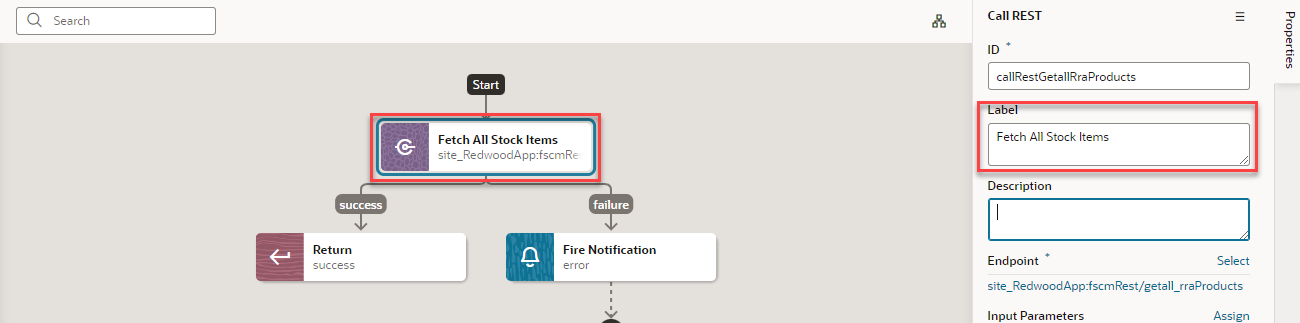
In the Properties pane, the ID value automatically updates to reflect the selected endpoint.
- In the Properties pane, click Select.
- To replace the Call REST action name with a more descriptive title, in the
Label field, enter Fetch All Stock
Items.
- Replace the default get limit, which is in increments of 25, with a more
reasonable limit for the KPI.
- Under Input Parameters, click # limit.
- In the Assign Input Parameters dialog box, in the Target panel, select # limit.
- In the # uriParams.limit field at the bottom of the dialog box, enter 1000.
- Select the Static Content option if it isn't
already selected.
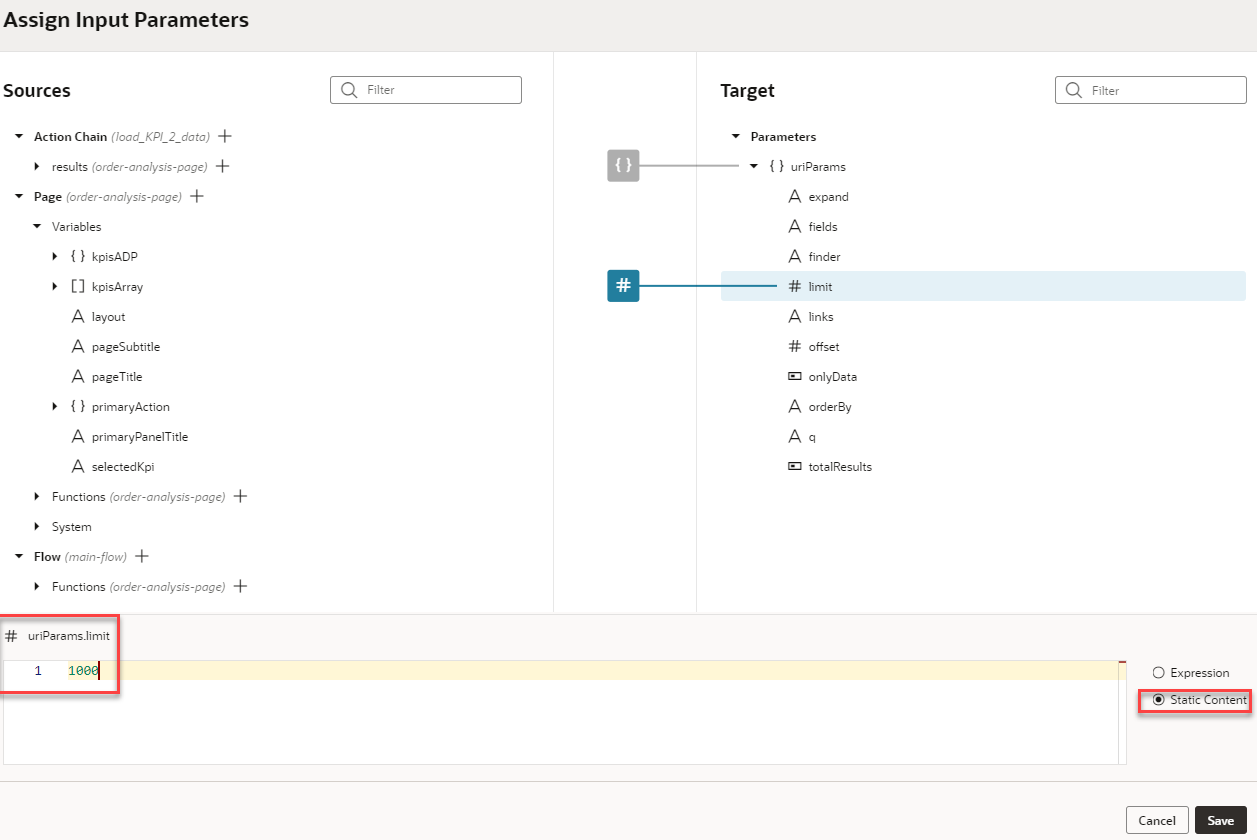
- Click Save.
- Configure the success path with the Assign Variables action.
- In the Actions palette, click Assign Variables
and drag it under the success path and over the Return action, then drop
it.
The Assign Variables action has an error icon and in the Properties pane, the error tells you that you need more than one property because you haven't configured any properties yet.
- To replace the Assign Variables action name with a more descriptive
title, in the Label field, enter
Assign Total Items in Stock.
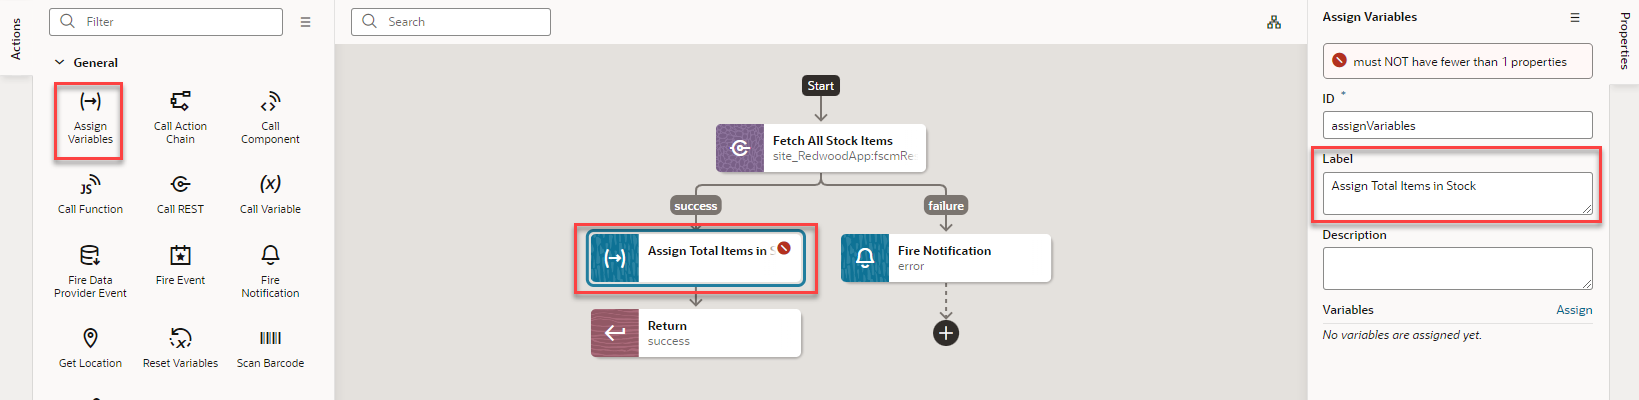
- Next to Variables, click Assign.
- On the Sources side of the Assign Variables dialog box, expand .
- In the Target panel, under Page, expand [ ] kpisArray, and select { } item[i].
- In the text area at the bottom of the dialog box, under { } $page.variables.kpisArray[0] field, select the Expression option.
- In the Sources panel, click # count and drag it
over the Target panel { } item[i] variable.The relevant expression should appear in the text area at the bottom of the dialog box in the { } $page.variables.kpisArray[0] field. If it doesn't, copy this expression and paste it in the field:
$chain.results.callRestGetallRraProducts.body.count.![The Assign Variables window displays with the { } $page.variables.kpisArray[0] field and the Expression option outlined in red.](images/image2022-11-4_12-1-22.png)
- Click Save.
- In the Actions palette, click Assign Variables
and drag it under the success path and over the Return action, then drop
it.
- By default, the variable assignment applies to the entire array. Update it to
apply to only the metric of KPI 2.
- On the Diagram subtab, click Code.
- In the
assignVariablesKpisArraysection, underparameters, change $page.variables.kpisArray to $page.variables.kpisArray[1].metric.![The Actions tab displays with Code and $page.variables.kpisArray[1].metric in the assignVariablesKpisArray section outlined in red.](images/ActionsCodeChange2.png)
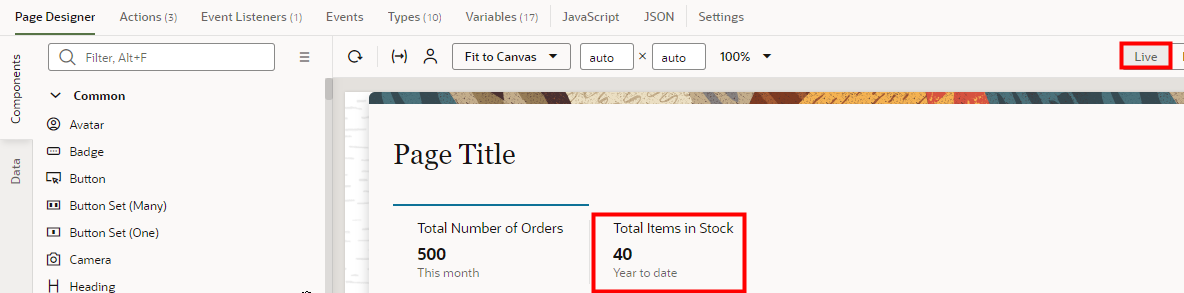
- To test the action chain, go to the Page Designer subtab and click
Live if you're not already in the Live mode. Under Total Items in Stock, the --- should be replaced with the number of items. It takes some time for the information to appear. You might need to refresh the page to get the information to appear.