Case
statements help you branch your workflow based on multiple conditions
you define. They are unique because you define an outgoing path for
each condition. When the first choice (condition) is matched, the
path for that choice is followed, and no other conditions within the
case statement are evaluated.
After
you add a case statement element to your flow diagram, you can edit
its attributes to branch your flow to different paths based on whether
contacts meet certain conditions. When you edit the case statement,
you can define multiple conditions using a contact field in the database,
a question, or a score.
Score pertains to the cumulative score
from all preceding survey question responses. Score always displays
on the Cases tab.
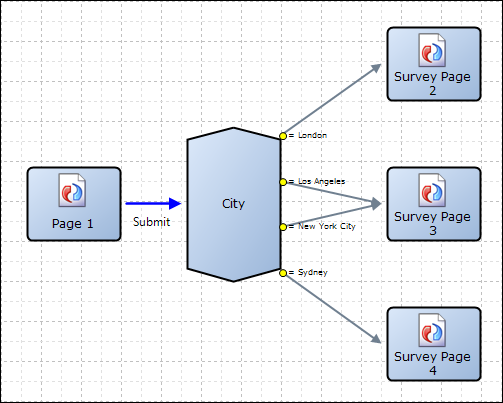
Case statements differ from decisions because
they let you add multiple paths to your flow. This image shows a case
statement with four choices that lead to three different paths.
- Double-click the Case Statement element.
The Case Statement window opens.
- Select a contact field, survey question, or score from
the Cases tab.
Tip: Depending on the item you select, choices are
either already defined by default or you must define them.
- If you want to add an “other” path to your case statement,
select Include Option for Other.
- To add a choice that is not defined by default, click Add Choice.
The bottom section of the Case Statement window displays
options to define logical expressions for your choices.
The Add
Choice button does not display if choices have already been defined
by default. For example, Contact Type or Global Opt-in under Default
Contact Fields have choices defined. Therefore, the Add Choice button
does not display when these fields are selected.
-
Click the Operator drop-down list to select the logical symbol that
completes your expression.
- Enter the field value in the Choice field.
- To add another choice that is not defined by default, repeat
steps 4 through 6.
- To delete a choice, select the choice and click Remove.
- To add a choice that is defined by default, select the
check boxes next to the choices you want to include in your case statement.
Cases with menu, yes/no, and opt-in items present you with default
choices defined by the database.
- To add any notes associated with the element, click the Notes tab and enter the notes.
- Click OK.