Activation Snapshots
Activating a campaign sends the campaign data to a destination system like Eloqua or Responsys. However, there is no record of the campaign data sent. This prevents marketers from being able to track the customers who have already been targeted in a campaign. Tracking customers enables marketers to make marketing decisions such as limiting the number of times that a customer can be targeted by a campaign.
Activation Snapshots alleviates this problem by enabling marketers to create a "snapshot" of a campaign when campaigns are run. The Activation Snapshot saves the data sent after a campaign run. Marketers can then use this data to make marketing decisions, such as suppressing communication to customers that have already been targeted recently.
Oracle Unity provides APIs to enable marketers to manage Activation Snapshots. Some of these APIs include:
-
Enable and disable activation snapshots for campaigns
-
Get and delete snapshots
-
Get and delete snapshot partitions
-
Get most recent snapshot partition
This topic will walkthrough how to use Unity expert config to create and manage Activation Snapshot data.
In this topic:
How it works
Activation Snapshots need to be enabled for each campaign job where you want to save campaign data. After campaign jobs run, Snapshots are saved. There are two locations where Activation Snapshots can be saved:
-
Within existing data objects
Save Snapshot data to existing data objects such as Event, Customer, and so on.
-
Within their own data objects
Save Snapshot data in a new Snapshot data object. The data object ID assigned is "snapshots_<campaignID>".
If Activation Snapshots for a campaign are disabled, Snapshots will no longer be saved, and all snapshots previously created are retained. Here's an illustration of the Activation Snapshot workflow.

Before you begin
-
This tutorial assumes you already have destinations, and segments already created. If you have not already created these, see the Oracle Unity Help Center for destinations and segments.
Step 1: Create a new campaign
First, we'll create a campaign to target our Christmas holiday shoppers. Our campaign job ID is "Holiday_Campaign". Leave your campaign unpublished for now, we'll activate our campaign later.
Step 2: Enable snapshots
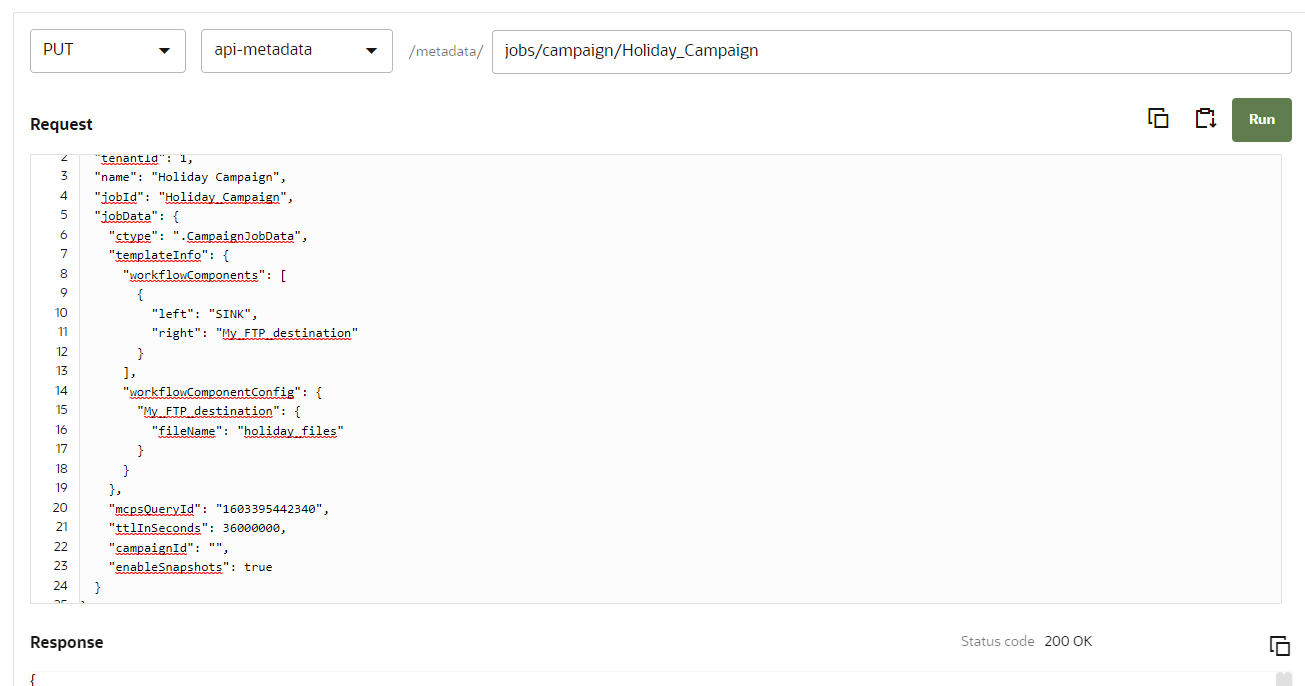
Next, we need to enable the snapshots feature. To enable snapshots, the enableSnapshots setting in a campaign job must be set to true. We'll use the Unity expert config to update the Holiday campaign we created.
To update the campaign:
-
Navigate to the expert config page of Oracle Unity by going to the following URL: https://[your cxunity hostname]/?root=expertConfig.
-
Configure the request as follows:

Request URL
PUT https://{AccountURL}/api-metadata/metadata/jobs/{jobId}Request body
The following parameters enable you to configure snapshots.
Parameter Data Type Required? Description enableSnapshotsBoolean Yes Enables the campaign job to create snapshots when the campaign is run. Here's a sample payload.
{ "tenantId": "1", "name": "Holiday_Campaign", "jobId": "Holiday_Campaign", "jobData": { "ctype": ".CampaignJobData", "mcpsQueryId": "Holiday_Query", "ttlInSeconds": 36000000, "campaignId": "Holiday_Campaign", "enableSnapshots": true } } -
Click Run.
-
A successful response will return a 200 OK, where the response echoes the details of the request.


Step 2.1: Save snapshot data to existing data objects
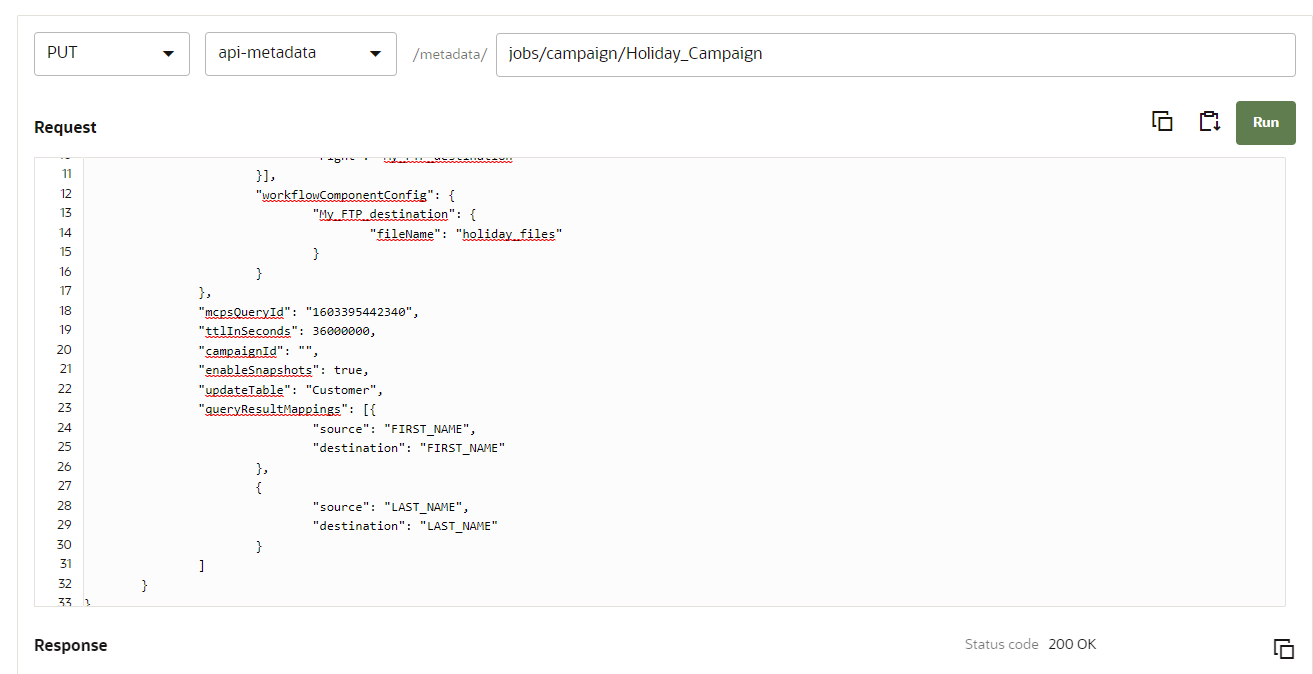
To save Snapshot data to an existing data object, we must add additional parameters when updating our campaign . These parameters are updateTable and queryResultMappings, explained below. Specifying these parameters enables you to decide which existing data object to save Snapshot data.
To update the campaign:
-
Navigate to the expert config page of Oracle Unity by going to the following URL: https://[your cxunity hostname]/?root=expertConfig.
-
Configure the request as follows:
Request URL
PUT https://{AccountURL}/api-metadata/metadata/jobs/{jobId}Request body
The following parameters enable you to configure where to save snapshot data.
Parameter Data Type Required? Description updateTableString Yes Specify the data object ID to save snapshot data. queryResultMappingsString Yes Specifies the source/destination attribute mappings for the data object. Here's a sample payload.
{ "tenantId": 1, "name": "Holiday Campaign", "jobId": "Holiday_Campaign", "jobData": { "ctype": ".CampaignJobData", "templateInfo": { "workflowComponents": [ { "left": "SINK", "right": "My_FTP_destination" } ], "workflowComponentConfig": { "My_FTP_destination": { "fileName": "holiday_files" } } }, "mcpsQueryId": "1603395442340", "ttlInSeconds": 36000000, "campaignId": "", "enableSnapshots": true } } -
Click Run.
-
A successful response will return a 200 OK, where the response echoes the details of the request.

Step 3: Activate the campaign
Next, we'll publish and activate our campaign. When the campaign runs, snapshots are created automatically. Oracle Unity creates a data object prefixed with "snapshots", i.e. "snapshots_<campaignJobID>". In the case where our campaign ID is "Holiday_Campaign" the new campaign ID is now "snapshots_Holiday_Campaign".
Step 4: Manage snapshot data
Now that your snapshots are created, you can leverage the snapshot data to perform tasks like retrieving snapshots and snapshot partitions.
Retrieve a list of snapshots
Use this endpoint to retrieve all snapshots in your Unity instance.
GET https://{AccountURL}/api-metadata/v1/{tenantAccessKey}/metadata/snapshots

The response returns all snapshots in your instance.
[
  {
    "tenantId": 1,
    "name": "snapshots_Holiday_Campaign",
    "versionTS": 1625864096790,
    "active": true,
    "createdTS": 1625864096790,
    "scope": "UNSET",
    "insertOnly": true,
    "tableId": "snapshots_Holiday_Campaign"
  }
]
Retrieve a snapshot
You can retrieve data about a snapshot using the following endpoint, where {snapshotId} is the snapshot's tableId.
GET https://{AccountURL}/api-metadata/v1/{tenantAccessKey}/metadata/snapshots/{snapshotId}
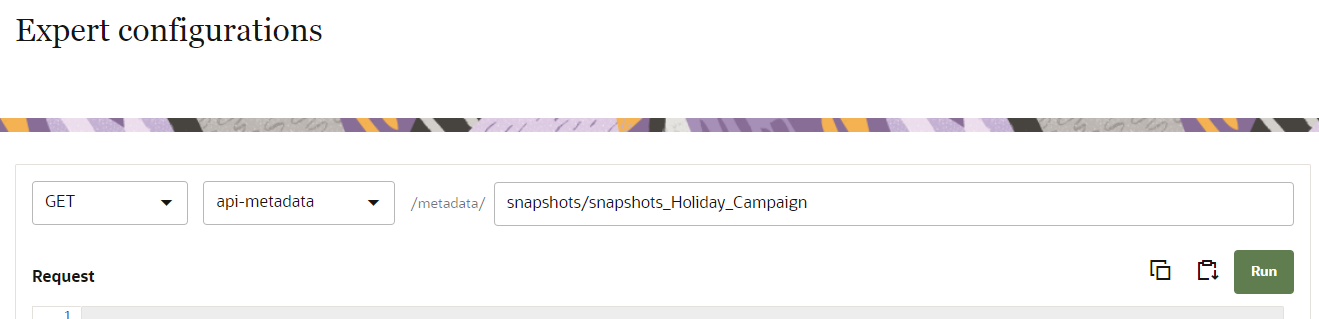
A successful response returns data about the snapshot, such as the data object attribute data (if applicable).
[
  {
    "tableId": "snapshots_Holiday_Campaign",
    "name": "Holiday_Campaign",
    "scope": "UNSET",
    "columns": [
      {
        "fieldId": "...",
        "required": true,
        "type": {
          "dataType": "BOOLEAN",
          "typeDescription": {

          }
        }
      },
      {
        "fieldId": "...",
        "name": "...",
        "type": {
          "dataType": "MAP",
          "typeDescription": {

          }
        }
      }
    ],
    "description": "..."
  }
]
Retrieve a list of partitions for a snapshot
Use this endpoint to retrieve all partitions for a snapshot.
GET https://{AccountURL}/api-data/v1/{tenantAccessKey}/data/snapshots/{snapshotId}/partitions

A successful response returns a unique ID for each partition, and a snapshot timestamp. Each timestamp corresponds to a run of the campaign. You can use the timestamps to query partitions.
[
  {
    "partitionID": "SYS_P1907702",
    "snapshotTS": 1625867041635
  },
  {
    "partitionID": "SYS_P1907703",
    "snapshotTS": 1625867583924
  }
]
Retrieve a snapshot's most recent partition
Use this endpoint to retrieve a snapshot's most recent partition.
GET https://{AccountURL}/api-data/v1/{tenantAccessKey}/data/snapshots/{snapshotId}/last
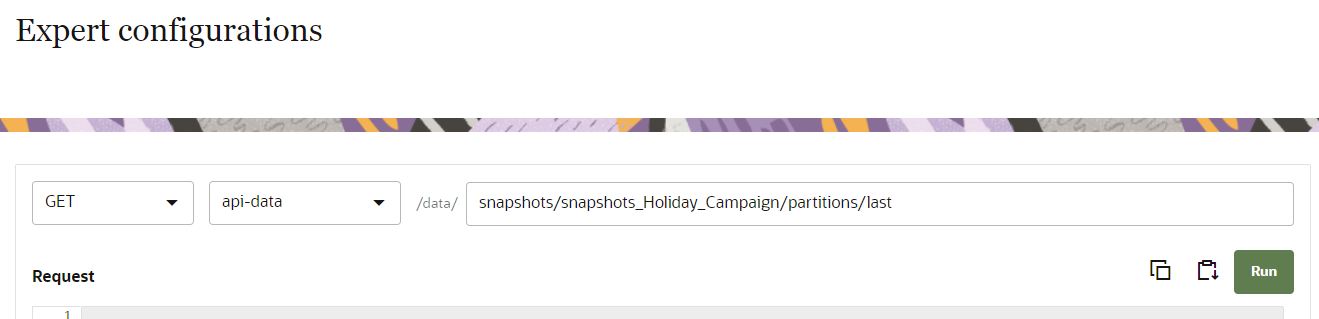
A successful response returns the snapshot's most recent partition.
[
  {
    "partitionID": "SYS_P1907703",
    "snapshotTS": 1625867583924
  }
]
Delete a snapshot partition
Use this endpoint to delete a specific snapshot partition, specified by the {partitionId}.
DELETE https://{AccountURL}/api-data/v1/{tenantAccessKey}/data/snapshots/{snapshotId}/partitions/{partitionId}
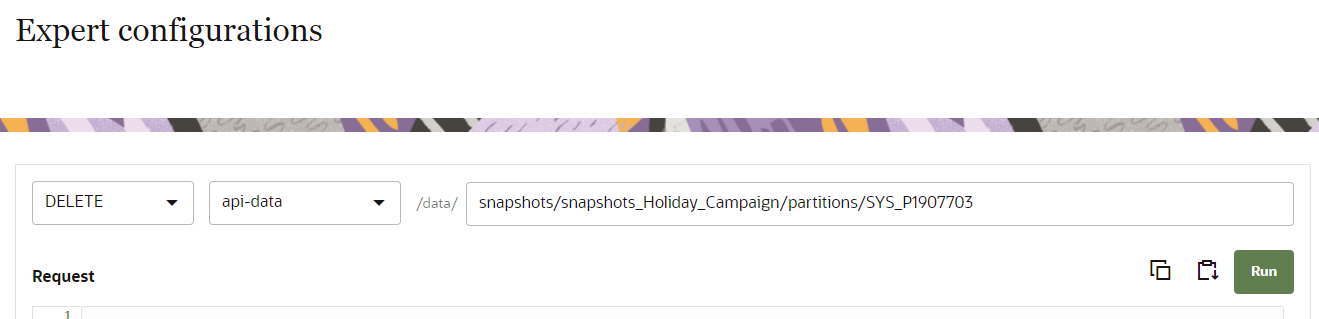
A successful response returns a 200 OK.