Paste-a-Pixel Campaigns
If your media execution partner currently does not have an app in the Oracle Data Cloud platform app catalog, you can manually enter the pixel required for sending campaign data to your partner.
The Oracle Data Cloud platform can deliver categories into your partner's platform that are associated with a users' mobile advertising IDs (MAIDs) or with cookie-based data through a variety of data transfer methods. If you do not know what method to use for your partner, contact My Oracle Support (MOS) to find out.
The following instructions assume that you will deliver cookie-based data, that your partner uses the server data transfer (SDT) delivery method, and that you will create an ID swap tag.
Tip: ID swap tags are not needed for MAID paste-a-pixel campaigns.
In this topic
Creating a paste-a-pixel campaign
To create a paste-a-pixel campaign:
- Log in to partner.bluekai.com and select Manage > Tags,
- Click Create New and create a new ID swap tag.
- In the Name box, enter a descriptive name for the ID swap tag, such as "ID Swap Tag - PartnerName."
- In the HTML box, enter the partner's ID swap pixel, which should have the following syntax:
<img src="IDSwapTag" height = "1" width="1">. ReplaceIDSwapTagwith your partner's ID swap tag. - Click Save.
- Select Manage > Schedules. The Schedules page is displayed.
- Click Create New to create a new schedule to fire the ID swap tag on your users once every 10 days.
- In the Name box, enter a descriptive name for your tag schedule.
- Under Tag Selection, select the ID swap tag you created.
- In the Container Selection list, click the containers on which the partner's ID swap tag is to be fired.
- Click Schedule Settings and enter the following values for the general and advanced settings:
Setting Value Status Active Priority 100 Start Date Enter the date on which the ID swap tag is to start firing End Date Leave empty Inside iFrame Enabled Override: Tag Avg. Latency Limit (ms) 5000 Override: Max Tag Execution Time (ms) 1000 Frequency 1 time every 10 days - Select Manage > Audiences. The Audiences page is displayed.
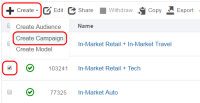
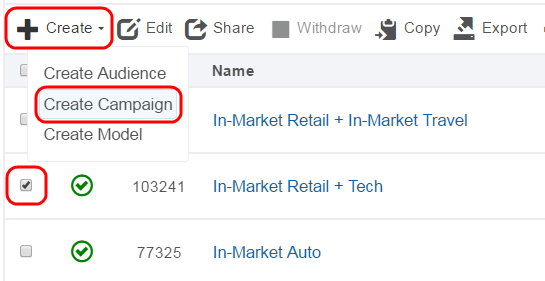
- Select the audience that you want to associate with the new campaign and then click Create > Create Campaign. Make sure that your partner supports the ID sources specified in the audience.
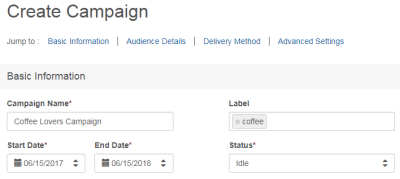
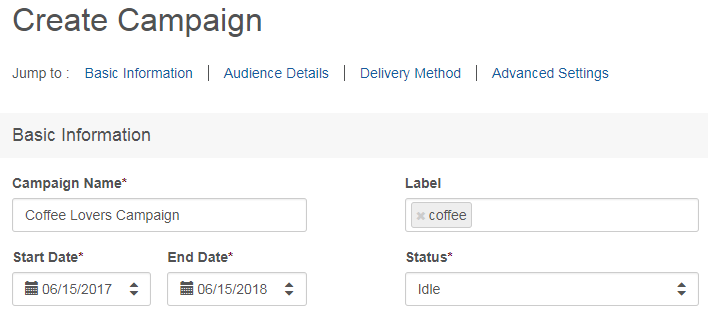
- In the Basic Information section, enter the following details:
- Campaign Name: Enter a unique descriptive name for the campaign that makes it easy to identify.
- Label: (Optional) Enter descriptive tags to help classify and filter your campaigns in the Campaignspage. Labels must have two or more characters.
- Start Date: The date when your campaign is to begin (the default is today's date)
- End Date: (Optional) The date when your campaign is to stop. By default, your campaign will end in one year.
- Leave the default Campaign Status of Idle because data delivery cannot begin until your audience is mapped to a segment object in the partner's platform.
Your campaign will not start running until you set its status to Active
- In the Pixel URL box , enter the delivery endpoint pixel URL that associates your ID swap pixel's domain with your SDT endpoint.
- (Optional) Append any of the available pixel URL macros.
- Click Verify and Add to validate your pixel and add it to the campaign.
- Click Save.
- After you verify that your partner has mapped your audience to their segment object, edit the campaign and set its Campaign Status to Active to begin delivering your Oracle Data Cloud platform data to the partner.
Creating a MAID paste-a-pixel campaign
You will need your media targeting partner's delivery endpoint pixel but MAID campaigns do not require you to deploy ID swap tags on your site.
To create a paste-a-pixel campaign to deliver MAID data:
- Log in to partner.bluekai.com and create an audience containing the categories you want to target.
- Target users on mobile devices by setting the audience's ID sources value to Mobile App or just one of its child options.
- Select Save > Save and Create a Campaign.
- In the Basic Information section, enter the following details:
- Campaign Name: Enter a unique descriptive name for the campaign that makes it easy to identify.
- Label: (Optional) Enter descriptive tags to help classify and filter your campaigns in the Campaignspage. Labels must have two or more characters.
- Start Date: The date when your campaign is to begin (the default is today's date)
- End Date: (Optional) The date when your campaign is to stop. By default, your campaign will end in one year.
- Leave the default Campaign Status of Idle because data delivery cannot begin until your audience is mapped to a segment object in the partner's platform. Your campaign will not start running until you set its status to Active.
- In the Pixel URL box, enter the delivery endpoint pixel URL that associates your ID swap pixel's domain with your SDT endpoint.
- (Optional) From the Additional Macros list, select any of the available pixel URL macros.
- Click Verify and Add to validate your pixel and add it to the campaign.
- Click Save.
- After you verify that your partner has mapped your audience to their segment object, edit the campaign and set its Campaign Status to Active to begin delivering your Oracle Data Cloud platform data to the partner.


