Adding a Custom Dimension
This section walks through an example of how to add a custom dimension to your
Consolidation and Close extended skill called Product. You need to
repeat these steps to add each custom dimension you have in your Financial Consolidation
and Close environment.
Note:
The same procedure can be followed for Tax Reporting.Before you start, you need to know the Custom Dimension name and synonyms.
To add a custom dimension:
-
In Oracle Digital Assistant, go to Development > Skills and locate and open your extended
Consolidation and Closeskill.From the sidebar navigation, click Entities
 .
.
-
To add the Product custom dimension to the
EPM_DIMENSIONentity:- In the left column, scroll down the list and click
EPM_DIMENSION. - Under Configuration in the middle of the dialog, click +
Value. The Create Value dialog displays.
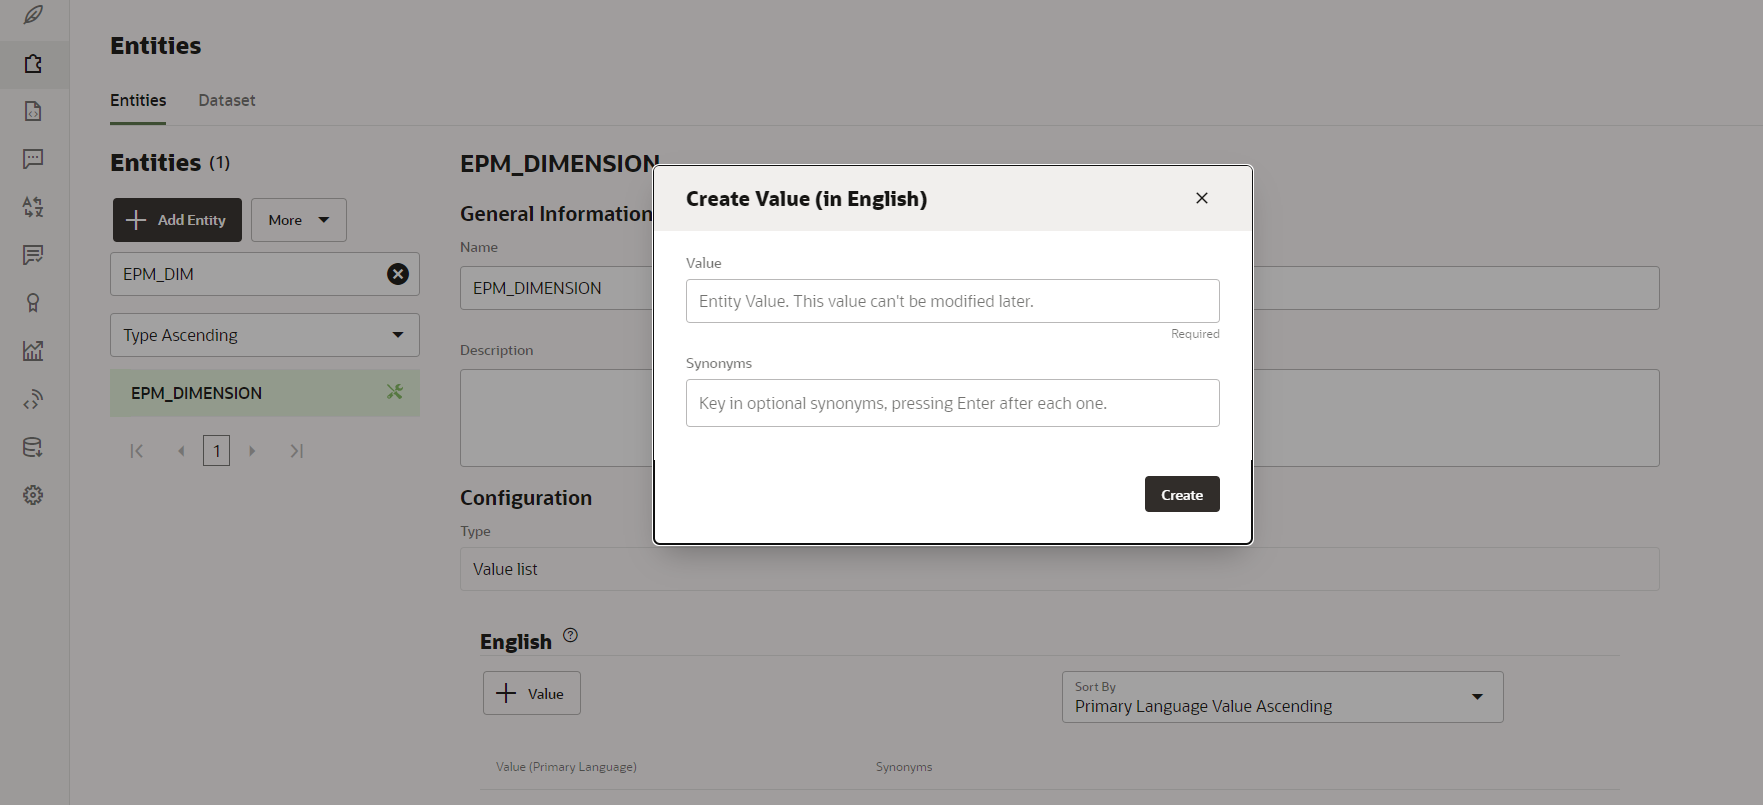
- In Value, enter the name of the custom dimension that you are adding to the Digital Assistant extended skill. In this example, enter Product.
- Optionally, add any synonyms and then click
Create.
Note:
An example of adding synonym for a dimension would be year, yr for a dimension called Years.
- In the left column, scroll down the list and click
- Add the custom entity to the extended skill as
DIM_<Dimension_name>. In this example, it would be addingDIM_PRODUCTto the skill.-
From the sidebar navigation, click Entities
 .
.
- Click + Entity (Create Entity). The Create
Entity dialog displays.
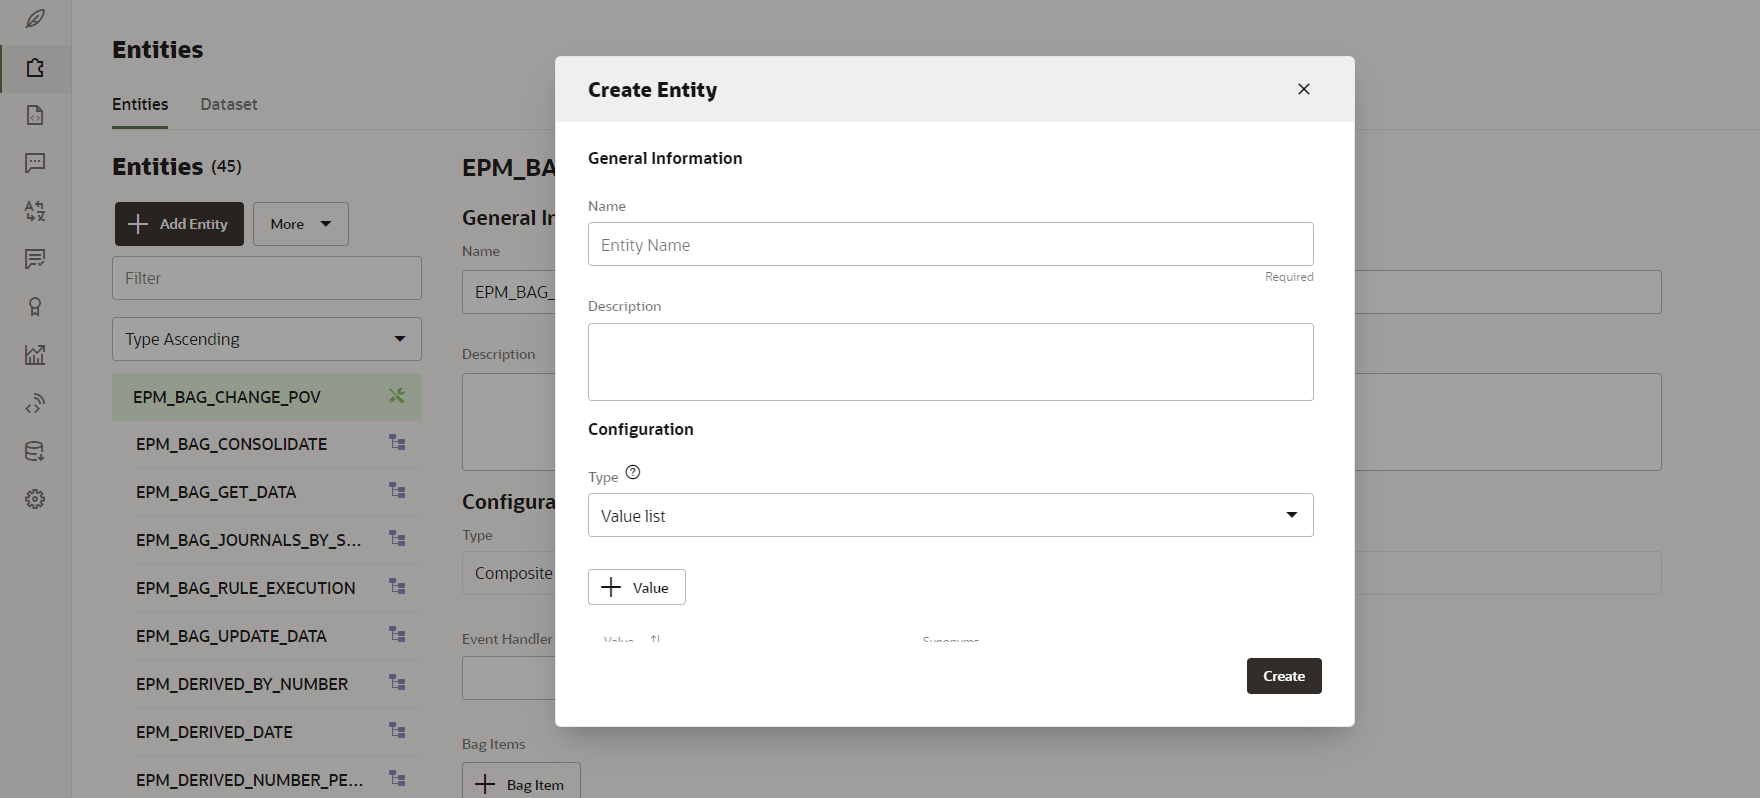
- In Name, enter the entity name in format
DIM_<DimensionName>. For example, if you are creating an entity for the dimension named Age Band, the entity name must beDIM_AGE_BAND. - In Type, select Value List, and then click Create.
For more information on creating entities, see Creating Entities.
-
- Add the newly created entity to
EPM_BAG_CHANGE_POVand then modify the properties.-
From the sidebar navigation, click Entities
 .
.
- In the left column, select
EPM_BAG_CHANGE_POV. - Under Configuration, select + Bag Item.
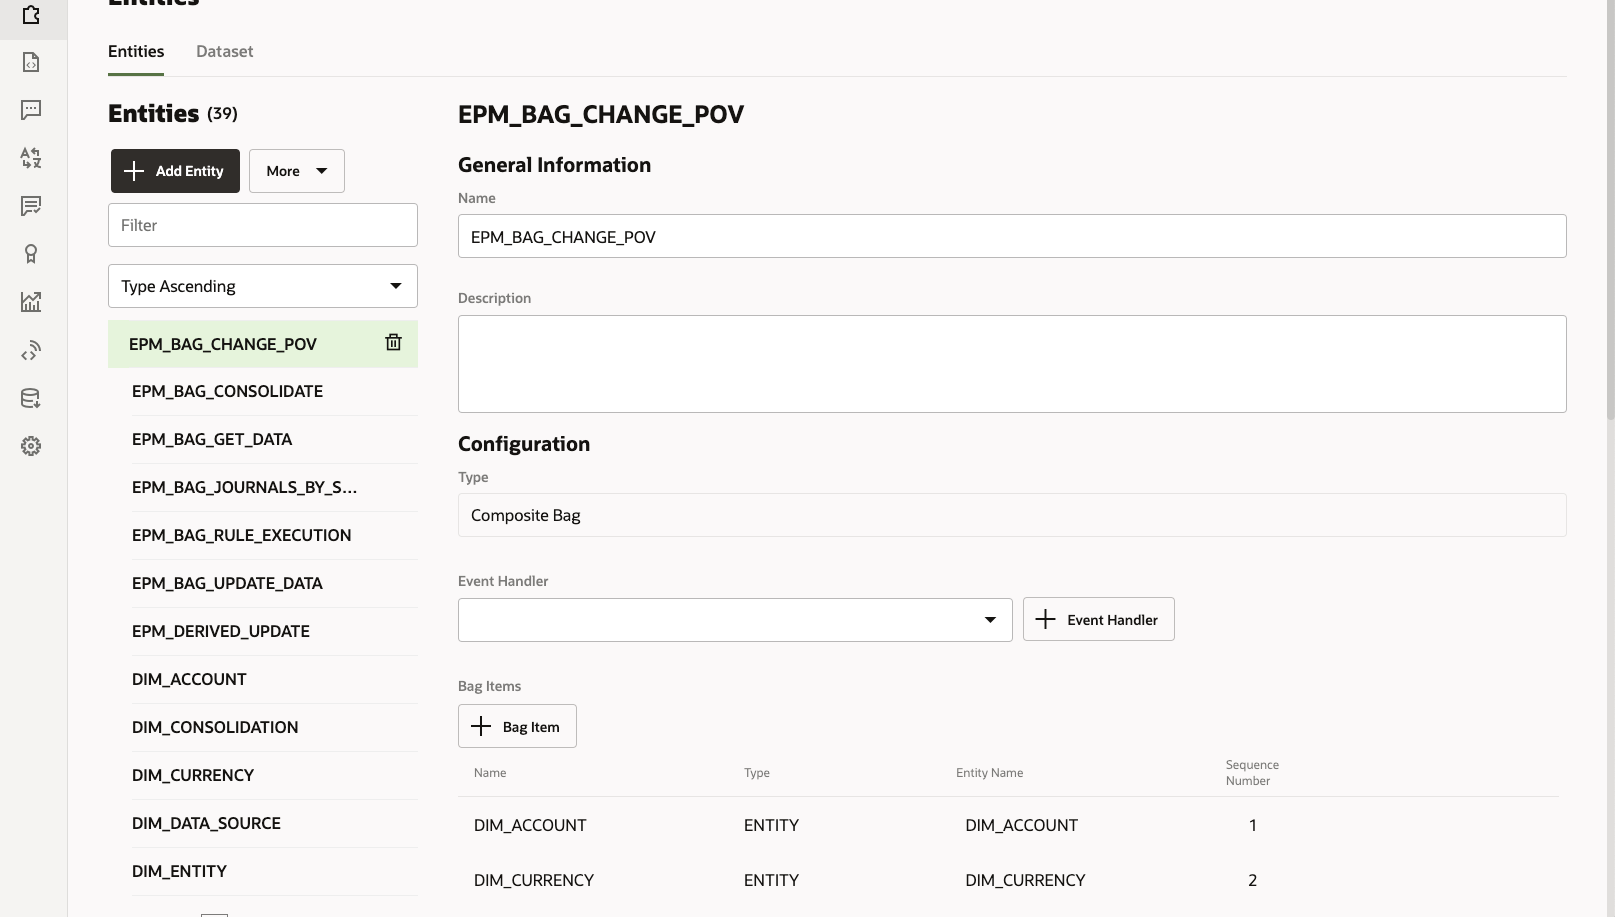
The Add Bag Item dialog displays.
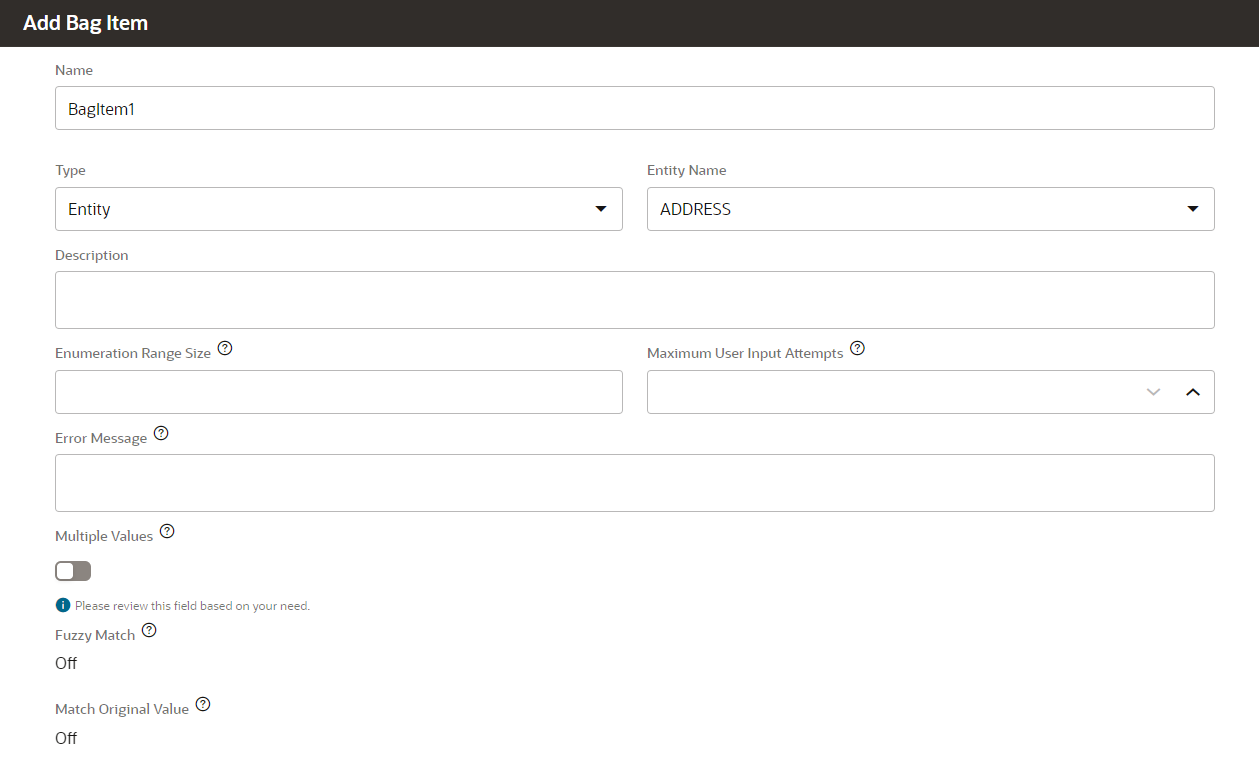
- On Add Bag Item, enter the following information:
- In Name, enter
DIM_<DimensionName>. For example,DIM_PRODUCT. - In Type, leave it as Entity.
- In Entity Name, select the entity that is created for the dimension.
Bag Item name should be the same as the entity name. In this
example, it must be
DIM_PRODUCT. - In Enumeration Range Size, enter the number of members to show in a list. For example, 7.
- In Maximum User Input Attempts, enter a value. For example, 2 would give the user two attempts for input.
- In Error Message, optionally enter an error message. For example, Selected product member is not valid.
- In Multiple Values, Fuzzy Match, and Match Original Value, leave these disabled or Off.
- In Name, enter
- On Add Bag Item, continue by filling in the Disambiguation Resolution,
Extraction Rules, Prompts, and Validation Rules items.
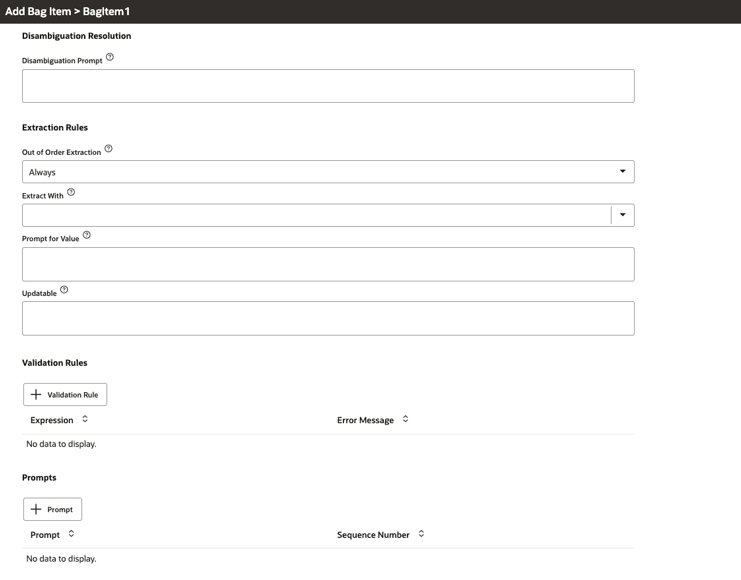
- Under Disambiguation Resolution, optionally you can enter text to prompt the user for Disambiguation Prompt. For example, enter the text I found more than one possible matches. Can you select one of the following product?.
- Under Extraction Rules, by default, the Out of Order Extraction is set it to Always.
- In Extract With, you can leave this blank.
- In Prompt for Value, enter a Java code snippet similar to the
following example.
<#if changePOVBag.value?has_content
                                        &&
changePOVBag.value.EPM_DIMENSION?has_content &&changePOVBag.value.EPM_DIMENSION?lower_case =='product'>true<#else>false</#if> - Under Validation Rules, optionally, click + Validation Rule to enter one or more validation rules by entering an expression and error message for each one.
- Under the Prompts section, optionally, click + Prompt to enter one or more prompts. For example, choose the Product below or enter a value.
- Click Close to save your entries.
-
-
Add the newly-created entity to
EPM_BAG_RULE_EXECUTION,EPM_BAG_UPDATE_DATE, andEPM_BAG_GET_DATA. Then modify the properties.Use the following steps to add the entity:
-
From the sidebar navigation, click Entities
 .
.
- Depending on the object to which you are adding the new entity, in the left
column, select
EPM_BAG_RULE_EXECUTIONorEPM_BAG_UPDATE_DATEorEPM_BAG_GET_DATA. - Under Configuration, select + Bag
Item.
The Add Bag Item dialog displays.
- On Add Bag Item, enter the following information:
- In Name, enter
DIM_<DimensionName>. For example,DIM_PRODUCT. - In Type, leave it as Entity.
- In Entity Name, select the name you created in step i. In this
example, it would be
DIM_PRODUCT.
- In Name, enter
- In Add Bag Item, continue by filling in the Disambiguation Resolution, Extraction Rules, and Prompt for Value items. In Prompt for Value, enter the value False.
-
- At the top of the page, click Train to re-train the assistant with the new
custom dimension.

- At the top of the page, click Play and test that the dimension is added.

- In the Message field at the bottom of the Bot tester window that opens, type the
command to connect to the skill for which you added the custom dimension. For
example, if the skill is Financial Consolidation, type
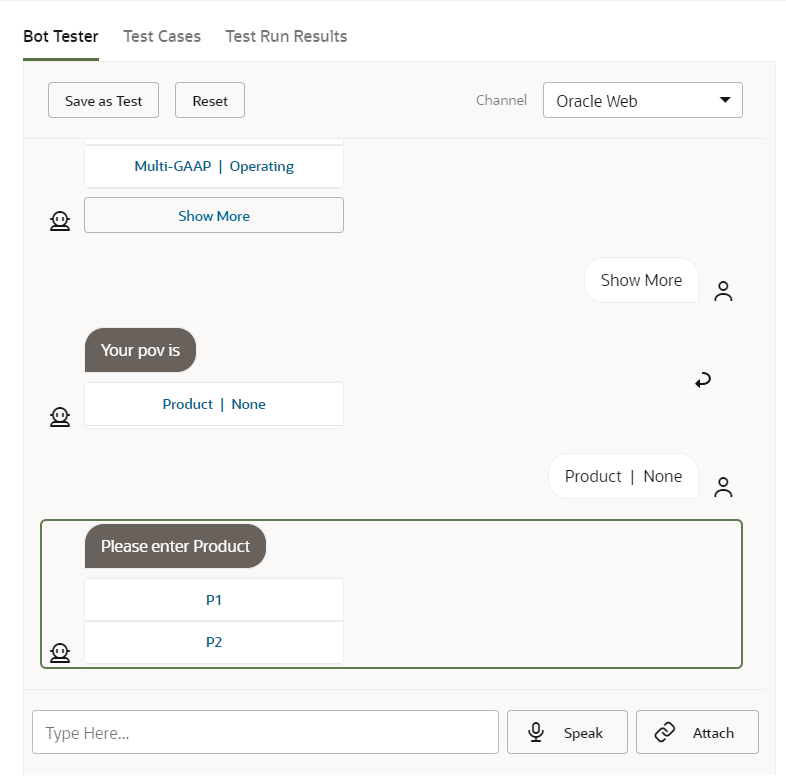
Show POV.Next, test the new custom dimension, as shown in the following example, for a new custom dimension called Product.
